
Like most, when I first spun up my home lab, one of the first things I wanted to do like anyone is to be able to hit my home lab services from the Internet. And, I did this for a few years, but had a Windows 10 machine hacked even with some pretty serious hardening and security measures. It made me realize no matter how much security you place on a machine, sticking it out on the Internet is a no no. Let’s look at why you need to stop exposing your home lab and tools for secure remote access for home lab instead.
1. Twingate
In testing a lot of the solutions today for remote access, I have settled on Twingate for secure remote access for home lab. It is really easy to setup and they have a free account which is great for home labs. With the free account, it is free for 5 users, you get the enterprise connectors, split tunneling, and conditional access policies.
Some may not like the fact that it is a paid solution with a proprietary cloud dashboard, but so far, this has not been a show stopper for me. The cloud dashboard actually makes it easier to manage from wherever you are and since it is free as part of the solution, this is an added bonus in my opinion.
Also, since you can spin up the connectors that you run on-premises using Docker, I have these spread out through my network on different devices, including:
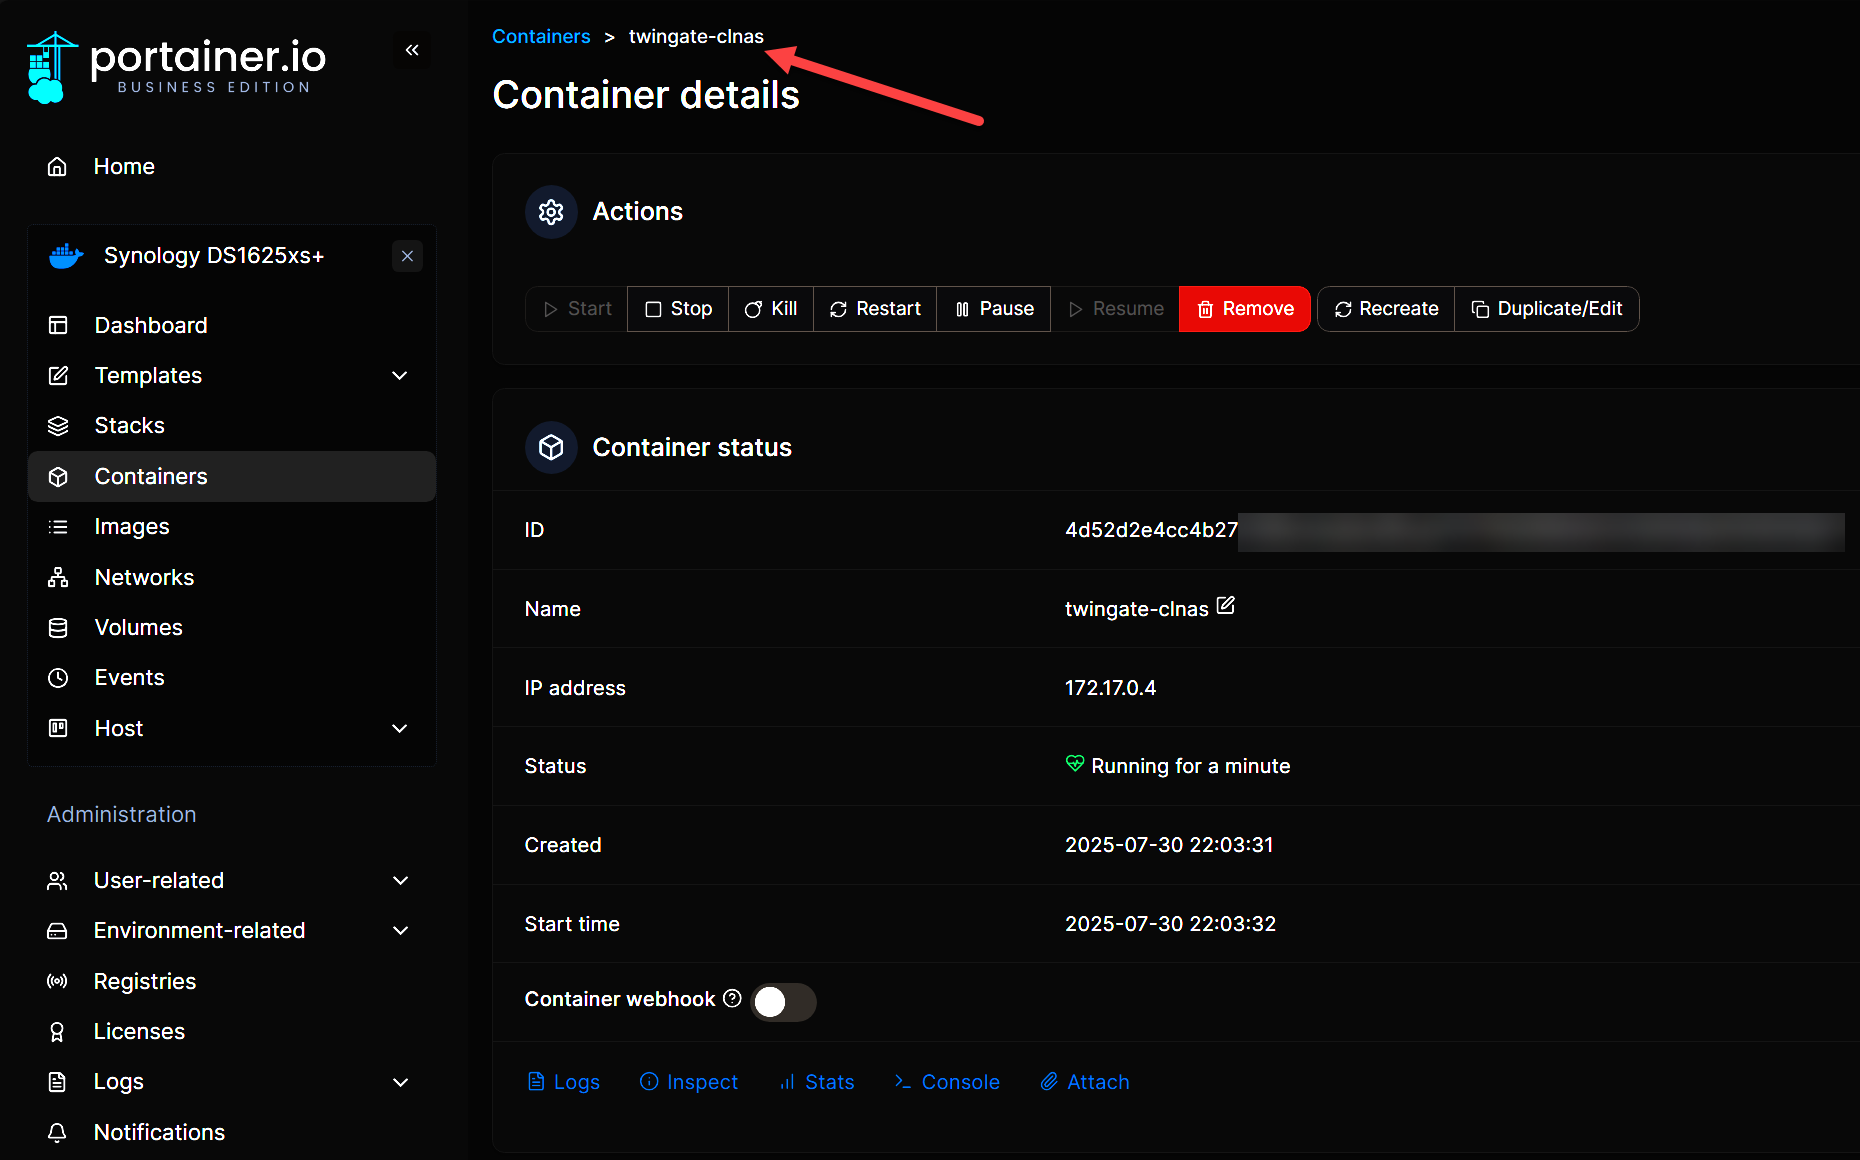
- Running a connector on my Synology NAS
- Running a connector on one of my Docker hosts
- I have one also running in a dedicated virtual machine (but will likely deprecate this one in favor of the Docker connectors).
What is Twingate?
Twingate is more of a hybrid of VPN and proxy technology. Compared to traditional VPN solutions, it has a much more modern approach to segmentation, access control, and other features like zero-trust.
Reasons I use it:
- No open ports on my firewall – How? Well, the traffic is established from the connector so as long as it can egress, it can establish the tunnel
- Granular access control per user and device
- Easy to deploy on Docker, VMs, or Raspberry Pi
- Works great with dynamic IPs or CGNAT
- Built-in DNS resolution for internal services you may be hosting
Even when I am traveling, I can hit any internal service in my home lab. This includes Proxmox dashboard, pfSense, Netdata, Gitea, Portainer, etc, just like I was local on the LAN.
Twingate also lets me separate services. I can restrict certain resources to certain devices or accounts. This is perfect if I want to allow read-only access to others (or segment off something sensitive).
You can spin it in Docker Compose like this:
version: '3.8'

services:
  twingate-connector:
    image: twingate/connector:1
    restart: always
    sysctls:
      net.ipv4.ping_group_range: "0 2147483647"
    environment:
      - TWINGATE_NETWORK=your-network-name
      - TWINGATE_ACCESS_TOKEN=your-access-token-here
      - TWINGATE_REFRESH_TOKEN=your-refresh-token-here
      - TWINGATE_LABEL_HOSTNAME=${HOSTNAME}
      - TWINGATE_LABEL_DEPLOYED_BY=docker
    networks:
      - your-proxy-network
    deploy:
      replicas: 1
      restart_policy:
        condition: any
      update_config:
        parallelism: 1
        delay: 10s

networks:
  your-proxy-network:
    external: true
2. Tailscale mesh VPN built on Wireguard
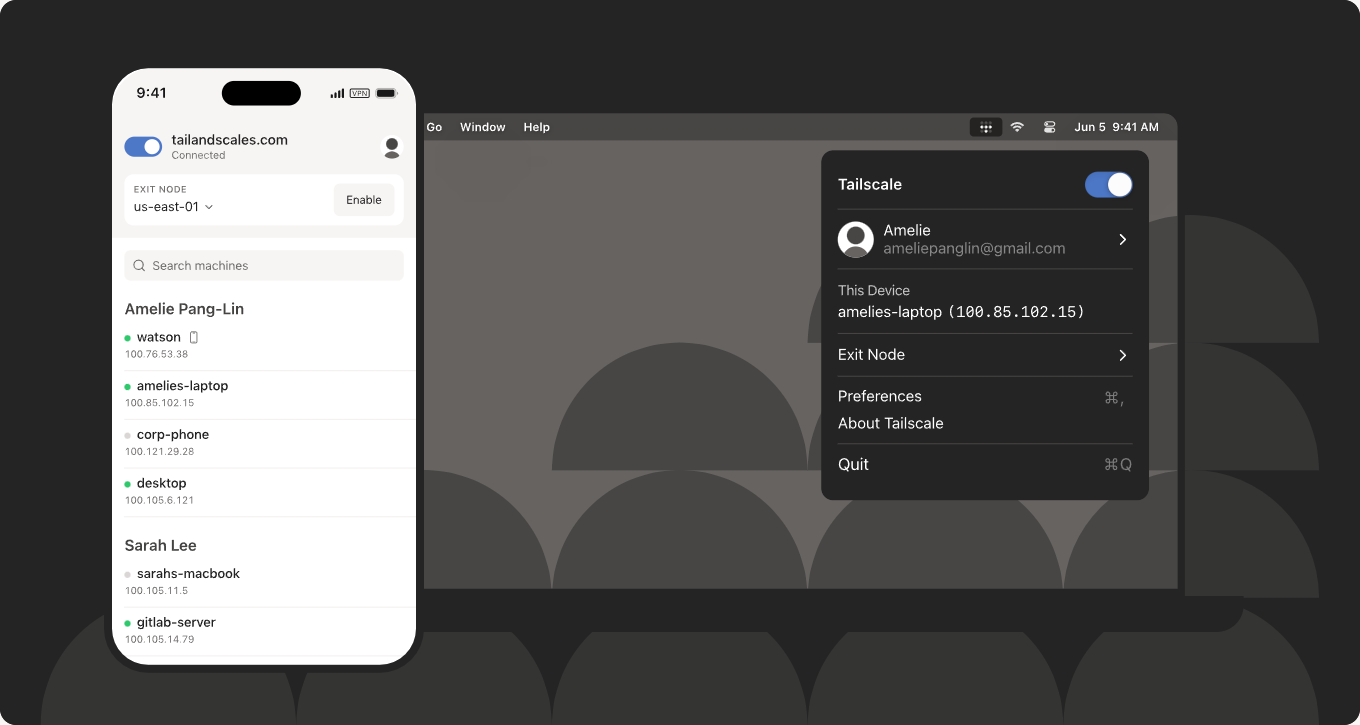
One of the other very popular choices in this space is Tailscale. It is a mesh VPN that is built on Wireguard. Home labbers love the solution because it is dead simple. You install the agent on your devices, sign into it, and when you do, everything is connected with each other. Each device that is on the Tailscale network gets a private IP address in the 100.x.x.x range. Using this IP address, between devices, you can talk to other devices directly.
What makes Tailscale awesome to use:
- No port forwarding is required
- It works behind NAT, CGNAT, double NAT
- It supports ACLs, MagicDNS, subnet routers
- Free for up to 100 devices at this time
Tailscale is great if you want an always-on private network where your laptop, phone, Raspberry Pi, and server all “see” each other like they’re on the same LAN.
I’ve used Tailscale to:
- Connect remote machines together without hassle
- Connect to Home Assistant remotely
- Access Proxmox web GUI on my phone
It just works and the WireGuard-based performance is excellent. The main trade-off is that all devices must use Tailscale to communicate.
You can spin up Tailscale using the below sample Docker-compose:
version: '3.8'

services:
  # example of subnet router/exit mode
  tailscale:
    image: tailscale/tailscale:latest
    hostname: docker-tailscale
    container_name: tailscale
    restart: unless-stopped
    privileged: true
    network_mode: host
    cap_add:
      - NET_ADMIN
      - NET_RAW
    volumes:
      - tailscale-data:/var/lib/tailscale
      - /dev/net/tun:/dev/net/tun
    environment:
      - TS_AUTHKEY=your-tailscale-auth-key-here
      - TS_STATE_DIR=/var/lib/tailscale
      - TS_SOCKET=/var/run/tailscale/tailscaled.sock
      - TS_EXTRA_ARGS=--advertise-routes=192.168.1.0/24 --advertise-exit-node
      - TS_USERSPACE=false
    command: tailscaled

  # Example of Tailscale sidecar container for specific services
  tailscale-sidecar:
    image: tailscale/tailscale:latest
    hostname: app-tailscale
    container_name: tailscale-sidecar
    restart: unless-stopped
    cap_add:
      - NET_ADMIN
      - NET_RAW
    volumes:
      - tailscale-sidecar-data:/var/lib/tailscale
      - /dev/net/tun:/dev/net/tun
    environment:
      - TS_AUTHKEY=your-tailscale-auth-key-here
      - TS_STATE_DIR=/var/lib/tailscale
      - TS_SERVE_CONFIG=/config/serve.json
      - TS_HOSTNAME=my-docker-app
    networks:
      - app-network
3. Plain WireGuard
For those that want a totally vanilla VPN solution, WireGuard is a great option. It’s the leanest, fastest VPN protocol out there. In fact many of the other solutions that we know and love are using Wireguard under the hood. And the great thing is that it is totally free and open-source.

You can use it to:
- Install it on Linux, routers, Docker containers
- Set up point-to-site or site-to-site tunnels
- Build roaming VPNs with static peers or dynamic endpoints
Why choose vanilla WireGuard:
- Full control over the config
- Zero cloud dependencies
- Extremely fast and secure
- Tiny footprint
WireGuard is the most “bare metal” of the solutions here. If you’re comfortable editing config files and managing keys, it’s rock solid. WG-Easy is a solution I have written about before that makes configuring Wireguard much easier. Check out my post here: WG-Easy: Wireguard Config Generator VPN Server in Docker.
Here is an example of Wireguard Docker Compose code along with WG-Easy:
version: '3.8'

services:
  wireguard:
    image: linuxserver/wireguard:latest
    container_name: wireguard-vpn
    restart: unless-stopped
    cap_add:
      - NET_ADMIN
      - SYS_MODULE
    environment:
      # User/Group IDs (run 'id' command to get yours)
      - PUID=1000
      - PGID=1000
      - TZ=America/New_York

      # Server configuration
      - SERVERURL=auto  # Auto-detect public IP, or set to your domain/IP
      - SERVERPORT=51820
      - PEERS=3  # Number of client configs to generate
      - PEERDNS=1.1.1.1,1.0.0.1  # Cloudflare DNS
      - INTERNAL_SUBNET=10.13.13.0
      - ALLOWEDIPS=0.0.0.0/0  # Route all traffic through VPN

      # Optional: Logging
      - LOG_CONFS=true
    volumes:
      # Config directory - this is where client configs will be saved
      - ./wireguard-config:/config
      - /lib/modules:/lib/modules:ro
    ports:
      - "51820:51820/udp"
    sysctls:
      # Enable IP forwarding
      - net.ipv4.conf.all.src_valid_mark=1
    networks:
      - wireguard-net

  # Optional: WireGuard Web UI for easier management
  wg-easy:
    image: weejewel/wg-easy:latest
    container_name: wg-easy-ui
    restart: unless-stopped
    cap_add:
      - NET_ADMIN
      - SYS_MODULE
    sysctls:
      - net.ipv4.ip_forward=1
      - net.ipv4.conf.all.src_valid_mark=1
    volumes:
      - ./wg-easy-data:/etc/wireguard
    ports:
      - "51820:51820/udp"  # WireGuard port
      - "51821:51821/tcp"  # Web UI port (access via http://your-server-ip:51821)
    environment:
      # IMPORTANT: Set your server's public IP or domain
      - WG_HOST=YOUR_SERVER_IP_OR_DOMAIN

      # Web UI password - CHANGE THIS!
      - PASSWORD=ChangeThisSecurePassword123!

      # Default settings for new clients
      - WG_DEFAULT_ADDRESS=10.8.0.x
      - WG_DEFAULT_DNS=1.1.1.1,1.0.0.1
      - WG_ALLOWED_IPS=0.0.0.0/0
      - WG_PERSISTENT_KEEPALIVE=25

      # Optional: Specify which traffic to route through VPN
      # - WG_ALLOWED_IPS=192.168.1.0/24,10.0.0.0/8  # Only route local networks
    networks:
      - wg-easy-net

networks:
  wireguard-net:
    driver: bridge
  wg-easy-net:
    driver: bridge
4. Cloudflare Tunnel
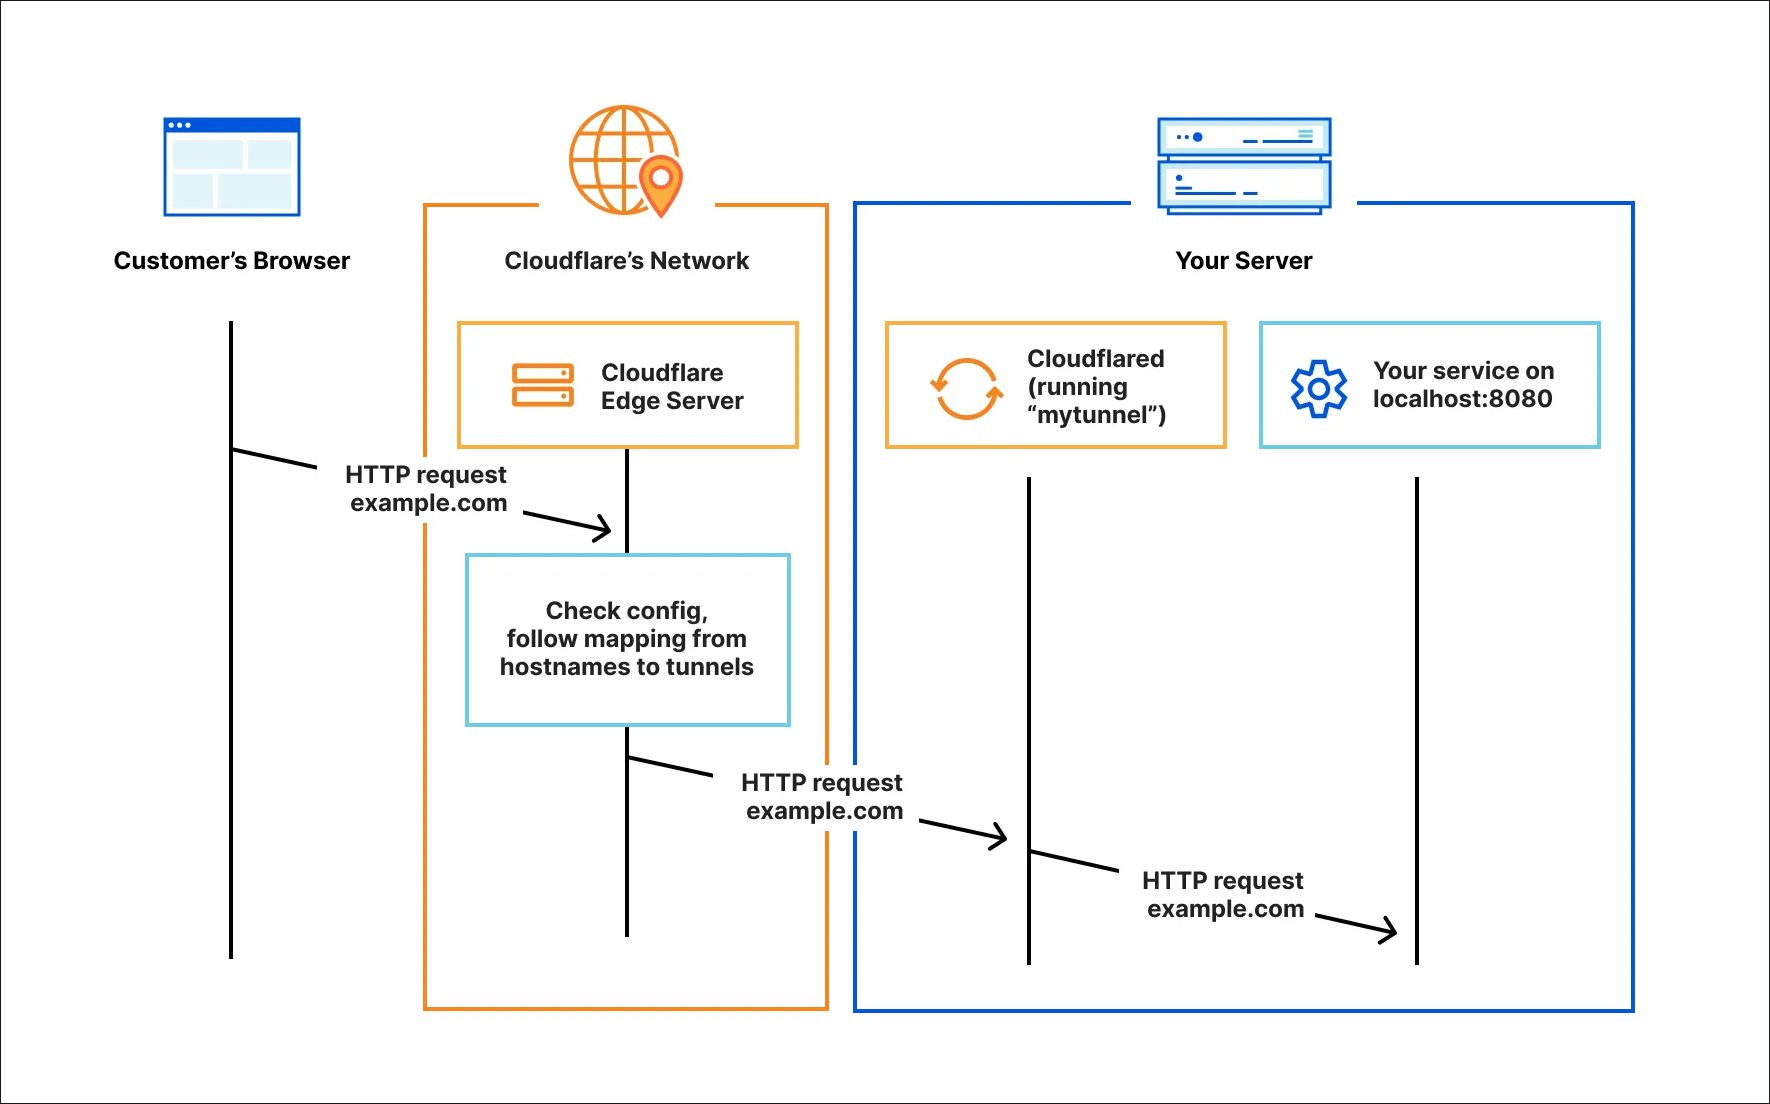
If you have a web service that you want to make available over the public Internet but you want to do this securely, Cloudflare tunnel is probably the right tool to use. Instead of opening ports like we have always done through the firewall, Cloudflare tunnels has you run a lightweight agent inside your home network (much like Twingate) that establishes a websockets over HTTPS tunnel outbound.
The cool thing is Cloudflare Tunnel can connect more than just HTTP web servers. It can connect SSH servers, remote desktops, and other protocols. Your “origin” servers serve the traffic through Cloudflare without being vulnerable to attacks that bypass Cloudflare. It then handles all the incoming requests made and routes them back to your internal network service.
If you want to make a service accessible via the public Internet, Cloudflare Tunnel is probably the right tool.
They have some great documentation on reference architecture here: Evolving to a SASE architecture with Cloudflare · Cloudflare Reference Architecture docs.
Why it’s awesome to use:
- No open ports, no NAT config
- Built-in DDoS protection behind Cloudflare’s network
- Automatic SSL with Let’s Encrypt
- Supports access rules with Cloudflare Access
With Cloudflare Tunnel, you can expose a service like Gitea, Portainer, or Grafana at https://myapp.mydomain.com, but only allow access to certain users or IPs. You can even integrate it with identity providers like GitHub or Google.
I’ve used this to:
- Share dashboards with others
- Demos
- Access services from mobile without VPN connections
- Test webhooks or third-party integrations
Just remember, with Cloudflare tunnels, this is still exposing your service to the public, but through a heavily protected proxy. It’s better than port-forwarding, but not as private as Twingate or Tailscale.
Which one should you choose instead of exposing your home lab?
Here’s a quick comparison table to help you decide:
| Feature | Twingate | Tailscale | WireGuard | Cloudflare Tunnel |
|---|---|---|---|---|
| Requires open ports | No | No | Yes (for server) | No |
| Easy to set up? | Yes | Yes | Not as easy as others | Yes |
| Works behind CGNAT | Yes | Yes | Can be tricky | Yes |
| Granular access control | Yes | Not as much as Twingate but has some ACLs | No | Yes |
| Public URL access | No | No | No | Yes |
| Cloud dependency | Yes | Yes | No | Yes |
| Self-hosted friendly | Yes | Yes | Yes | Not as much as others |
Video covering this topic
Wrapping up
Exposing your home lab to the Internet is sometimes a sledgehammer approach that can work to get your services out there quickly, but from a security perspective, it is not worth it. I have self-hosted a few things that I have exposed directly to the Internet with firewall rules and other hardening, but given enough time and persistence, attackers can find a way to get into a machine, especially for dangerous services like RDP, etc.
Since there are great tools available out there for secure remote access for home lab, this is why I stopped exposing my home lab entirely. The services we have covered are what I think are some of the best and each has its strong suite. Whatever tool you choose, stop punching holes in your firewall and start using one of these modern solutions. What are you using today? Let me know in the comments.
Google is updating how articles are shown. Don’t miss our leading home lab and tech content, written by humans, by setting Virtualization Howto as a preferred source.
About The Author


Excellent post! Thanks Brandon.
Thank you Carmelo!
Brandon
Lovely blog I just ran into while I start my lab home journey. I was already using tailscale to access my docker containers but good to see other players that offer similar services. Great job Brandon!
Spectre,
Thank you so much for the comment! Glad to have readers find the blog and find the information helpful. Stop by anytime and kindly share across your socials, etc!
Brandon
There is also VPN called ZeroTier. It’s great and simple solution for me.
Rafal,
Thanks for your comment! I do like Zerotier as well and definitely one that could easily interchange out in the list with Wireguard, Tailscale, etc.
Brandon