Do you have a Ubiquiti Unifi wireless system setup for wireless access? Ubiquiti offers really great “enterprisey” products for the price that are very fully featured. I like the Unifi products for providing fully featured wireless configurations both at home and in an office setting. If you have a wireless network that you want to configure for enhanced security in the environment and especially to make use of a centralized identity source like Active Directory, setting up Ubiquiti Unifi RADIUS authentication is the way to go. Using RADIUS, you can tie in your Ubiquiti environment to Active Directory for using your identities stored there for additional authentication capabilities. Let’s take a look at Ubiquiti Unifi RADIUS authentication configuration and see how it can easily be accomplished.
Requirements for setting up RADIUS authentication for Ubiquiti Unifi
- Setting up a new wireless network on the Unifi controller
- Configuring a new RADIUS profile in the Unifi controller
- Configuring a RADIUS server (for the purposes of this post, using Microsoft’s Network Policy Server (NPS) role)
- Configuring RADIUS client in NPS including AD group, authentication method, certificate, etc
- Configuring a Network Policy for wireless clients
RADIUS authentication can be intimidating for those that have not configured it before, however, with only a few steps, we can get a basic RADIUS configuration configured without issue.
Let’s take a look and step through each of these to configure RADIUS authentication for wireless clients.
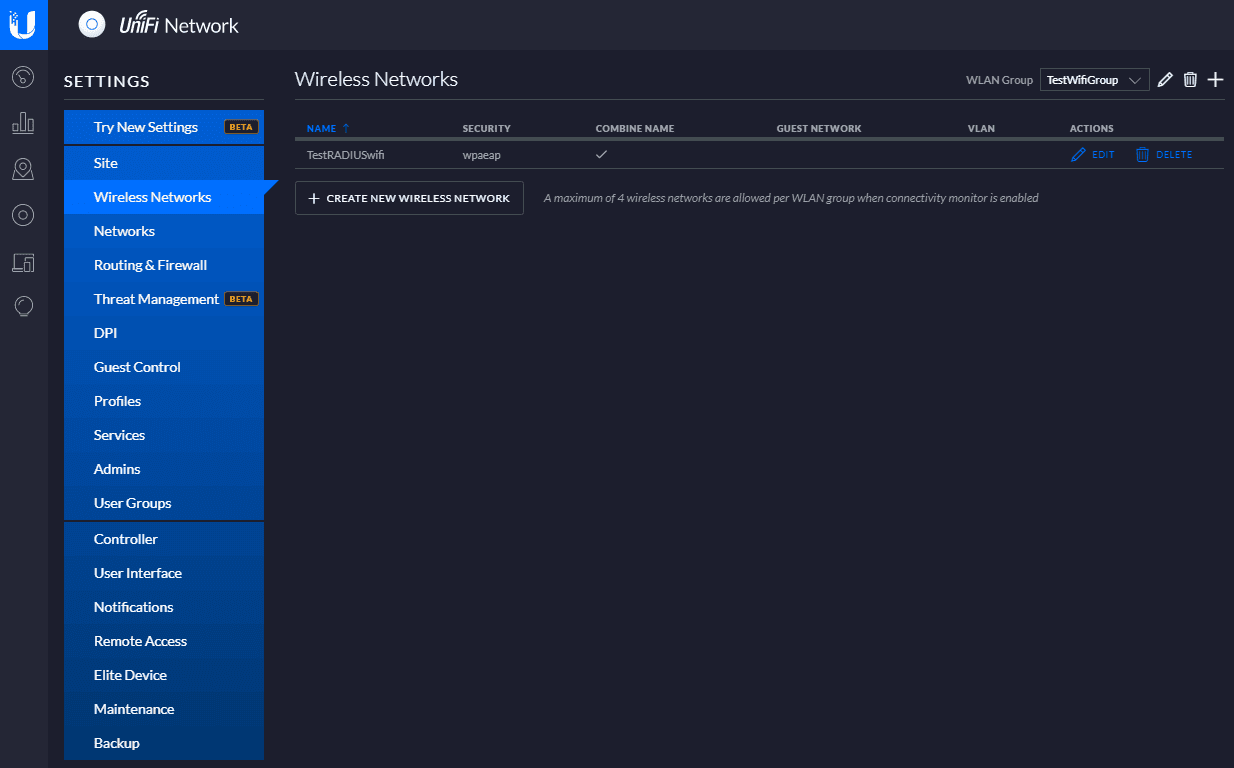
Setting up a new wireless network on the Unifi Controller
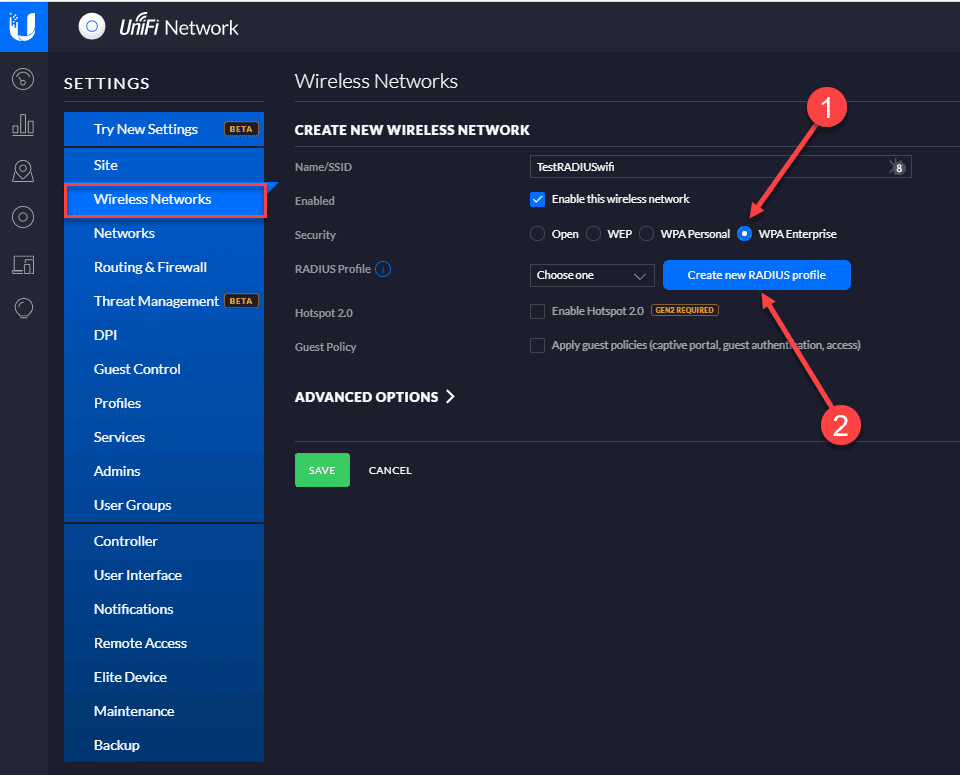
The first step we will take is setting up a new wireless network in our Unifi controller UI. To use RADIUS, we will create a new wireless network that is WPA Enterprise enabled on the Security setting.
Once you select the WPA Enterprise setting, you need to Create new RADIUS profile.
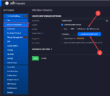
In the Create new RADIUS profile dialog box, name the profile and set the addresses for both the RADIUS Auth Server and the Accounting server (will be the same in most deployments, especially using NPS).
In the Password/Shared Secret, enter the shared password that will be used by the Unifi APs to authenticate with the RADIUS server.

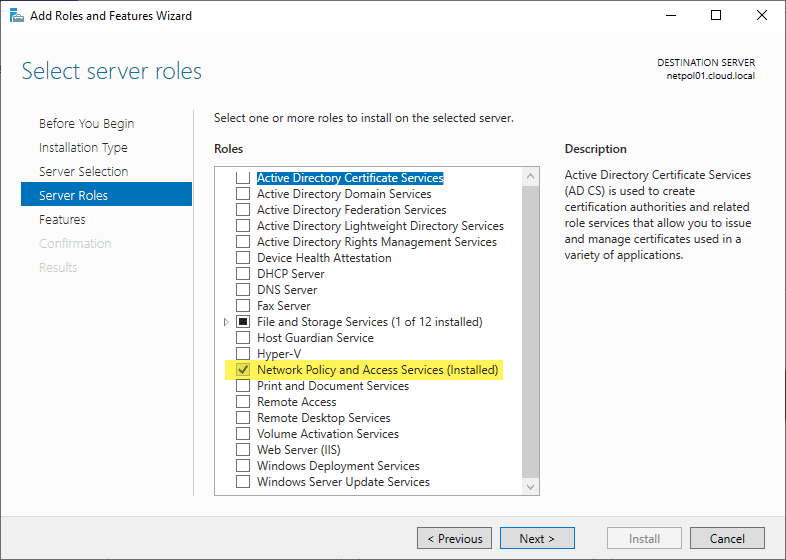
Install the Network Policy Server (NPS) Role
In my environment, I have a Windows Server 2019 server that I have installed the Network Policy and Access Services role on.
Accept the additional role services that may be needed during the installation. You will most likely need to reboot your server after the installation (or I like to do this as a best practice) to ensure all services are squared away.
Configuring RADIUS Clients in NPS
Once you have the NPS server running on your Windows Server, you will need to setup your RADIUS clients. The clients in this case will be the Unifi APs that will be accessing your RADIUS server.
This is a step that typically trips a lot of would be configurations up. Pay attention to detail here. Make sure you have the correct IPs that are assigned to the management of the wireless APs. Also, make sure you enter the shared key for the RADIUS clients correctly.
To add a RADIUS client, right-click the RADIUS Clients folder and select New. ***Note*** You will need to do this for each Unifi AP that you want to be able to perform RADIUS authentication.
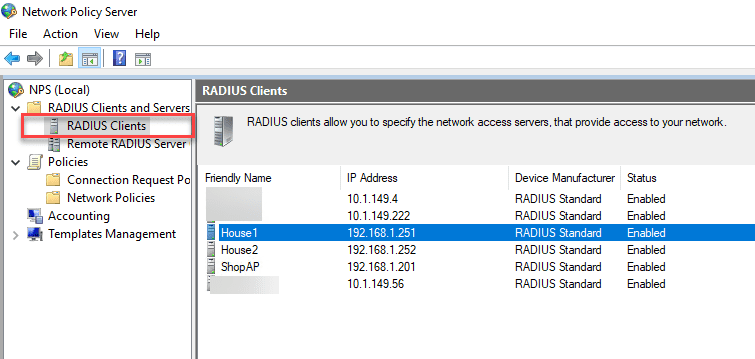
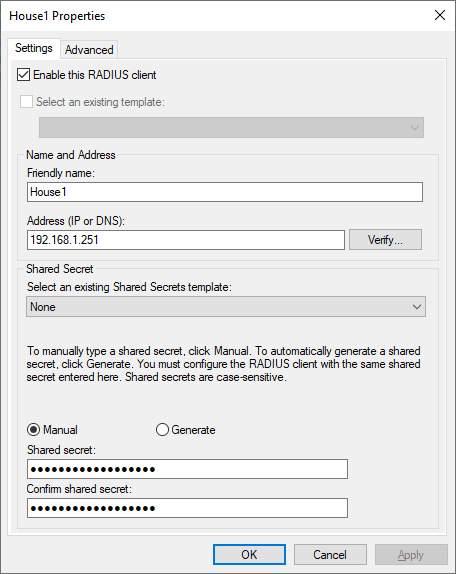
In the properties of your RADIUS client, you enter the IP address/DNS name and also the Shared secret.
Configuring a Network Policy for Wireless Clients
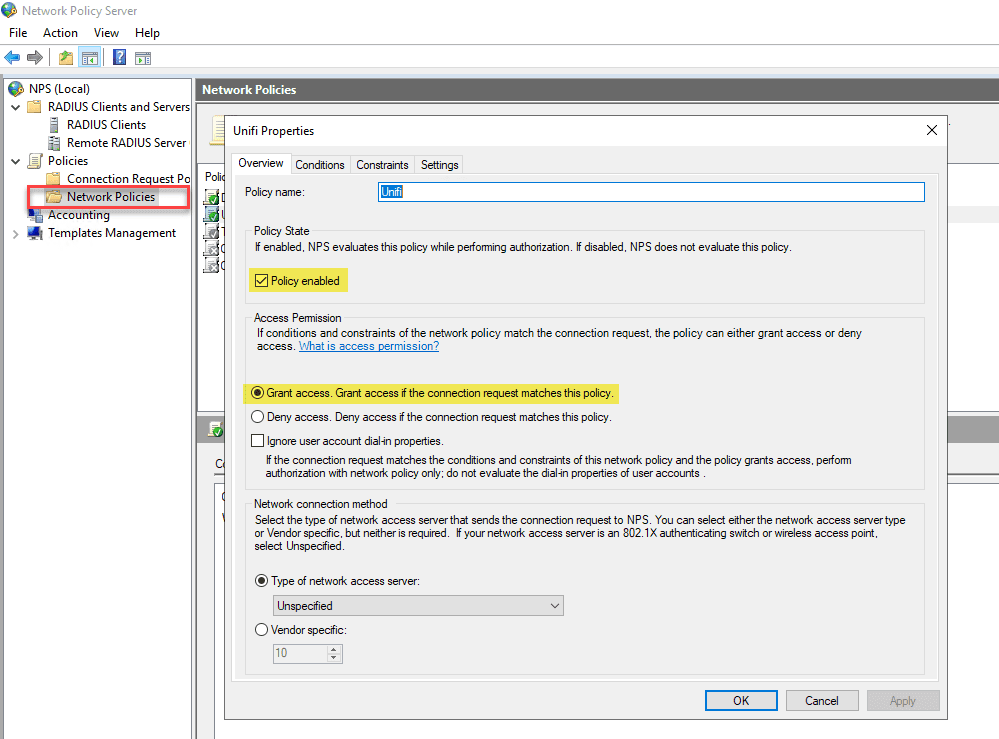
Once you have the RADIUS clients (Unifi APs) added to your RADIUS clients of the NPS server, you are ready to create the Network Policy. The network policy is essentially the requirements of the connection.
The policy is checked to see whether or not the user attempting to authenticate matches the policy requirements. This might include Windows group membership and other requirements.
First, create the new policy. By default it will create as enabled and granting access, but make sure you have the options selected here that you want in the Overview tab.
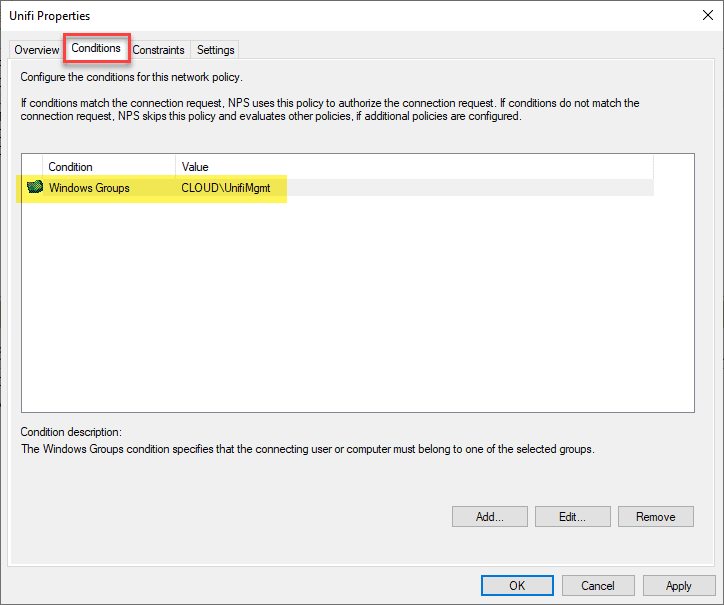
On the Conditions tab, you set the Conditions that you want to match such as Windows group membership.
There are many others including:
- Machine groups
- User groups
- Day and time restrictions
- IP address
- Allowed EAP types
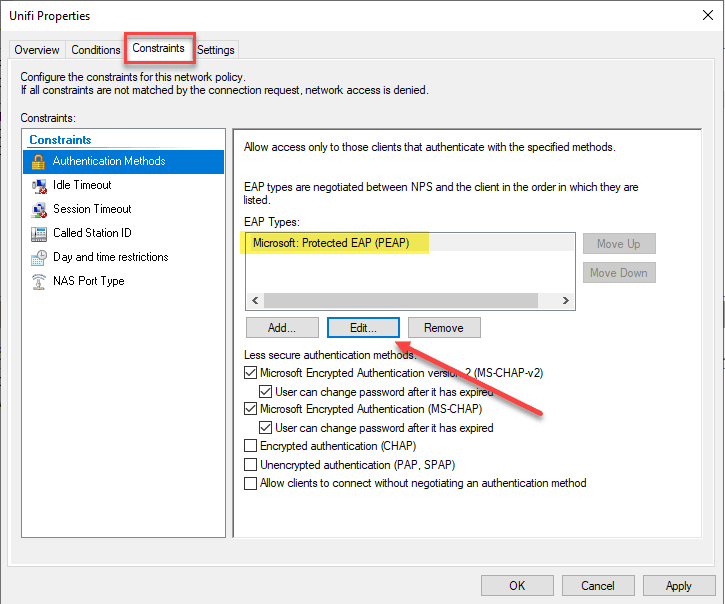
On the Constaints tab, the authentication methods is the configuration we want to give attention to. Make sure you have the options configured as below. On EAP types we want to use:
- Microsoft: Protected EAP (PEAP)
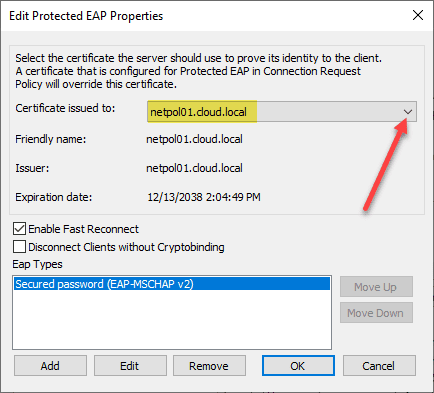
Click the Edit button to edit the properties of the Microsoft PEAP option.
Select the certificate to use with PEAP. If you don’t have a certificate available, you can generate a self-signed certificate by using the PowerShell command:
new-selfsignedcertificate -dnsname "yourserver FQDN goes here" -KeyLength 2048 -CertStoreLocation cert:LocalMachineMy -NotAfter (Get-Date).AddYears(20)
Once you have the certificate configured, the Network Policy configuration is basically complete. If you have any other options you want to tweak, you can make those changes. However, I like to start out basic in case there is any troubleshooting in general with connectivity that needs to be performed.
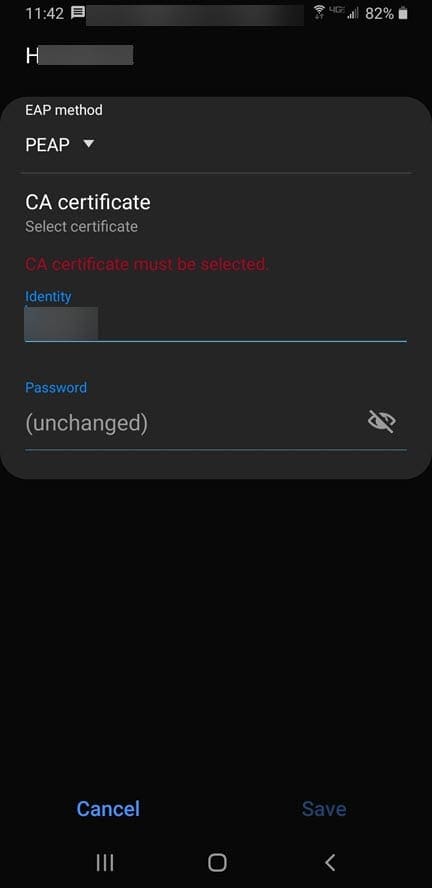
This is an Android device. I have selected the EAP method of PEAP. Under identity, this is where you place your Active Directory user. A note here, you don’t have to prepend the NETBIOS domain name in front, only the username. Then enter the AD password.
Troubleshooting Unifi RADIUS authentication
There are several troubleshooting areas that I will mention where generally problems can creep in.
- Make sure you have the correct IP address for the Unifi APs
- Make sure you have typed the shared secret password correctly between the Unifi RADIUS profile and the shared secret that is configured for the RADIUS clients configured for your APs in NPS.
- Make sure Windows firewall is allowing RADIUS connections (UDP 1812,1813)
- Make sure if you have scoped the configuration down to a Windows group, the user you are authenticating with is actually a member of that group
- Check the event logs on the NPS server for NPS events
- Use the NTRadPing tool to troubleshoot connectivity
Wrapping Up
Setting up RADIUS authentication in your Ubiquiti Unifi environment is fairly straightforward. Generally speaking, the details is where generally most admins are tripped up in configuring this.
With RADIUS troubleshooting, it is usually something small that will cause authentication to fail. Usually issues with the RADIUS client or shared secret will cause issues. Using the troubleshooting list above however, generally you can find the culprit.


If you generate self-signed certification using this comand
new-selfsignedcertificate -dnsname “yourserver FQDN goes here” -KeyLength 2048 -CertStoreLocation cert:LocalMachineMy -NotAfter (Get-Date).AddYears(20)
it won’t work. Because Andorid 10 or later version won’t accept this certificate and if you try to install certfificate manually, it will report “Private key required to install a certificate”.
Alexander,
Thank you for your comment. I haven’t tested this in a while, so definitely good to know if you are seeing issues with self-signed certs in the later versions of Android. It is always best to use real SSL certs. If I can find some time to circle back to this, it would be great to replace with a LetsEncrypt certificate in the steps for testing which should work fine.
Brandon
hey Brandon, great post indeed!
I’m going to setup a radius server along our Ubiquiti environment, bear in mind I do not have an Unifi Security Gateway but a Meraki as main firewall, however, all switches are Ubiquiti, I see some issues with Android newer versions posted by Alexander, have you planned to makes some tests again ?
hey I will be glad to post back here my results a soon I made the changes
thanks!
Crane,
Very nice! Thanks for the comment and glad the post was helpful! Keep us updated on how your project goes.
Brandon
Hi, thank you for your post.
I have a question, Do I need to share the CA with the clients? Or is downloaded automatically.
and if the users need to be added to the domain?