I first wrote about Patchmon in its v1 form back at the end of 2025. It immediately stood out to me as something that filled a real gap in the Linux home lab space and even production environments. If you have more than just a few servers, you realize that keeping track of updates and making sure these get applied is a challenge. You have to rely on scripts, automation frameworks, Ansible, etc to stay updated. Or you can just do it the old fashioned way and “sneakernet” the updates across. With Patchmon v2, I think we have arguably one of the strongest solutions in that space for patch management. Let’s take a look at the features and capabilities.
The biggest limitation in PatchMon V1
There was one real problem in the v1 release that was holding it back from being amazing and that was the ability to initiate patches from Patchmon. You could see what updates were available, but you could not actually do anything about them from the interface.
Read my review of Patchmon v1 here: PatchMon Is the Linux Update GUI I’ve Been Wanting for My Home Lab.
As you can imagine, this created a bit of a disconnect in the workflow. You would use PatchMon to discover what needed attention, then switch over to your tool of choice for patching as we mentioned earlier. But this as we know is not seamless. The developer knew that and it was always expected that at some point Patchmon would be able to do everything. That is exactly where PatchMon V2 comes in.
What PatchMon V2 changes
The big change and addition is icing on the cake I think. You can now actively patch your servers, whether these are bare metal or running inside your Proxmox VE Server environment. Now, instead of Patchmon being just a glorified monitoring dashboard for patching and update needs, it is an actual patch management tool. Instead of stopping at visibility, you can now take action directly from the same interface, which is super cool.
Now, when you see a system that has pending updates, you do not need to open a terminal or switch tools. You can initiate the patching process right from the PatchMon interface. This definitely streamlines the workflow and allows you to stay up to date on patches and visibility across your server estate.
Supports not only Linux but also FreeBSD and Windows. This is a major upgrade over v1 which at the time when I tried it out, it was Linux only and no Windows. For me personally, I am more interested in the Linux side of things, but how awesome is it that you can manage all of your patching operations across both Linux and Windows?
***Note*** Currently, at least in my testing with Windows, it is visibility only. But suspecting this will be like v1 and has monitoring for updates in Windows and then later will add the ability to actually apply updates in Windows as well. So stay tuned to the project on that front.
So, lots to like about this new version. Let’s see how we can get it up and running.
Installing Patchmon V2
The process to install Patchmon V2 is straightforward. From the official documentation on the GitHub page, you can install it with the following:
mkdir patchmon && cd patchmon
bash -c "$(curl -fsSL https://raw.githubusercontent.com/PatchMon/PatchMon/refs/heads/main/docker/setup-env.sh)"
docker compose up -d
Below, you see how I made the directory, changed into the directory and then ran the script to pull down the docker compose and env file. The script also steps you through how you want to access your Patchmon installation. It asks you if it will be behind a reverse proxy and what URL or domain name you will be accessing it with. This is so it configures the CORS origin correctly, etc.
Also, I will say the process to install Patchmon is massively easier than v1 as the script below has streamlined much of the heavy lifting.
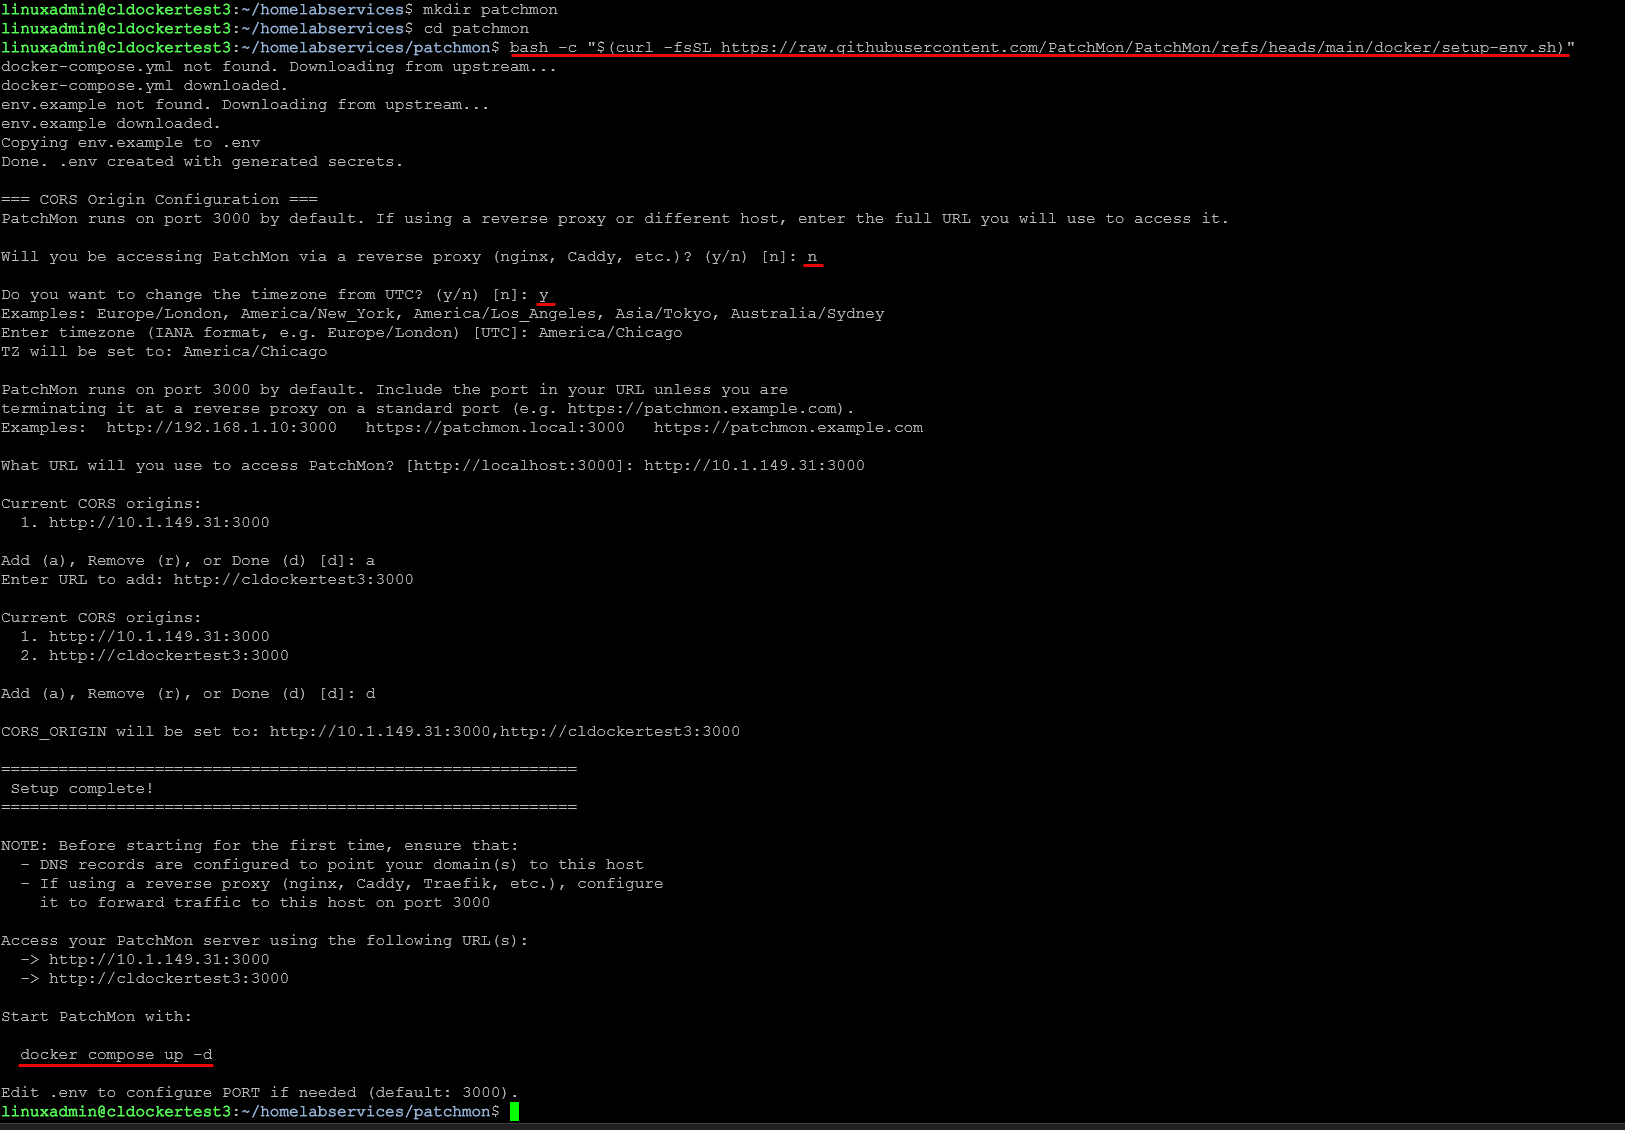
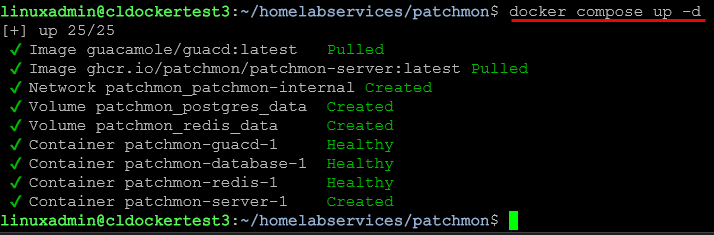
Below, we are running the docker compose up -d command to bring the stack up. The script above simply configures things to get ready to bring up the stack. The docker compose up -d command is still needed to actually bring up the stack.
Exploring the Patchmon v2 interface
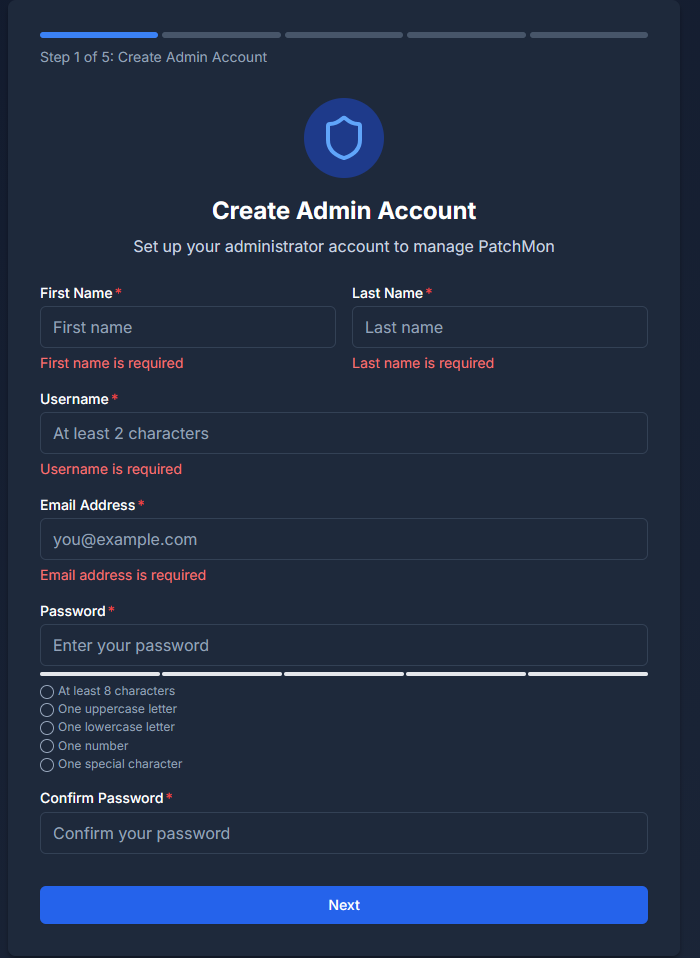
Now that we have it up and running, we just access the solution with the URL we configured during the provisioning process. When you do, you will step through the little mini wizard starting below with creating your admin account.
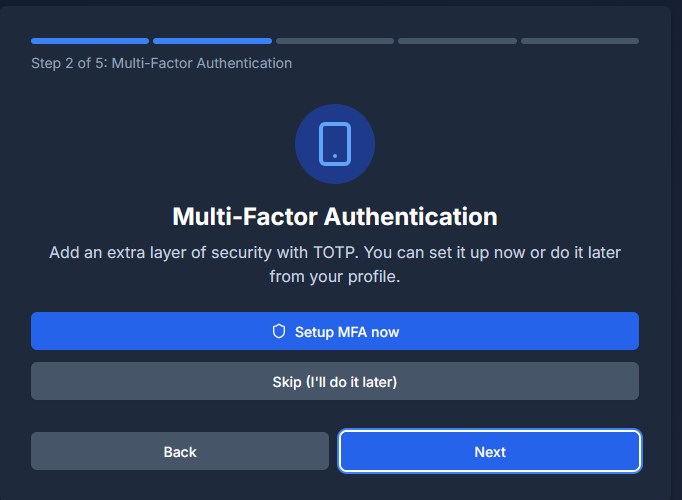
Next is configuring mulit-factor authentication.
Step 3 has you confirm the server URL. This is the URL agents use to connect. So keep this in mind that if you change the URL later which you can do under the Settings.

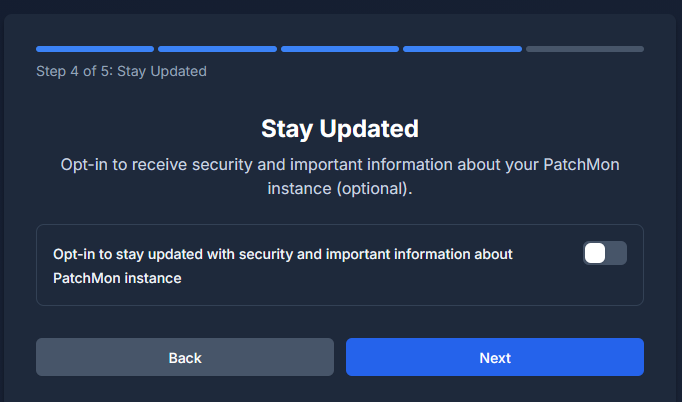
Next, you can opt in or out of staying updated on the latest information with Patchmon.
Finalize the installation and access the dashboard.

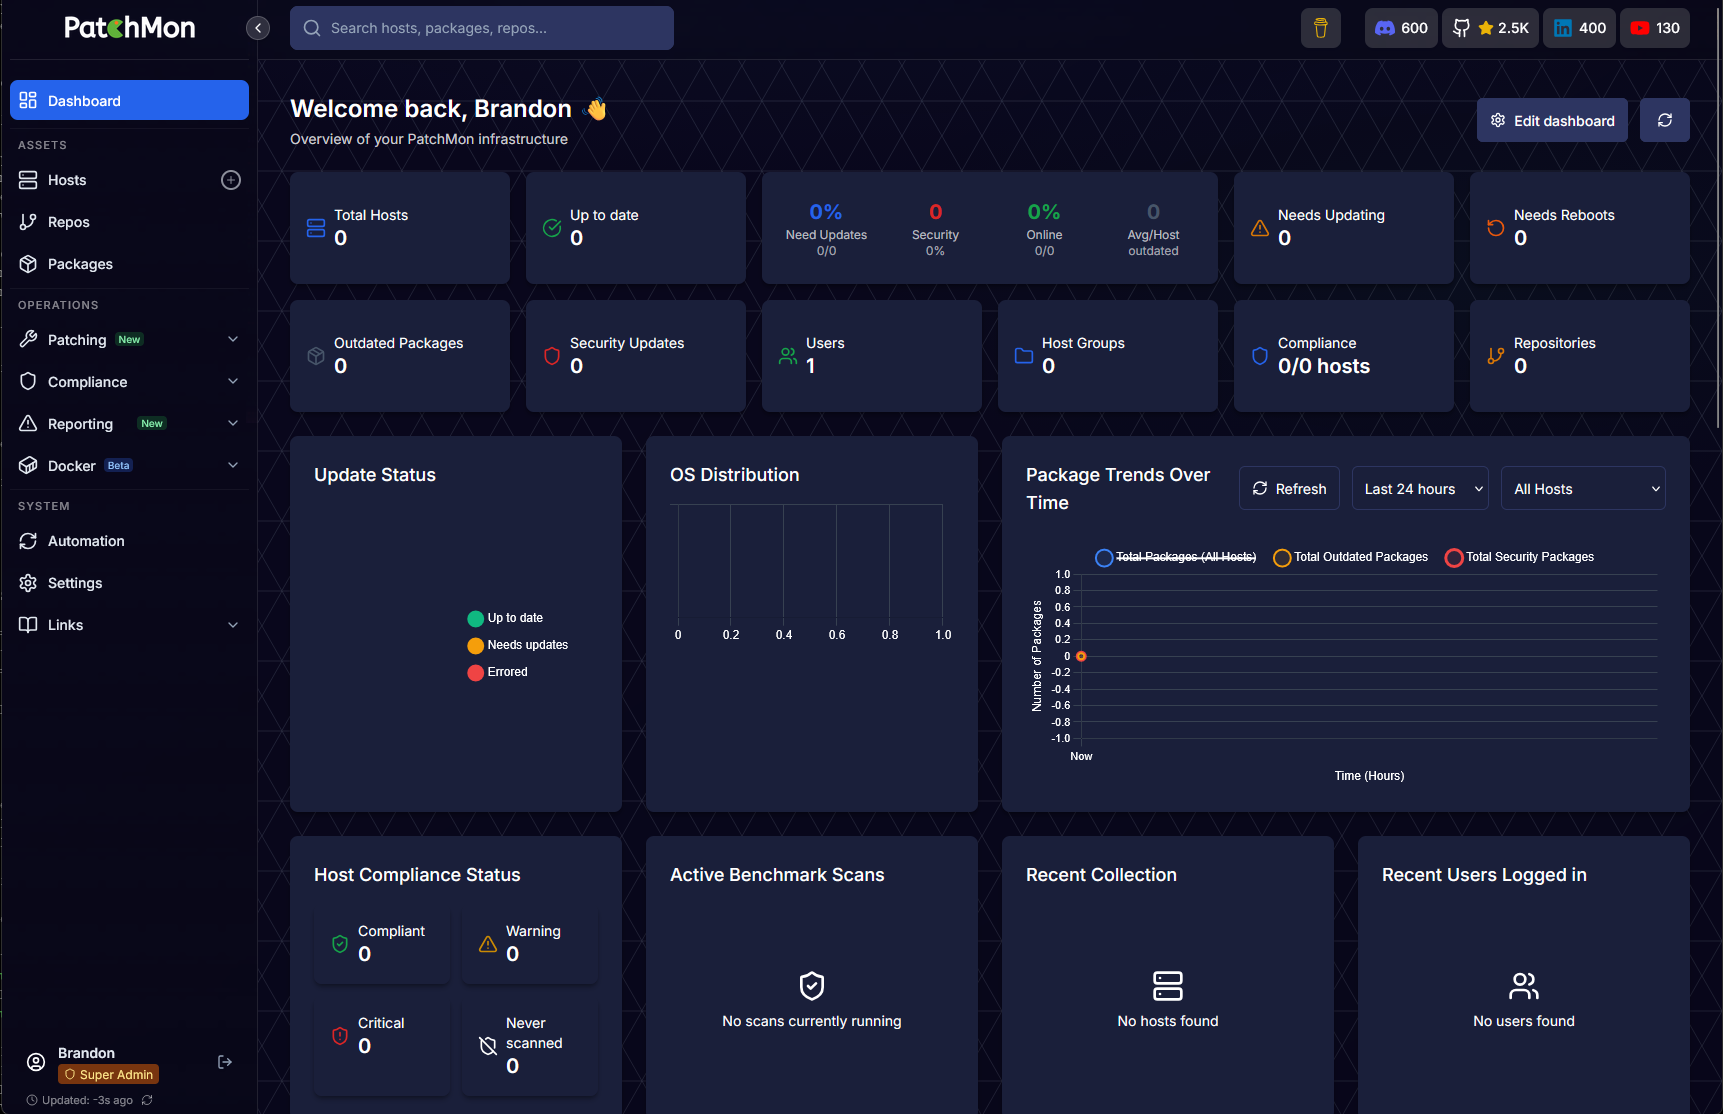
After you click the button above to Access Dashboard, you will be taken to the default Patchmon v2 dashboard.
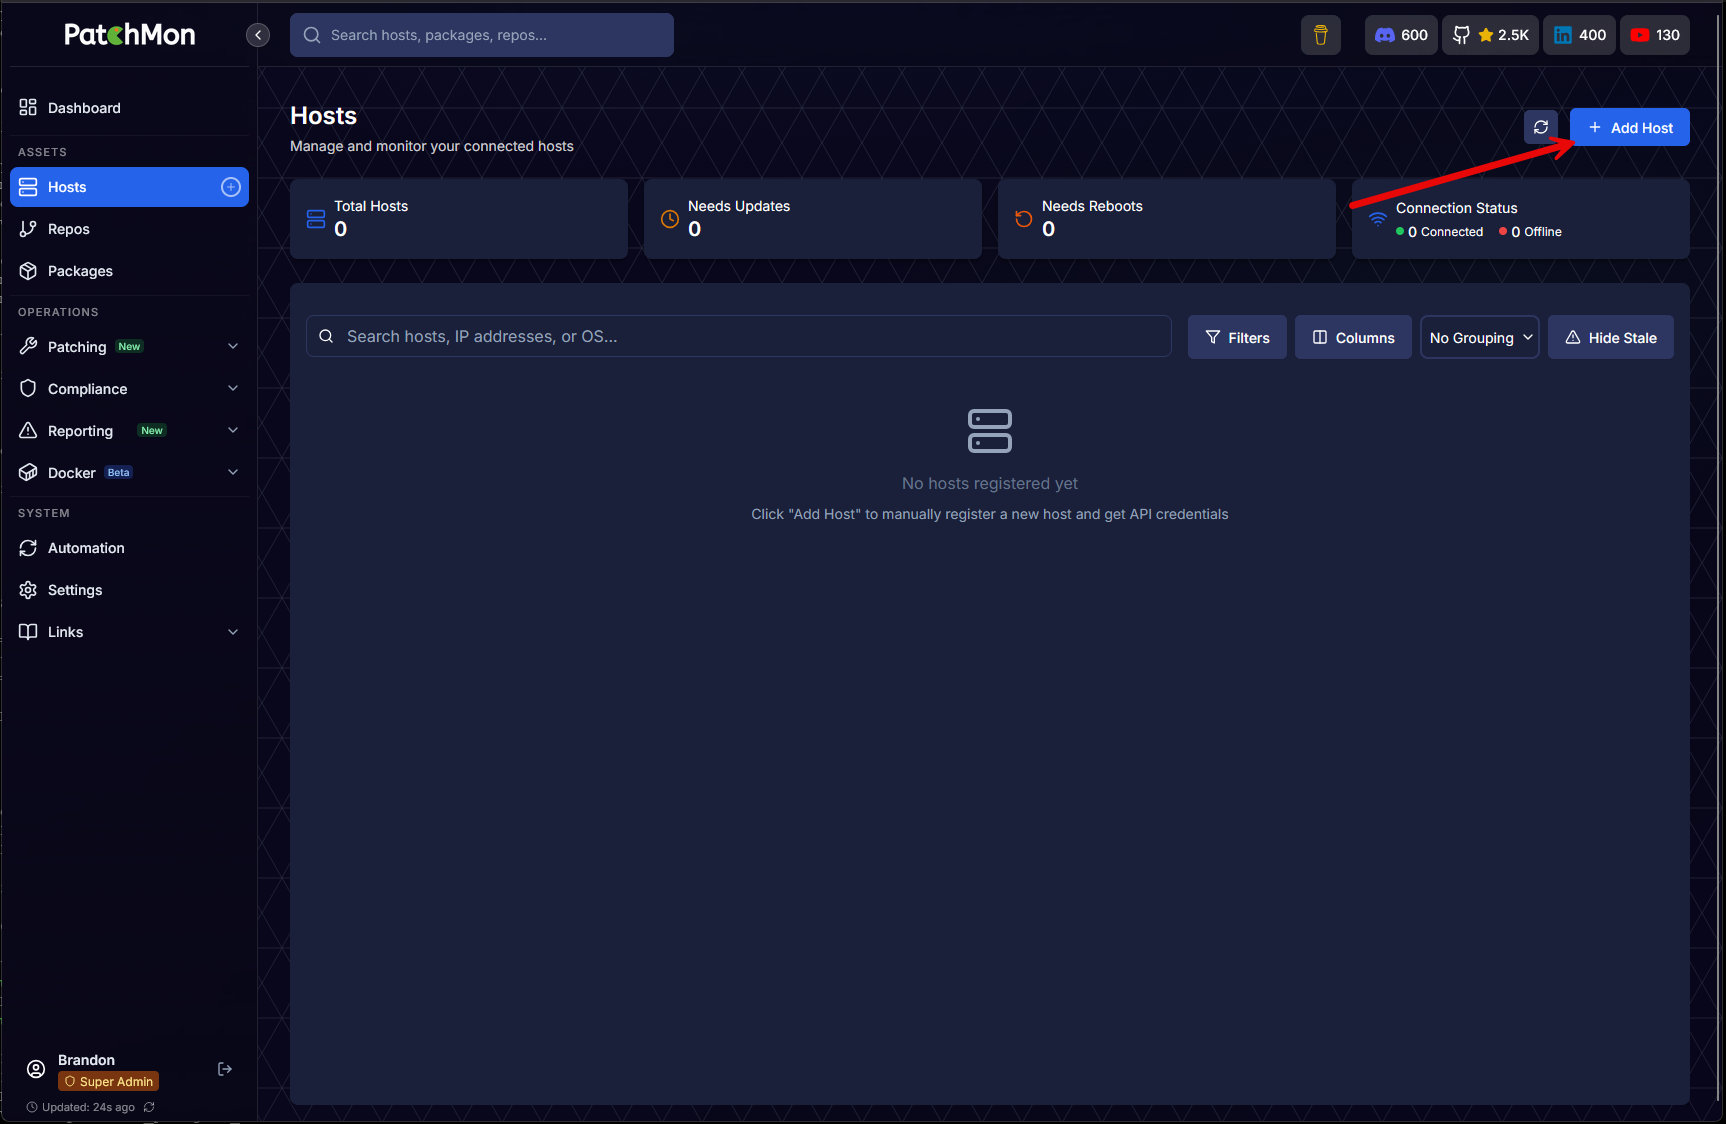
Adding hosts to Patchmon v2
Now that we have the solution fully provisioned and the mini setup wizard completed, we can add hosts that we want to manage. Click the Hosts menu > + Add Host button.
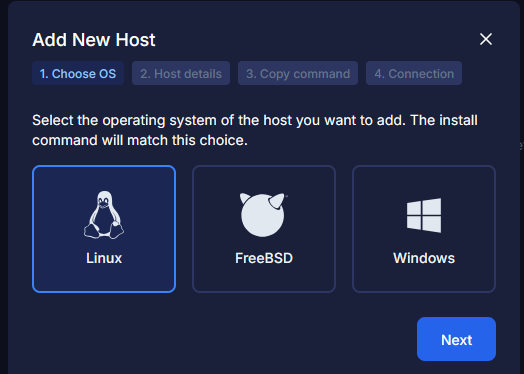
This will launch the wizard below to add hosts to the solution. First, you will choose between Linux, FreeBSD, and Windows. Click Next.
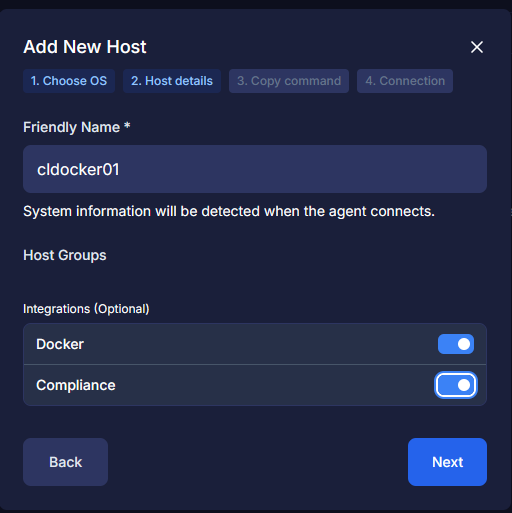
On the host details screen, here you enter the friendly name and add to host groups if you have any configured, and choose integrations you want, like Docker. These are really handy as it will also monitor your Docker image details, etc.
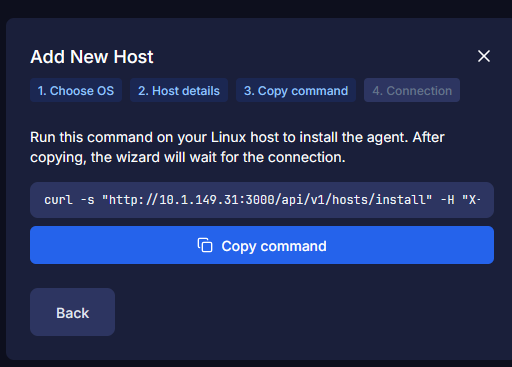
On step 3, you click the Copy command and it copies the script you need to run on the remote host.
The wizard will then move to the screen below, where it is waiting on you to run the command on teh remote host.

Below, I am running the onboarding script on the remote Linux host.
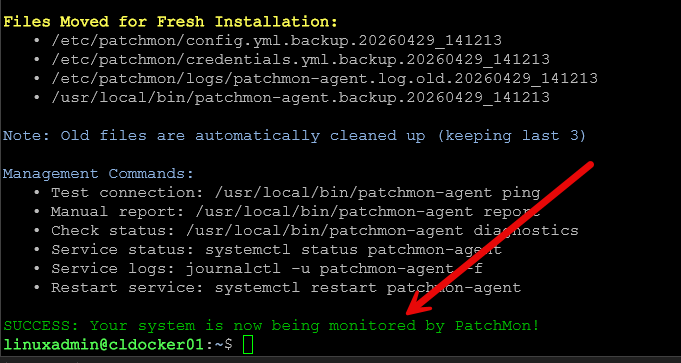
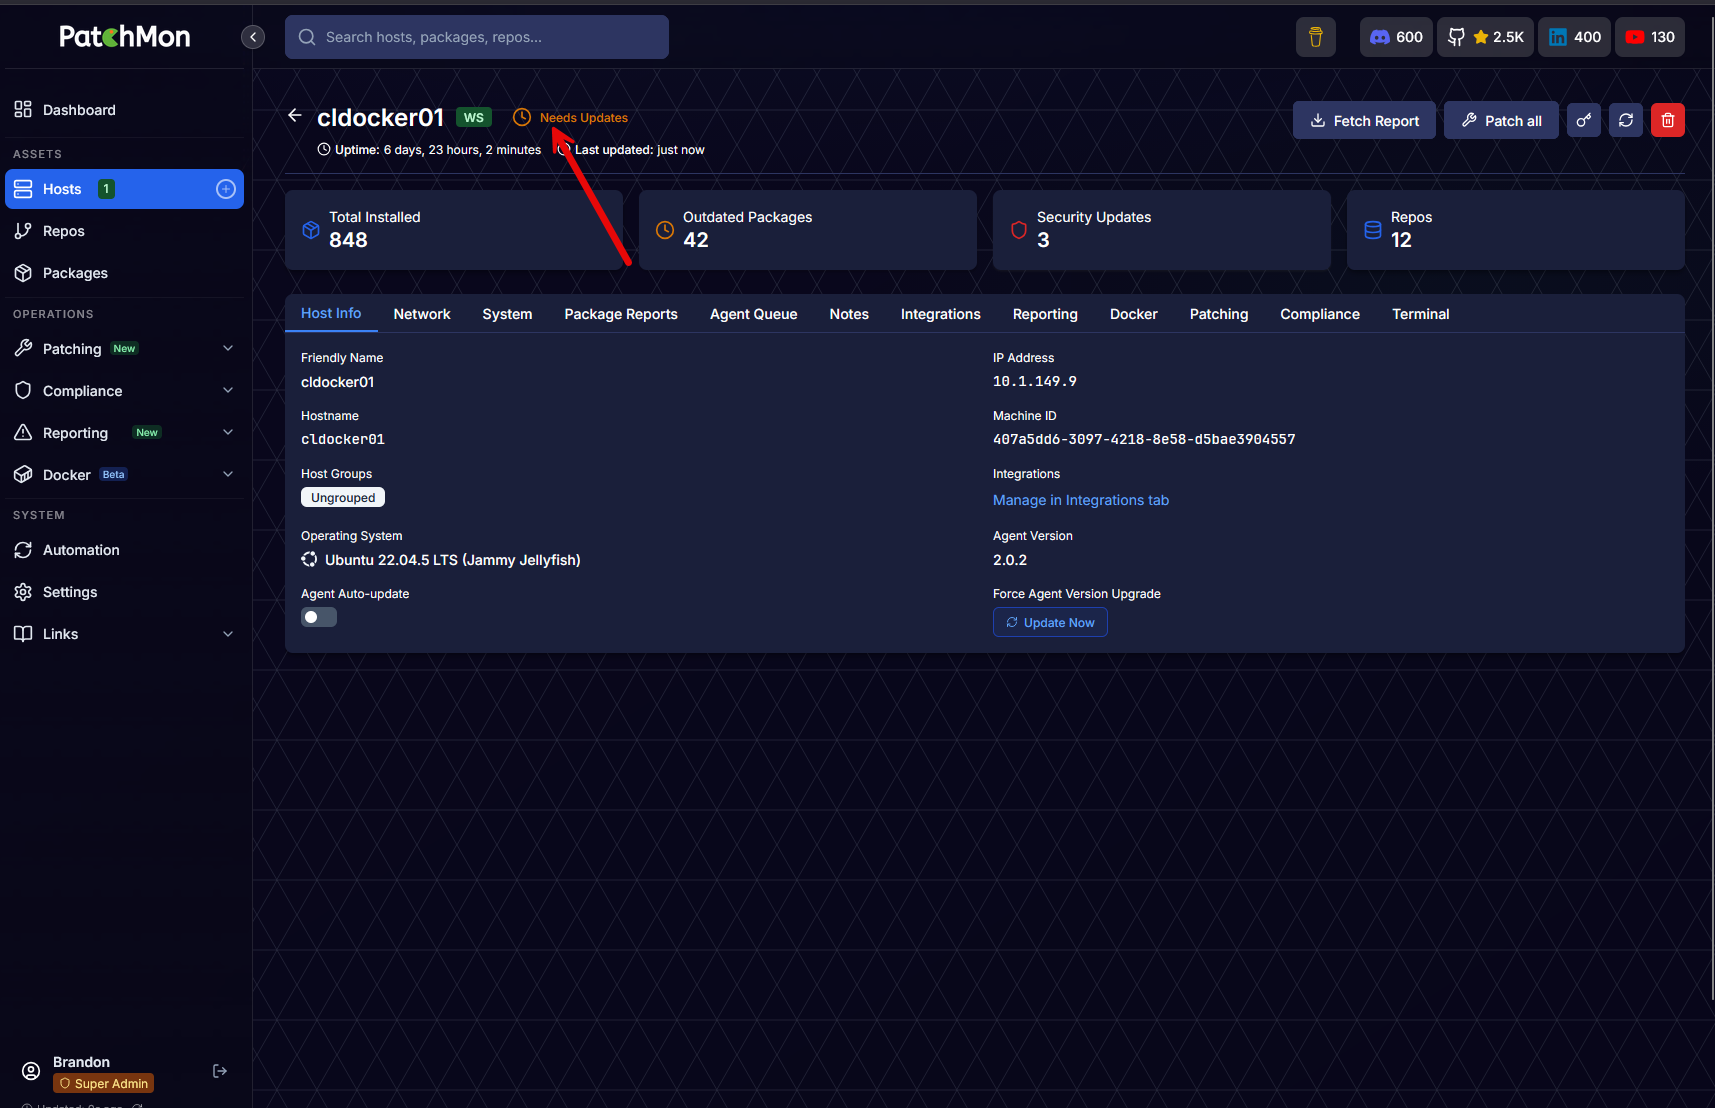
The host is onboarded successfully. Immediately, I see the status of Needs updates.
Actively running updates on remote hosts
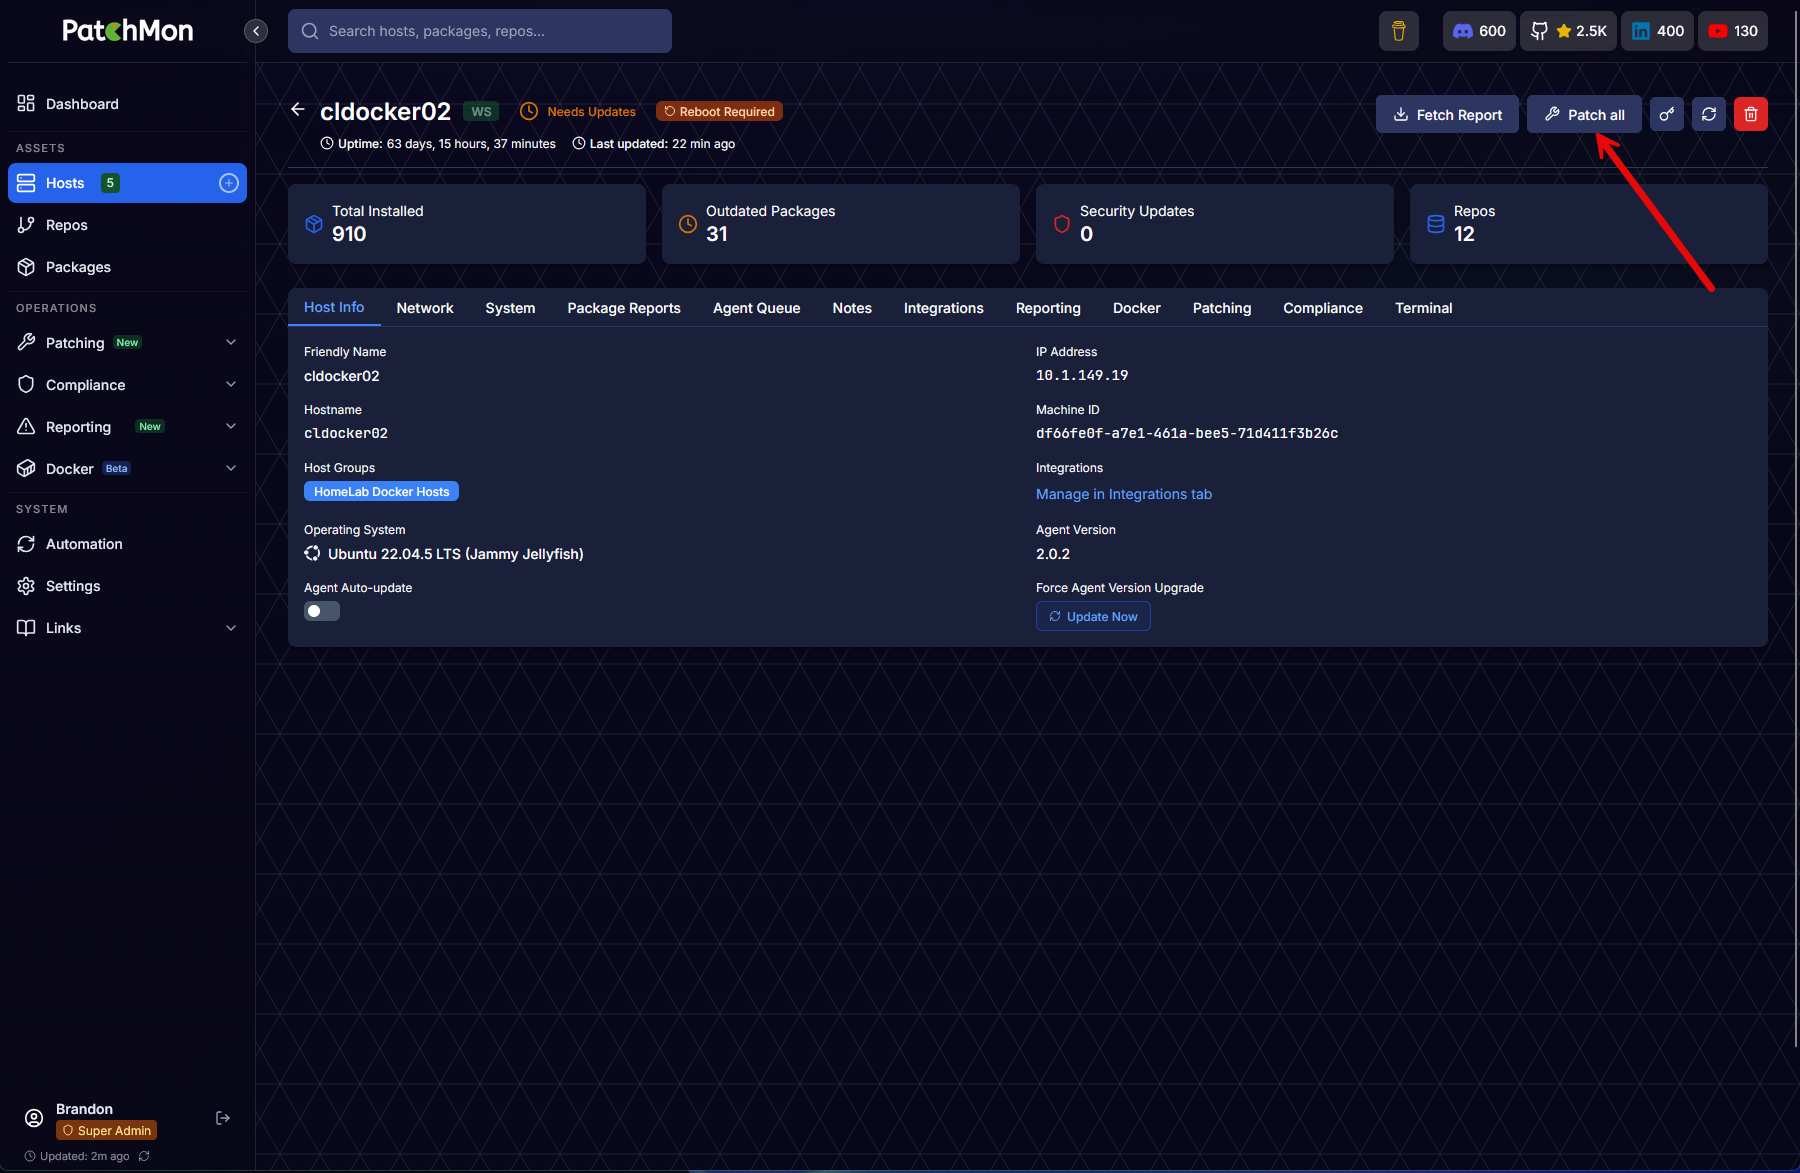
Now that we have the host onboarded, we can run the actual updates on the remote host, which Patchmon v2 makes really easy. Click on a host and then click the Patch all button.
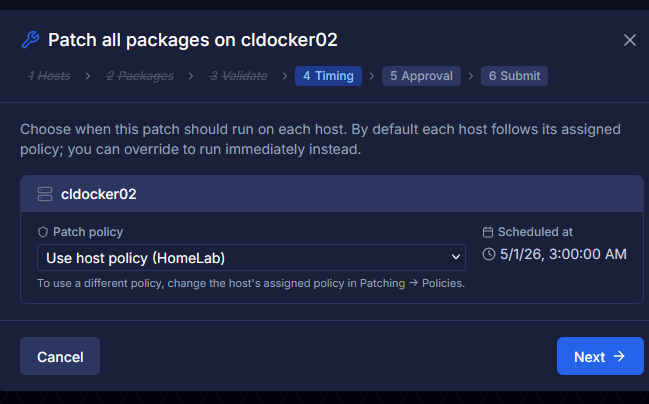
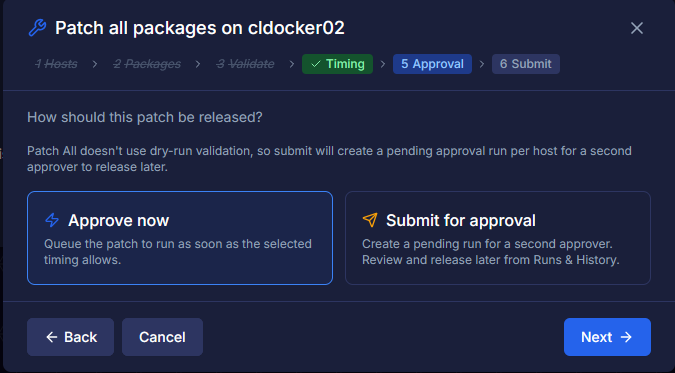
The patch all packages on <hostname> wizard launches. We first select the timing of the updates. It will default to policy (if you have one configured), but you can also override that as well.
Here, I clicked the drop down menu to select Override: Run immediately. Click Next.
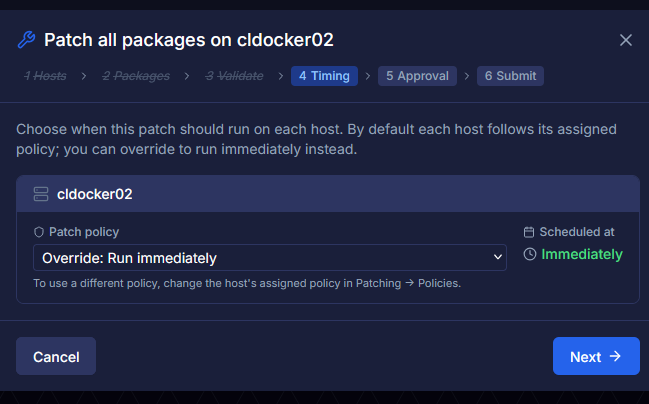
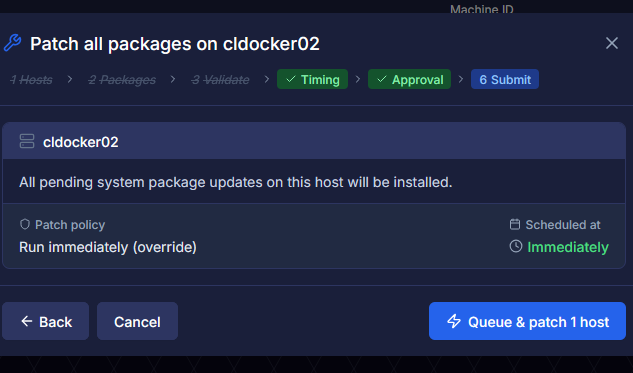
Step 5 is Approval. Click Approve now > Next.
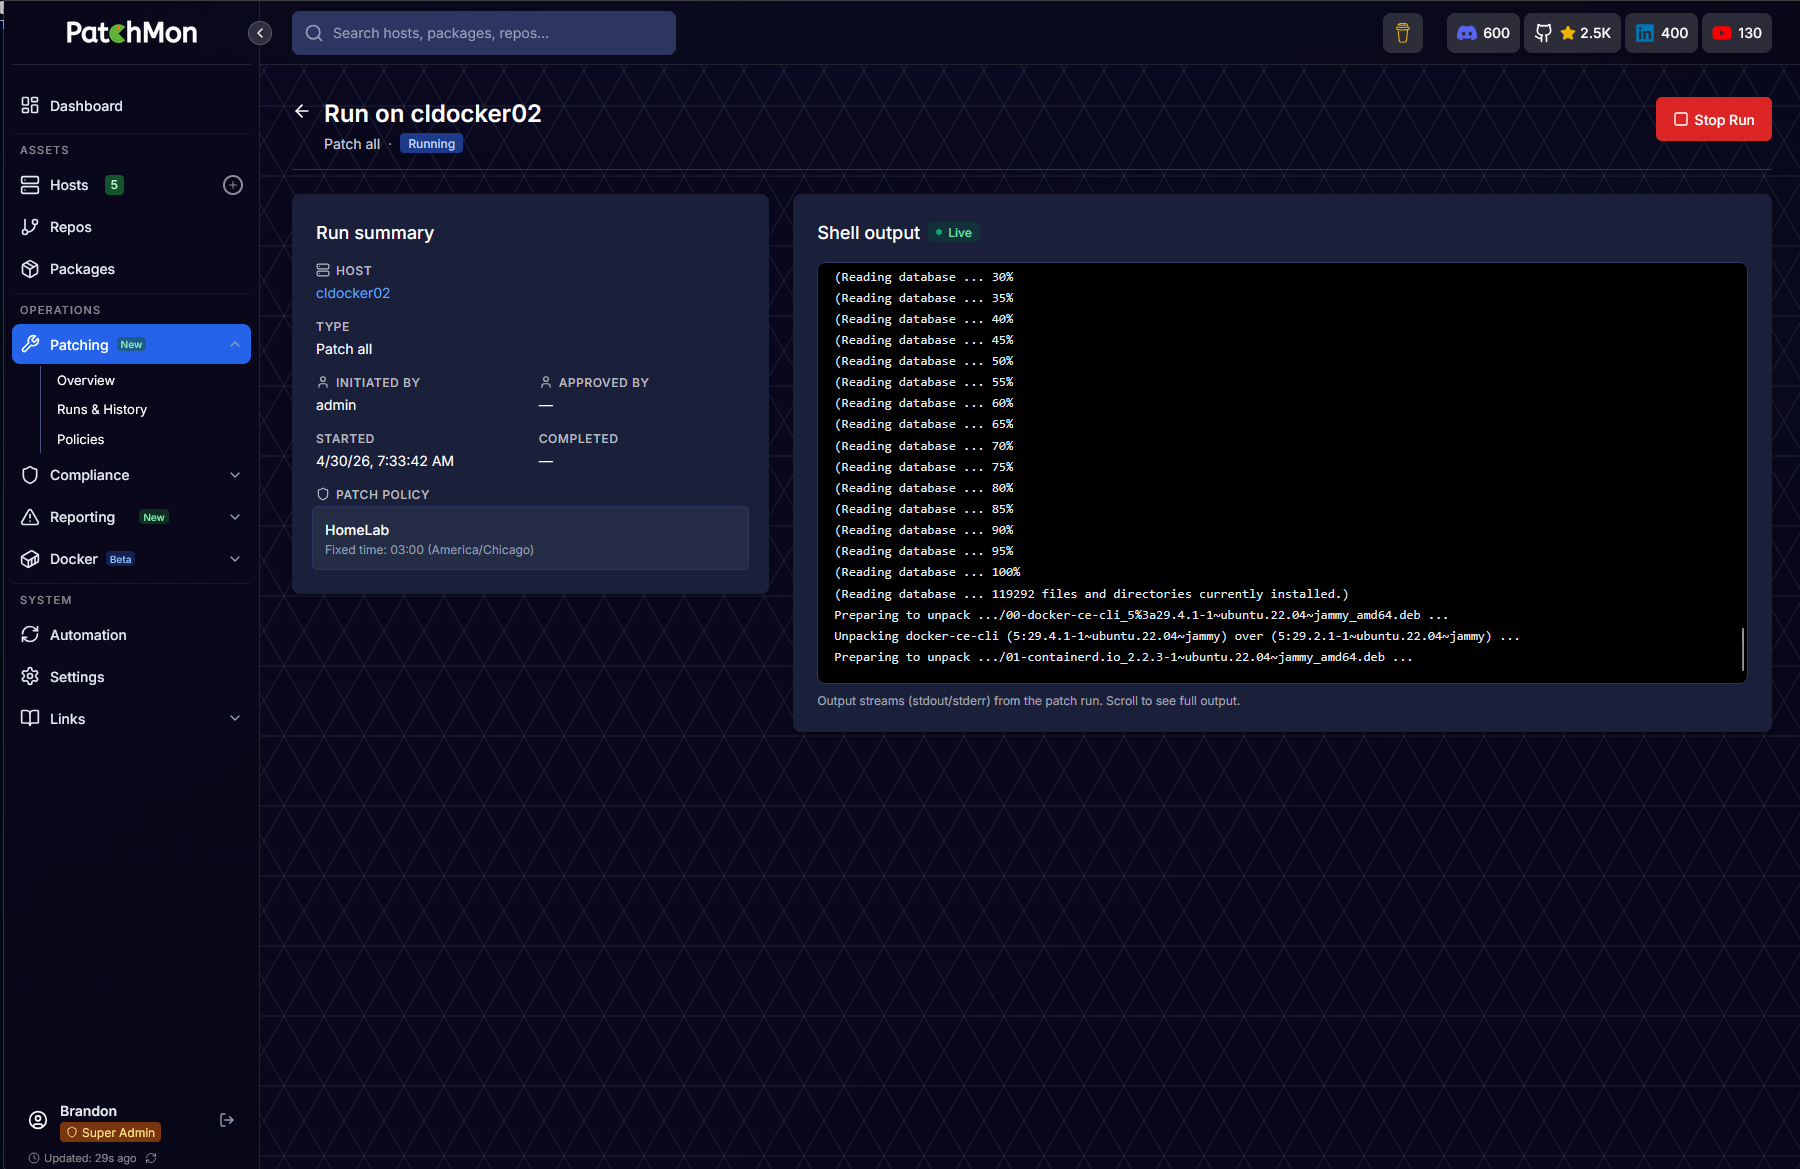
Finally, submit to the queue and patch the host.
One of the neat features is it has a shell output that allows you to monitor the update process in real time from the UI.
Using policy to automate updates
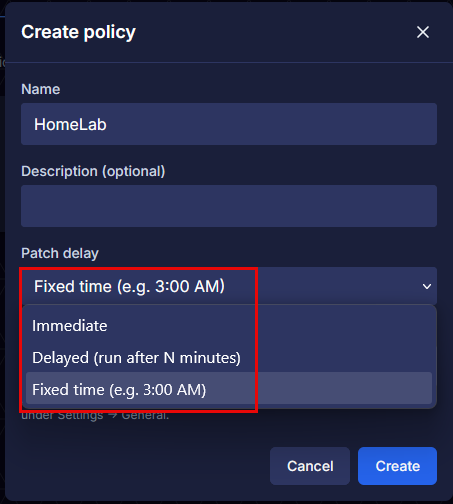
One of the really neat features of Patchmon v2 is the ability to create policies that can control the update process. Policies allow you to define when and how updates are applied to specific hosts. Click the Patching > Policies menu. Then + Create policy. This will launch the dialog box below.
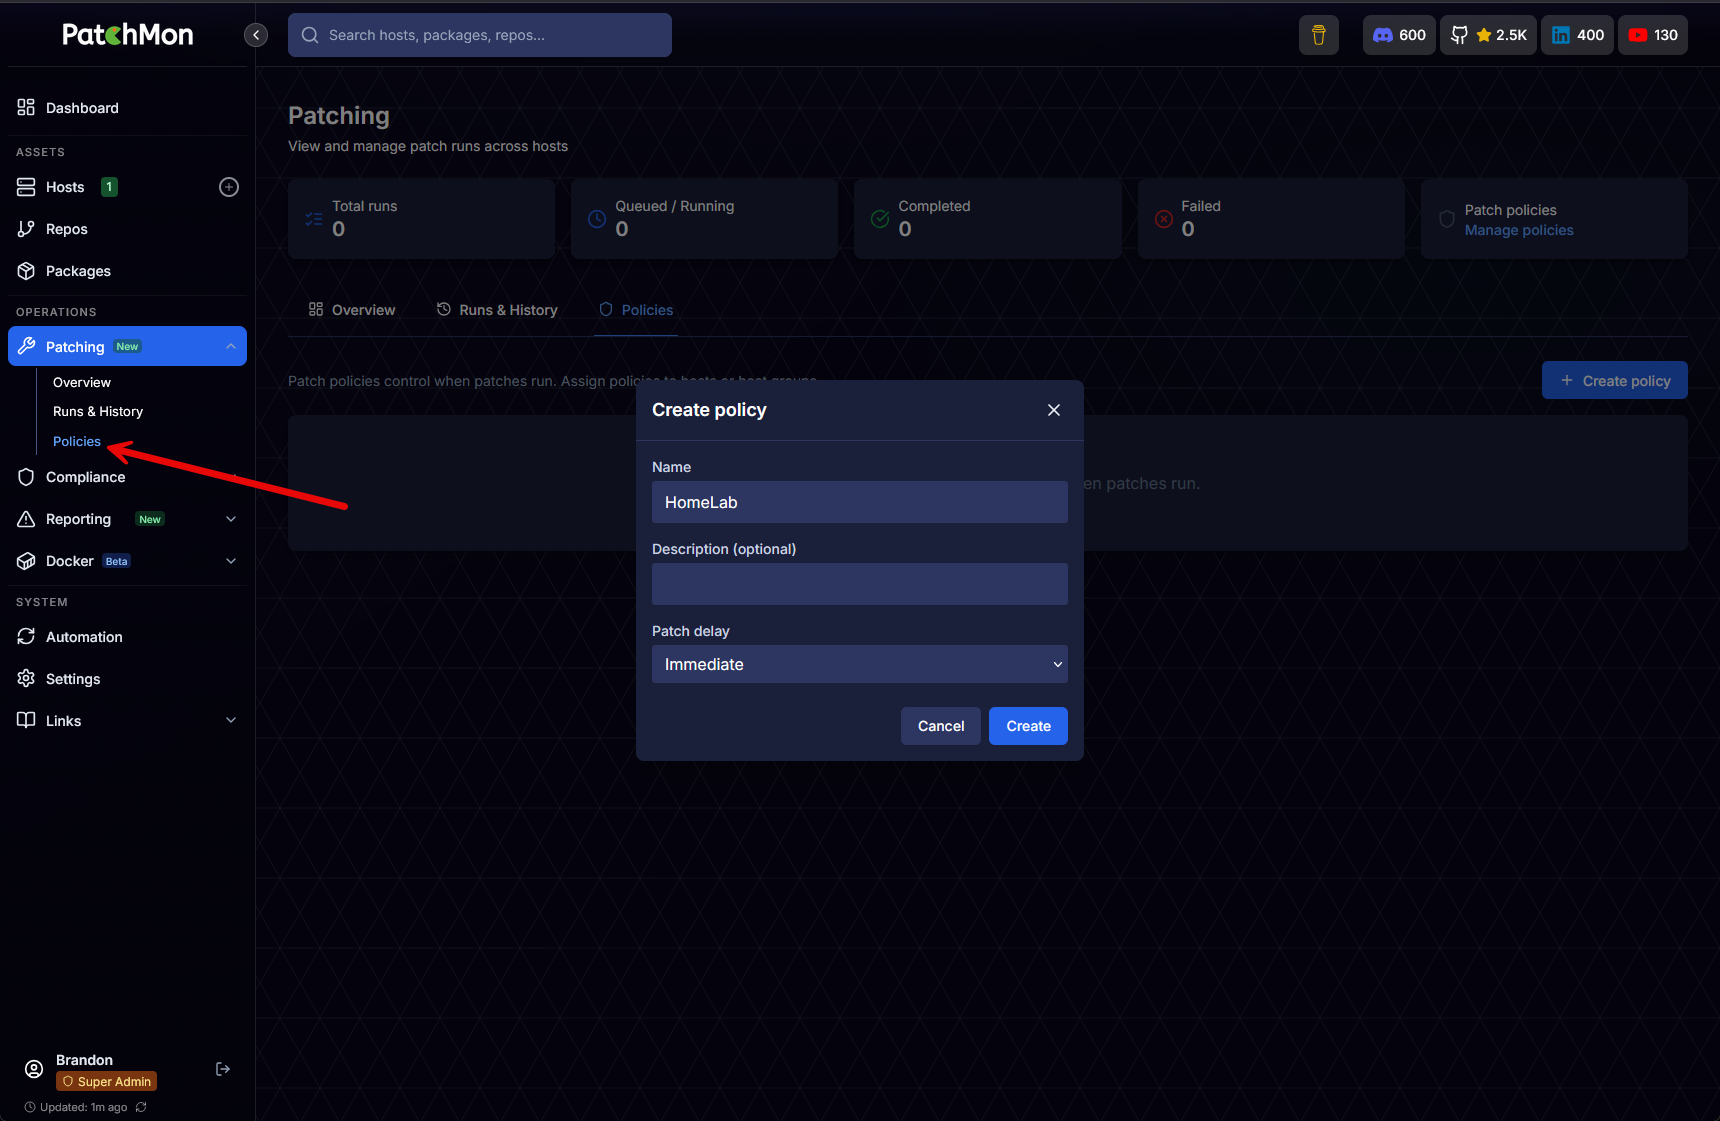
On this configuration box, you name the policy, add an optional description, and configure the Patch delay. The Patch delay (oddly named I think) is where you setup the schedule basically. You can choose the time you want to run the updates as well here.
Once you create the policy, the next thing you will likely want to do is create a host group to define which hosts the policy applies to. You can assign to individual hosts, but the host group makes the most sense I think for most and it also allows exclusions. One thing to call out, the Host groups management is found under Settings and not under patching. I think this placement is a little odd and not intuitive. I would suggest this be moved to the patching menu as this is where most will look for it in my opinion.
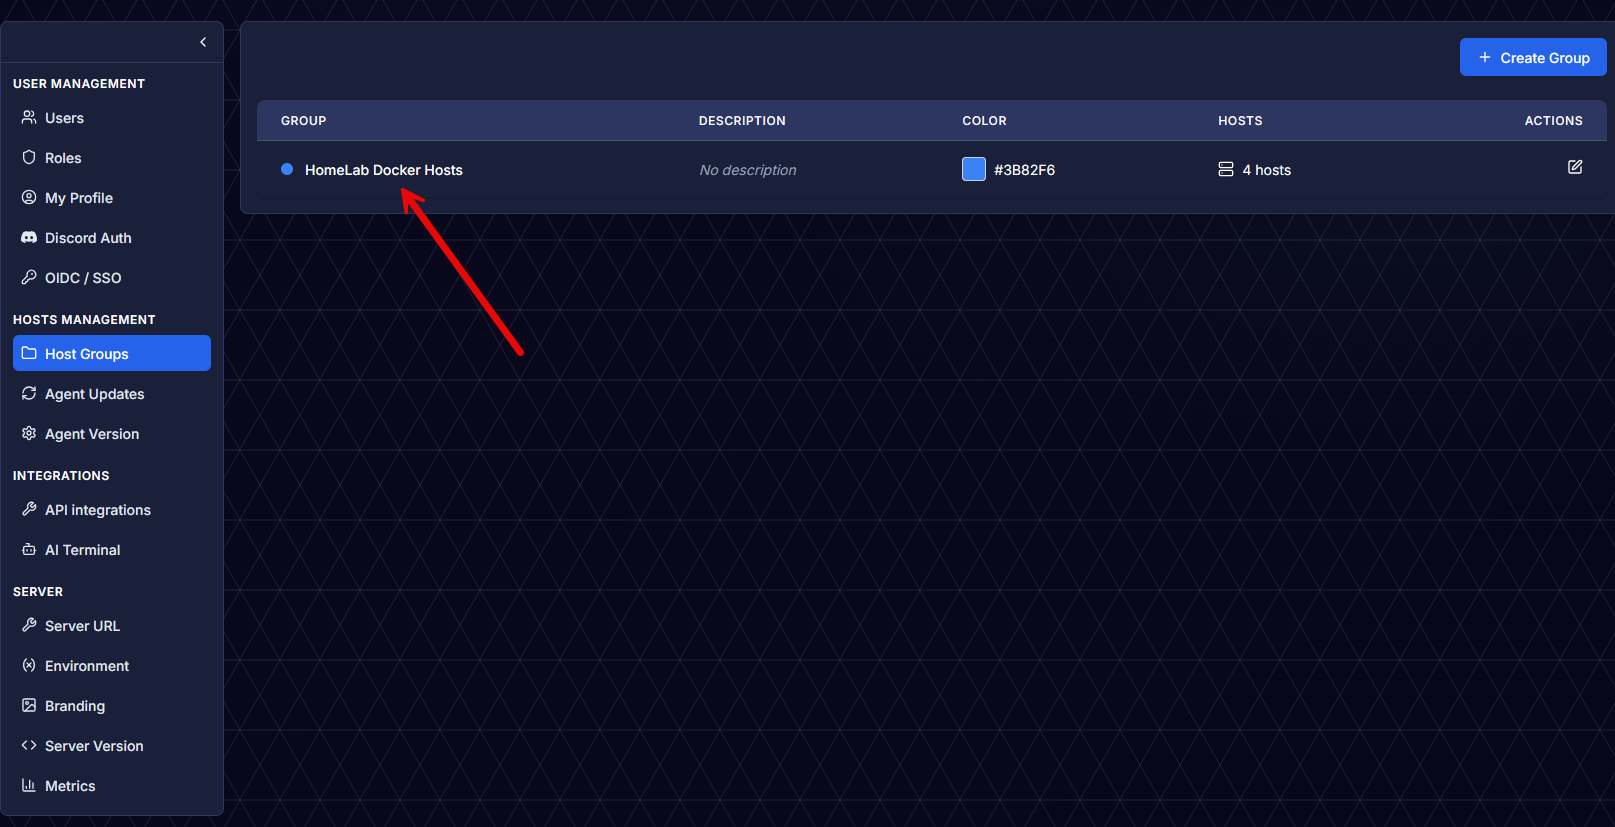
Now, under the assignments of the update policy, here we can choose the host group that we created.

Wrapping up
All in all, there is a lot to like about Patchmon v2. I was impressed with v1 a few months ago. But there is no comparison with what v2 can now do with the ability to actually perform updates on your Linux, FreeBSD, and also Windows servers. This means you can basically manage updates for all your server estate in the home lab or production with a single solution. And, this is free and open source which is fantastic. What about you? Are you currently trying out Patchmon in your home lab or are you using something else entirely? Let me know in the comments what you think about it.
Google is updating how articles are shown. Don’t miss our leading home lab and tech content, written by humans, by setting Virtualization Howto as a preferred source.
About The Author


Have you tried action1?
Brad,
Thanks for the comment. I have tried action1 and do like it. One thing I like about Patchmon compared to Action1 is it can be self-hosted.
Brandon
I hate these apps that shouldn’t be in docker or at least have a proper bare metal install. If you need 4+ containers for your app, it’s no longer meant for docker IMO.
Thats certainly an opinion you can have, but docker containers are intended to encapsulate a single process per container. So if an app requires multiple parts, it should be broken into multiple containers. These can easily be grouped together in a single docker-compose or k8s deployment. Provisioning an entire VM or worse, bare metal server for this is drastic overkill, and a huge waste of resources.
Ed,
Great points here and definitely lines up with my thoughts as well.
Brandon
John,
Have you had a bad experience with Docker in the past? I have fully embraced Docker for most applications. They make provisioning, infrastructure as code, upgrades, and so many other things much easier, and they save on resources. Also, they are the modern way of self-hosting or even running apps in the enterprise.
Brandon