
I am a huge fan of automation in the home lab and have long had pipelines running that automate deployments of virtual machines in my VMware vSphere and now Proxmox environments. Ubuntu Server has been a staple “general” Linux operating system in my home lab for years. It is a great one to automate using Hashicorp Packer. In this post, I want to walk through how I am automating the newly released Ubuntu 26.04 builds in Proxmox VE using HashiCorp Packer. I will cover what Ubuntu 26.04 brings to the table and the files you need for Packer.
Why Ubuntu 26.04 LTS matters for home labs
Every new LTS release from Canonical is a big deal, especially for home lab environments. The LTS releases are typically what most of us run for our “production” workloads where stability and and long-term support matter.
Ubuntu 26.04 LTS, also known as Resolute Raccoon. Ubuntu Server continues the trend of providing a solid, enterprise-ready Linux platform while bringing in modern improvements under the hood. One of the biggest advantages of sticking with an LTS release is the extended support window. You get five years of standard support. This makes it ideal for infrastructure workloads that you do not want to constantly rebuild.
Under the hood, Ubuntu 26.04 includes a newer Linux kernel (7.0) that improves hardware compatibility, performance, and security. I think this is a great detail to know especially if you are running newer hardware in your home lab like Mini PCs, NVMe storage, or high-speed networking, or GPUs. Better driver support and kernel improvements can benefit and impact performance and stability in virtualized environments.
Another area of improvement with Ubuntu Server 26.04 is security. It contains updated cryptographic libraries, improved default configurations, and enhancements to things like AppArmor. If you don’t remember, this is the platform that continues to harden by default. For home labbers who are exposing services or experimenting with zero trust networking, this is an important detail.
You also benefit from updated package versions across the board. This means you get newer versions of Docker, Kubernetes components, development tools, and system utilities. Also, when it comes to automation, Ubuntu continues with this release to improve cloud-init and autoinstall capabilities. This is a great reason why using Ubuntu Server with Packer works so well.
Stop installing your Ubuntu Server VMs manually
For a long time, I was like many in the home lab or production environments. I installed the operating system the traditional “click ops” way. You mount the ISO, boot the VM, click through the installer, configure your networking, storage, install updates, etc, etc. Then when you were done, you converted this virtual machine into a “template” that you could reuse over and over.
This process works, but it is slow and inconsistent. Every time you install a VM manually, you can introduce slight differences. Maybe you forget a package. Maybe you configure something slightly different one time vs another. Maybe you use a different hostname pattern. Over time, these little differences add up and make your environment harder to manage.
The bigger issue though I think is time. Even a fast manual install still takes several minutes of hands-on work. Multiply that across multiple VMs and rebuilds, and this can lead to hours of total time over the course of a few weeks or months. This is where automation changes everything.
With Hashicorp Packer, you define your build once and reuse it forever. Every VM starts from the same known good state. If you need to update something, you update the template and rebuild. This leads to no more guessing what changed between your systems. In my home lab, this approach has allowed me to rebuild entire environments in a fraction of the time it used to take.
Haven’t heard of Hashicorp Packer?
If you haven’t that is ok, but you are missing out on one of the best tools for automating these types of operations that is out there. Packer is a tool that is specifically designed to create “machine images”. So, instead of you going through the motions of installing operating systems by hand, Packer handles the entire process for you.
So, at a high level, it gives you the following:
- Packer connects to Proxmox using the API
- It creates a new virtual machine
- It boots the VM using the Ubuntu 26.04 ISO
- It feeds automated install instructions using autoinstall and cloud-init
- It provisions the system with any additional configuration
- It converts the finished VM into a reusable template
In the end, you are left with a clean, fully configured Ubuntu 26.04 template that you can start cloning instantly. This approach is really powerful because it is repeatable and you can even schedule it to happen in the middle of the night if you want to.
Download Packer and Ubuntu 26.04
Packer is only just a quick download to get started. What I like about all the Hashicorp tools is they are all a self-contained binary that you run, including Packer. When you download Packer you are downloading the binary that is ready to run once you extract the zip file.
You can get Packer for your platform from this URL: Install | Packer.
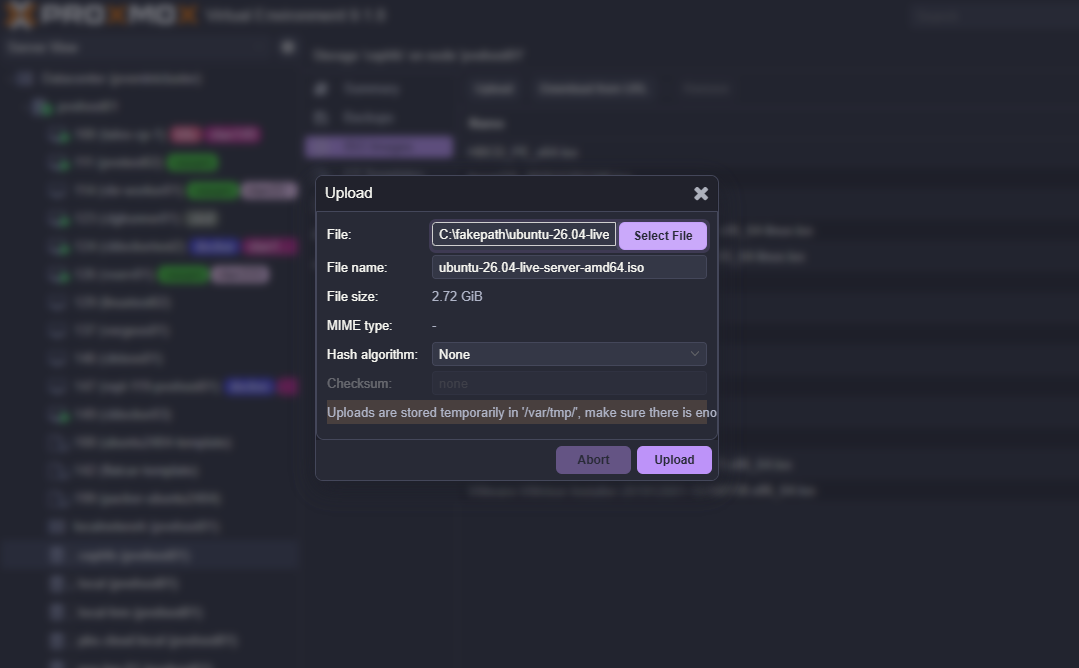
Also, you need to download Ubuntu Server 26.04, which you can do from here: Get Ubuntu Server. Upload the .ISO image to your ISOs location in Proxmox which you will reference in your Packer files.
My Ubuntu 26.04 Packer template for Proxmox
Once you have Packer downloaded, it is just a matter of putting together the files you need to run the packer build. In a simple build, it requires the following files and structure:
- ubuntu-26.04.pkr.hcl
- variables.pkr.hcl
- 99-pve.cfg
- folder: http
- meta-data
- user-data
So, let’s see the contents of each of these. First we have the ubuntu-26.04.pkr.hcl file:
# Ubuntu Server Resolute Raccoon
# ---
# Packer Template to create an Ubuntu Server 26.04 LTS (Resolute Raccoon) on Proxmox

# Resource Definiation for the VM Template

packer {
  required_plugins {
    name = {
      version = "~> 1"
      source  = "github.com/hashicorp/proxmox"
    }
  }
}

source "proxmox-iso" "ubuntu-server-resolute-raccoon" {

    # Proxmox Connection Settings
    proxmox_url = "${var.proxmox_api_url}"
    username = "${var.proxmox_api_token_id}"
    token = "${var.proxmox_api_token_secret}"

    # (Optional) Skip TLS Verification
    insecure_skip_tls_verify = true

    # VM General Settings
    node = "pvehost01"
    vm_id = "299"
    vm_name = "ubuntu-server-resolute-raccoon"
    template_description = "Resolute Raccoon"

    # VM OS Settings
    boot_iso {
        iso_file = "cephfs:iso/ubuntu-26.04-live-server-amd64.iso"
        iso_storage_pool = "cephfs"
    }
    # (Option 2) Download ISO
    # boot_iso {
    #     iso_url = "https://releases.ubuntu.com/26.04/ubuntu-26.04-live-server-amd64.iso"
    #     iso_checksum = "dec49008a71f6098d0bcfc822021f4d042d5f2db279e4d75bdd981304f1ca5d9"
    # }
    template_name        = "packer-ubuntu2604"

    # VM System Settings
    qemu_agent = true

    # VM Hard Disk Settings
    scsi_controller = "virtio-scsi-pci"

    disks {
        disk_size = "80G"
        format = "raw"
        storage_pool = "rbd-vm"
        type = "virtio"
    }

    # VM CPU Settings
    cores = "4"

    # VM Memory Settings
    memory = "4096"

    # VM Network Settings
    network_adapters {
        model = "virtio"
        bridge = "vmbr0"
        firewall = "false"
    }

    # VM Cloud-Init Settings
    cloud_init = true
    cloud_init_storage_pool = "local-lvm"

    # PACKER Boot Commands
    boot_command = [
        "<esc><wait>",
        "e<wait>",
        "<down><down><down><end>",
        "<bs><bs><bs><bs><wait>",
        "autoinstall ds=nocloud-net\\;s=http://{{ .HTTPIP }}:{{ .HTTPPort }}/ ---<wait>",
        "<f10><wait>"
    ]
    boot = "c"
    boot_wait = "5s"

    # PACKER Autoinstall Settings
    http_directory = "http"
    http_bind_address = "${var.http_ip}"
    # (Optional) Bind IP Address and Port
    # http_port_min = 8802
    # http_port_max = 8802

    ssh_username = "ubuntu"

    # (Option 1) Add your Password here
    ssh_password = "ubuntu"
    # - or -
    # (Option 2) Add your Private SSH KEY file here
    # ssh_private_key_file = "~/.ssh/id_rsa"

    # Raise the timeout, when installation takes longer
    ssh_timeout = "20m"
}

# Build Definition to create the VM Template
build {

    name = "ubuntu-server-resolute-raccoon"
    sources = ["proxmox-iso.ubuntu-server-resolute-raccoon"]

    # Provisioning the VM Template for Cloud-Init Integration in Proxmox #1
    provisioner "shell" {
        inline = [
            "while [ ! -f /var/lib/cloud/instance/boot-finished ]; do echo 'Waiting for cloud-init...'; sleep 1; done",
            "sudo rm /etc/ssh/ssh_host_*",
            "sudo truncate -s 0 /etc/machine-id",
            "sudo apt -y autoremove --purge",
            "sudo apt -y clean",
            "sudo apt -y autoclean",
            "sudo cloud-init clean",
            "sudo rm -f /etc/cloud/cloud.cfg.d/subiquity-disable-cloudinit-networking.cfg",
            "sudo rm -f /etc/netplan/00-installer-config.yaml",
            "sudo sync"
        ]
    }

}
Next, is the variables.pkr.hcl file. Be sure to replace your proxmox_api_url, proxmox_api_token_id, and proxmox_api_token_secret with your own values.
***Note*** It would be best practice here to also create a variables.tfvars file and instead put sensitive variables in that file and add this to your .gitignore file. However, note for simplicity, just showing this in a single variables.pkr.hcl file. Replace with your values here:
variable "proxmox_api_url" {
  type = string
  default = "https://pvehost01.cloud.local:8006/api2/json"
}

variable "proxmox_api_token_id" {
  type = string
  default = "cicd@pam!cicd"
}

variable "proxmox_api_token_secret" {
  type = string
  default = "aaaa1111-bbbb-cccc-1111-aaaa1111bbbb"
  sensitive = true
}

variable "http_ip" {
  type = string
  default = "10.1.149.27" #Needed if you have multiple IPs on your packer machine or need to hard set the IP it will connect to for the Packer server
  description = "IP address to bind the HTTP server for cloud-init"
}
Next, is the 99-pve.cfg file:
datasource_list: [ConfigDrive, NoCloud]Finally, we have the two files that are found in the http folder. First is the meta-data file. It is simple as it is blank. Second, we have the user-data file:
#cloud-config
autoinstall:
  version: 1
  locale: en_US
  keyboard:
    layout: us
  ssh:
    install-server: true
    allow-pw: true
    disable_root: true
    ssh_quiet_keygen: true
    allow_public_ssh_keys: true
  packages:
    - qemu-guest-agent
    - sudo
  storage:
    layout:
      name: direct
    swap:
      size: 0
  user-data:
    package_upgrade: false
    timezone: America/Chicago
    users:
      - name: ubuntu
        passwd: "$6$rounds=4096$repeatrepeat$repeatrepeatrepeatrepeatrepeatrepeatrepeatrepeatrepeatrepeat"
        groups: [adm, sudo]
        lock-passwd: false
        sudo: ALL=(ALL) NOPASSWD:ALL
        shell: /bin/bash
Running the Packer build
Once you have all the files in place, including your downloaded Packer exe, we need to run a couple of commands. First, we need to initialize Packer:
packer init .
Next, we run our packer build command:
packer build .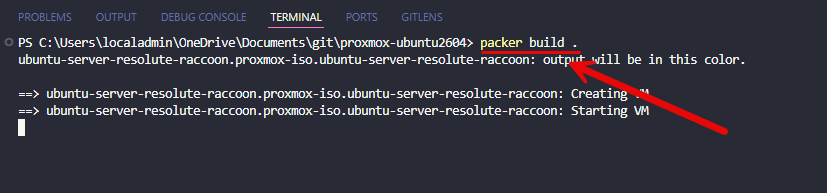
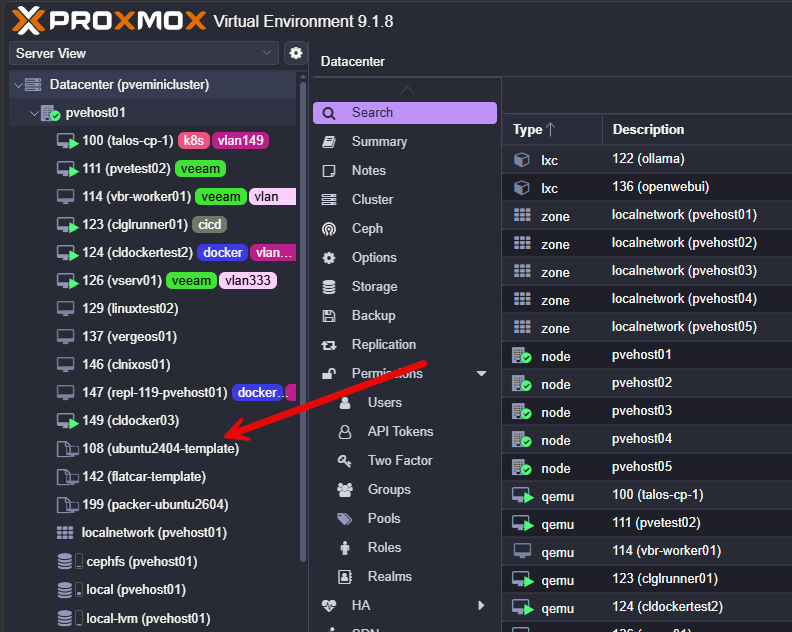
After the build completes, you should see the new Proxmox VM template in your inventory:
Wrapping up
Hopefully, this post will help anyone that would like to try out Ubuntu Server 26.04 LTS in Proxmox using an automated build process with Hashicorp Packer. The process is straightforward and only requires just a few files to be in place and the download for Packer and Ubuntu Server 26.04. Automating your build using Packer is a great way to start getting a feel for automating your home lab environment. How about you? Are you already using Packer along with Proxmox for automated builds?
More in this topic


Discuss this in the Community
Google is updating how articles are shown. Don’t miss our leading home lab and tech content, written by humans, by setting Virtualization Howto as a preferred source.
About The Author

Have you considered using an Ubuntu cloud image instead of the iso?
Hi Brandon! I’m just starting to use Proxmox and Packer so I apologize in advance. I noticed that once I issue packer build command it launches the VM in Proxmox but how do I keep it from destroying the VM when I ctrl +c out of the packer build command?
Thank you
Matt
Hi Brandon, i updated my packer image to ubuntu 26.04 and it went fairly well. The only issue i noticed is when i started a deployment with terraform. The IP is set incorrectly, whilst cloud-init and netplan have the correct data, EXCEPT the interface name. netplan has eth0 and the vm only know predictable interface names, i.e. ens18.
Did you encounter this issue ? my guess is current packer proxmox module does not play fair with the new cloud-init version in ubuntu 26.04 (kernel 7.0.0 change). I can probably disable the predictable naming to revert to the old “eth0”, but i am not a fan of imposing regressions to my configs.
i think i’ll stick to 24.04 until the different parties involved cater properly for 26.04.
Gregory,
Thanks for the comment here and glad the testing with 26.04 is moving forward it sounds like for you. I can’t say that I have ran into this, but I need to do more testing myself wth 26.04 and deployments with Terraform as I will be looking to get my lab upgraded. I still have 22.04 running on a few hosts. I will be putting this through the paces and keep everyone updated.
Brandon
Brandon
Based on Brandon’s post, I was able to solve the issue as follows.
I experienced the same problem with Ubuntu Server 26.04 templates created via Packer and deployed through Terraform on Proxmox. Cloud-Init received the correct static network configuration from Terraform, but the VM always booted with a DHCP address. Investigation showed that Proxmox Cloud-Init generated a network configuration for eth0, while Ubuntu 26.04 renamed the interface to ens18 during boot. Cloud-Init then failed with:
Unable to rename interfaces
[busy] Error renaming mac=xx:xx:xx:xx:xx:xx from ens18 to eth0
As a result, the static IP configuration was not applied.
The following Packer modifications solved the issue. The GRUB configuration must be executed as the first shell provisioner so that all VMs cloned from the template boot with the expected interface name (eth0).
Required Packer changes
provisioner “shell” {
inline = [
“sudo sed -i ‘s/^GRUB_CMDLINE_LINUX_DEFAULT=.*/GRUB_CMDLINE_LINUX_DEFAULT=\”net.ifnames=0 biosdevname=0\”/’ /etc/default/grub”,
“sudo update-grub”
]
}
The existing Cloud-Init cleanup provisioner should additionally contain:
“sudo cloud-init clean –logs –seed”,
After rebuilding the template with Packer and deploying a new VM through Terraform, Cloud-Init completed successfully, the interface remained eth0, and the configured static IP address was applied correctly.
Why this works
Ubuntu 26.04 uses predictable network interface names (ens18) by default. Proxmox Cloud-Init, however, generates network configuration targeting eth0. By adding the kernel parameters
net.ifnames=0 biosdevname=0
the guest keeps the traditional eth0 naming, preventing the Cloud-Init rename failure and allowing the network configuration provided by Terraform to be applied correctly.
Good article. With this distribution I am always getting to the language selection screen. I changed to all possible boot parameters included ones listed in this article and used help of 5 robots and like 20 different boot option variations. Still no luck 🙁 I believe it is 26,04 problem