Lately, I have started to introduce more tooling into the home lab that utilizes S3 storage. I have already had some of this in the home lab. When I stood up Portainer Business edition by way of the home lab license, I implemented backups to a MinIO container that I had running on my Synology NAS device. S3 storage is a common storage type that is configured for backups with a lot of tools that I use in the home lab and increasingly so since I have moved to Kubernetes as my main container platform. Backups of modern solutions like Kubernetes expect S3 endpoints more times than not. Kubernetes tools like Velero want object storage. Applications want a place to store artifacts, uploads, and media. Even AI workflows start leaning heavily on object storage for certain things. With MinIO going the way of closed source, RustFS caught my attention. Let’s see why.
What is RustFS?
RustFS is an open-source object storage platform built in Rust that aims to provide full S3 compatibility. It is also one of the top solutions that I have seen out there since the free and open source MinIO has now gone by the wayside. Check out this Reddit thread here: MinIO is no longer open source – who is replacing it? : r/sysadmin.
At a high level, RustFS is trying to be a modern alternative to tools like MinIO. A few things will stand out to you pretty quickly. Note the following that I think are great features of the project:
- It is written in Rust, which means you get memory safety and very predictable performance characteristics
- There is no garbage collection layer which can cause latency spikes and make your lab feel slow
- It is designed to be S3 compatible from the ground up (authentication, APIs, and integration with standard tools (If something works with AWS S3, it should work here.
And also, something pretty cool is that it is built with both small deployments and distributed scaling in mind. That means you can run it in a simple Docker container today in the home lab and grow it later if you want. That combination made it feel like something worth actually testing in the home lab setup, especially since I am in need of S3 storage for a few projects.
The MinIO change
I have already mentioned this a couple of times so far and linked to one of the Reddit threads above. In case you haven’t heard, MinIO, changed its license from Apache License 2.0 to AGPLv3. Not only this, but they gutted the functionality from the latest release of the free and open source solution.
For a long time, MinIO has been the default solution when someone asks how to run S3-compatible storage in a home lab. It has been lightweight, fast, and easy to deploy for the most part. Check out my post on how I have been using it to host S3 storage on my Synology NAS device: Host S3 Compatible Storage on your Synology NAS with MinIO!

Needless to say, these changes have stung for many home lab users who have been using MinIO for object storage for quite some time.
Why I did not just use Ceph RGW
If you have read about my home lab, especially in my 2026 version of it, you have seen me write a LOT about Ceph and Ceph solutions. Right now I am using Ceph RBD storage as my default shared storage in my new Proxmox 5 node mini cluster that is driving the production workloads in my home lab environment. I also have CephFS running on top of this for a few of my Kubernetes workloads that make sense, it also stores my ISO images for my Proxmox cluster and a few other resources.
So, why not just enable RGW and call it a day? I could definitely do that, and that still isn’t out of the question for me. Ceph RGW or Rados Gateway is extremely powerful. For home lab though, it has its tradeoffs. It would mean more more services to manage for me. More configuration. More moving parts. Also, I don’t want to store the backups of that environment on the same environment on which it is running (not a good move to backup to the same infrastructure you are backing up).
So let’s look at deploying RustFS.
Deploying RustFS in Docker
Deploying RustFS in Docker is really easy to get up and running. The official Docker deployment feels very familiar if you have ever run something like MinIO before or really any other dockerized solution. Below is the parameter complete configuration example given by RustFS on their documentation page:
docker run -d \
  --name rustfs_container \
  -p 9000:9000 \
  -p 9001:9001 \
  -v /mnt/rustfs/data:/data \
  -e RUSTFS_ACCESS_KEY=rustfsadmin \
  -e RUSTFS_SECRET_KEY=rustfsadmin \
  -e RUSTFS_CONSOLE_ENABLE=true \
  -e RUSTFS_SERVER_DOMAINS=example.com \
  rustfs/rustfs:latest \
  --address :9000 \
  --console-enable \
  --server-domains example.com \
  --access-key rustfsadmin \
  --secret-key rustfsadmin \
  /data
Here is a Docker Compose version of that same code that I am using in the home lab for testing:
services:
  rustfs:
    image: rustfs/rustfs:latest
    container_name: rustfs_container
    restart: unless-stopped

    ports:
      - "9000:9000" #this one is for the API
      - "9001:9001" #this one is for the console

    volumes:
      - /mnt/rustfs/data:/data

    environment:
      RUSTFS_ACCESS_KEY: rustfsadmin
      RUSTFS_SECRET_KEY: rustfsadmin
      RUSTFS_CONSOLE_ENABLE: "true"
      RUSTFS_SERVER_DOMAINS: example.com

    command: >
      --address :9000
      --console-enable
      --server-domains example.com
      --access-key rustfsadmin
      --secret-key rustfsadmin
      /data
That is it. All you have to do after modifying the above for your volume mount you want and customizing your credentials, just run the normal:
docker compose up -d
Once it is running, you can immediately browse out and start setting up your S3 compatible storage. In my case, I backed it with fast NVMe storage and exposed it internally on my lab network. Nothing fancy, just a clean and simple setup to see how it behaves.
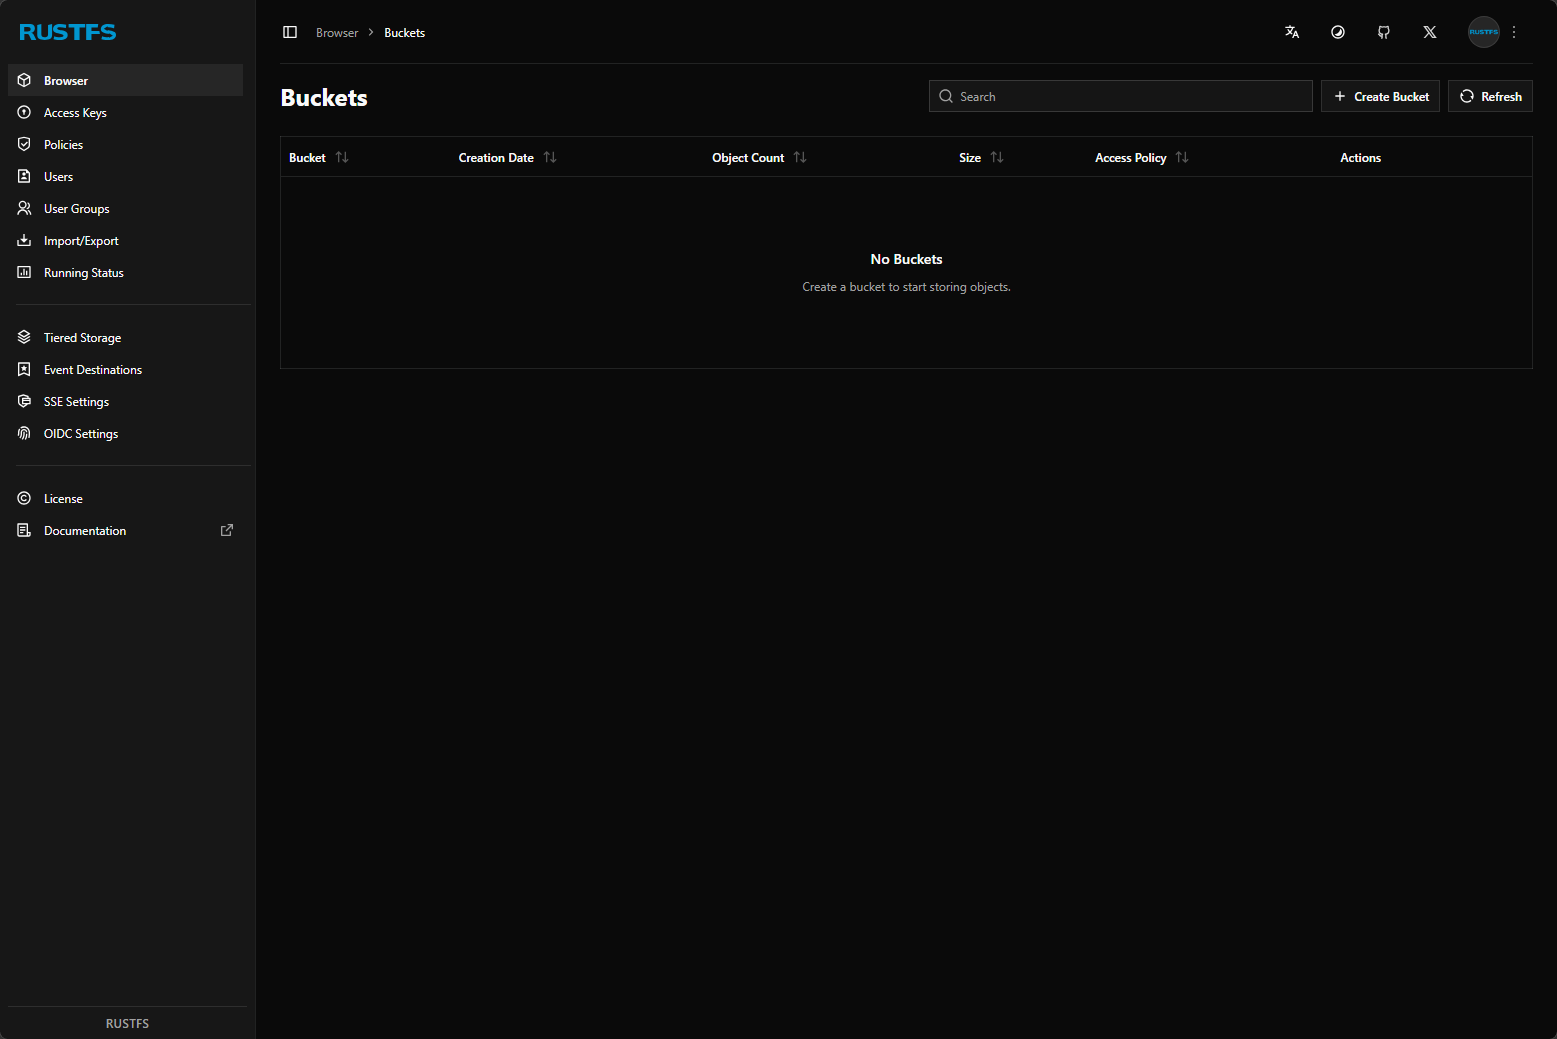
Browsing out and logging into the interface for the first time
After I got the container up and running, I just browsed out to the port that I exposed in my lab for this container. As a note, the default port that it tries to expose for the console is port 9001, which if you use Portainer in your lab, the agent connection uses this port. Keep this in mind as you will need to change from this port to something else to avoid the conflict there.
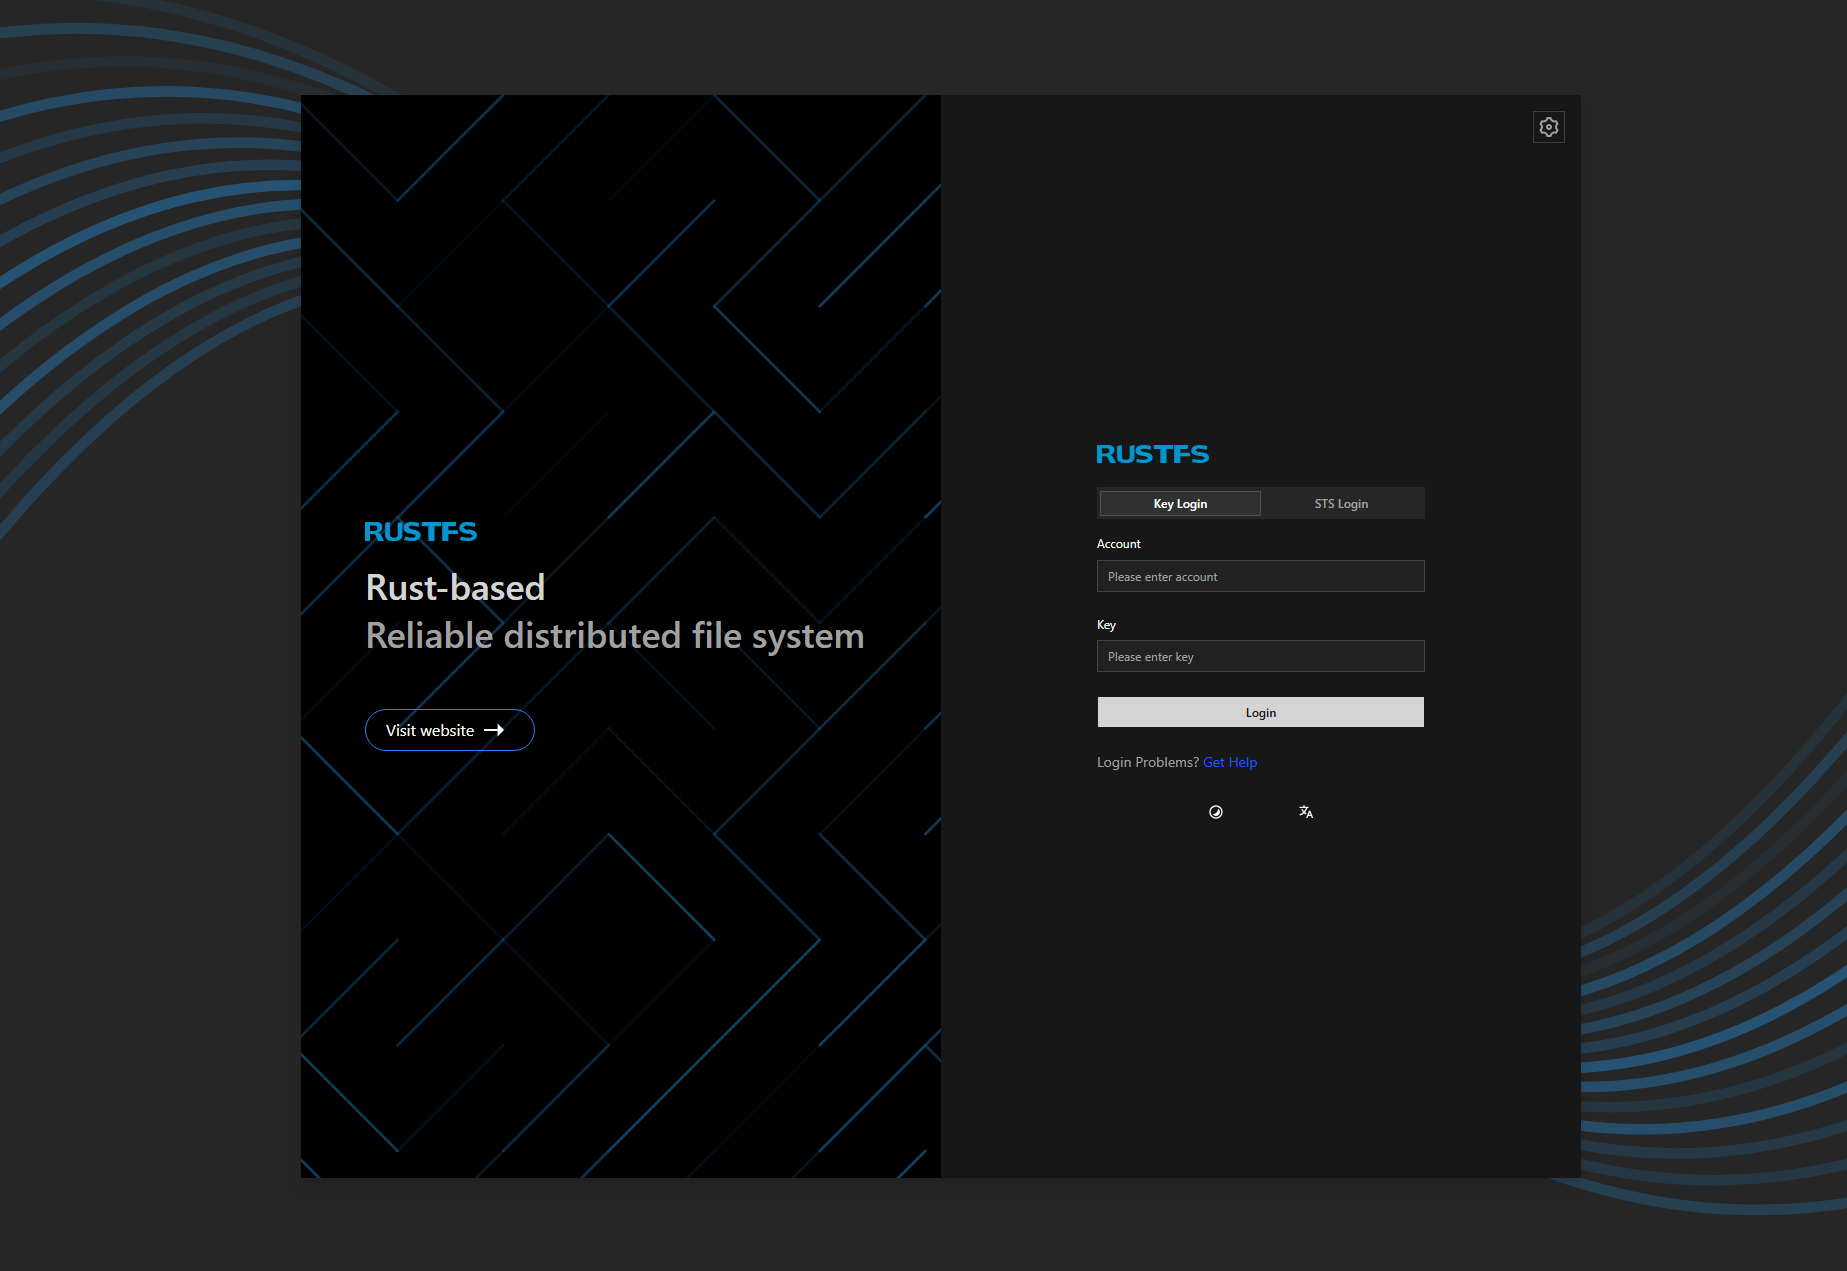
When you login using the password you configure in your Docker Compose, you will see the RustFS dashboard.
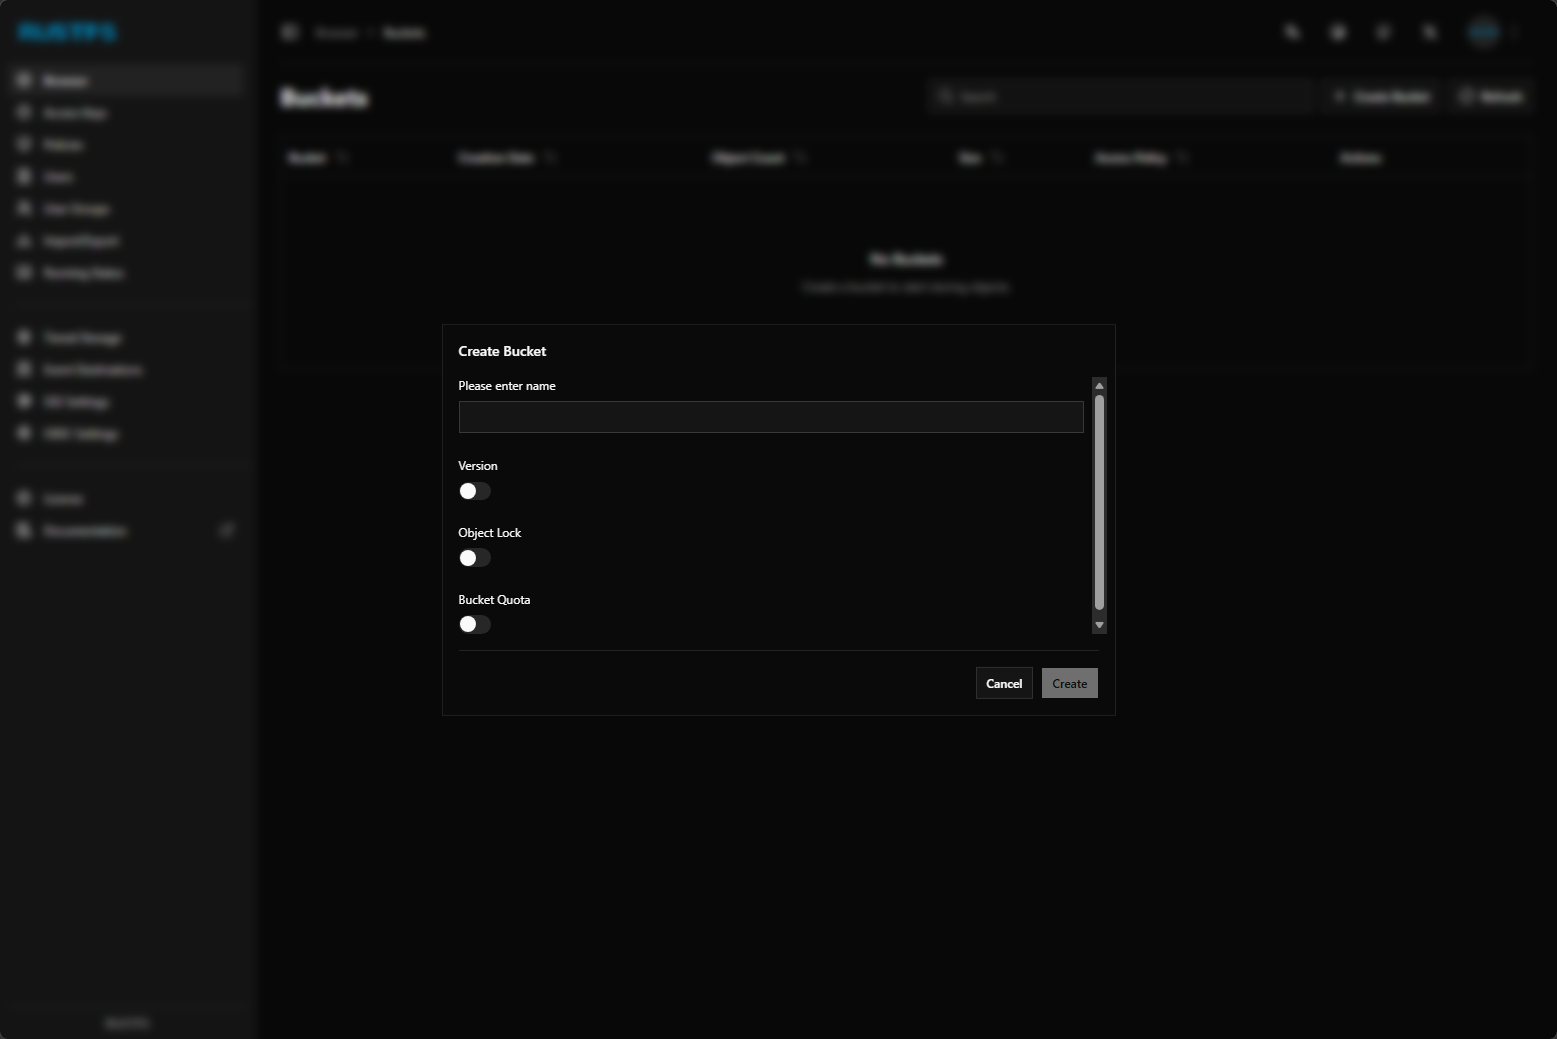
These are options that you get when you configure a new bucket. You can see the version, object lock, and bucket quota configurations that can be set.
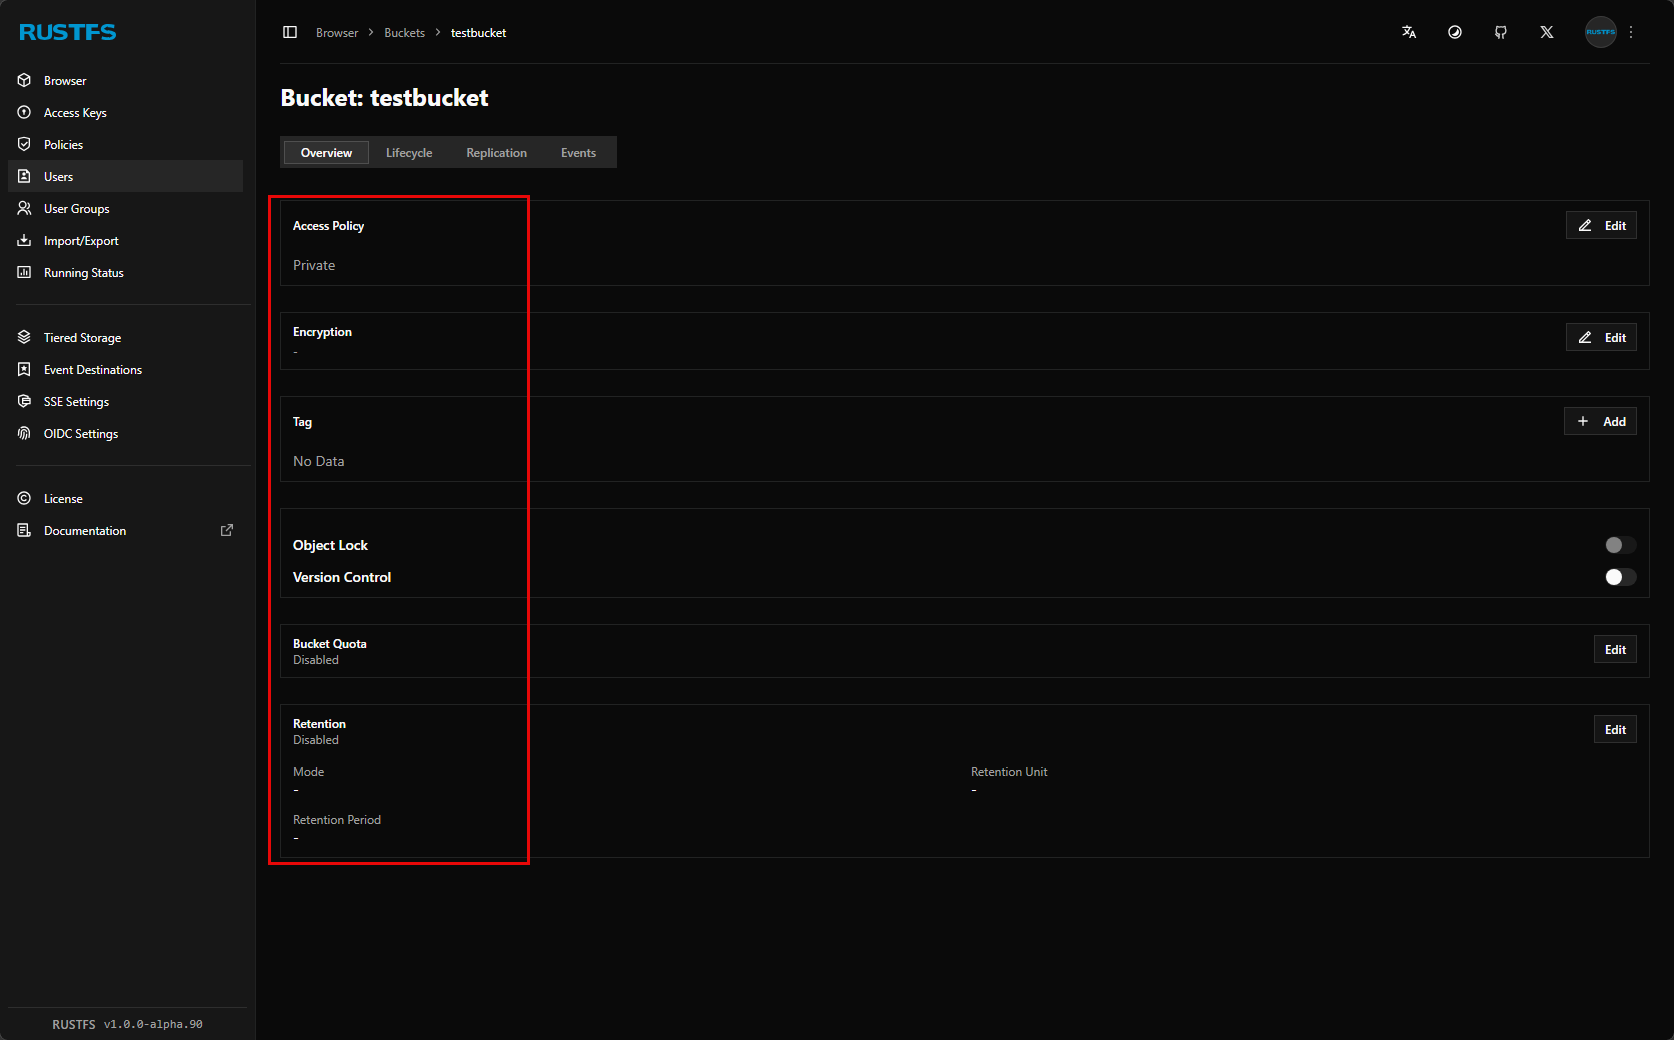
After creating a bucket, you can edit the bucket and set the access policy, encryption, tag, object lock configuration, etc.
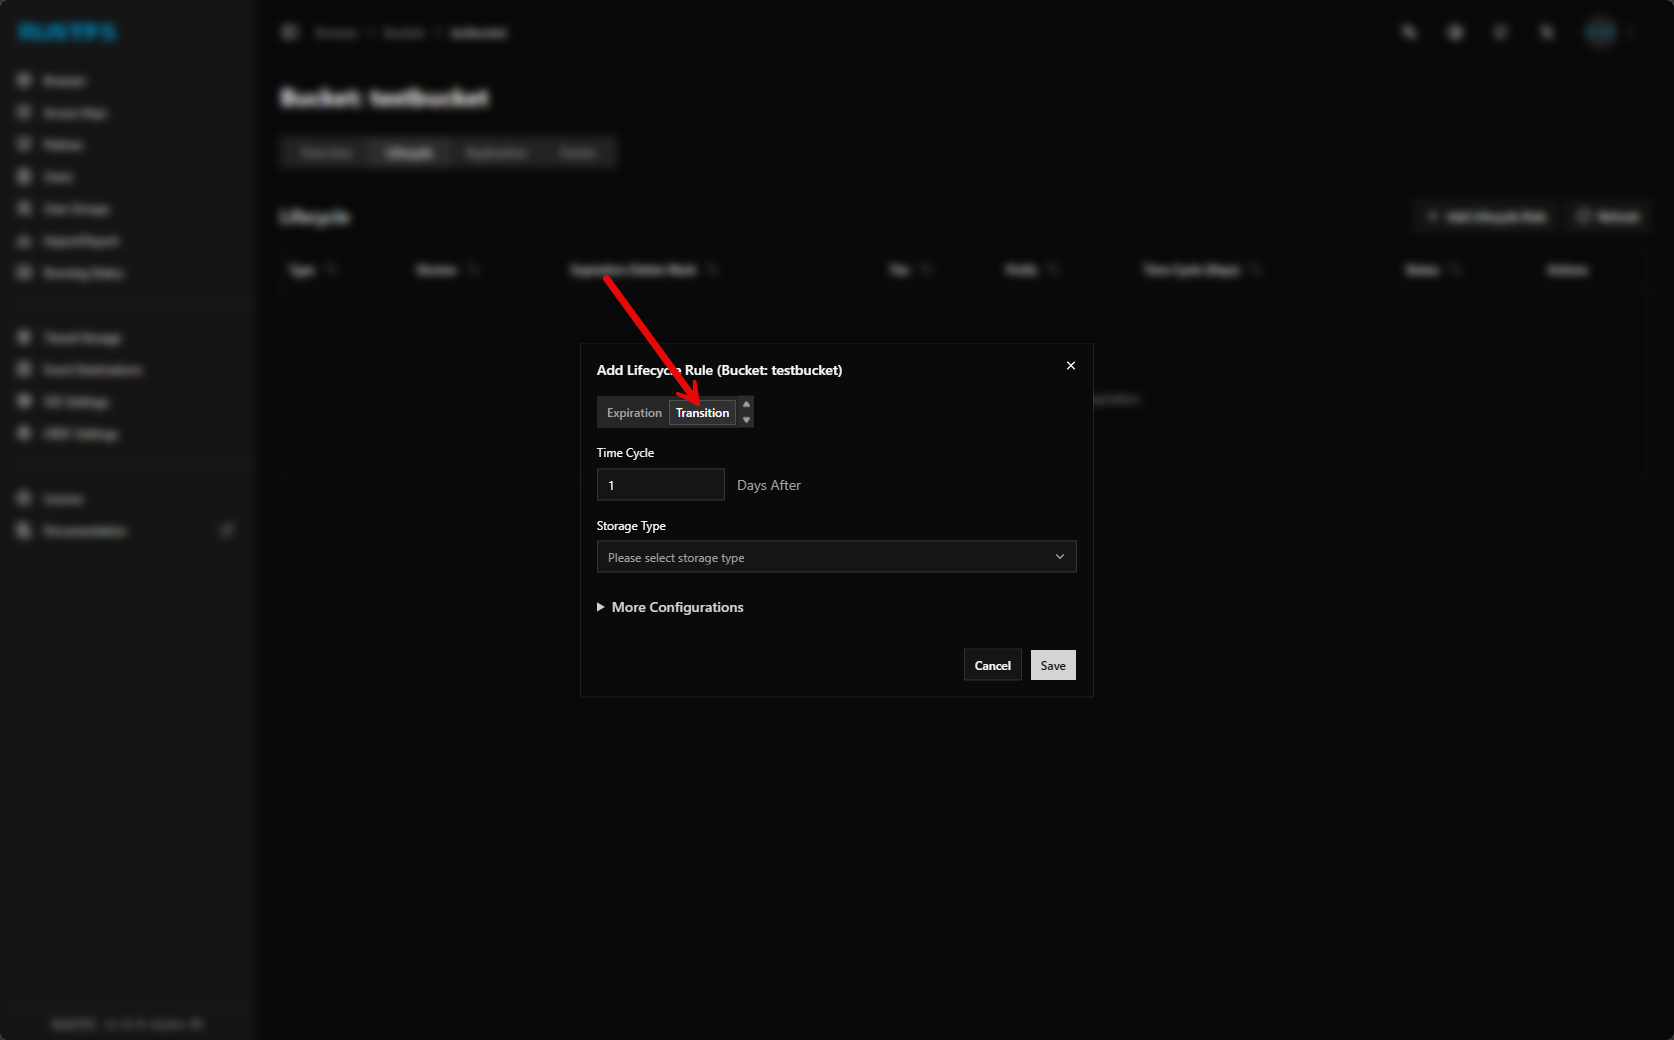
Setting expiration on the bucket configuration.
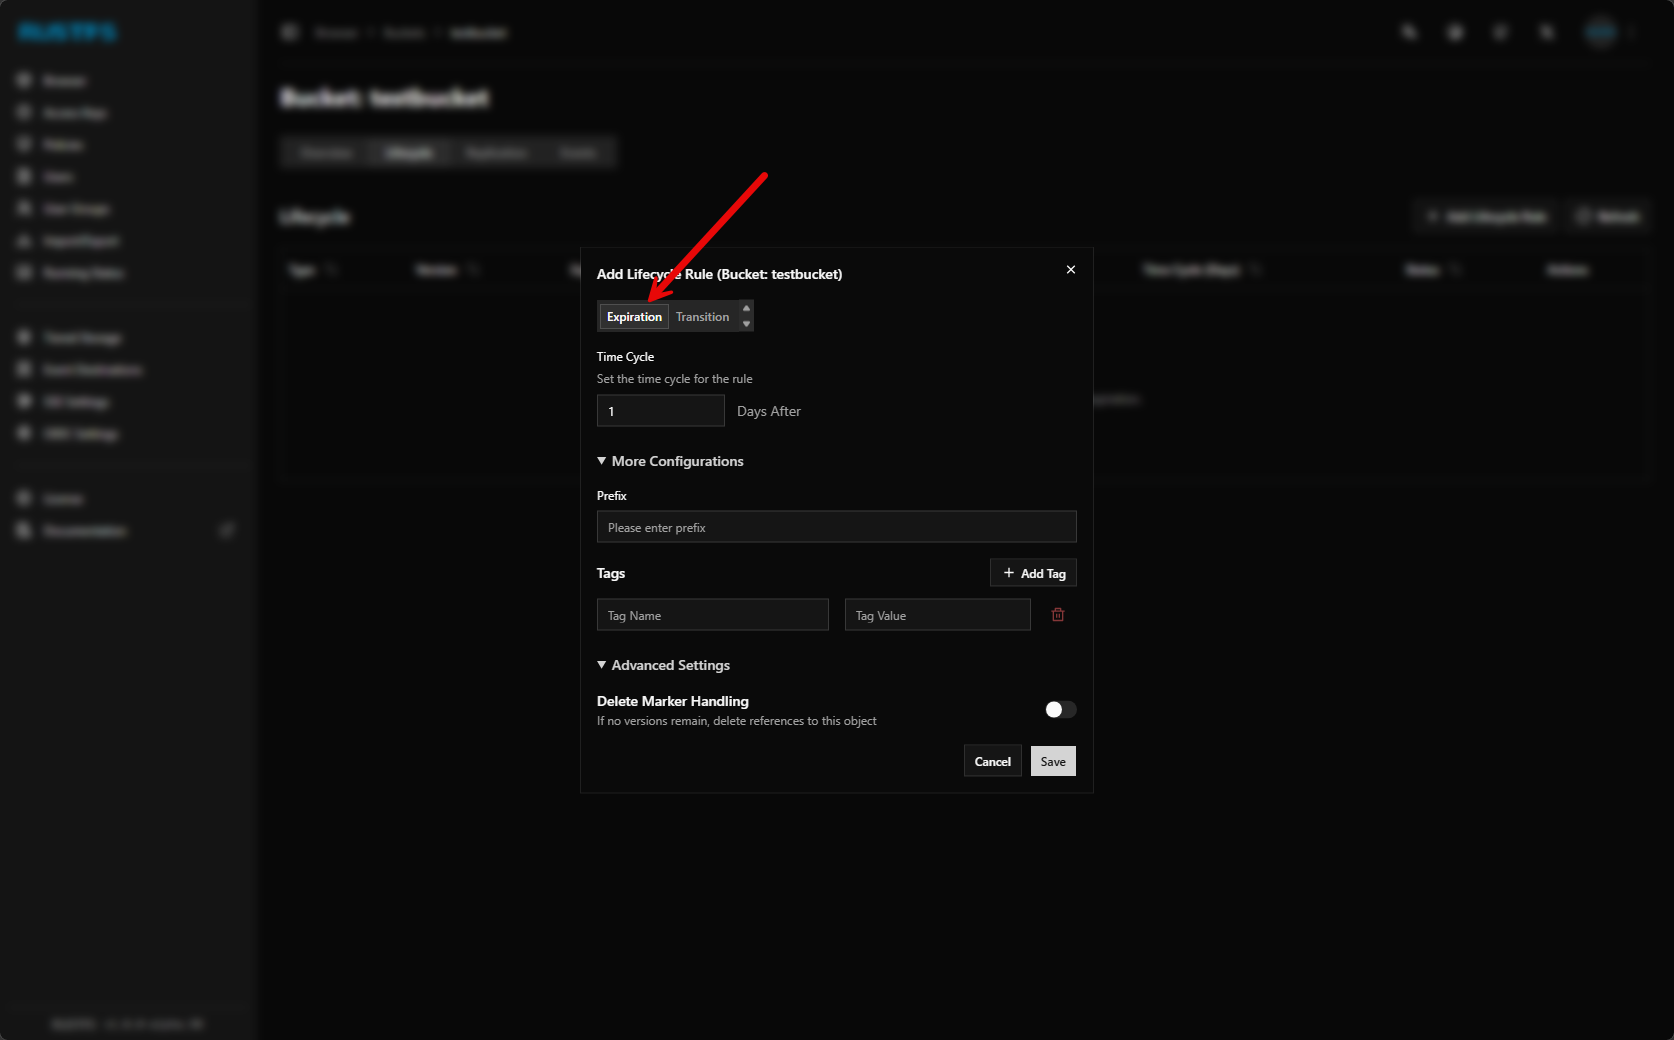
You can also transition your bucket storage to a different storage tier which I think is super interesting to be able to have automation to hot, warm, cold storage.
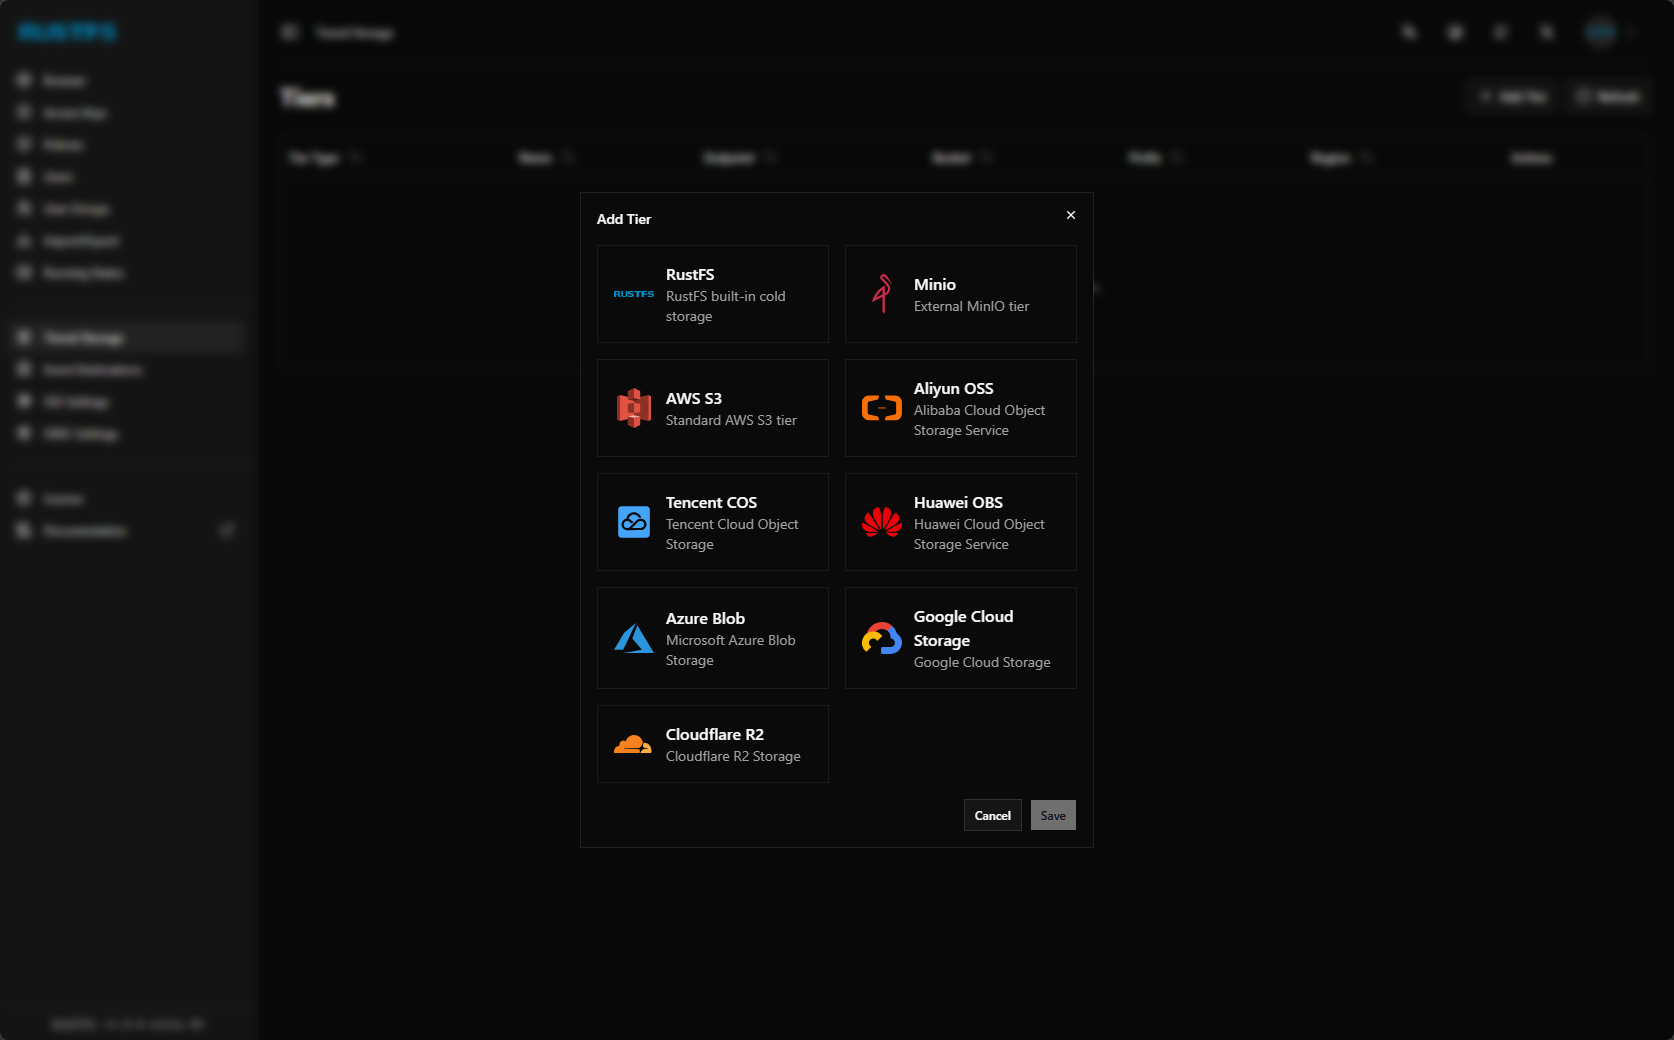
Here are the providers that are currently built in for adding a new storage tier.
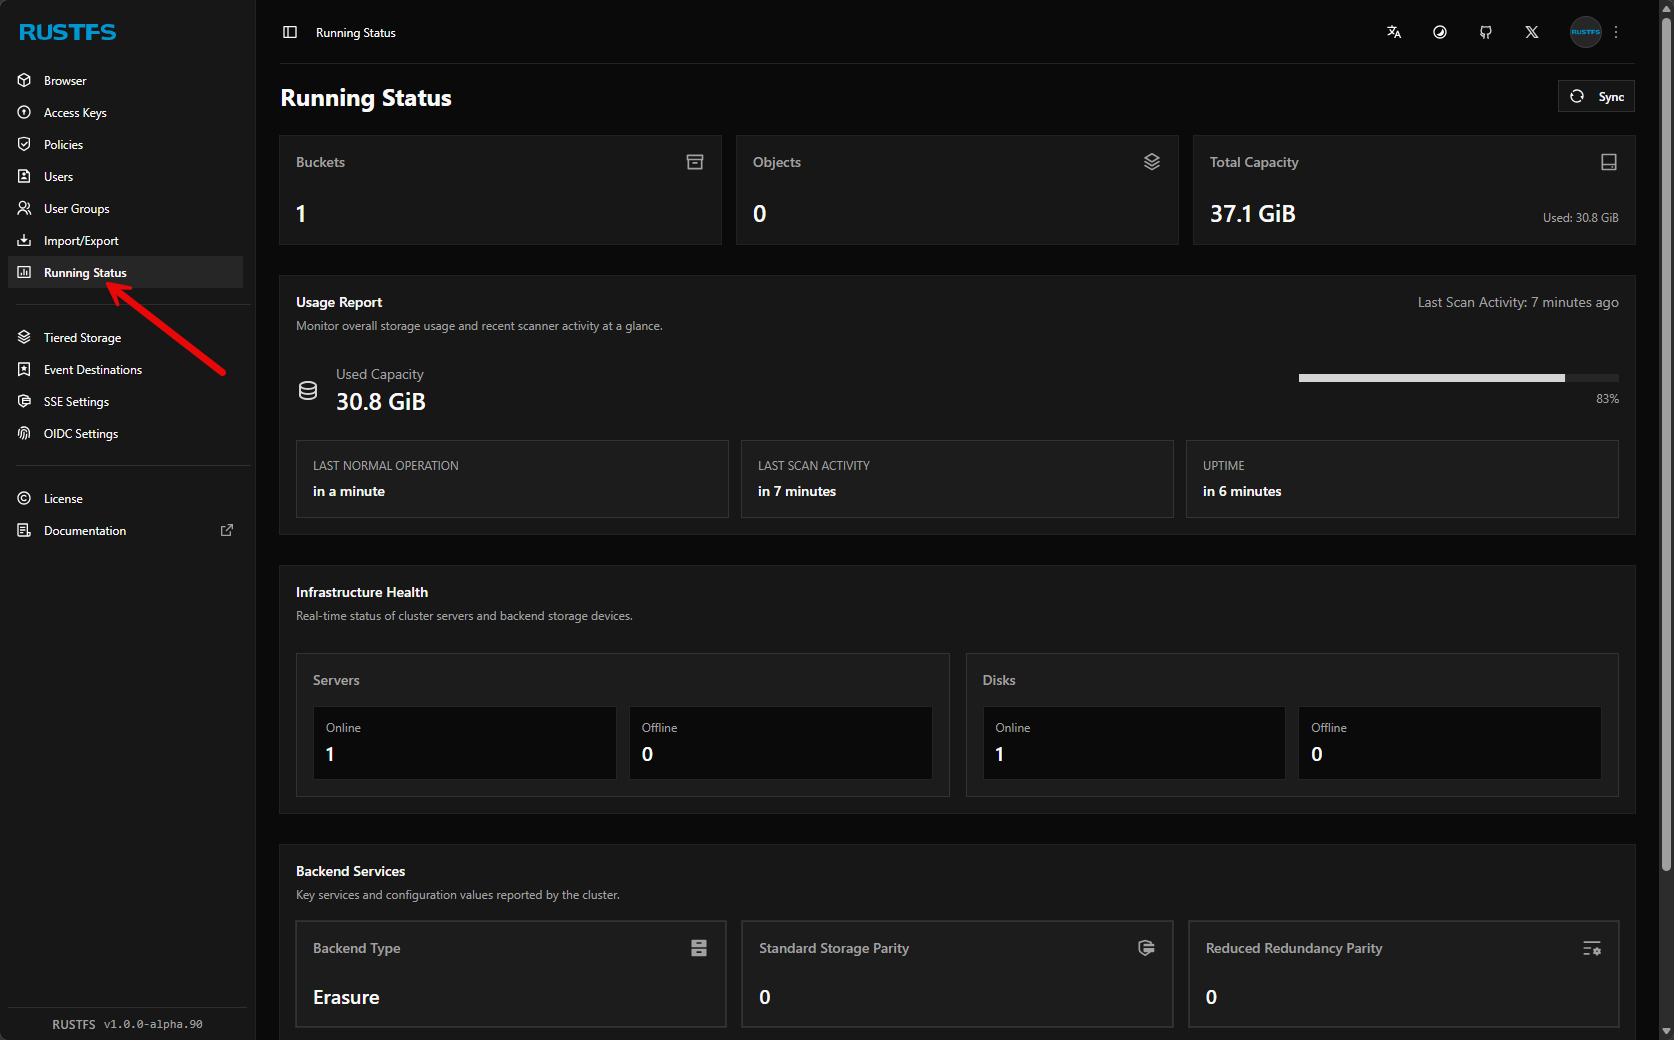
It also has health statuses built into the dashboard under the running status.
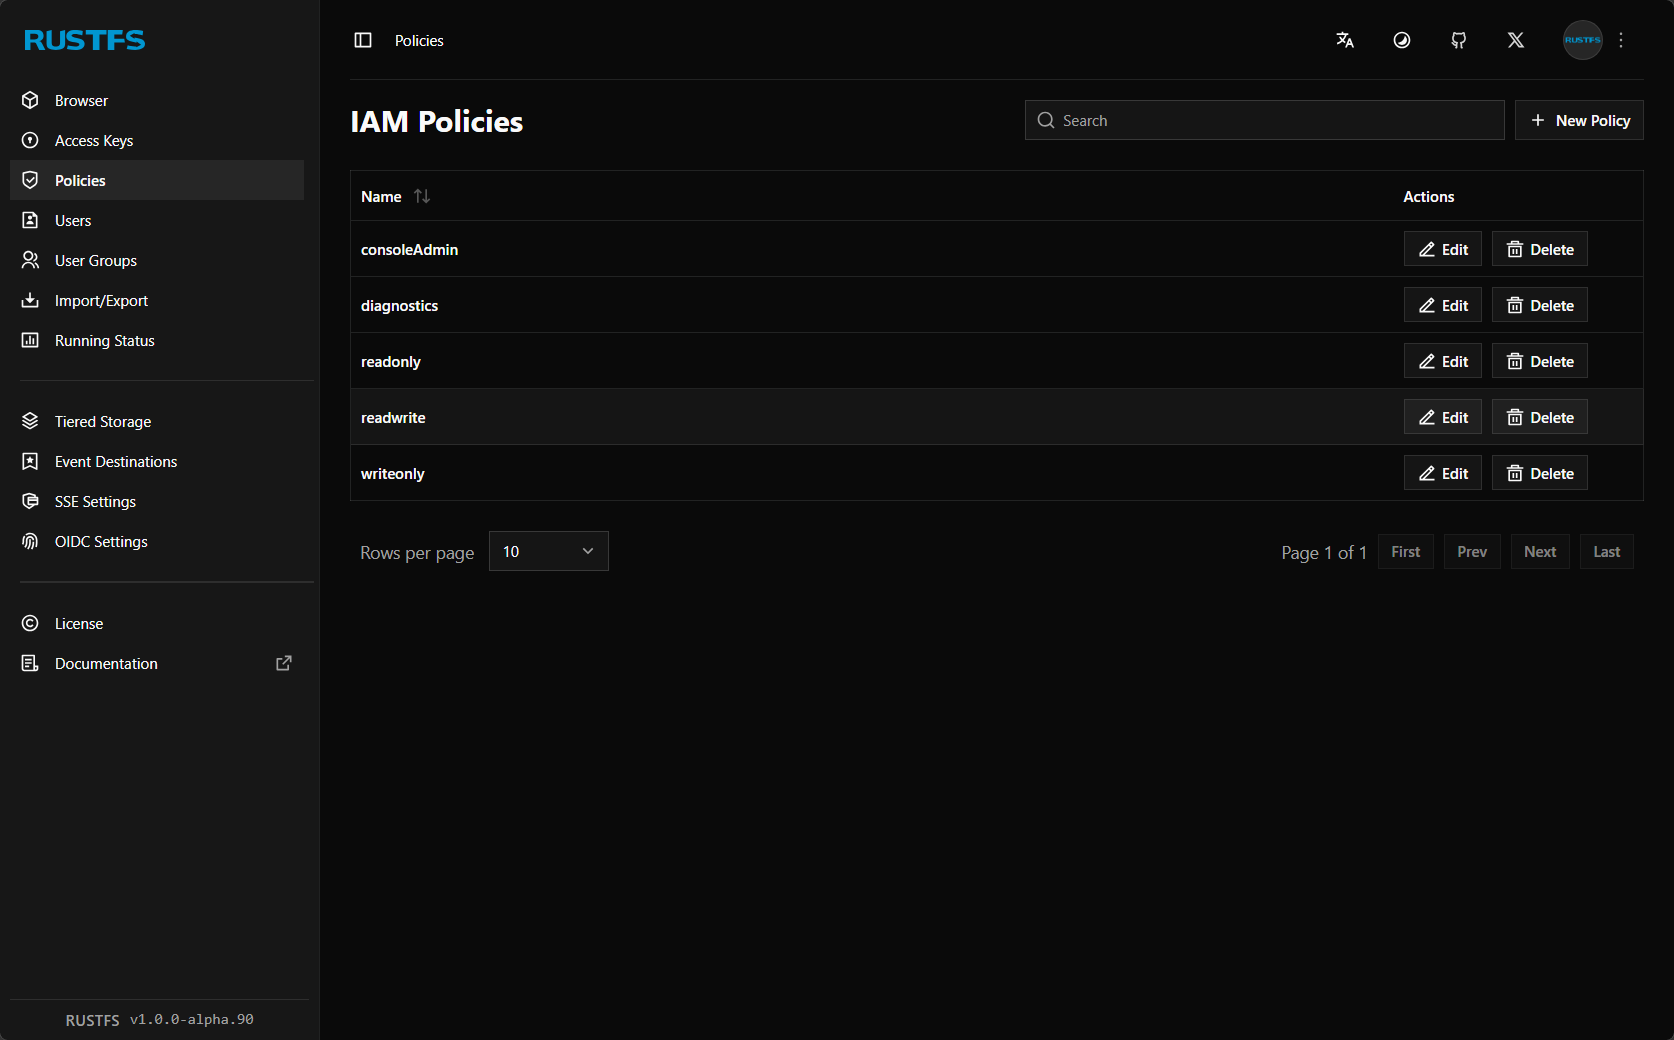
You can configure IAM policies for your bucket. In addition to creating custom policies, there are several IAM policies that are built in by default.
Here is where you configure your access keys.

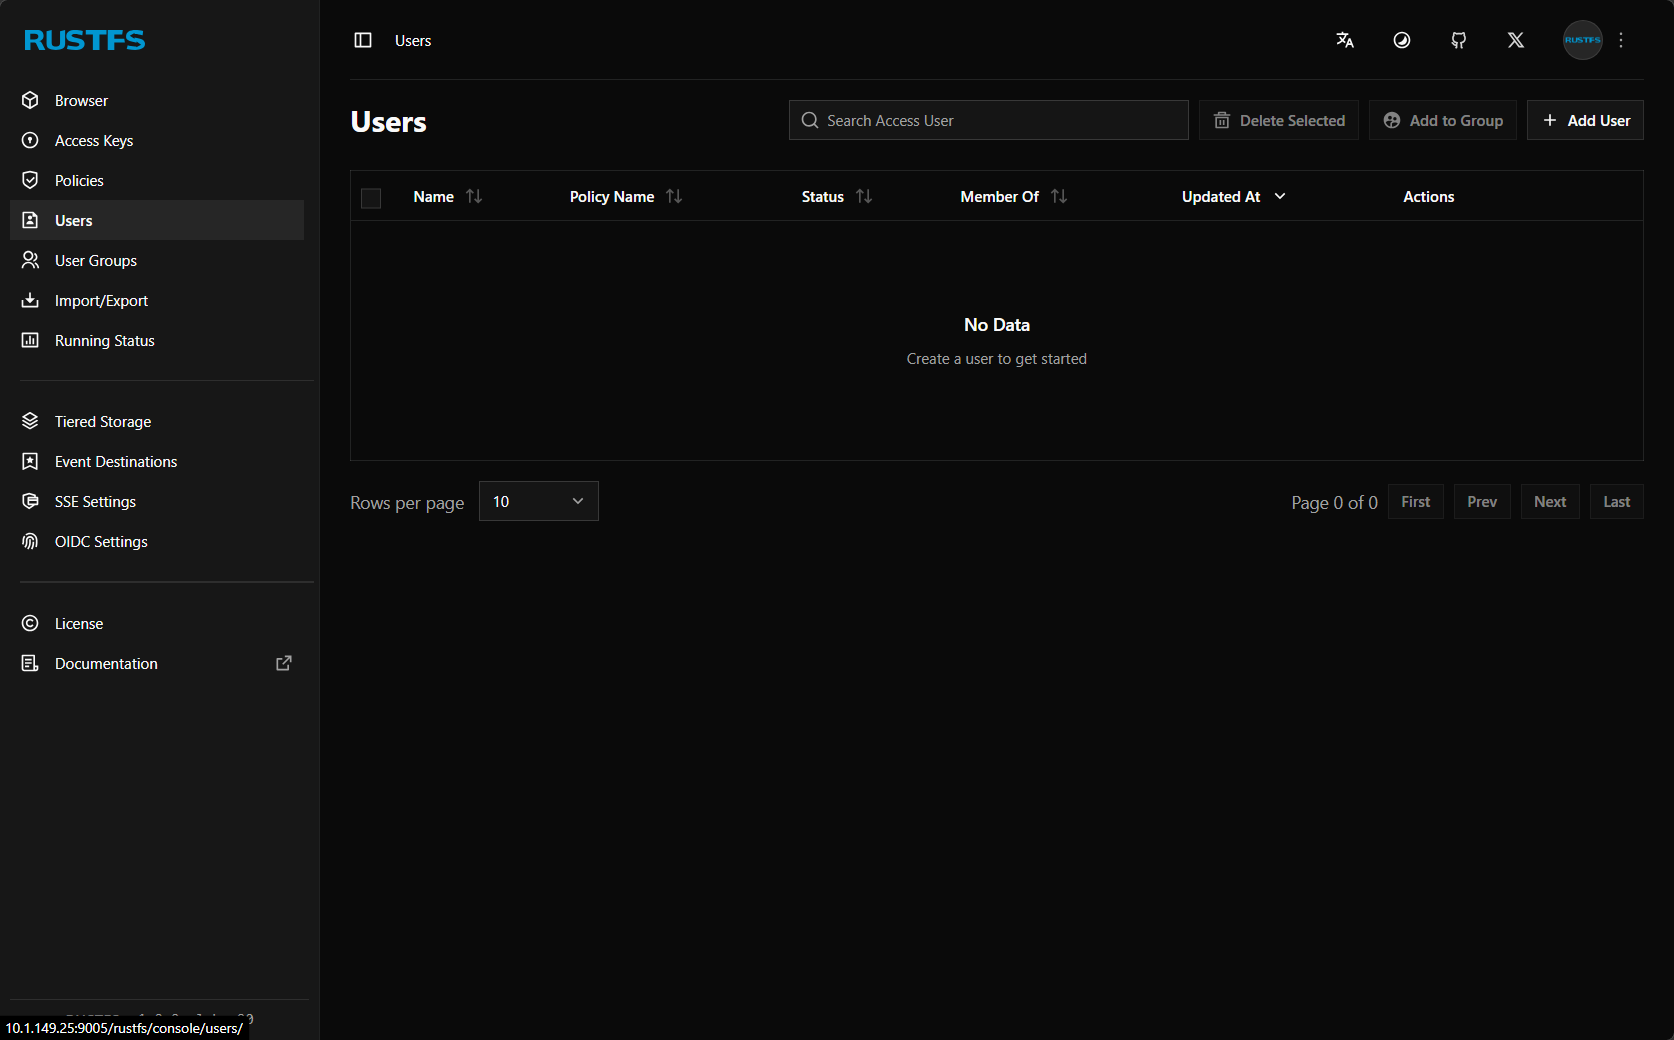
You can add users to RustFS S3 storage.
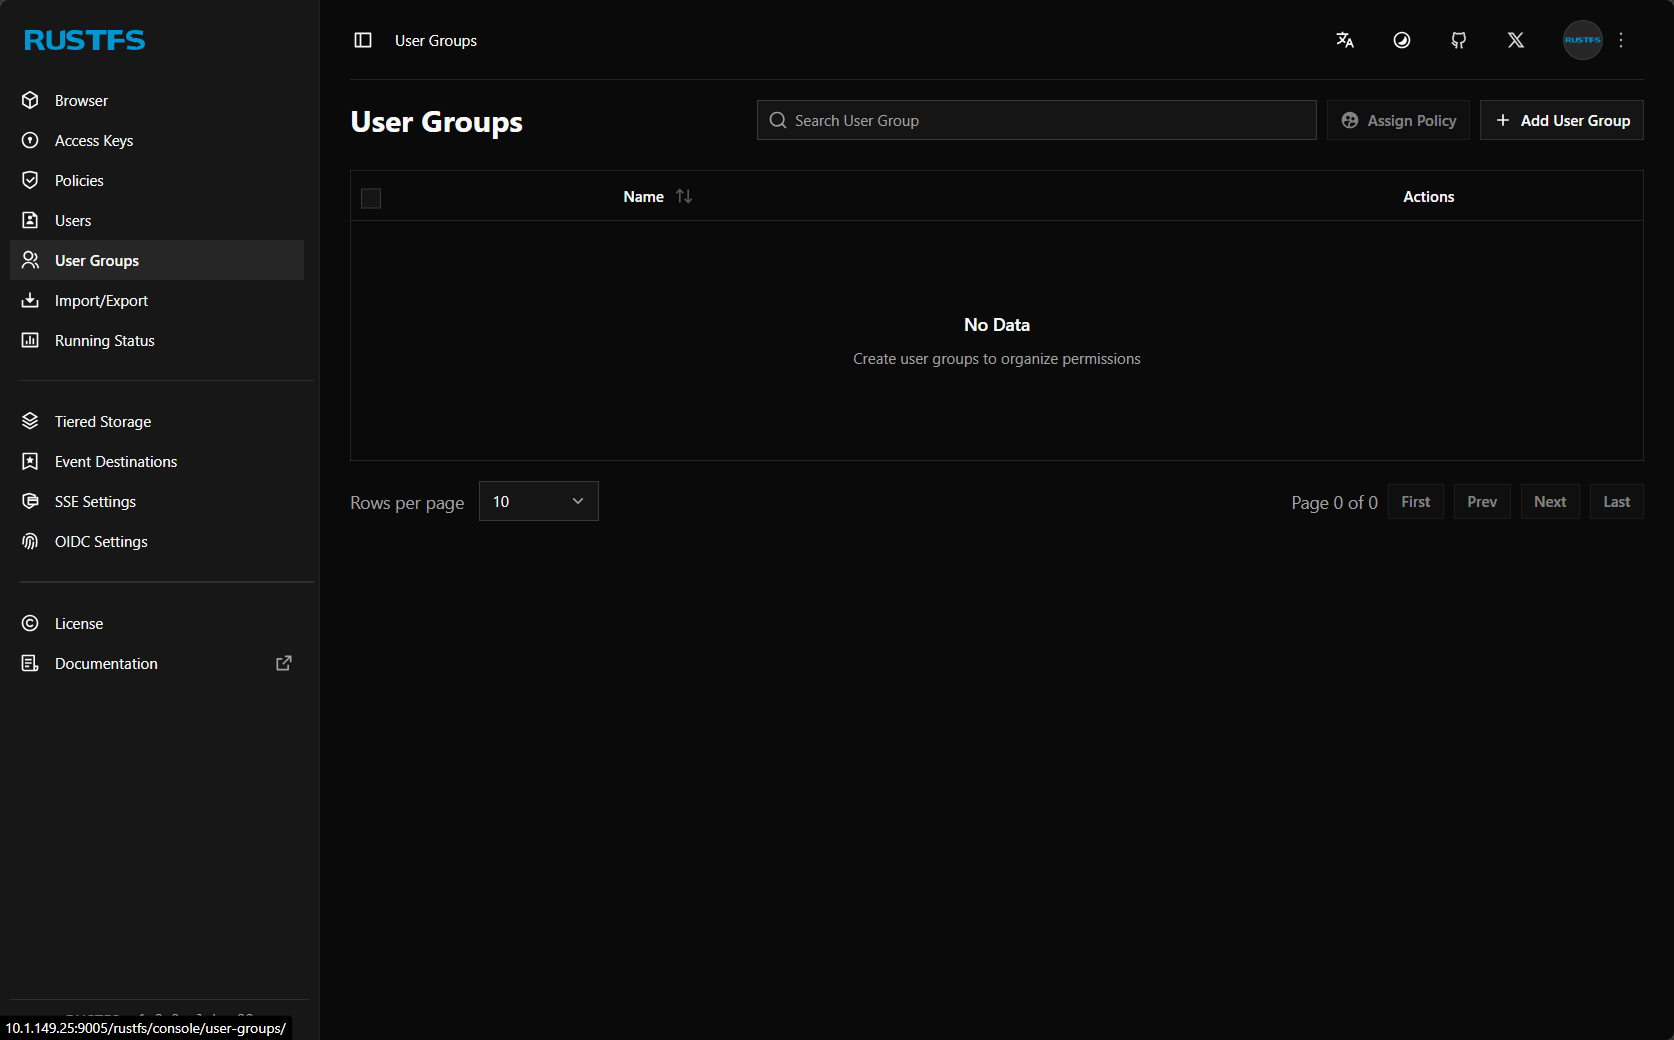
User groups allow setting permissions efficiently.
There are currently two event notifications you can configure, including MQTT and Webhook.

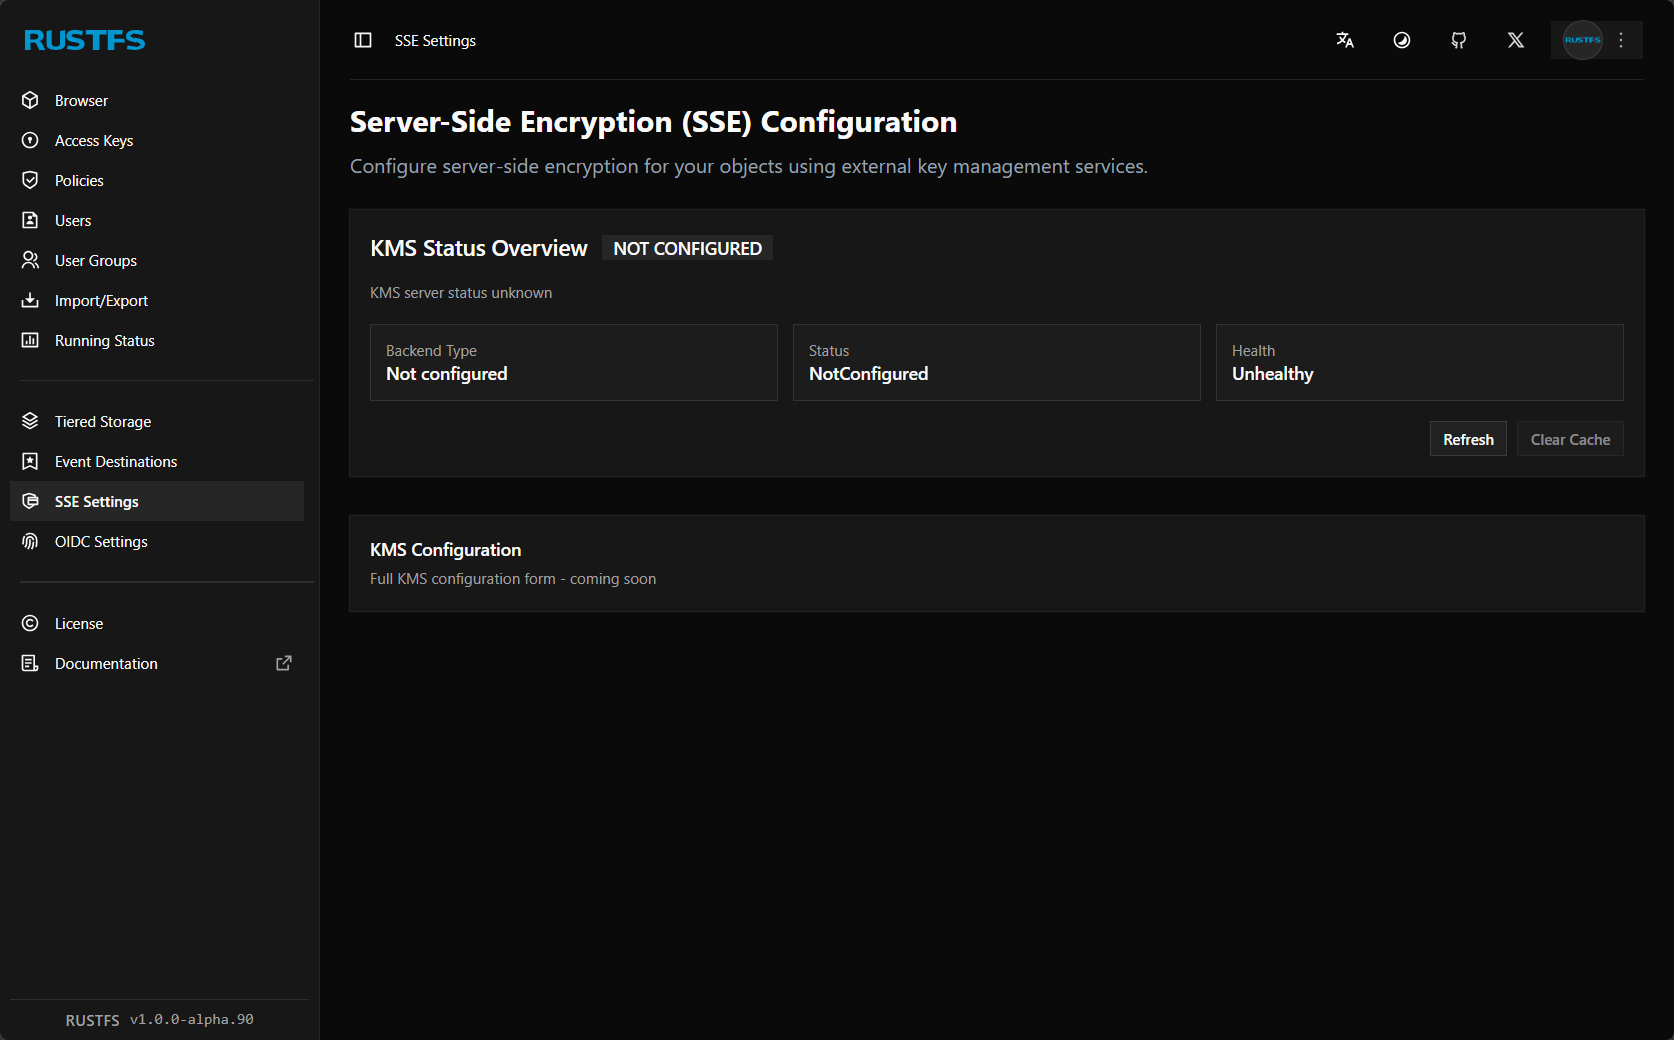
It supports server side encryption (SSE) config.
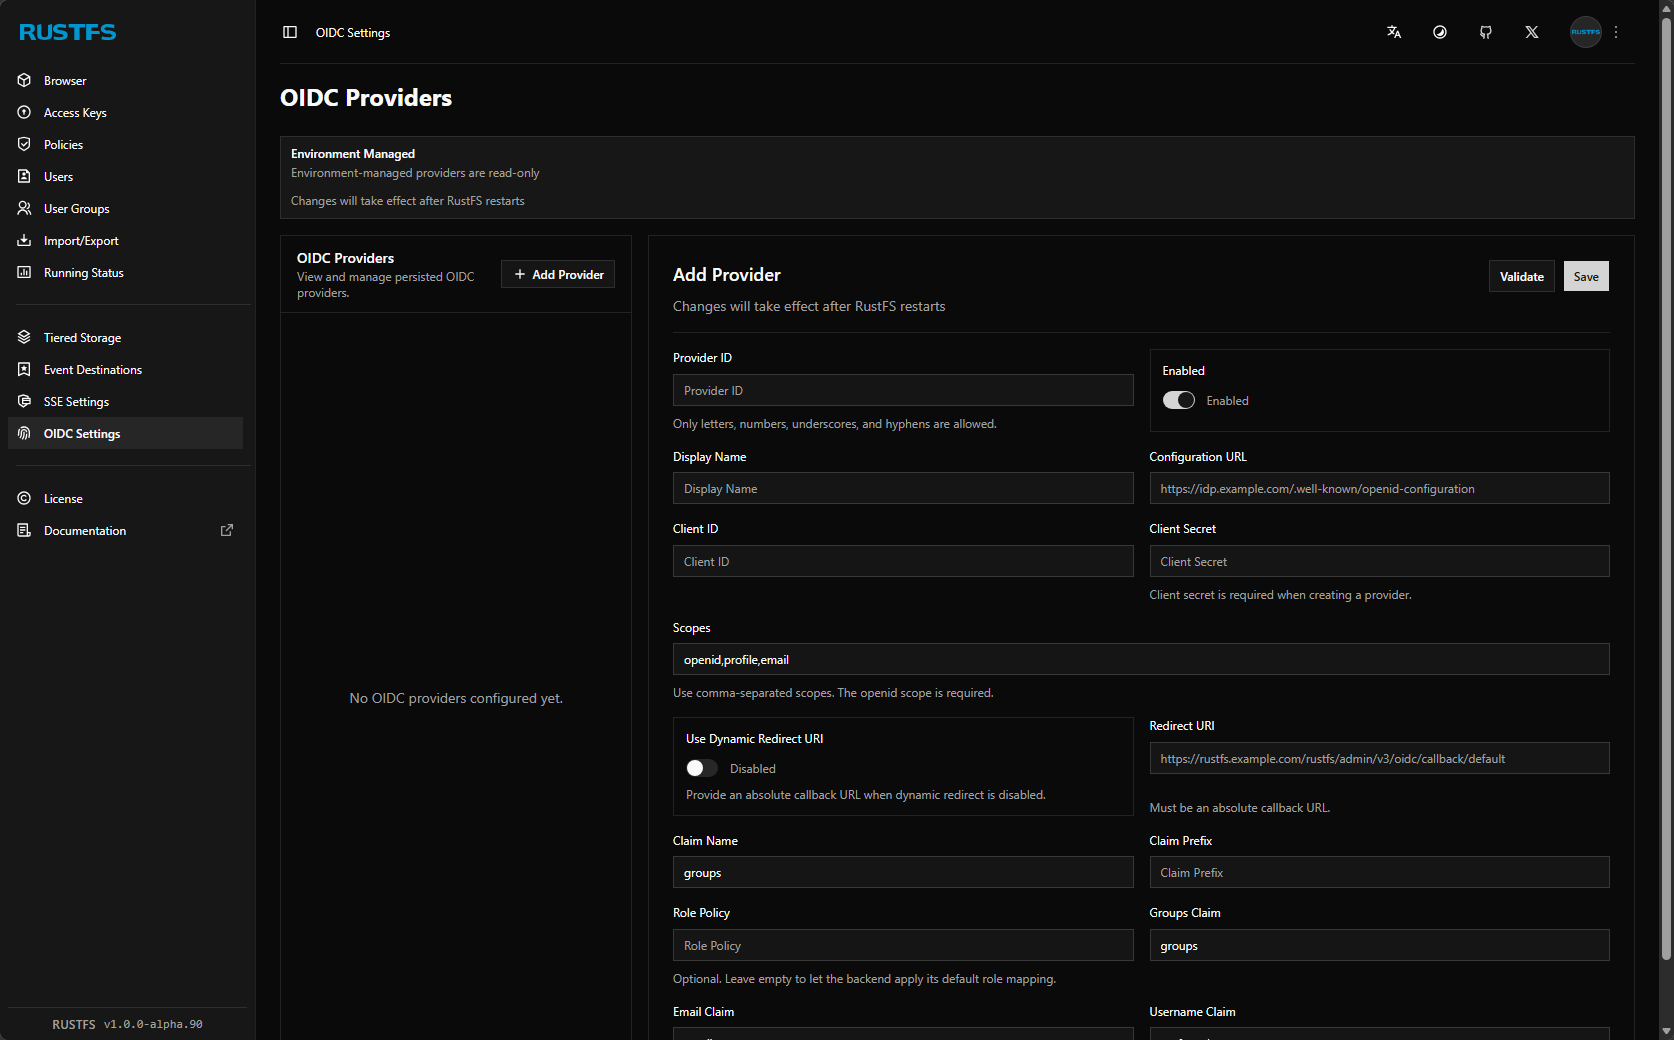
OIDC providers configuration if you already have a centralized identity source for your home lab, this integrates right along with that.
What happened after introducing this in my home lab?
It is pretty cool to have real S3 storage that looks like, behaves like, and for all purposes is S3 storage running locally in my home lab environment. What I like is not having to rely on cloud environments for object storage.
This opens up a lot of really cool and neat things you can do and tools that integrate natively with S3 storage. Think about the fact that Proxmox Backup Server (PBS) now supports S3 compatible storage in PBS 4.x. Also, most modern tools have functionality built-in to back up to S3 storage. I have my Portainer configuration backing up to it currently, and also about to implement Velero backups for Kubernetes which also natively integrates with S3 object storage.
Other cool things about having your own object storage is that you can interact with your storage natively from the command line with tools like the aws cli tool. Using the native aws cli, you can work with your storage, like you would native S3 storage. Check this out.
To point your aws cli tool to your locally hosted RustFS server, you can do the following. You run the aws configure command and then you follow the prompts like you would connecting to your AWS account except you give it your RustFS credentials.
aws configure

AWS Access Key ID: rustfsadmin
AWS Secret Access Key: rustfsadmin
Default region name: us-east-1
Default output format: json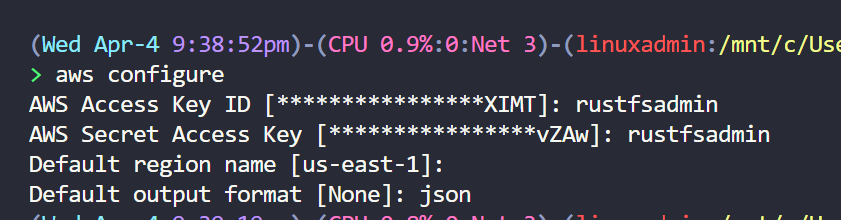
Then, after you configure your credentials, region, and output, you can then start issuing commands by pointing the command to the local endpoint:
aws --endpoint-url http://localhost:9000 s3 ls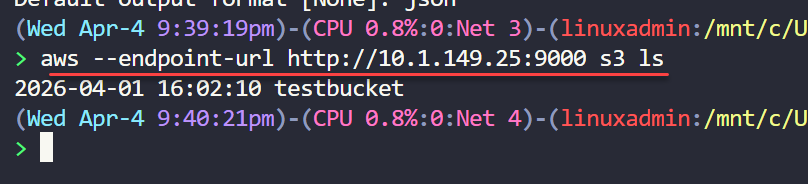
You could create an alias to include the endpoint URL if you want to make things easier which is what I did. I tested it with:
- AWS CLI for bucket and object operations
- rclone for syncing data
- S3-compatible backup workflows as mentioned
This is what I like about the solution is there is no weird custom adapter layer or compatibility issues. You don’t have to rewrite any of your workflows. It just works.
Features that I think actually matter in a home lab
RustFS already includes a solid set of features that make it a great candidate if you are coming from something like MinIO or native S3 storage in AWS. Object versioning is one of the big ones. You can keep multiple versions of the same object which is super useful, especially for backups and other scenarios.
Replication is another feature that is supported and this opens the door to more resilient setups if you want to expand beyond having a single node.
Encryption is built in, which is one of those features that is very important if you are storing anything sensitive. It also has good lifecycle management which lets you define rules for how your data is handled over time and tiering that data out over various storage tiers which are easy to setup and configure.
There is also support for WORM-style configs. This is a well-known feature of modern object storage which can help protect against accidental deletion or modification by things like ransomware, so definitely a really good safety net.
Here is a quick table of features:
| Feature | What it does | Why it matters |
|---|---|---|
| Object versioning | Stores multiple versions of objects | You can rollback and protect against accidental changes |
| Replication | Copies data across your nodes | Adds resiliency and scalability |
| Encryption | Secures data at rest and in transit | Protects your sensitive data |
| Lifecycle management | Automates data retention and cleanup | Reduces manual storage management steps |
| Storage tiering | Moves data between storage tiers | Optimizes for performance and storage usage |
| WORM | Prevents modification or deletion | Protects against things like ransomware and accidental deletion |
Wrapping up
RustFS is a solution that I think quietly impresses. Is has just about every feature you will need when self-hosting your own home lab S3 storage. It is easy to deploy and getting up and running only takes just a few minutes. It really helps to fill a gap in many home labs for modern object storage that you self-host without relying on cloud object storage. Now, with the future of MinIO very uncertain, the RustFS project is one to keep a pulse on or even plan your migration over if it makes sense to you. How about you? Are you using RustFS in your home lab yet? Let me know in the comments your thoughts on it for S3 object storage in the home lab.
Google is updating how articles are shown. Don’t miss our leading home lab and tech content, written by humans, by setting Virtualization Howto as a preferred source.
About The Author