
Proxmox is my choice of home lab hypervisor moving forward. It has so many capabilities and features. It can definitely support a healthy list of project based learning and experimenting that most want to do in their self-hosted environment. However, outside of just pure projects that we want to accomplish, there are maintenance tasks that most home labbers may ignore. These are not always big ticket items but can be just small tasks that can prevent huge headaches later on. If I had one free weekend and wanted to strengthen my Proxmox lab, these are the five Proxmox maintenance tasks that I would tackle first.
1. Actually test a full restore of a VM
When you have a home lab most realize the importance of backing up their home lab workloads, VMs, containers, etc. Proxmox Backup Server (PBS) is definitely the free, purpose-built backup solution of choice. Then there are always what I think of as the Cadillac backup solutions like Veeam that I think are rock solid, even for Proxmox being one of the newest solutions in their portfolio. They seem to have it down already.
Regardless of the solution that you use though, just simply backing your workloads up is not enough. You need to actually test your backups and make sure these are good, contain the data you expect and very importantly, they are restorable.
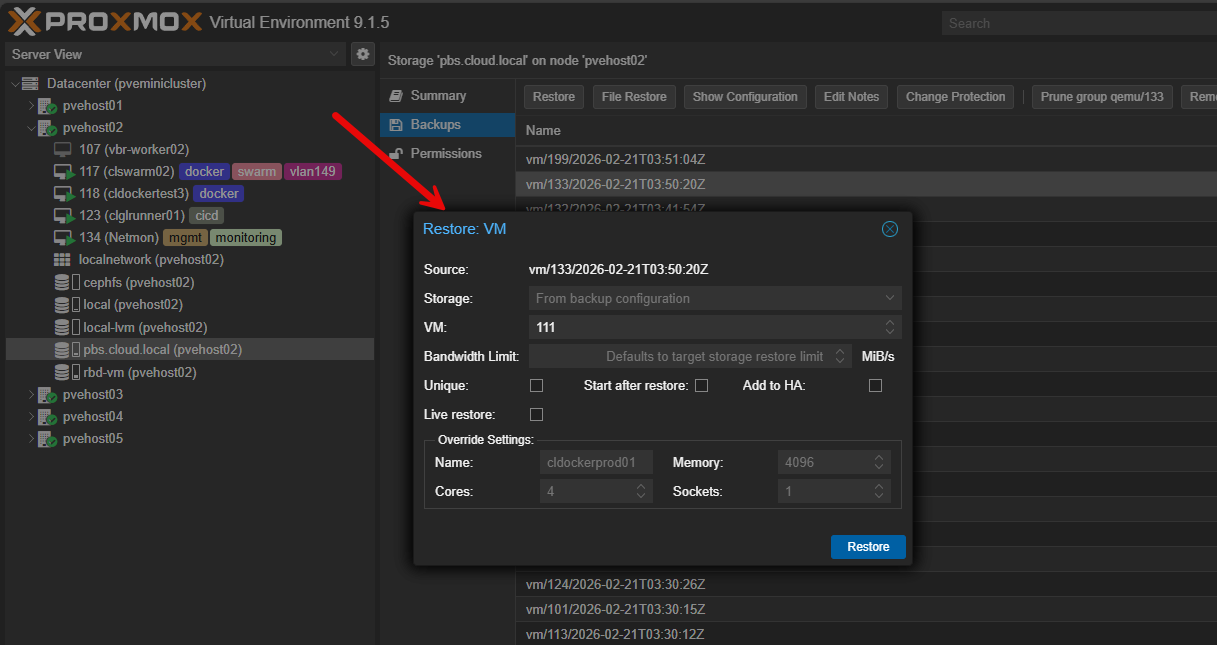
Most home labbers have never performed a full test restore of a VM in their home lab. That is where you start. Pick a non-critical virtual machine and:
- Run a manual backup
- Restore it to a new VM ID
- Boot it
- Log in
- Confirm services and applications are working correctly, etc
Solutions like PBS have file-level restores. Test these also. Browse the backup catalog and make sure you understand how to navigate your backup software and restore things under calm circumstances. The whole point of this Proxmox maintenance task exercise is to discover any problems BEFORE you are actually in a real outage or have lost data due to something crashing, a hardware failure, or something else.
2. Clean up and validate your networking configuration
Like any other hypervisor or virtualization stack, it rarely gets messy overnight. Networking is usually one of the areas we think, “I’ll clean this up later or configure this the right way later on.” But, the problem is “later” never comes.
You might add a bridge for management. Later you experiment with a VLAN. Maybe you start to test bonding. Then, after a few months, your configuration file is messy, and confusing and probably riddled with stale configuration that is no longer needed.
One of the maintenance tasks I recommend is spending time to review the following:
- All vmbr interfaces
- VLAN assignments
- Physical NIC usage
- Bond configurations
- MTU values
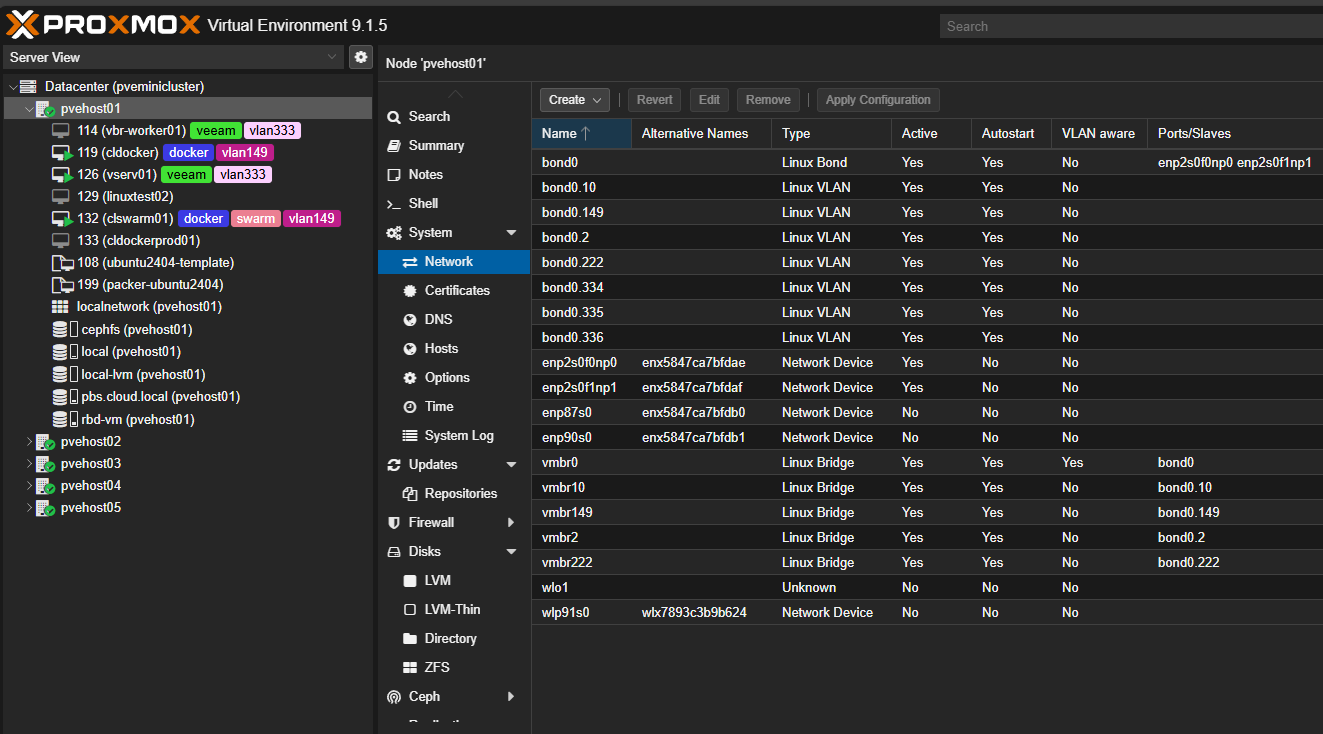
Use the time to get rid of unused bridges. If your MTU values are not aligned, take the time to standardize these. If you haven’t separated out your management, VM traffic, and storage traffic, take the time to do this and document it properly. Check out my recent blog on RackPeek that I think is a great tool for documenting your rack and home lab in code as a Proxmox maintenance task.
3. Audit and clean up your storage space
We all have been there. Local storage fills up quietly. You accumulate old ISO images, templates, and you have snapshots lingering on several different VMs. Backup retention policies are set once and never audited again.
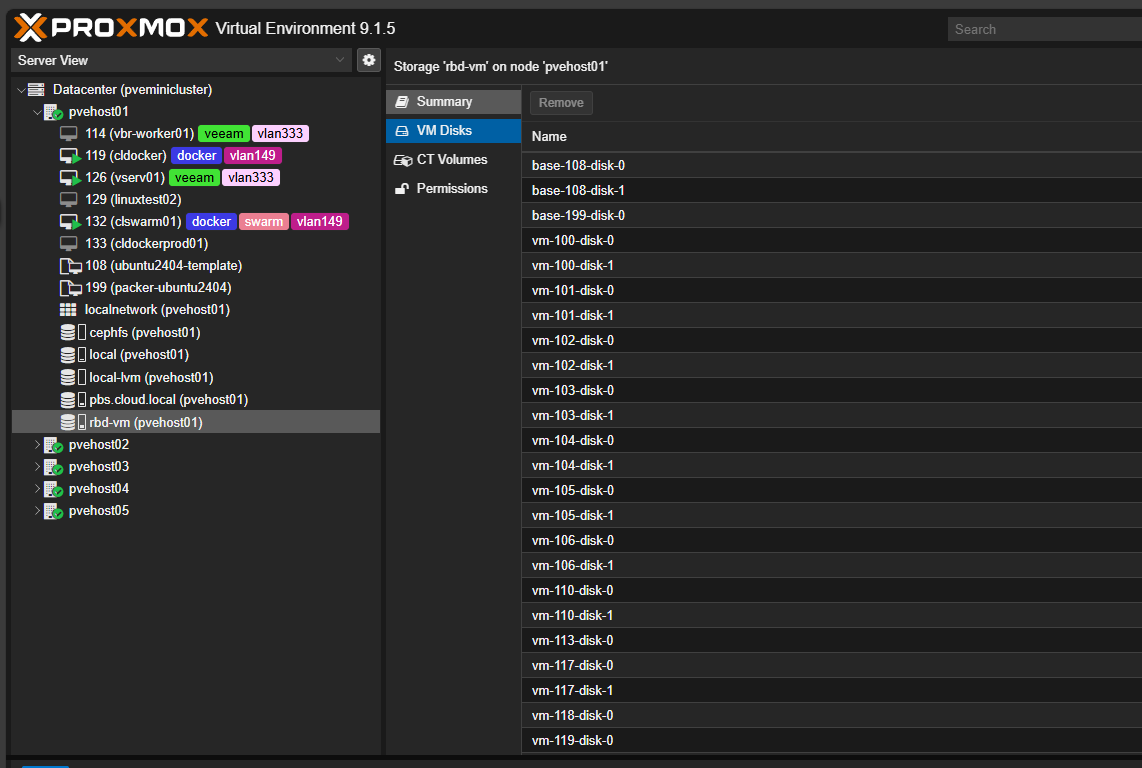
With all of the normal home lab churn, local storage accumulates stale files and other resources. A great weekend maintenance project is to proactively review and audit your storage usage. You can do this easily with a simple audit in the Proxmox GUI.
Take note of the following:
- Datacenter storage usage
- Each node’s local storage
- Snapshot lists
- Backup retention settings
You can ask questions such as this:
- Are these ISOs still required?
- Are there abandoned templates?
- Are snapshots older than intended?
- Is local-lvm approaching capacity?
Full or nearly full storage volumes can cause lots of issues. These can include backup failures, snapshot errors, and unexpected VM instability. Reclaiming space reduces your risk there.
4. Test HA failover before you actually need it
One of the reasons that most build a Proxmox cluster is so they have failover capabilities with high availability. Proxmox HA makes sure that your VMs are protected if the host they are on goes down for any reason.
However, even after setting up an HA cluster, most home labbers never simulate a failure to see if HA works as expected. Like backups, the last thing you want to do is experience a real outage only to find that your HA failover didn’t work as intended or there was an underlying issue preventing the VMs from being spun up on a different host.
The great thing about Proxmox HA is that you don’t have to pull the plug on a host to test it out. You can actually simulate an HA failover by putting your Proxmox host into maintenance mode. To put a host into maintenance mode, use the command below:
ha-manager crm-command node-maintenance enable <your node name>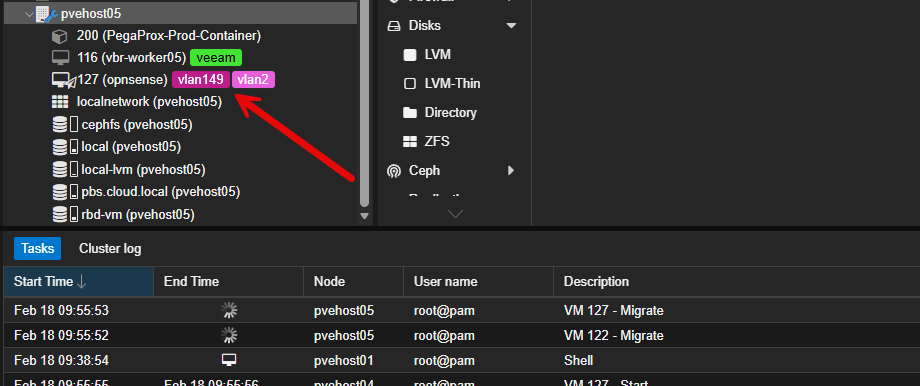
When you do this, Proxmox will in a controlled way migrate off all the VMs from that particular host to another host. So, if there are going to be failures with HA, it should show up in this process. Watch the logs. Watch task history. Pay attention to how long migrations take and whether any services fail to come back online.
You are validating several things at once:
- HA service responsiveness
- Storage availability across nodes
- Network consistency after failover
- VM boot reliability
Again though, don’t assume, test it out and make sure.
5. Right-size your VMs and resources
Especially these days when RAM prices are insane, overprovisioning resources not only causes undue pressure on your existing lab resources, but it also can add up to real money out of your pocket if you need to upgrade hardware when resources become low.
Overprovisioning can happen gradually. A VM that once needed additional CPU keeps those cores forever. A workload that may have needed some extra memory for a short term remains permanently oversized. Over time, these resource allocations add up.
Most home labs never revisit VM sizing after these resources were deployed. A maintenance weekend should include a resource audit.
Be sure to review:
- CPU cores assigned per VM
- Memory allocations (a big one)
- Historical usage graphs
- Socket and core configurations
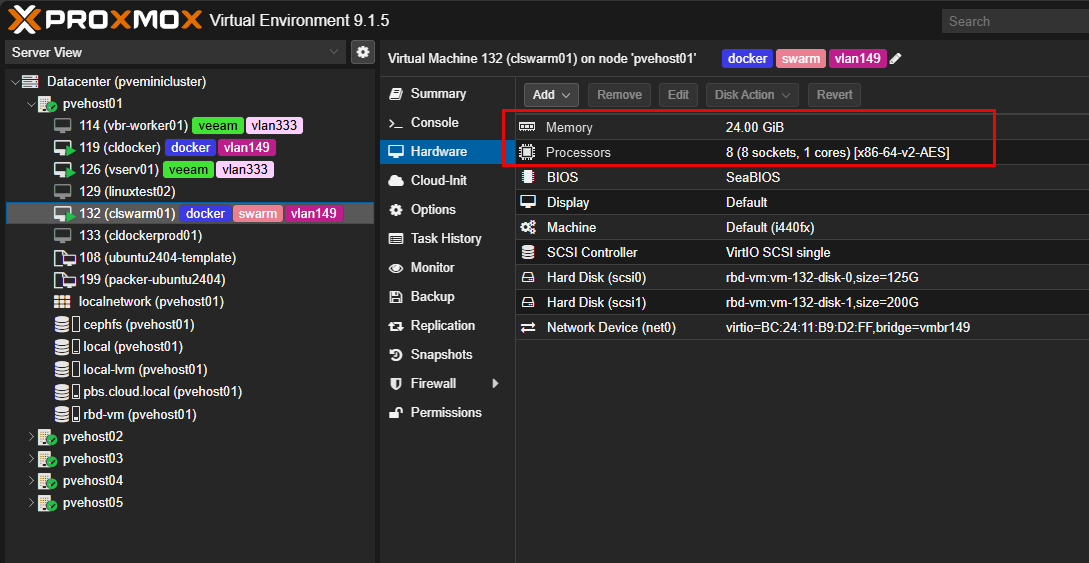
Compare what is allocated with what you see the VM is actually consuming during peak and average workloads. Also, when you lower unneeded CPU cores and excess memory, this improves the scheduling efficiency of your entire system. It also frees resources for future workloads you have. In smaller labs this can definitely improve performance by rightsizing VMs.
Wrapping up
The good thing about all these maintenance projects is that they don’t require that you need new hardware or that you need to rebuild your cluster. They are simple maintenance items that anyone can do. Testing restores, cleaning up your networking, getting back storage, testing HA, and right-sizing your VMs are not necessarily exciting projects, but they will keep your lab running in tip top shape so that it performs for all the more exciting projects that most want to run in their home labs. If you dedicate a single weekend to these five tasks, your Proxmox environment will be stronger by next week! How about you? What Proxmox maintenance tasks are you doing in the home lab this weekend?
Google is updating how articles are shown. Don’t miss our leading home lab and tech content, written by humans, by setting Virtualization Howto as a preferred source.
About The Author