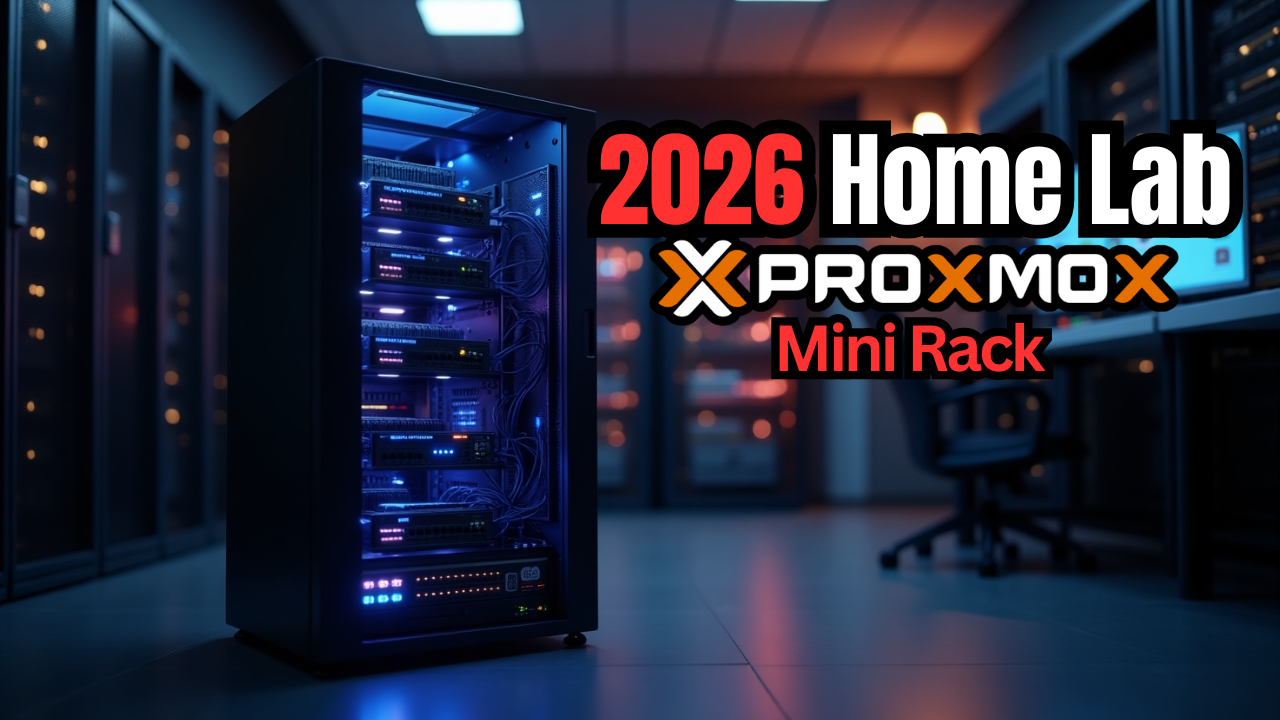
Going into home lab testing and learning for 2026, I wanted to continue building on a project I started with my mini 10 inch rack while also making better use of several random mini PCs I had on hand for testing and experiments. My goal was to bring random hardware I have sitting around into something more intentional. The plan was to build a multi-node Proxmox cluster inside the mini rack and then layer on a Talos Linux Kubernetes cluster on top of it. In this post, I will walk through how my mini rack Proxmox cluster with Kubernetes is coming together in 2026 and why I think this setup will become a core part of my home lab that will continue to evolve.
The direction for my home lab in 2026
I am noticing a trend for myself with the home lab in 2026: smaller, more intentional, and container focused. My home lab is becoming smaller in footprint size with the 10 inch rack I introduced. With the 10 inch rack build and setup, you have to be more intentional. I have put more design thought into this project than any other project that I have spun up in my lab previously over the years.
With a 10 inch rack, you have to plan things when you have little room to work with. But, also, when thinking about a Proxmox cluster you also have to think about how everything is laid out and configured. Then layering Talos Kubernetes on top of this adds another design decision.
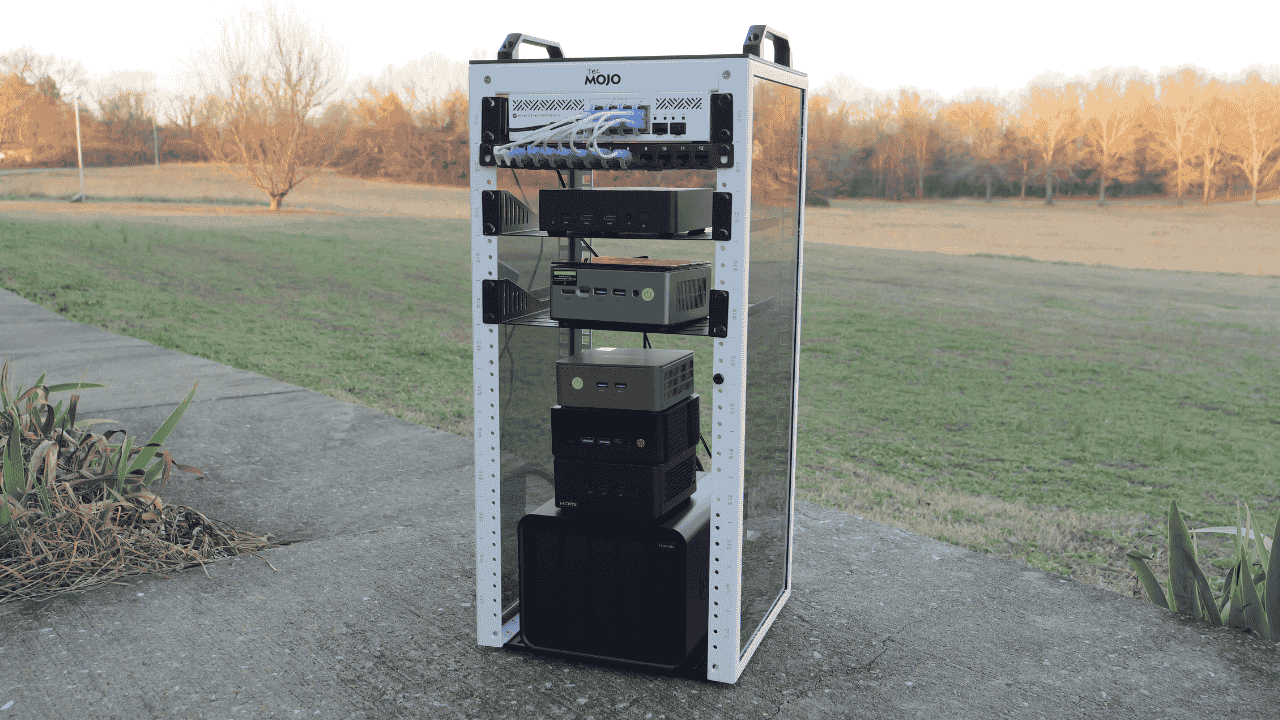
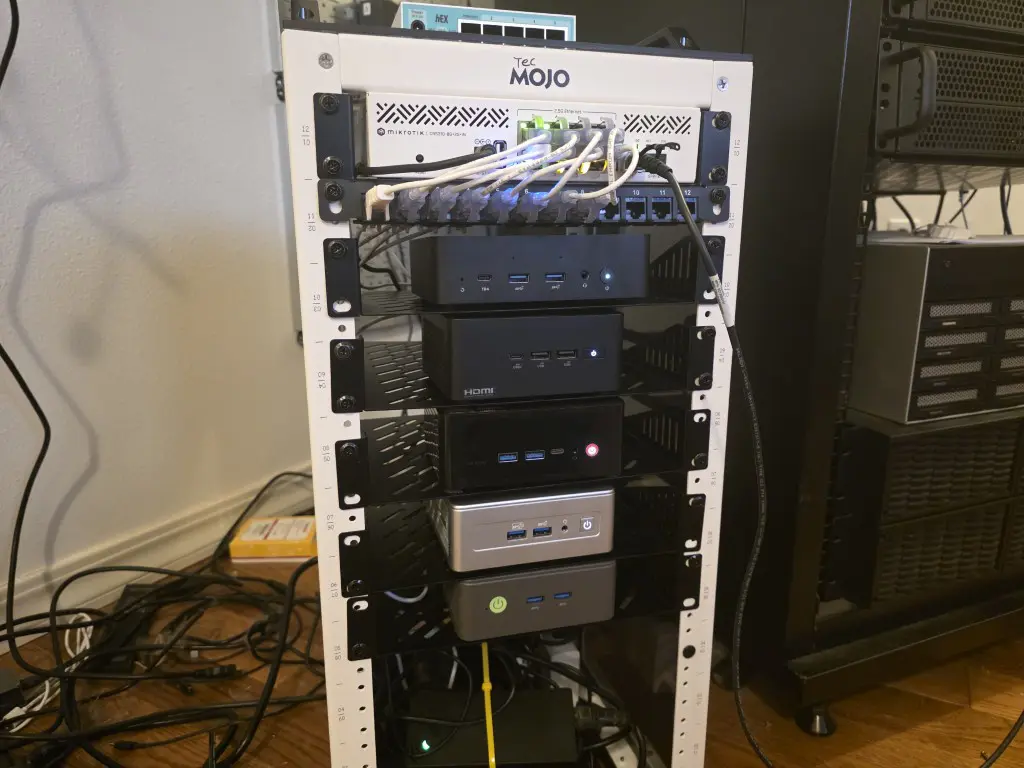
I am running dissimilar hardware across 5 mini pcs as well. So, I had to think about which resources I want to run where as some of the mini PCs have more resources than others (RAM, CPU, etc). Below is a pic of my mini rack along with the Mikrotik networking, etc.
Why Proxmox and Talos?
If you have been following my blog lately, you will have seen the blog post where I covered this topic comparing Proxmox with VMware for the past year. You can take a look at that post here: I Spent a Year Running Proxmox and VMware Side by Side in My Home Lab. This will give you a good understanding of why I am choosing Proxmox for this mini rack build. Also, Proxmox gives me a lot of options. I could run Talos baremetal, but I would be stuck with Kubernetes only. Having Proxmox on the mini PCs gives me lots of options to run a mix of traditional VMs and Kubernetes.
Also, why Talos? Well, I have run a lot of different variations of Kubernetes in the home lab. Most recently, I had been using MicroK8s along with MicroCeph which I think works great. But, I wanted to dive further into Talos Kubernetes this year, especially since I got Omni up and running in the home lab. It is a very slick management solution for Talos Linux that is just the icing on the cake. Read how to stand up Omni in your home lab here: How to Install Talos Omni On-Prem for Effortless Kubernetes Management.
My physical hosts for the Proxmox cluster
Below is a table of the physical hosts and their specs that I have in the mini Proxmox cluster in the mini rack:
| Proxmox Host | Mini PC Model | CPU | RAM | Storage |
|---|---|---|---|---|
| pvehost01 | Minix EU715-AI | Core Ultra 7 155H | 128 GB | 1 TB NVMe |
| pvehost02 | ASUS NUC 14 Pro | Core Ultra 7 155H | 128 GB | 1 TB NVMe |
| pvehost03 | Trigkey S7 | Ryzen 7 7840HS | 32 GB | 1 TB NVMe |
| pvehost04 | Geekom AE7 | Ryzen 9 7940HS | 32 GB | 512 GB boot + 1 TB VM storage |
| pvehost05 | GMKtec G3 Plus | Intel N150 | 16 GB | 512 GB NVMe |
Talos Kubernetes Control Plane and Worker nodes
Let’s look at the information around my Talos Kubernetes control plane and worker nodes.
| Talos Control Plane VM | Runs on Proxmox Host | Why |
|---|---|---|
| talos-cp-1 | Minix EU715-AI | One of my 128 GB RAM nodes |
| talos-cp-2 | ASUS NUC 14 Pro | One of my 128 GB RAM nodes |
| talos-cp-3 | Trigkey S7 (7840HS) | Strong CPU, reliable third fault domain |
I intentionally did not place a control plane node on the Intel N150 box.
Each Talos Kubernetes control plane node is intentionally sized for stability rather than raw performance. etcd and the Kubernetes control plane components benefit far more from consistent latency, memory headroom, and fast local storage than from large core counts.
Control plane VMs
Each control plane VM is configured with the following specs:
- vCPU: 4
- RAM: 8 GB
- Disk: 40 to 60 GB on local NVMe storage
- CPU type: x86-64-v2
This configuration gets you a three node highly available control plane and it also keeps resource usage fairly low. Running one control plane VM per physical host gives me proper etcd quorum and clean failure domains without unnecessarily loading up and putting pressure on the smaller nodes in the cluster.
Using the x86-64-v2 CPU type also keeps the control plane portable across mixed Intel and AMD hosts. Due to my mix of hardware, this was an important consideration. It avoids migration issues while still exposing modern CPU features like AES acceleration that Talos and Kubernetes benefit from.
With the control plane designed, the worker nodes are where hardware differences really start to matter and these need to be thought through.
Tier 1 worker nodes
These two machines carry the bulk of your workloads and anything stateful or memory heavy.
| Talos Worker VM | Runs on Proxmox Host | vCPU | RAM | Notes |
|---|---|---|---|---|
| talos-w-1 | Minix EU715-AI | 12 | 32 GB | Platform workloads, stateful services |
| talos-w-2 | ASUS NUC 14 Pro | 12 | 32 GB | Platform workloads, stateful services |
Best workloads for these nodes:
- databases
- monitoring stacks
- CI runners
- anything stateful
- anything memory heavy
Tier 2 worker nodes
For my mini PCs with strong CPUs, but less RAM, I had to think about the workloads for these nodes. These are excellent for app workloads, replicas, and compute-heavy jobs that are not hungry for RAM.
| Talos Worker VM | Runs on Proxmox Host | vCPU | RAM | Notes |
|---|---|---|---|---|
| talos-w-3 | Trigkey S7 (7840HS) | 8 | 16 GB | App replicas, stateless services |
| talos-w-4 | Geekom AE7 (7940HS) | 8 | 16 GB | Compute heavy tasks, builds |
Best workloads for these nodes:
- application replicas
- stateless services
- background jobs
- CPU-heavy build tasks
Edge and utility nodes
My edge and utility node that I have earmarked is the GMKtec G3 Plus with the Intel N150. Due to performance reasons with the N150, I’m not going to make this a primary Kubernetes worker. It could be used for things that I want isolated from Kubernetes and ran natively in Proxmox, such as:
- DNS
- NTP
- Reverse proxy
- Monitoring endpoints
- Management utilities
If I want to add this in my Kubernetes cluster for experimentation or content, I can add this as an optional edge worker VM and keep it isolated.
Optional edge worker VM possibility:
- Name: talos-w-edge
- vCPU: 2
- RAM: 4 GB
- Disk: 30 to 60 GB
- Taint it so only explicitly defined workloads land there
Proxmox clustering
So just a quick overview of my Proxmox cluster so everyone can see what I am doing here, I have a 5 node cluster configured between the (5) mini PCs. No shared storage between them as of yet, but this is the next phase of my mini rack project as I will entertain what storage solution I want to use for shared storage. Also, I am exploring this with Talos as well.
Technically, there are two aspects of shared storage: Proxmox cluster and Talos cluster. You could have shared storage at both levels or shared storage at either level that you want. Since the Talos cluster nodes are running as virtual machines, they aren’t aware of clustering or clustered storage outside of the VM.
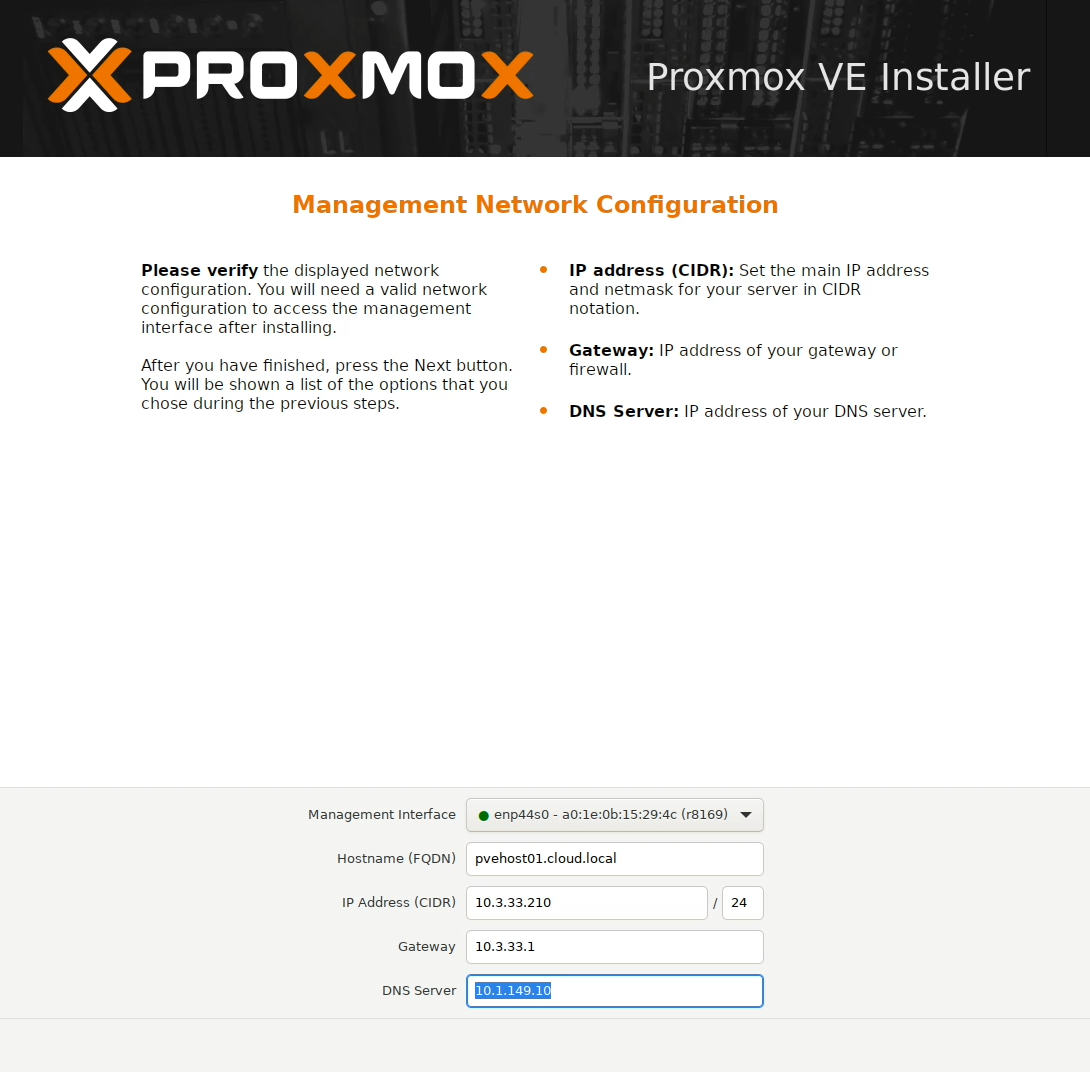
Below is a look at a few screenshots I took along the way for the configuration of the Proxmox cluster. Here I am installing Proxmox 9.1.x.
After getting all the Proxmox nodes up and running and installed, I created the cluster, and then joined the cluster from the other 4 nodes.
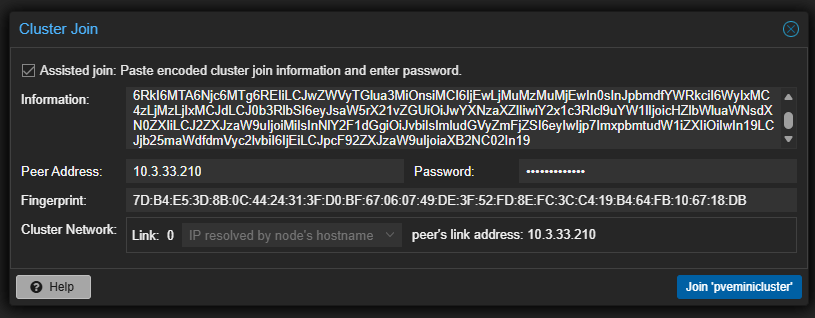
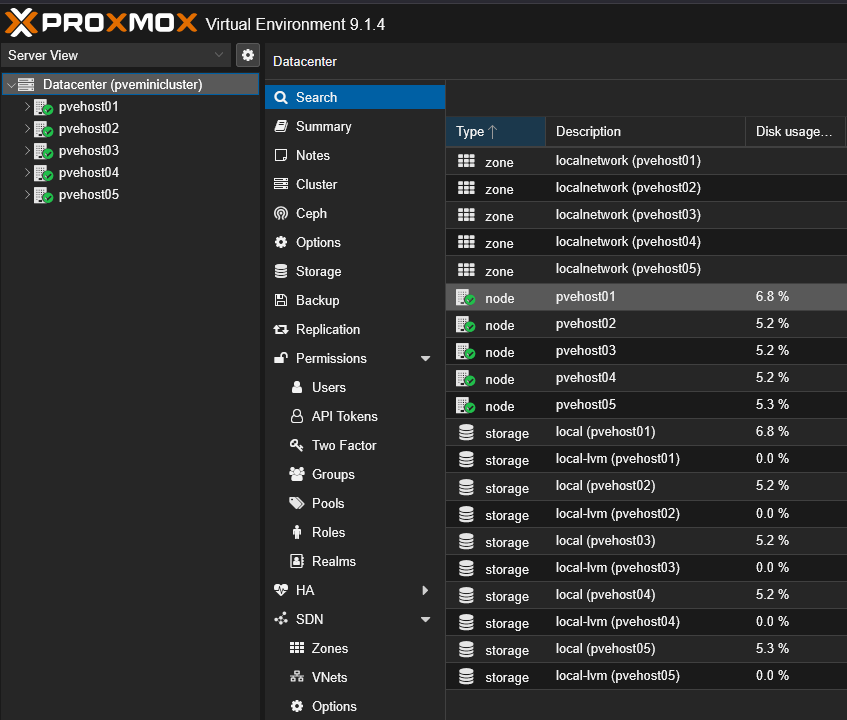
Here you can see all five Proxmox nodes joined to the cluster.
Deploying the Talos Linux nodes
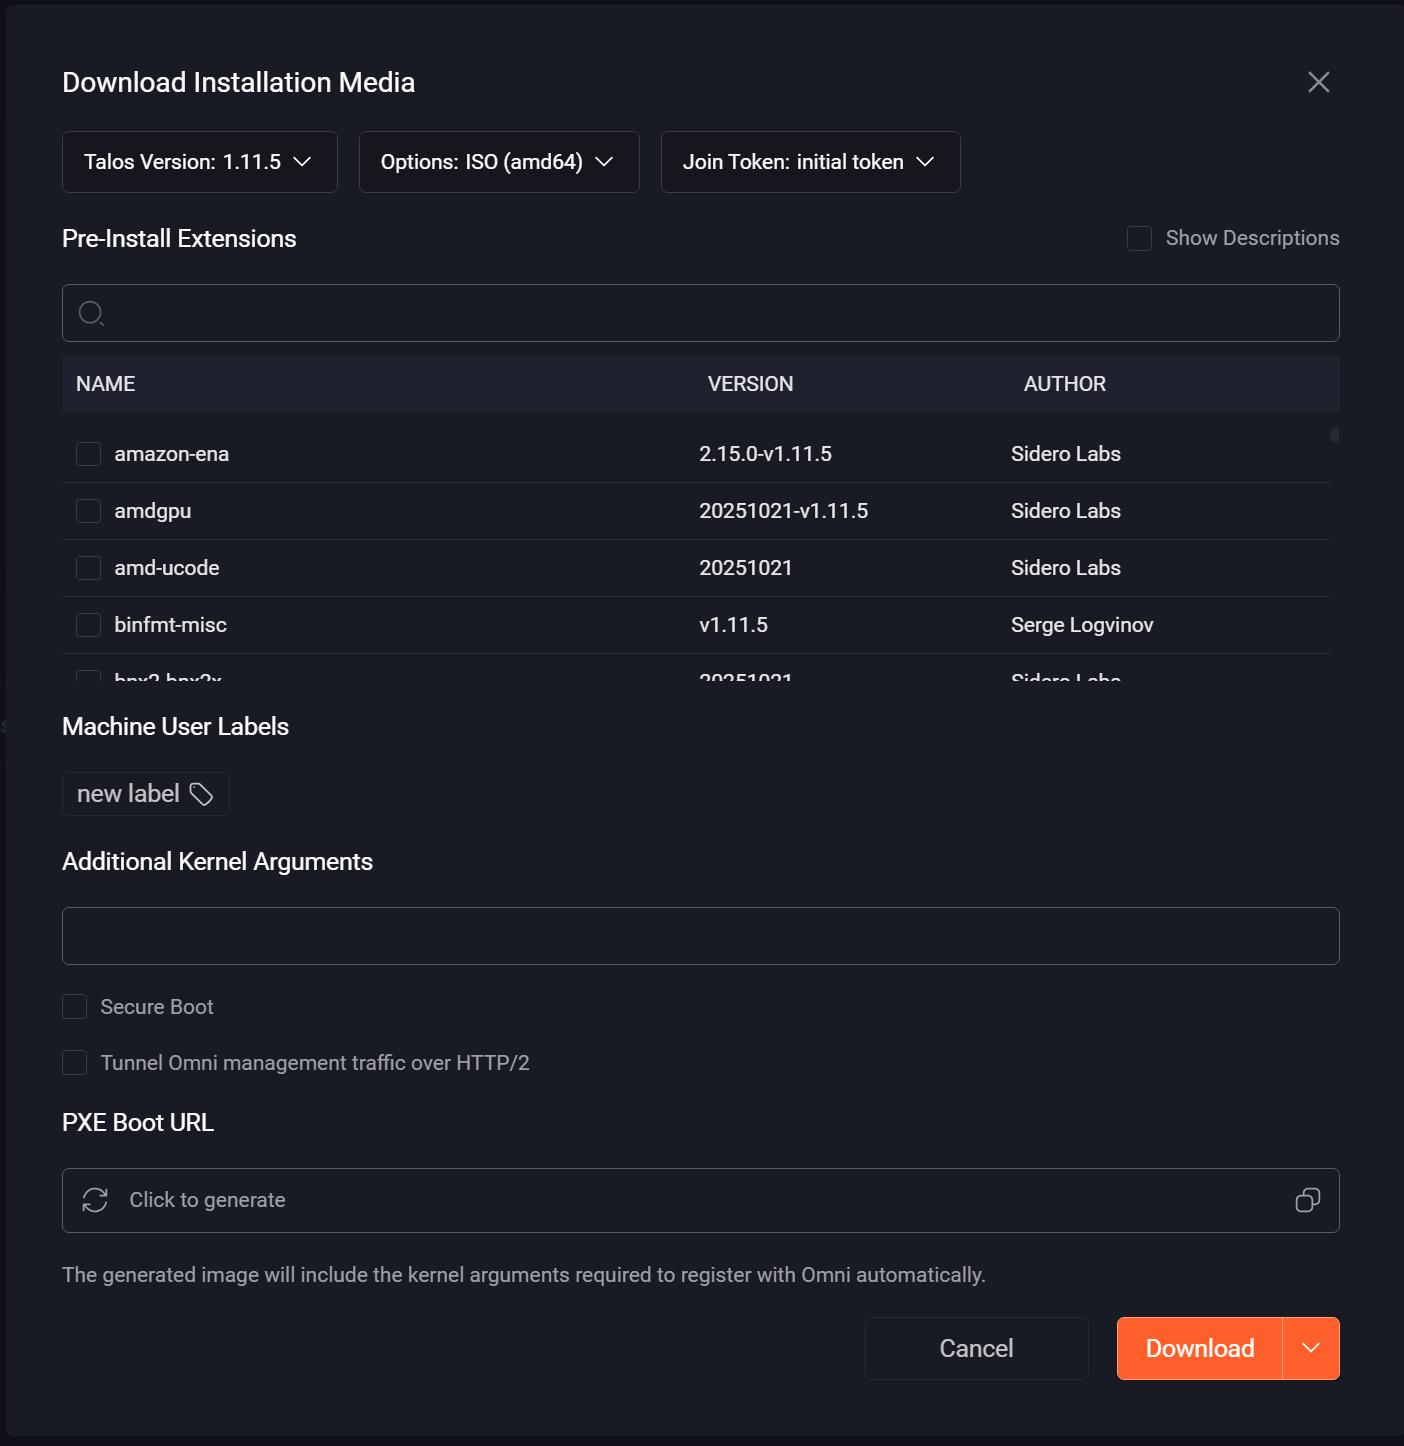
Once I had my Proxmox environment up and running and the cluster built. I started deploying my Talos Linux Kubernetes nodes. This is a simple process with Omni. In Omni, you can create a custom ISO for Proxmox that can be used when spinning up virtual machines in your Proxmox environment.
Below, you see the download Installation Media dialog box. This allows you to choose the Talos version, your options for the media, and join token, etc. You can also add extensions for things like storage, etc. I used this to create the installation media and just clicked Download.
I then copied the media to each of my Proxmox nodes. I created the Talos control plane nodes and worker nodes spread across the cluster on different Proxmox nodes. So, the way Talos works is you have the same installation for all your nodes from the media. Then we will designate the control planes and workers in the Omni cluster configuration.
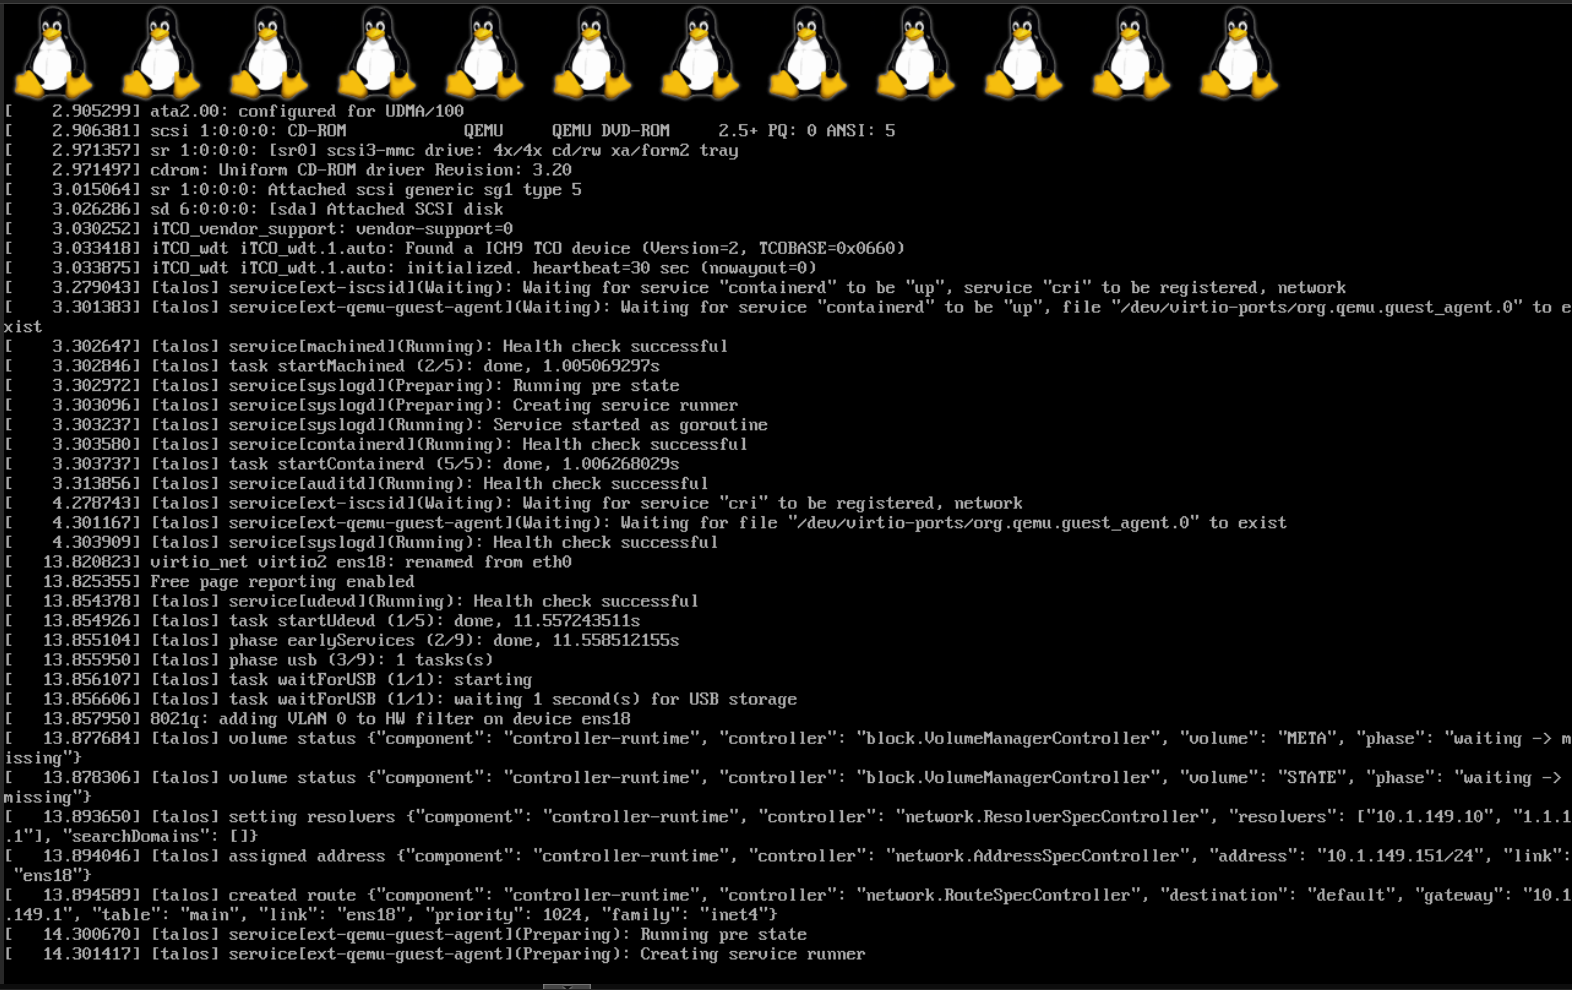
Once the machine boots, you can customize the network information like hostname, IP address, DNS server, gateway, etc.
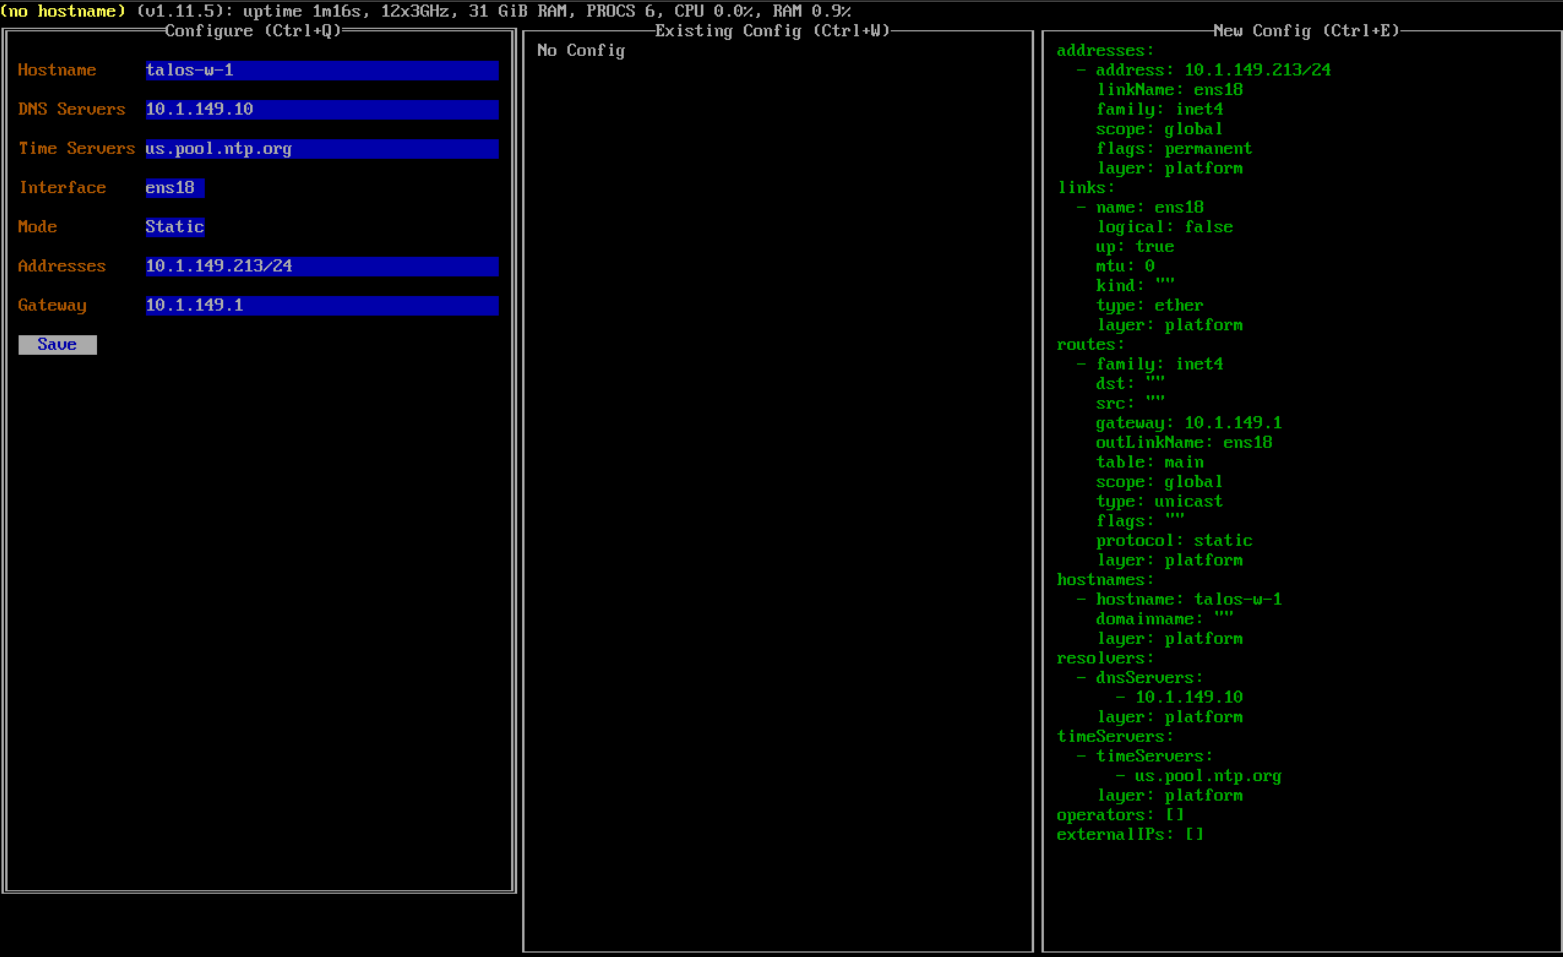
Here you can see one of the nodes I have customized and in the Proxmox inventory and various nodes, you see the mini rack Proxmox Kubernetes cluster nodes spread across them.
Creating the Talos cluster
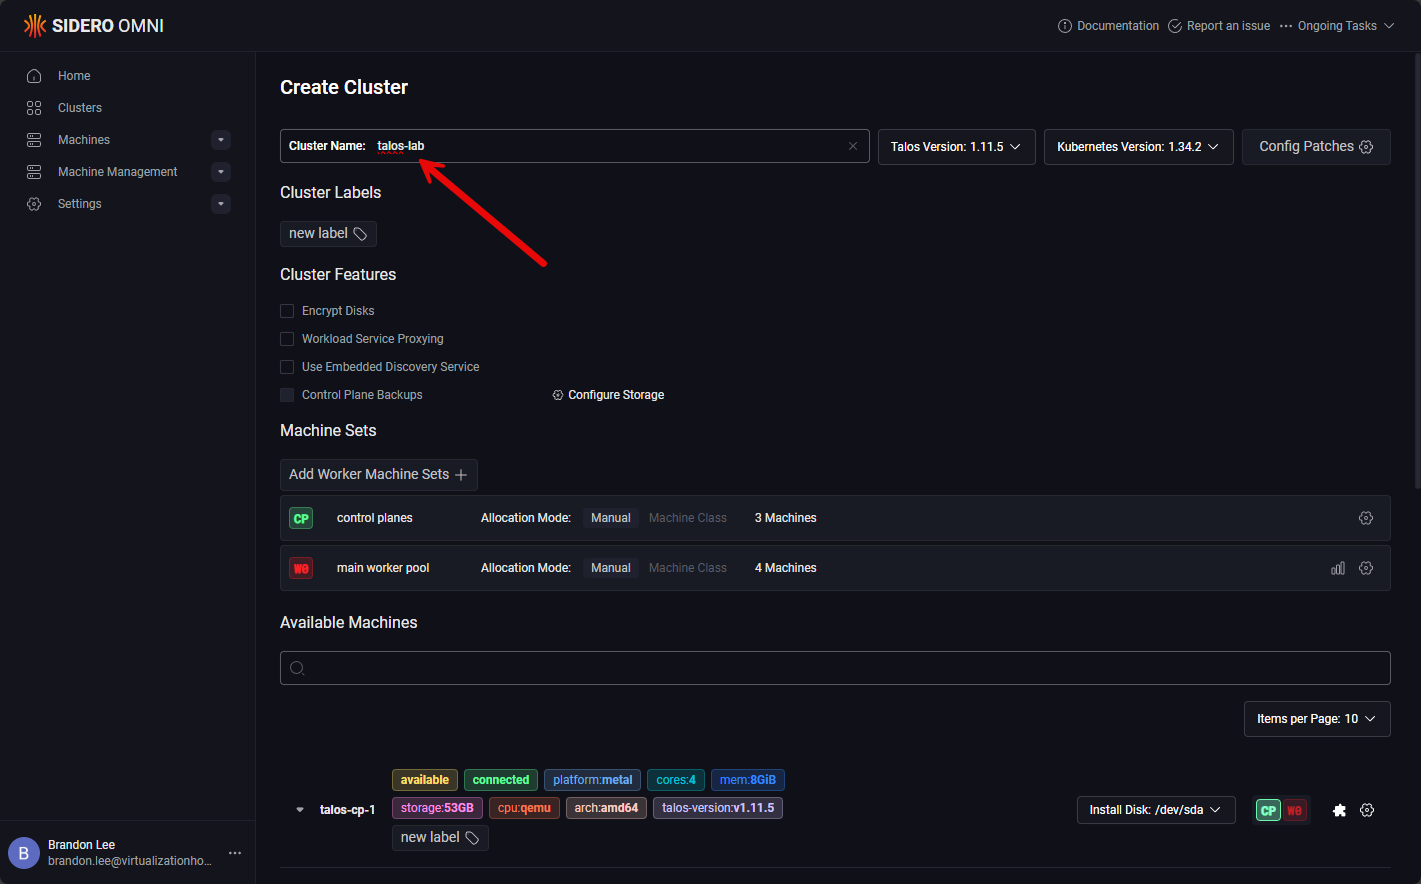
Below, I am creating the Talos cluster using Omni. The Omni management interface makes this extremely easy. Click Clusters > Create Cluster.

Name your Talos cluster.
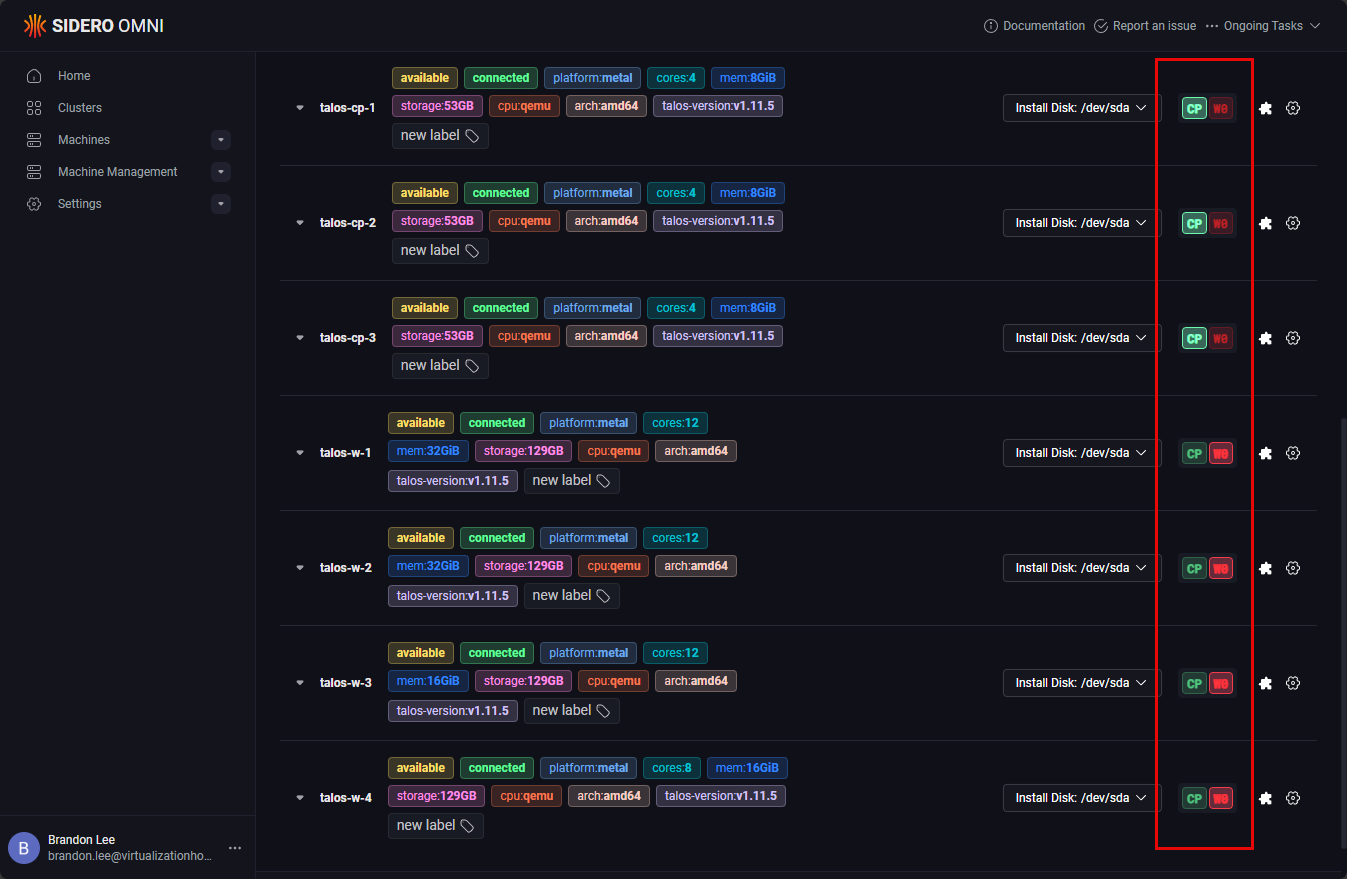
Once you use the customized media to bring up the machines, these will install and report back to Omni and you will see them in inventory. Then all you do is designate which ones you want to be the control plane nodes and the worker nodes.
Finally, click the Create Cluster button.

The process to create the cluster begins.
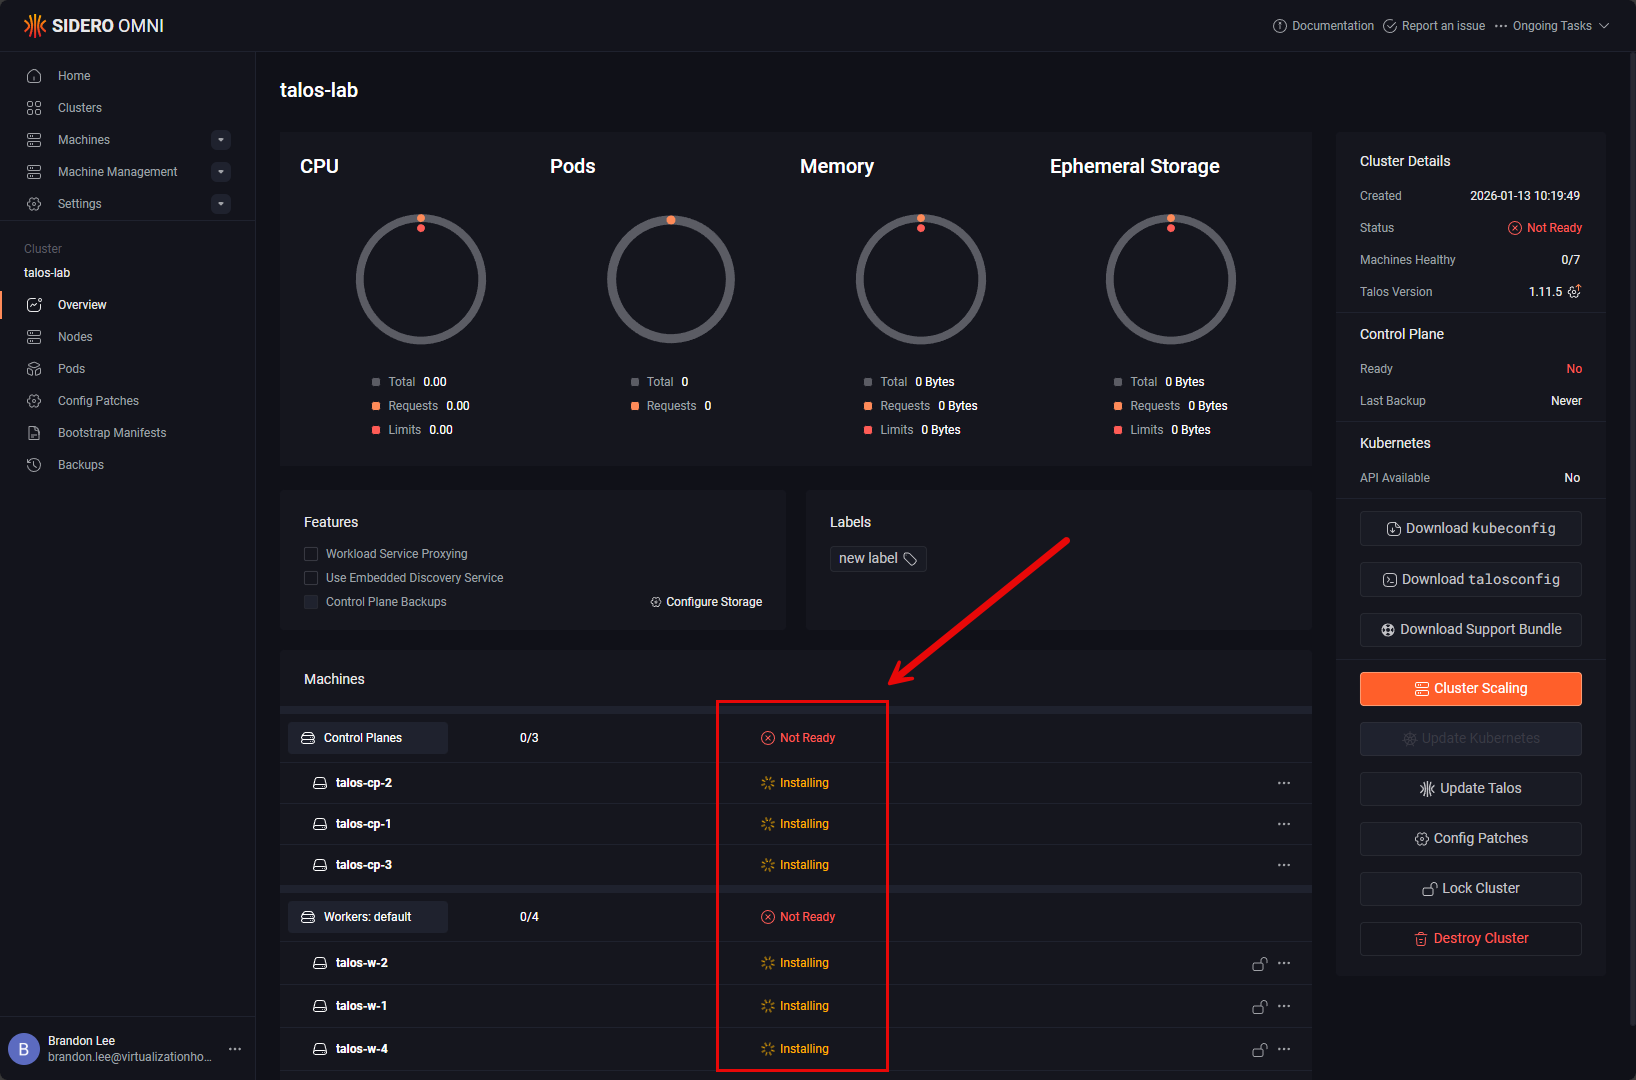
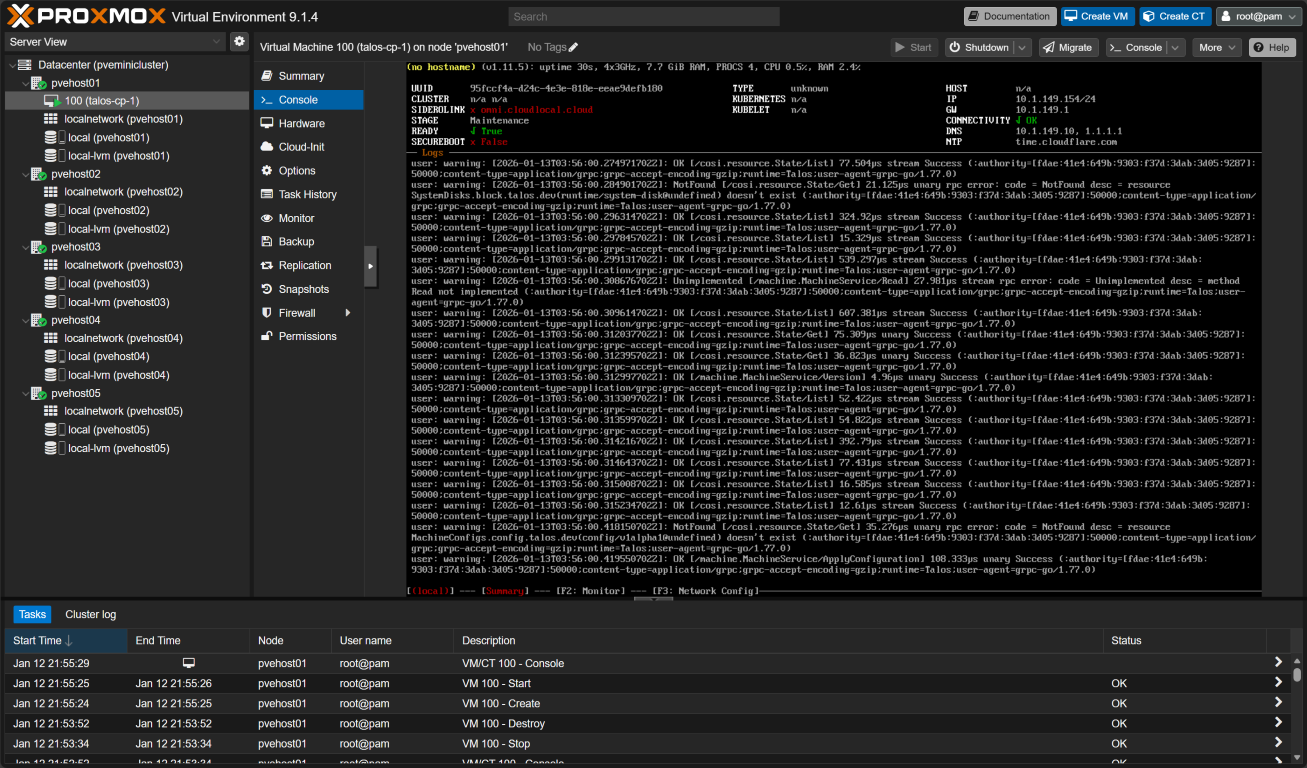
After getting the cluster up and runniing there were a couple of other things I did like upgrading the version of Talos Linux it used (went from 1.11.5 to 1.12.1) and also upgrading the Kubernetes version to 1.34.3 from .2). I didn’t upgrade to 1.35.0 as of yet. Letting the dust settle there a bit more.
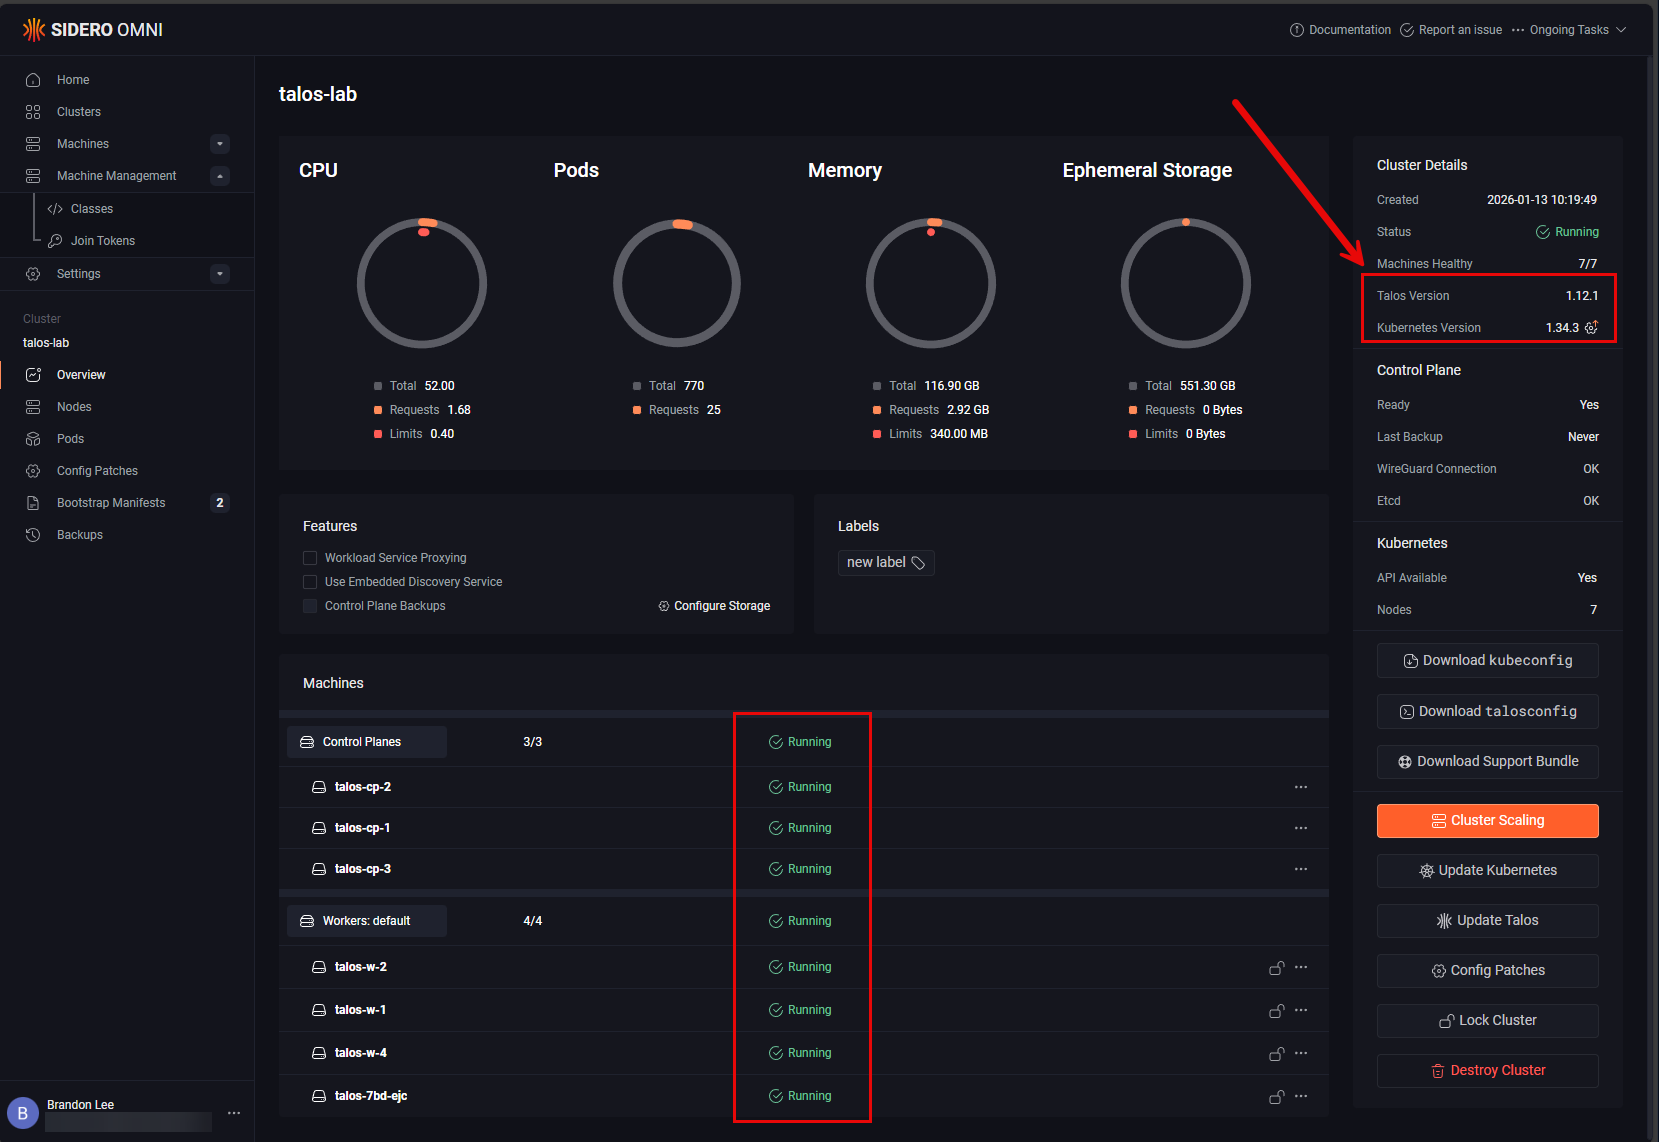
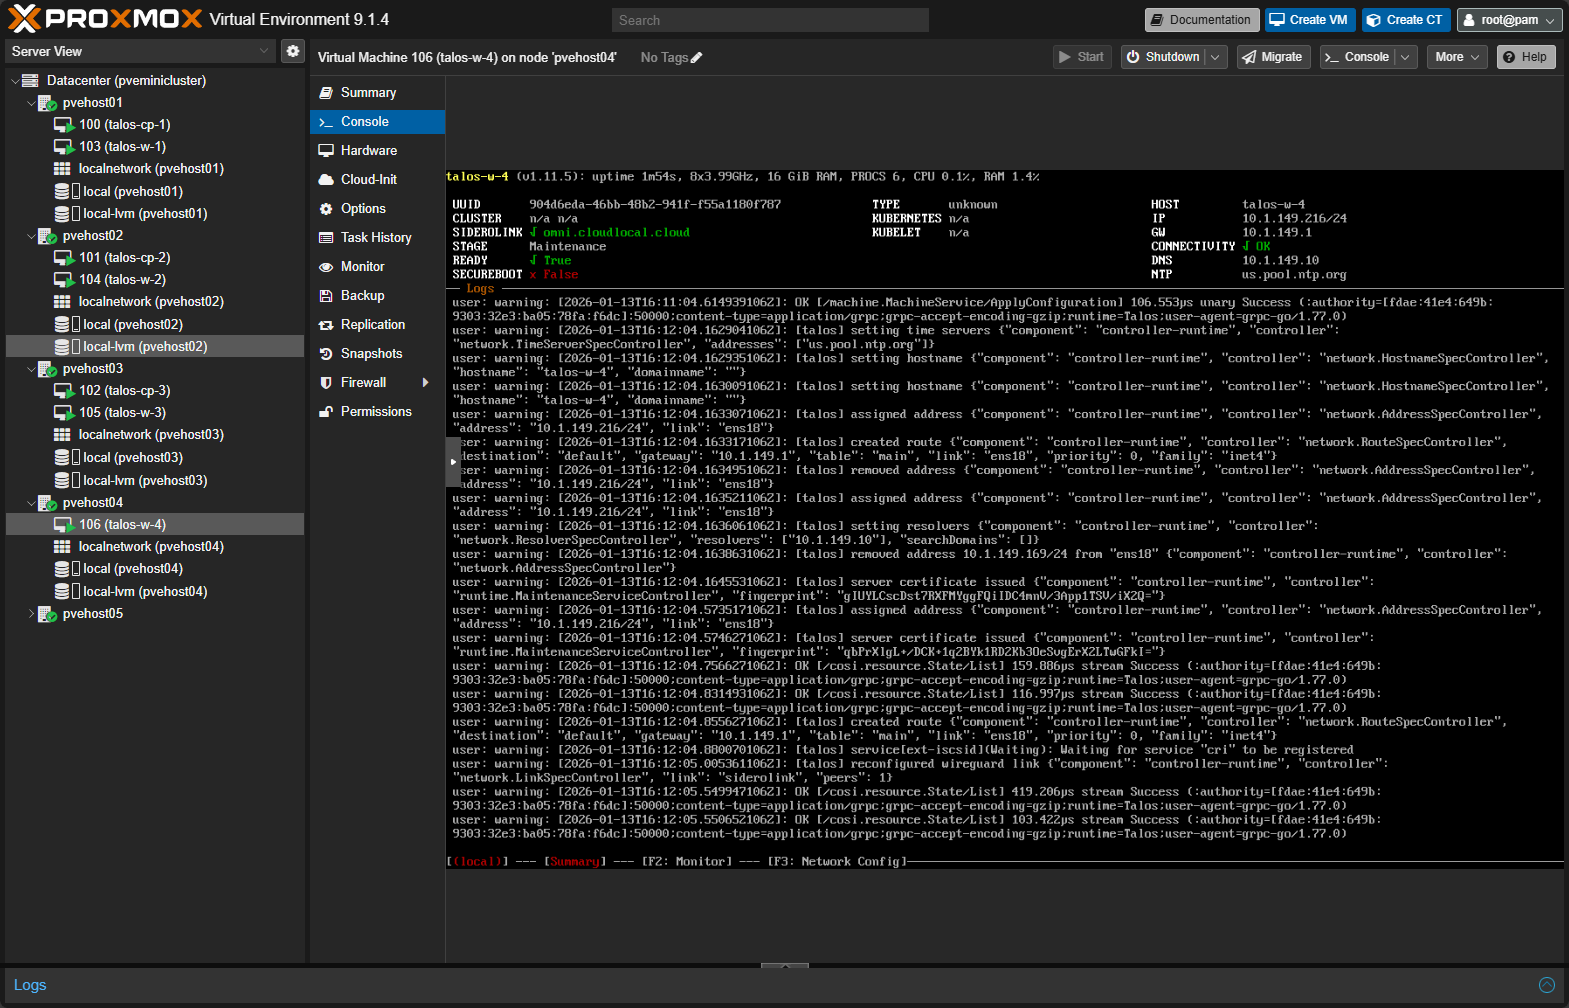
After I have downloaded my kubeconfig file, I was able to see my nodes from the command line:

Next plans for this setup
So I have everything up and running and next on my list is looking at which Kubernetes storage I want to use in the lab. There are so many great technologies, but I want to find the right one that works and is what I need for this setup for persistent storage. Let me know your ideas here that you would suggest.
I also have not made cabling nice and neat in the mini rack so right now everything is just kind of strung inside without a lot of organization. My plan of action was to just get everything up and running first and configured as there is inevitably always a reason to take things out when you are in the building phase. So that is another step that is on my agenda for moving forward with this setup. I am super excited with how everything is running and how the project has turned out so far.
Wrapping up
How about you? What are your plans for 2026? Are you building out a mini rack Proxmox Kubernetes cluster? Are you building out a full size rack or something else? Do let me know in the comments. I would be curious to see what everything is thinking about for 2026 with their home labs.
Google is updating how articles are shown. Don’t miss our leading home lab and tech content, written by humans, by setting Virtualization Howto as a preferred source.
About The Author