I am constantly on the lookout for new tools that can help with managing resources in the home lab. Reverse proxies are extremely important and useful since they allow you to manage routing traffic into your containerized and other resources by using a DNS name instead of an IP. This way you don’t have to access containers using their default non standard ports, etc. Also, they allow you to manage your SSL certificates using Let’s Encrypt. I have used and worked with many reverse proxies in the lab, including Nginx Proxy Manager, Traefik, Pangolin, and Caddy. However, there is a new one that I was actually blown away by in terms of features and functionality. It is called Zoraxy. Could this be the best reverse proxy to use for home labs? Let’s see.
What Zoraxy Is and its background
If you haven’t heard of this very cool reverse proxy, it is a modern reverse proxy that gives you web routing and it is extremely fast and lightweight since it is written in Go. It has a strong focus on usability. The core goal of the project is to give users and home labbers a powerful reverse proxy that has a modern interface and doesn’t need a deep knowledge of Nginx configuration syntax or complicated rules file edits.
It is very much akin to the benefits of Nginx Proxy Manager in that it encourages you to think of your resources in terms of services, domains, and routing. So, in the home lab, you just need to know where the app lives, which domain it should respond to, and if it needs TLS.
Even though it is built around the premise of being easy, it doesn’t sacrifice other more advanced features like WebSockets, automatic HTTPS, multiple routing modes, access controls, and it even does load balancing. We will get into more of what it offers below.
Check out the official project GitHub repo here: GitHub – tobychui/zoraxy.
How it is different from Nginx Proxy Manager
Nginx Proxy Manager has been the proxy that I have long recommended for beginners to use and it still is a great choice if you want to start there. However, Zoraxy has a few benefits and advantages to note. It’s written in Go so it is lighterweight. It is more configurable and gives you more options.
The interface I found to be more robust than Nginx Proxy Manager and can do more like work with more CAs like ZeroSSL or other custom SSL providers. It also has a better interface for point and click selecting your Docker containers you have running or picking a custom target as I will show below.
Take a look at the comparison below:
| Feature / Area | Zoraxy | Nginx Proxy Manager |
|---|---|---|
| Primary Focus | Simple and clear solution for routing web trffic | UI driven management of Nginx |
| Core Engine | Custom Go based proxy | Nginx |
| Web UI | Very modern and intuitive for the most part | Functional but more utilitarian |
| TLS and certificates | Built in ACME support with clear visibility | Built in Let’s Encrypt integration |
| WebSocket support | Enabled by default | Supported but sometimes requires manual tweaks |
| Routing | Domain and path based routing with visual clarity | Domain based routing with advanced options |
| Configuration | UI first with sensible defaults | UI backed by generated Nginx configs |
| Difficulty to learn? | Very intuitive, a little steeper learning curve than NPM since it has more options | Not difficult. You don’t have to even understand Nginx at all if you don’t want and just rely on the UI |
| Monitoring | Has monitoring built in and shows history of reachability | Has basic up or down for proxy hosts but not a history graph |
| SSO and OAuth 2.0 | Has SSO and OAuth 2.0 built-in | No built-in SSO or OAuth 2.0 support |
| Resource usage | Lightweight and efficient | Lightweight but tied to Nginx |
| Best suited for? | Home labs wanting a simple and fast setup and lots of features | Still the simplest interface but fewer options |
Install Zoraxy using Docker
Let’s look and see how to get up and running with Zoraxy in the home lab. The below Docker compose code is my code from a test Docker container host I have running. You will see my bind mounts listed below. Just change these to what you need in your environment.
This is pretty straightforward otherwise, including mounting the Docker socket and setting timezone, creating network, etc. I added a custom DNS server as I am doing some split horizon DNS trickery in my environment. You can strip that out if not needed.
services:
  zoraxy:
    image: zoraxydocker/zoraxy:latest
    container_name: zoraxy
    restart: unless-stopped
    networks:
      - zoraxy
    ports:
      - 80:80
      - 443:443
      - 8000:8000
    volumes:
      - /home/linuxadmin/homelabservices/zoraxy/config/:/opt/zoraxy/config/
      - /home/linuxadmin/homelabservices/zoraxy/plugin/:/opt/zoraxy/plugin/
      - /var/run/docker.sock:/var/run/docker.sock
    extra_hosts:
      - "host.docker.internal:host-gateway"
    dns:
      - 10.1.149.10
    environment:
      FASTGEOIP: "true"
      TZ: "America/Chicago"

networks:
  zoraxy:
    driver: bridge
    name: zoraxy
In the default configuration, ports 80 and 443 handle incoming traffic. Then port 8000 is used for the management interface. So once you have your Docker compose file in place, just run the standard command to bring up the stack:
docker compose up -d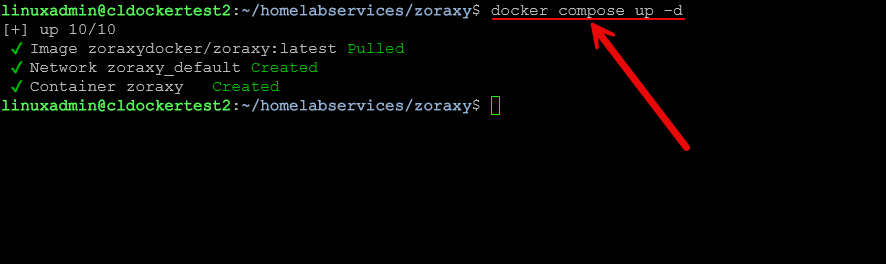
You can then do a simple:
docker compose psThis will show you if the container is healthy, etc.

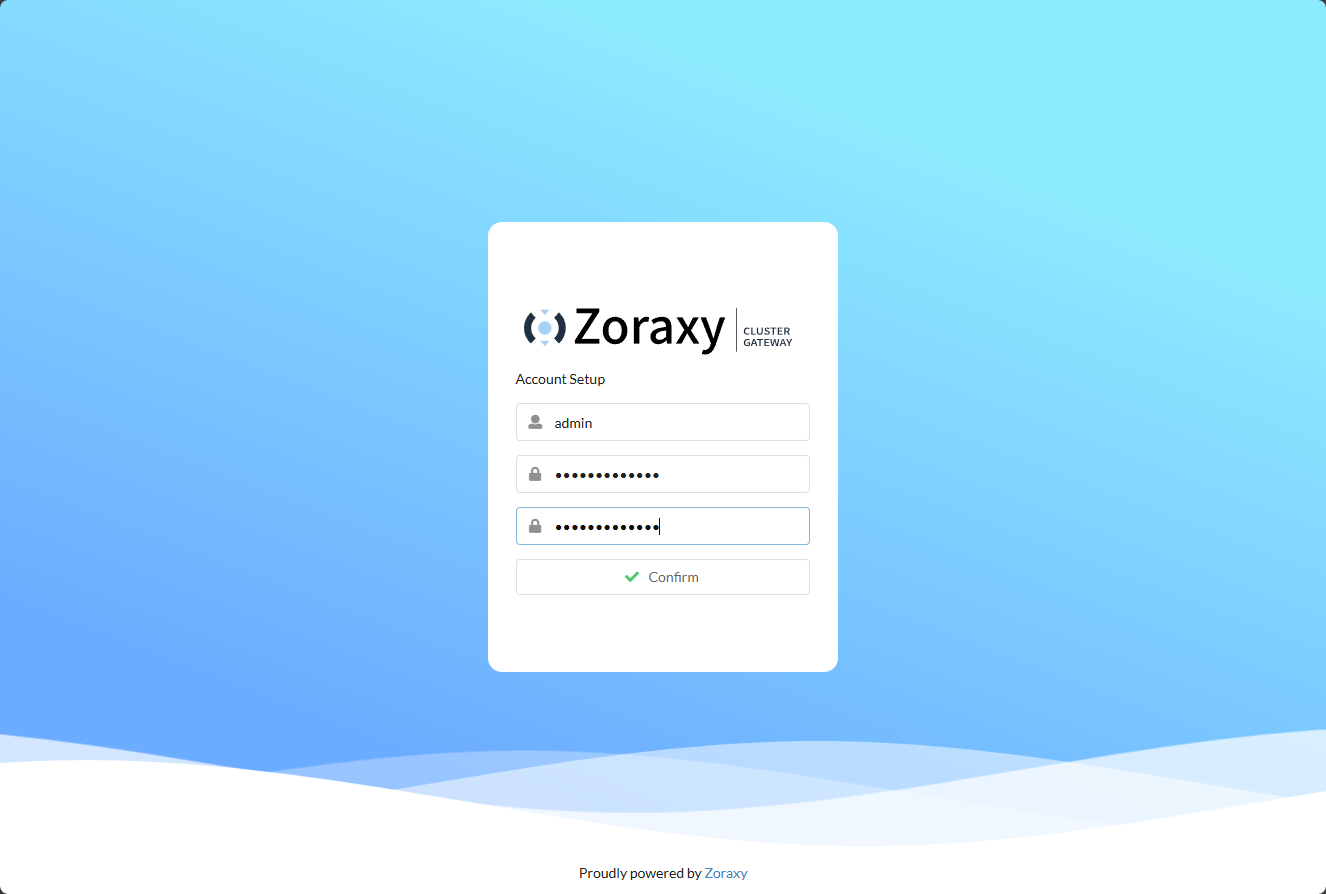
Browse out to port 8000 on the host. It will ask you to create your first admin account and password.
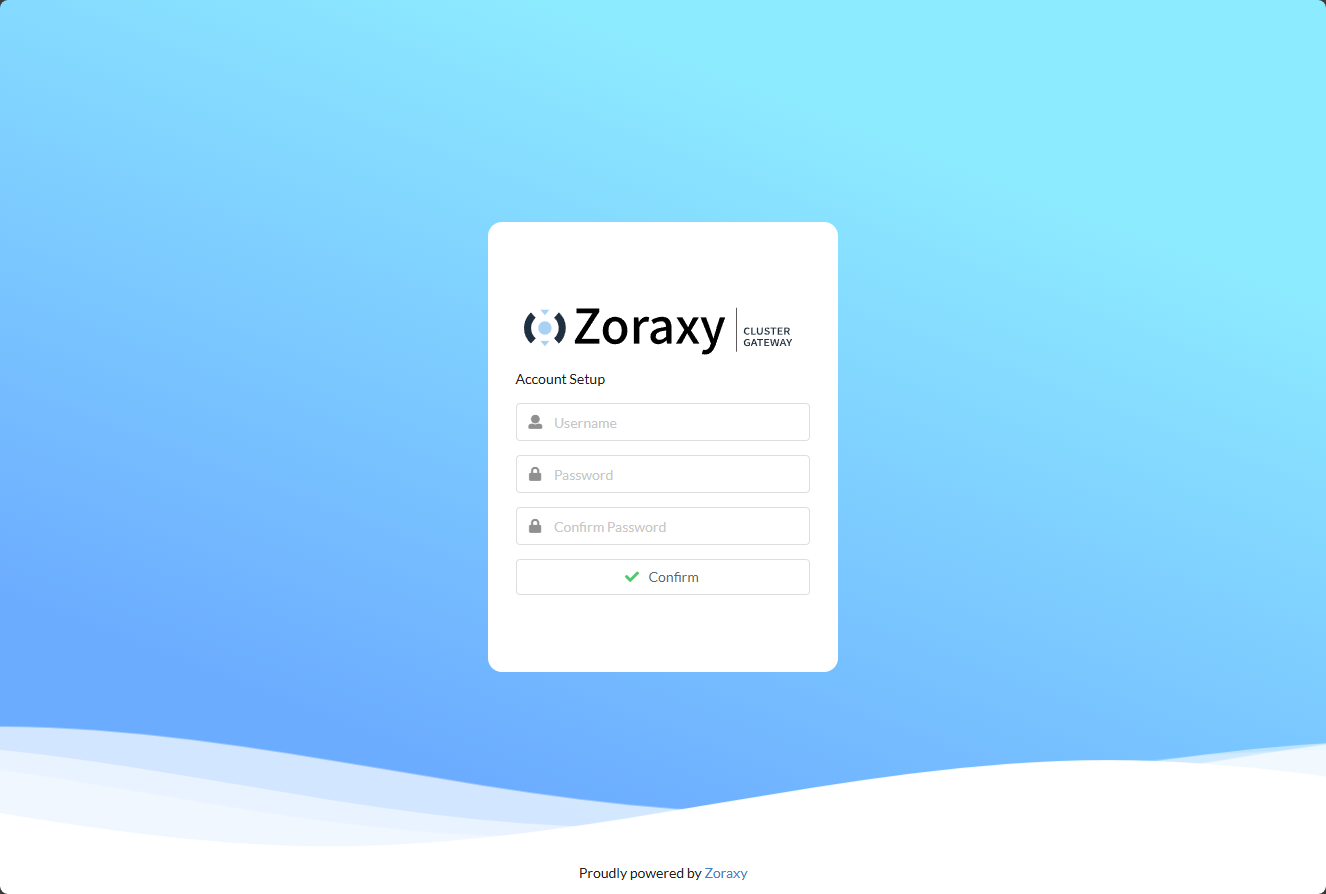
Creating the first admin account.
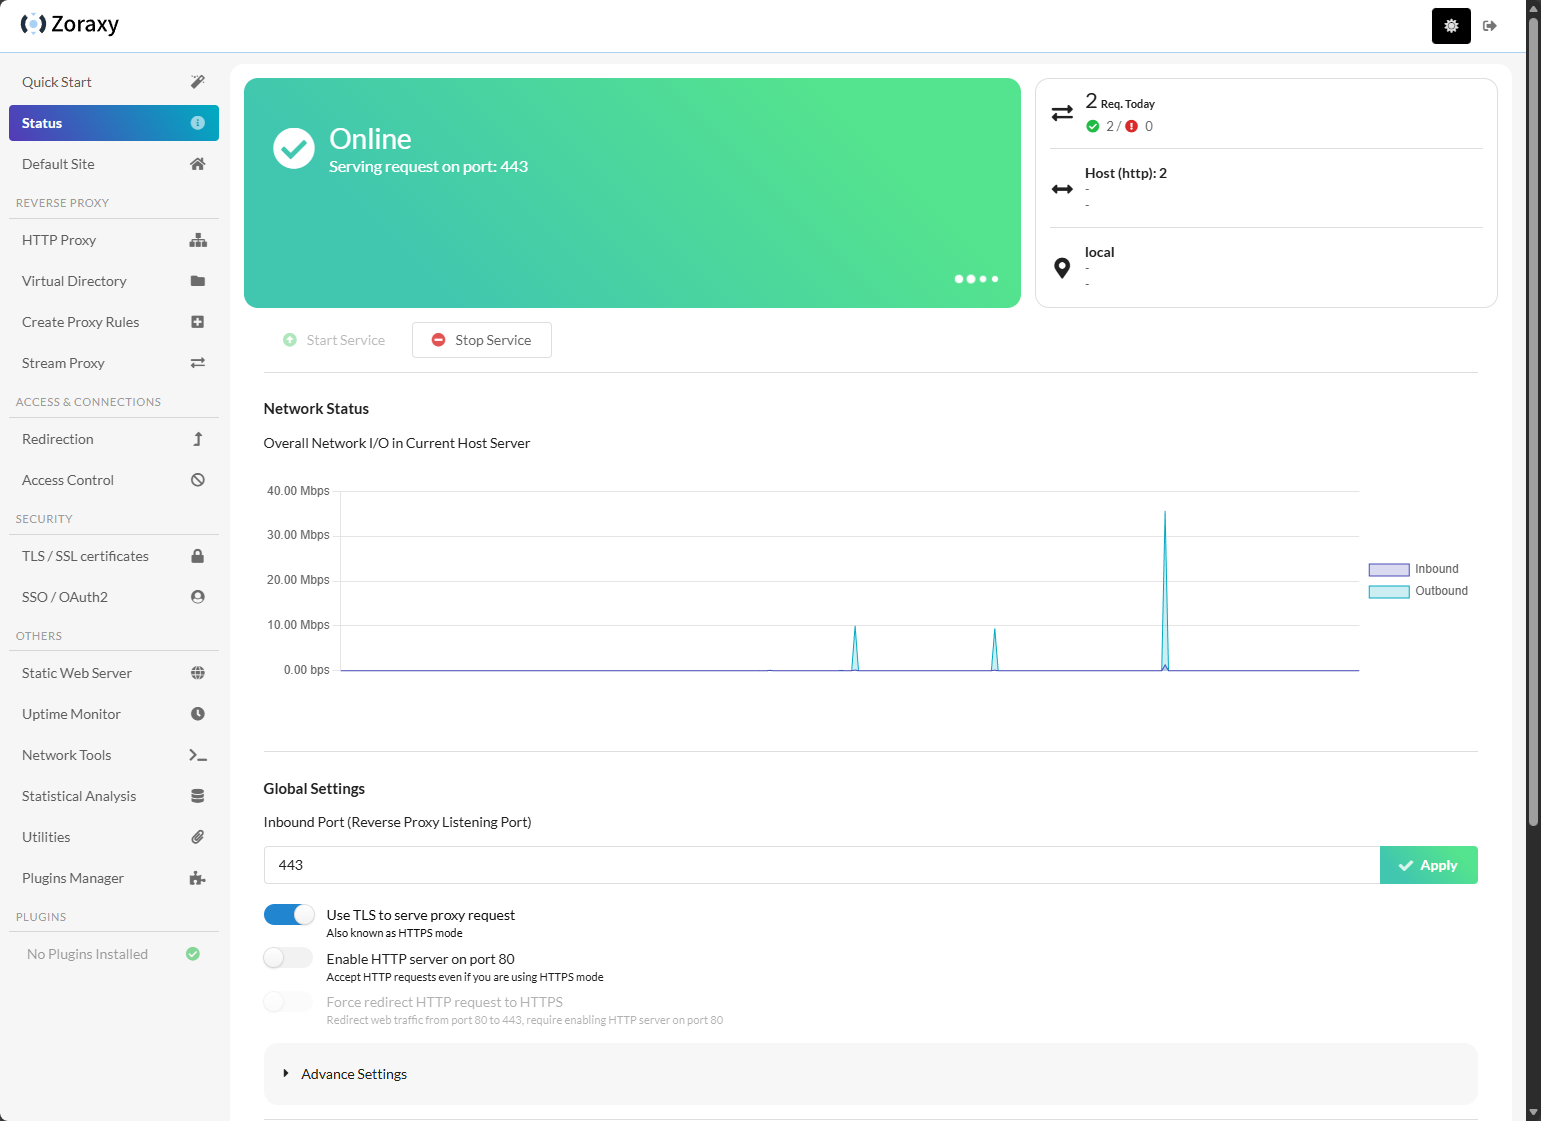
After creating the account and logging in, here is the default dashboard. The solution looks really really good. And I like the modern layout with the menus on the left and slick dashboards and toggles for configuration.
Simple walkthroughs to help learn Zoraxy
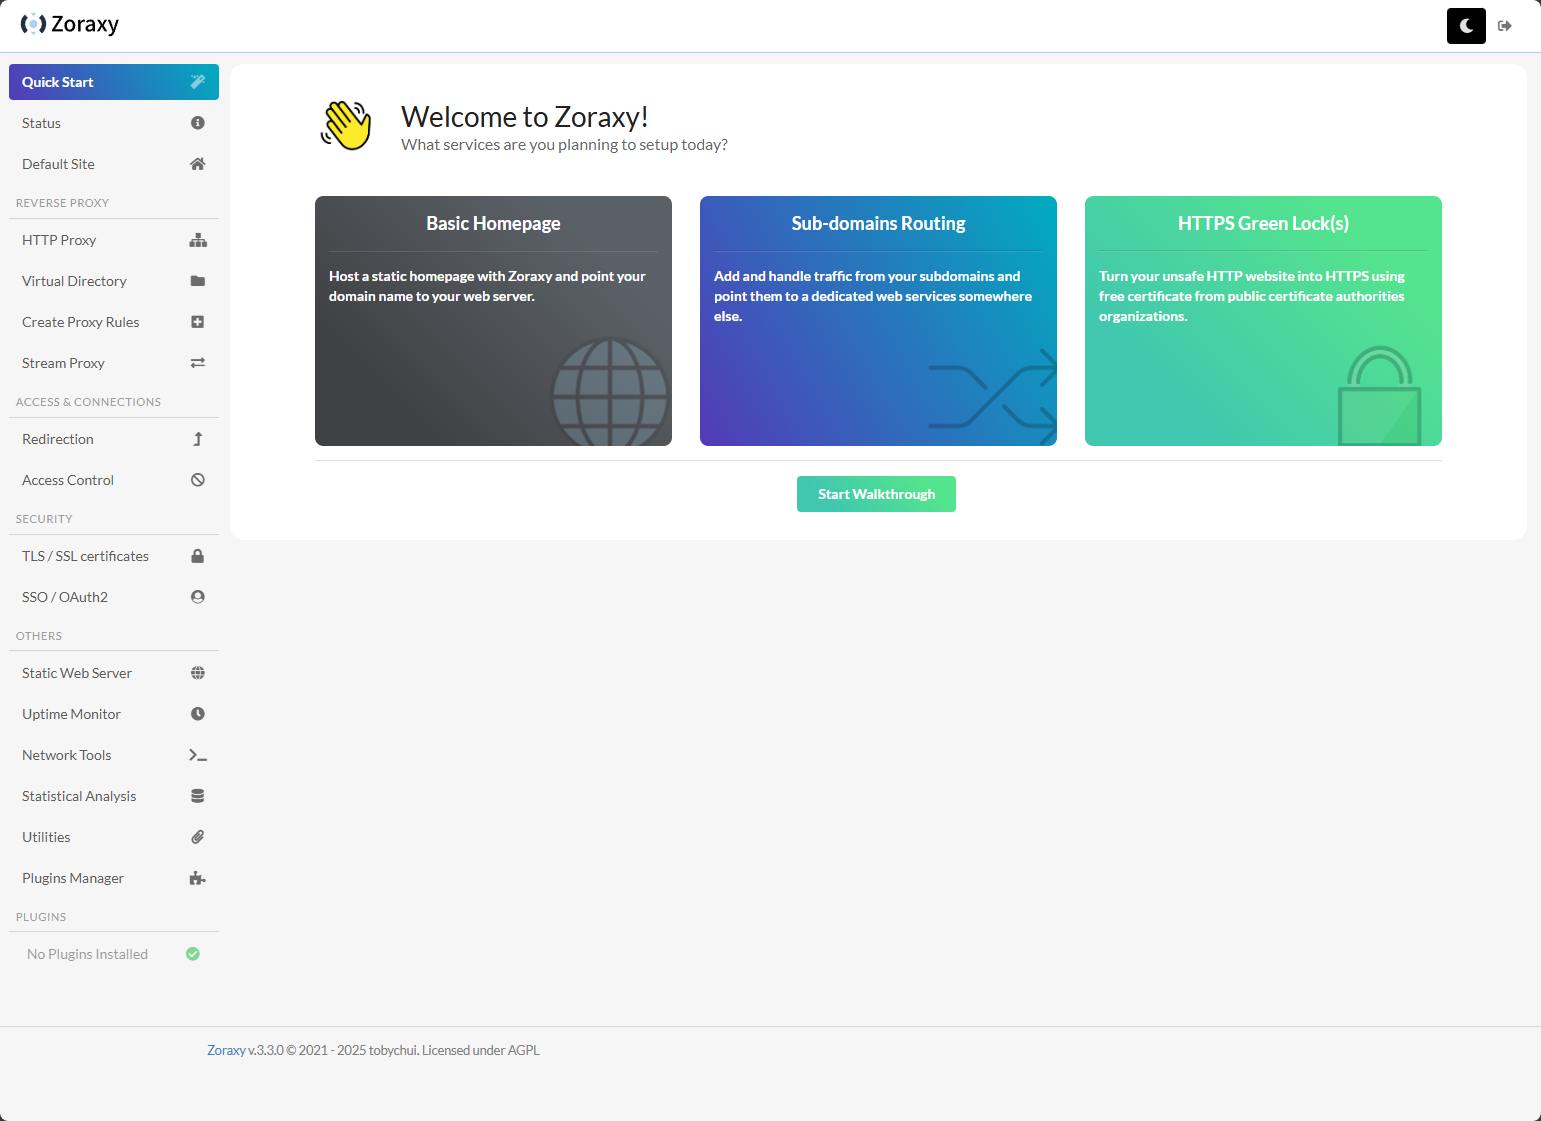
One of the very cool features I think about Zoraxy is the Quick Start walkthrough wizard. You can click one of the three types of endpoints that you want to configure, and Zoraxy will step you through the process, highlighting the areas of the interface where you need to make the configuration changes.
Let me show you what the HTTPS Green Lock(s) wizard looks like. Here you can click one of the three options.
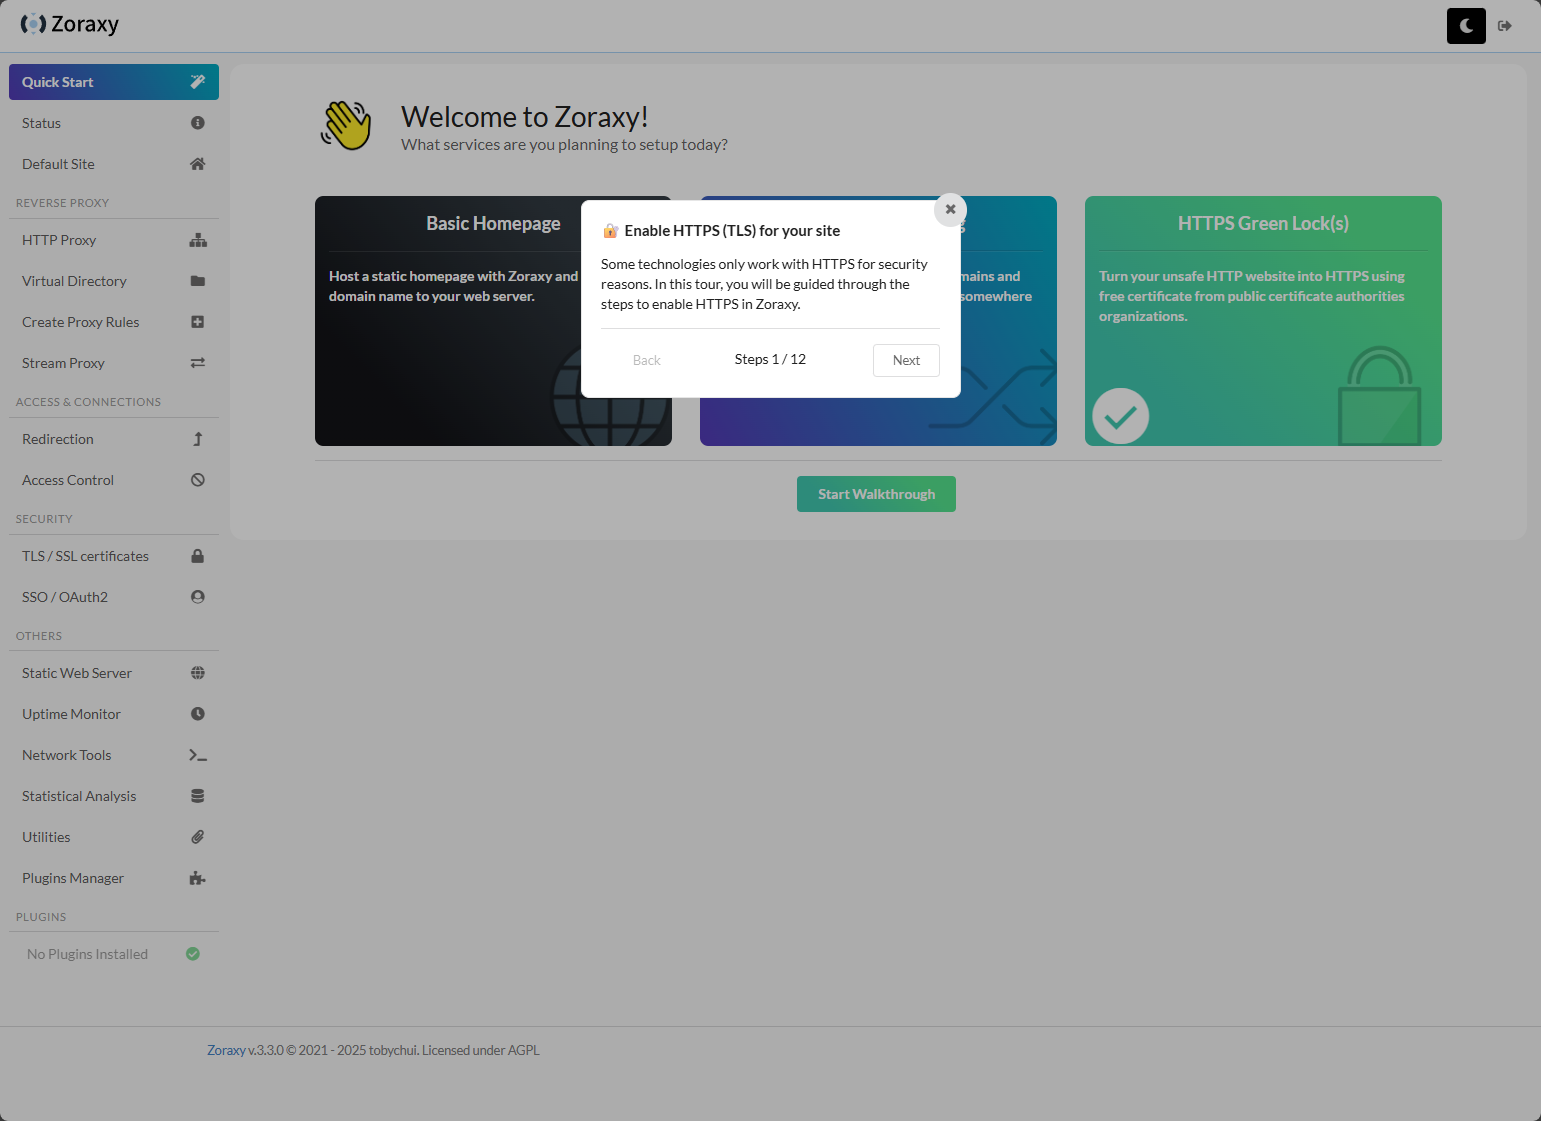
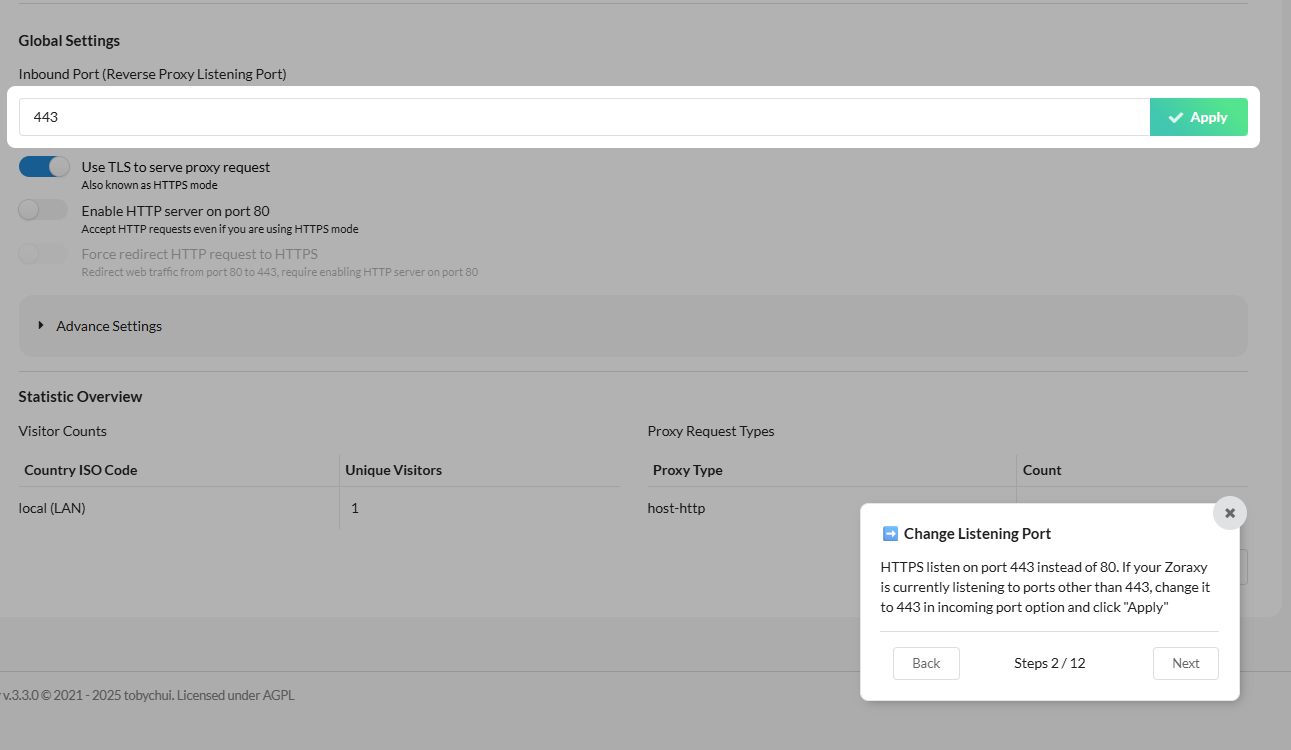
After clicking the HTTPS Green Locks, you can see the checkbox on that selector, then the dialog box opens to Enable HTTPS for your site.
Here we are shown how to change the listening port.
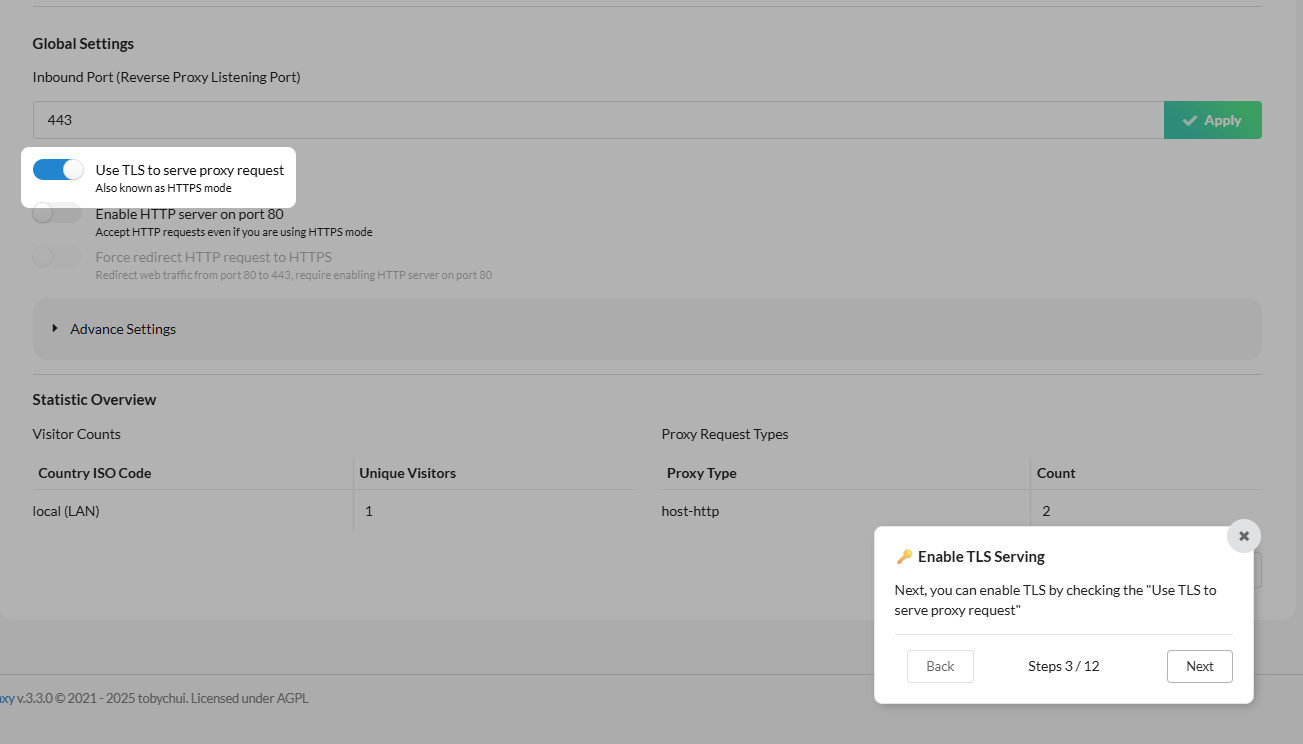
Next, we can enable TLS serving.
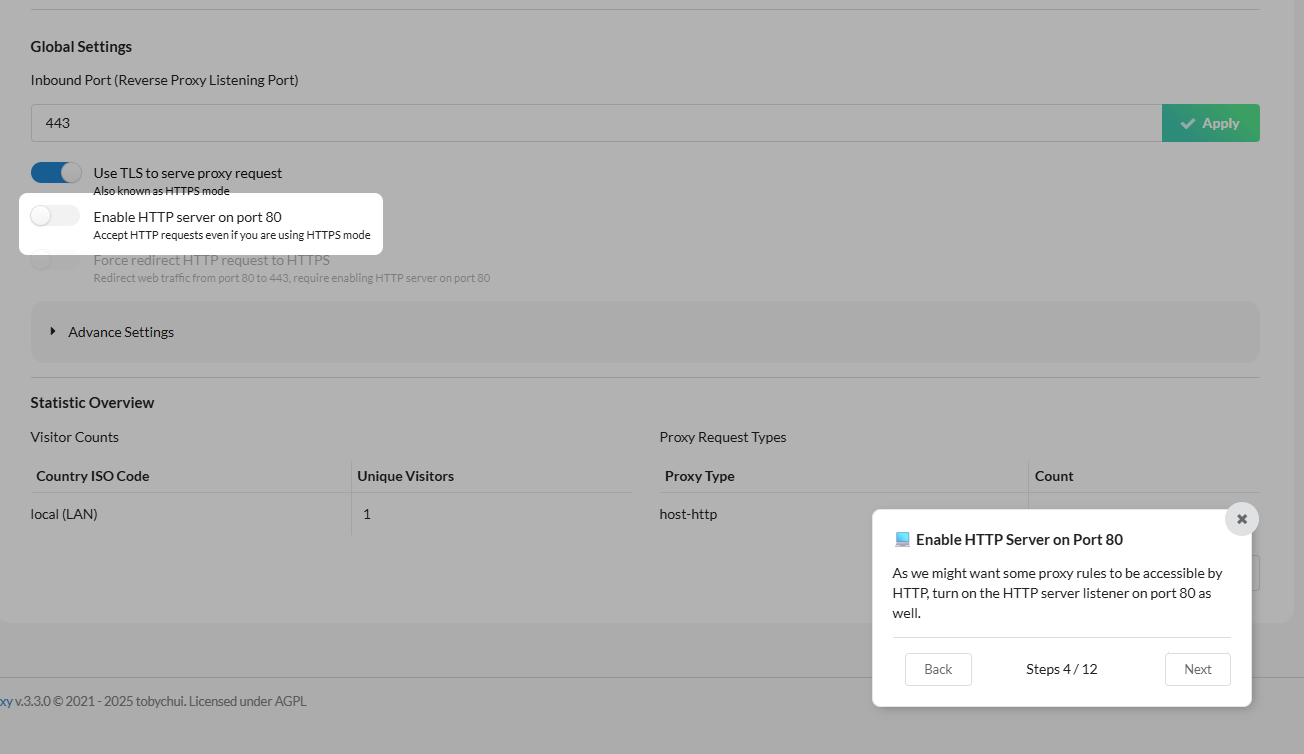
Also, you can enable port 80 HTTP.
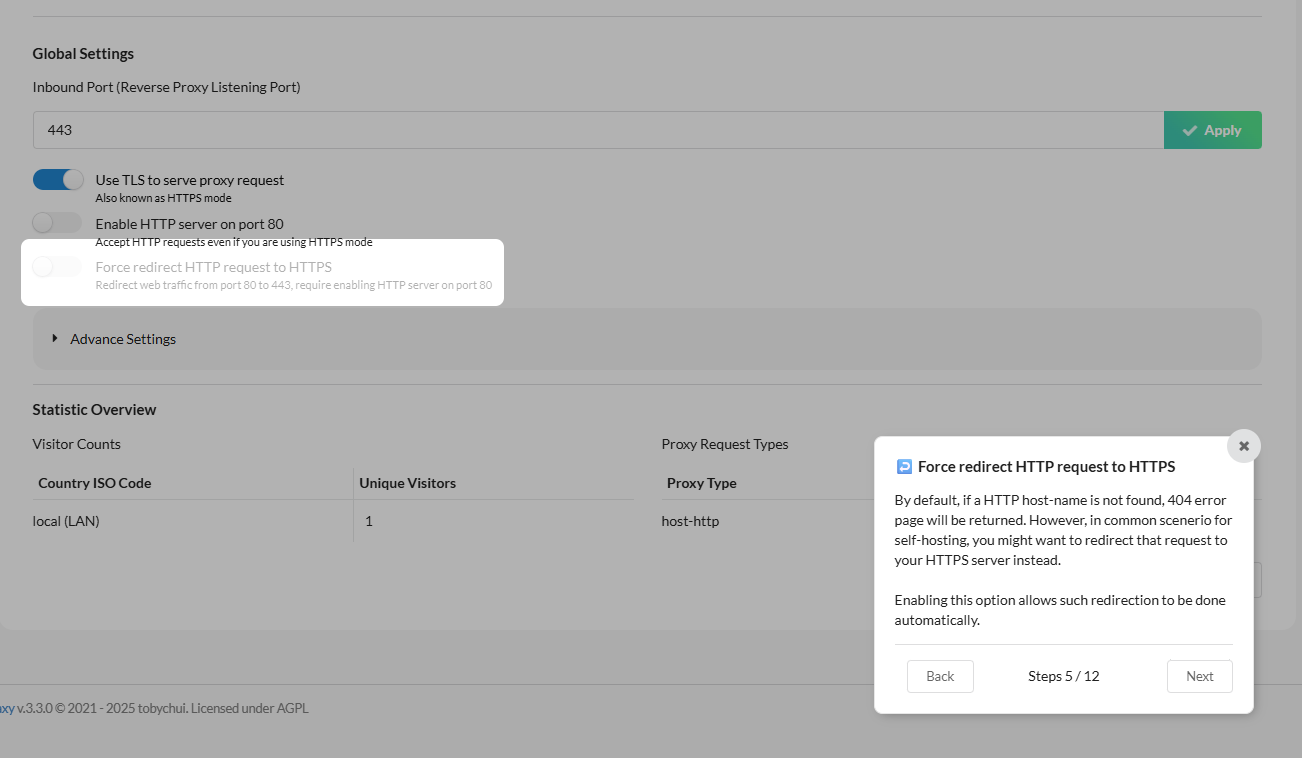
If you want to force a redirect to HTTPS, we can do that as well.
HTTPS is now enabled.

TLS/SSL certificates configuration as the next part of the wizard.

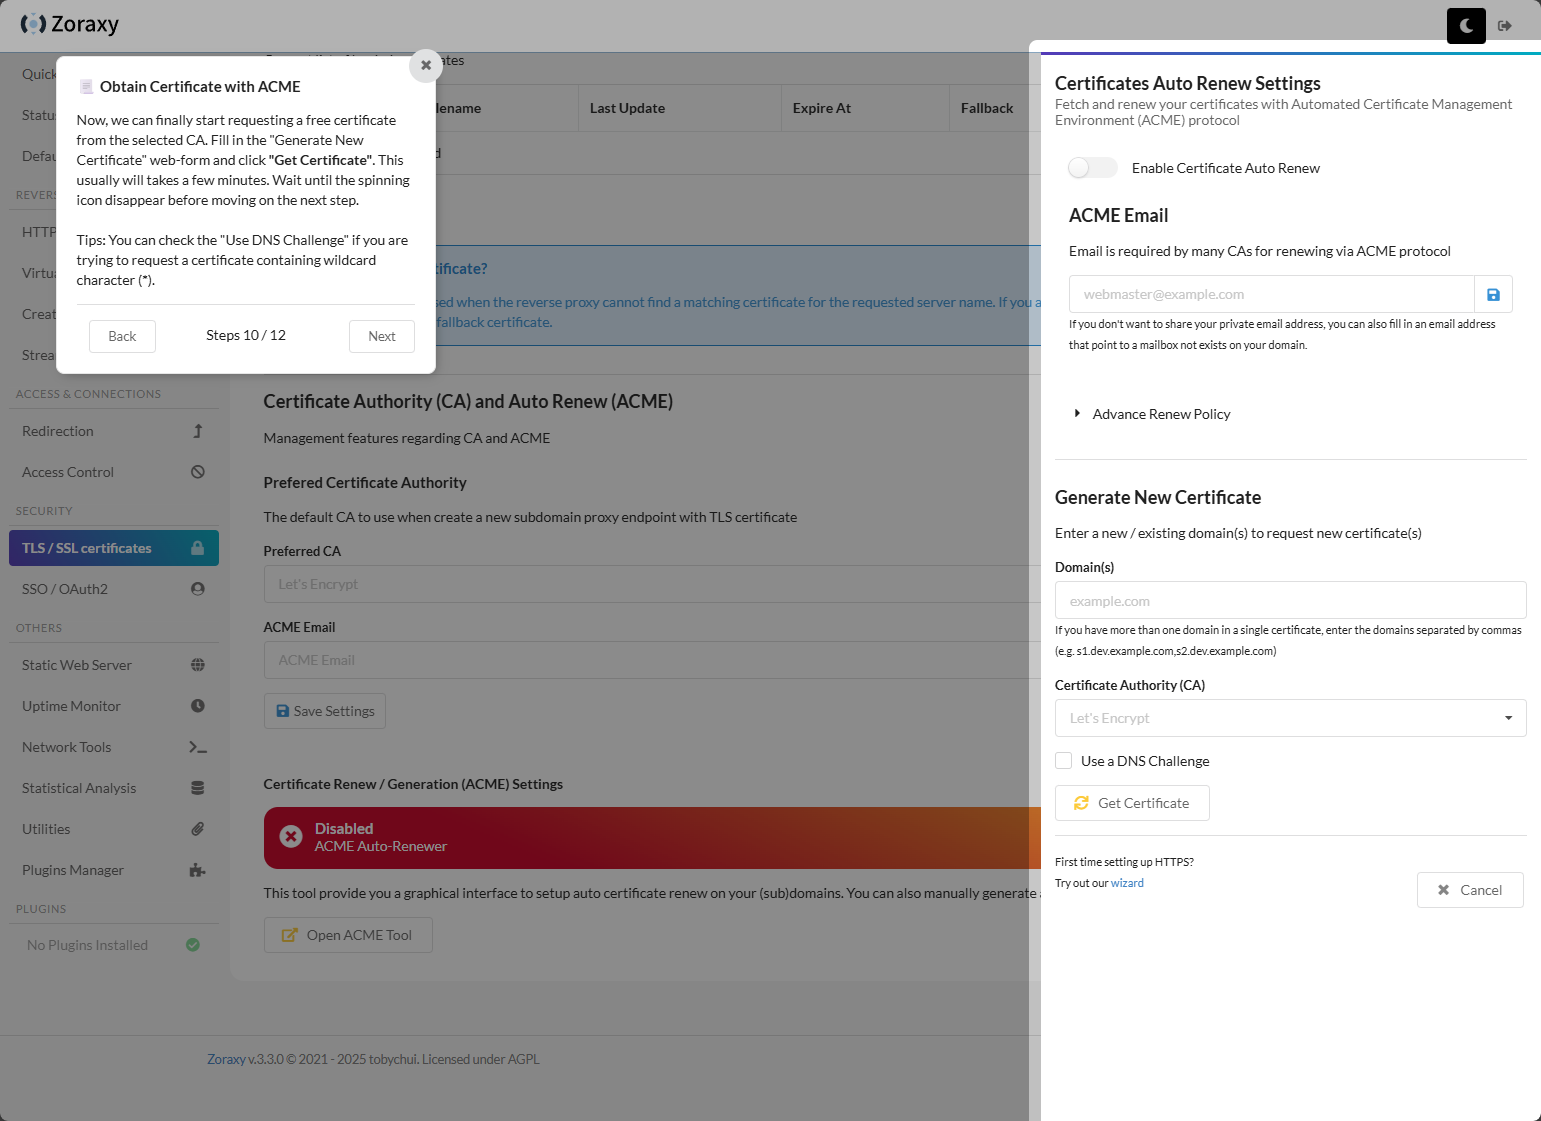
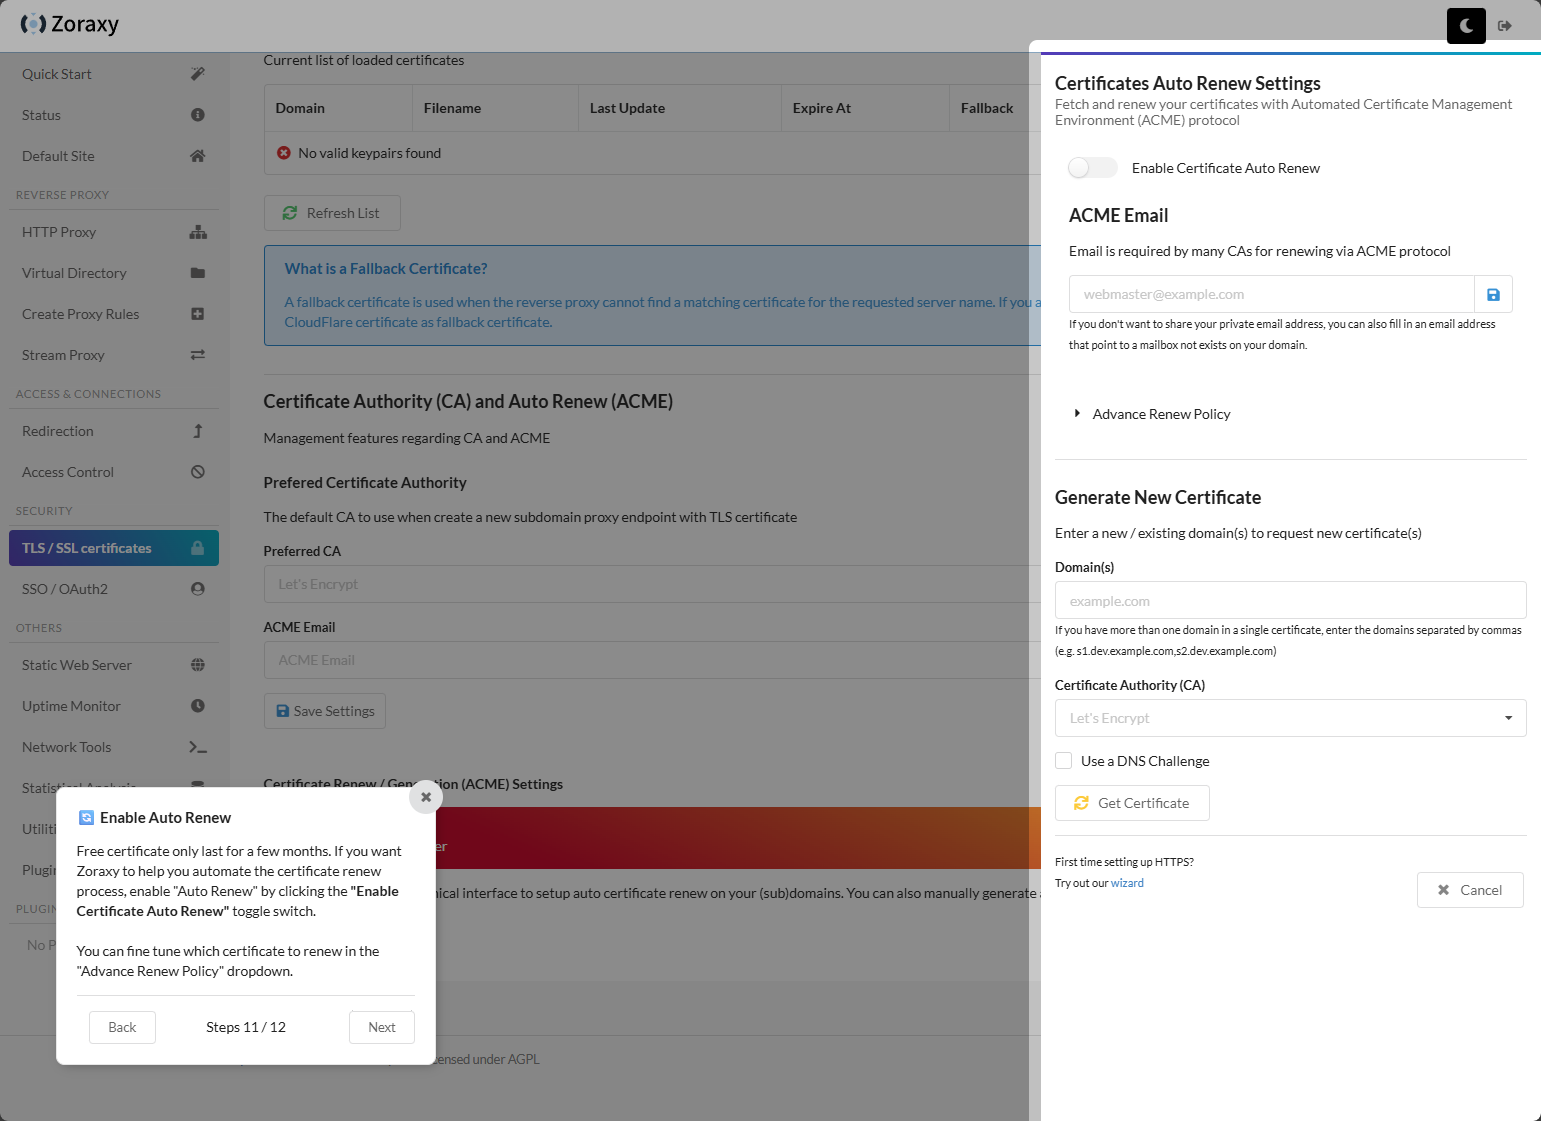
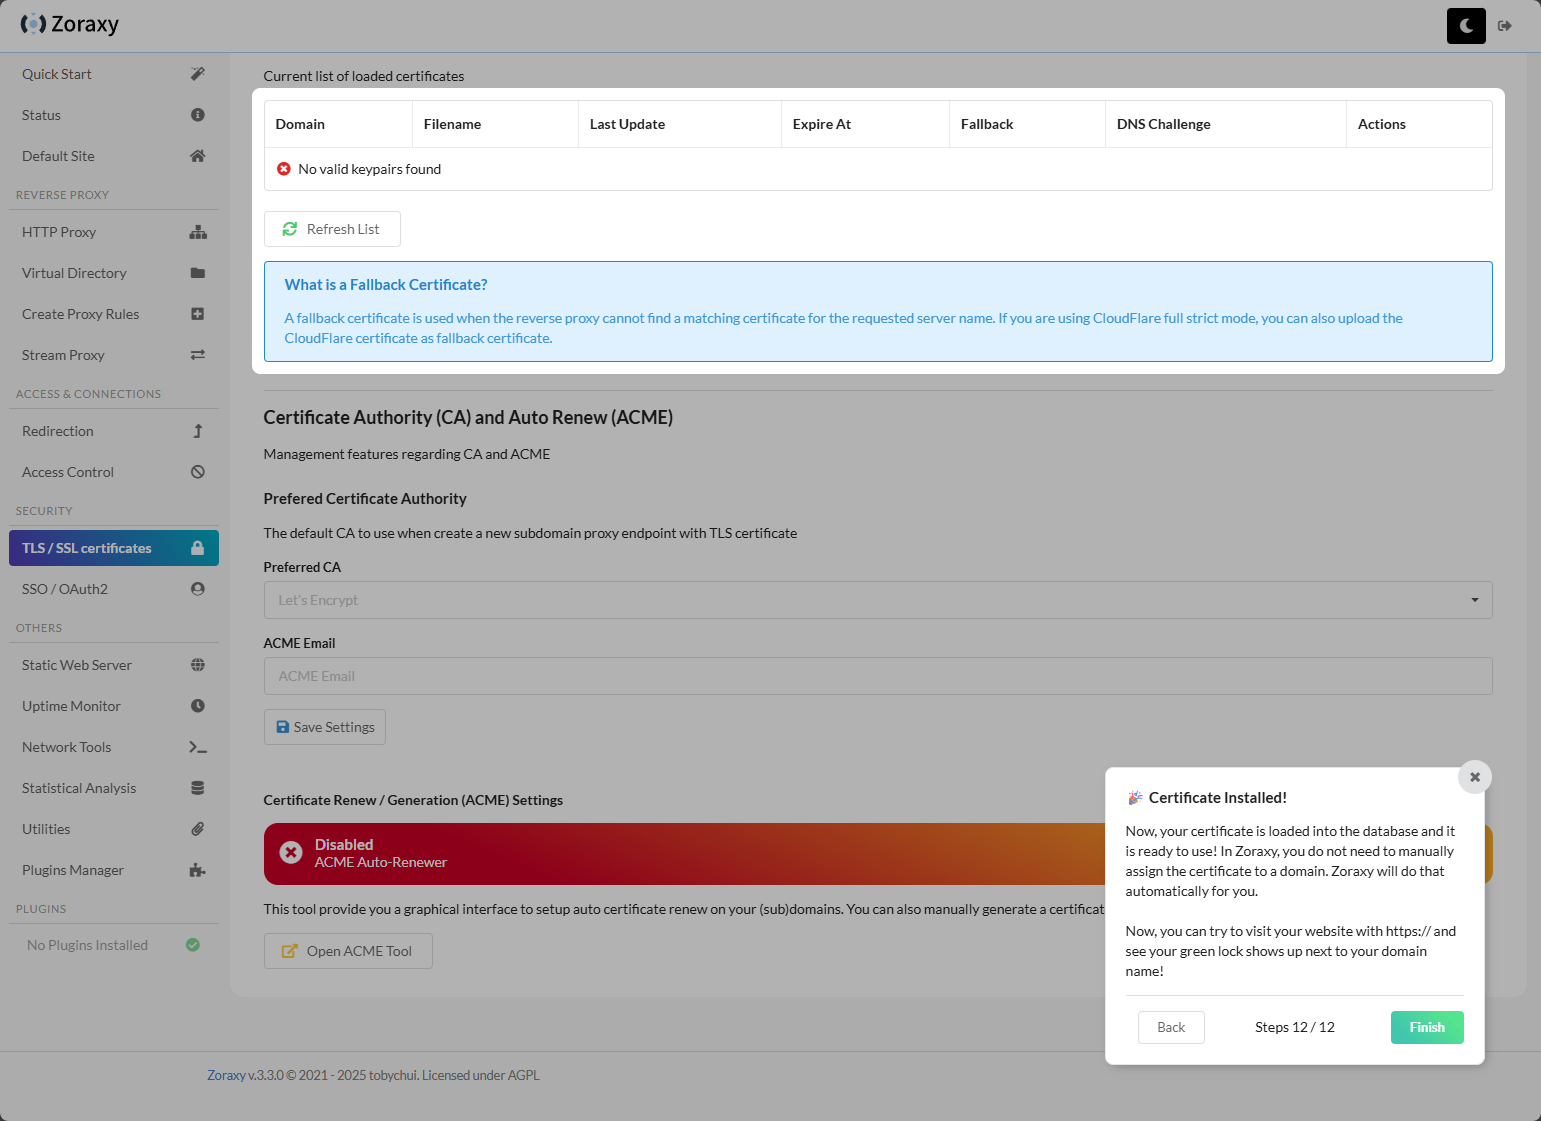
Showing how to setup ACME configuration and auto renew.
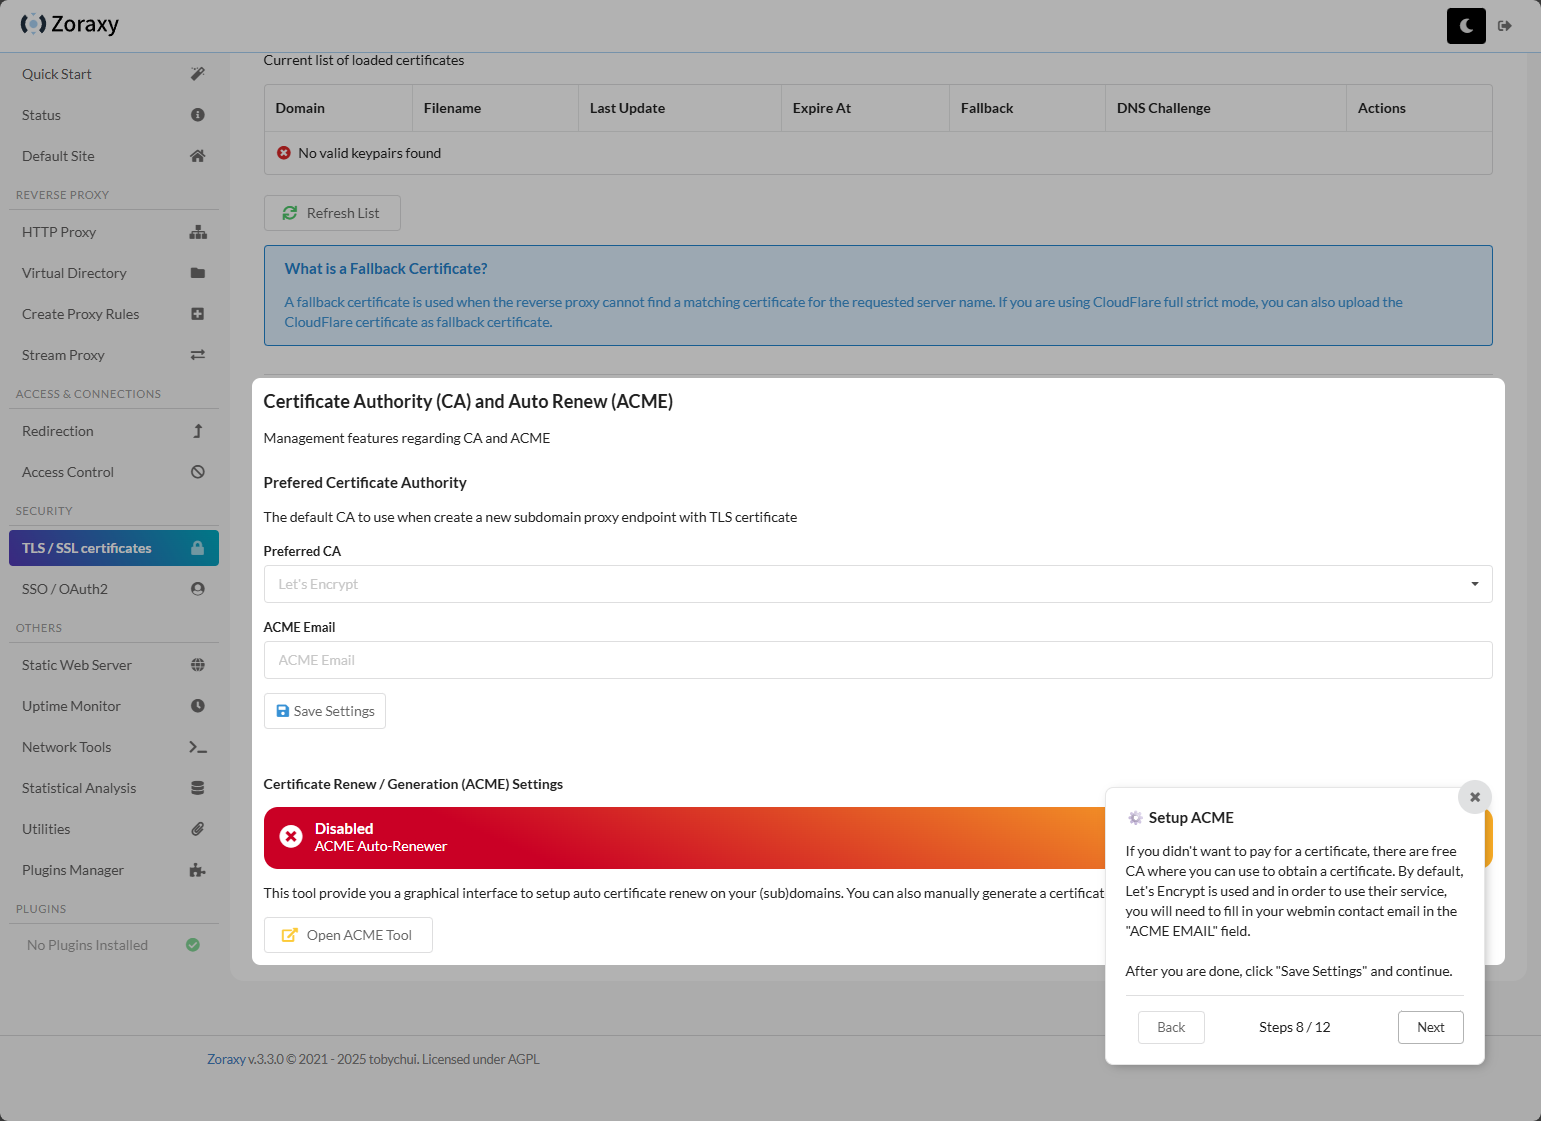
The ACME tool in Zoraxy.
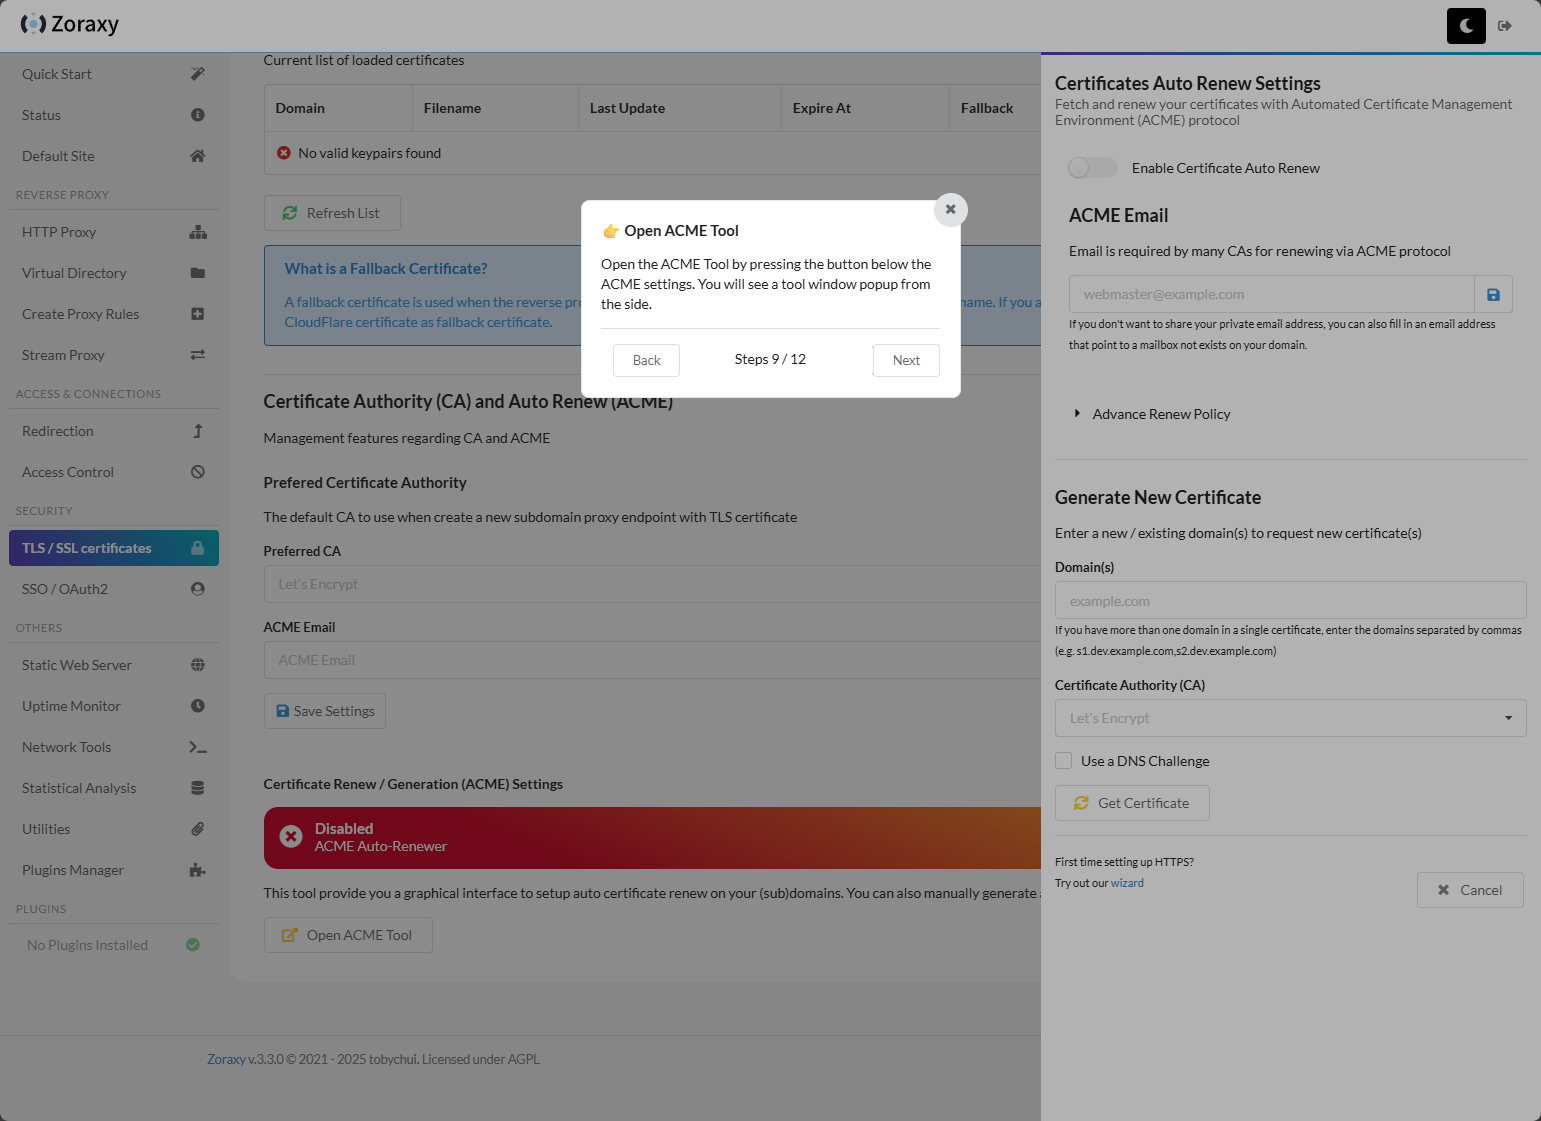
Configuring the auto renew settings, email, and where you can generate a new certificate. Like NPM and others, you can use DNS challenge. It supports a wide range of DNS providers.
Enabling auto renew.
Certificate installed as part of the wizard.
Configuring the ACME tool
After stepping through the wizard above where it shows you where everything is, I wanted to start configuring things manually just to learn the process. To get to the area of the interface where you can open the ACME tool and start configuring, you can navigate to TLS / SSL certificates > Open ACME Tool. This will pop out the side blade in the interface where you can configure the DNS challenge, etc.
You can see below, I am using Cloudflare. The information I found that it needed is the AuthEmail and AuthToken. Just put in your domain name, select the DNS challenge option, and configure your provider that you need for obtaining the certificate.

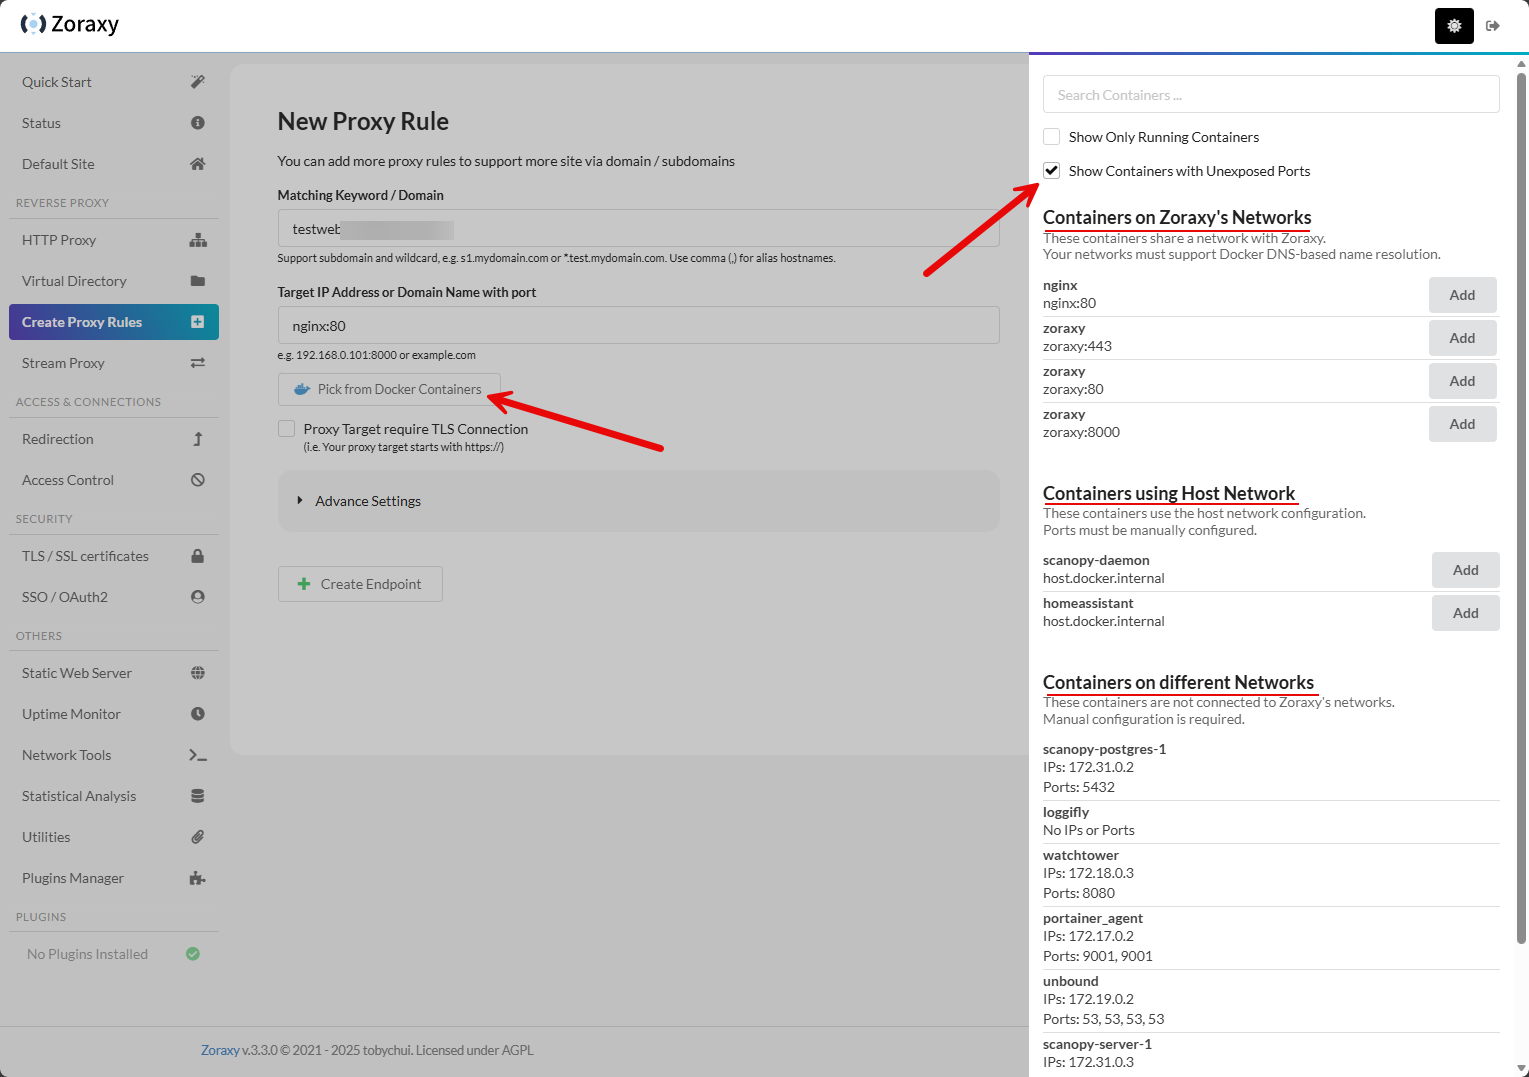
Creating a new Proxy Host
If I could make a suggestion to the developer here on the interface, it would be to combine the Create Proxy Rules menu with the HTTP Proxy menu as this would be more intuitive. I know I immediately went to the HTTP Proxy menu when I wanted to create a new proxy host. It seems like this additional menu is a bit redundant. But this is just a small gripe and hopefully something that might be considered.
Take a look at the darkened area here. I have clicked the Create Proxy Rules menu. This launches the New Proxy Rule workflow. What I really like about Zoraxy is the visibility it gives you when creating your proxy rules. I spun up a new Nginx container to have something to play around with for proxy traffic. Note how I clicked the Show Containers with Unexposed Ports. I had put the Ngin container on the same network as my Zoraxy container so I didn’t expose any ports. This allows you to see the containers on Zoraxy’s networks, but notice you also get Containers using Host Network and Containers on different networks. This is really cool that it gives you this level of information and granularity building your rule.
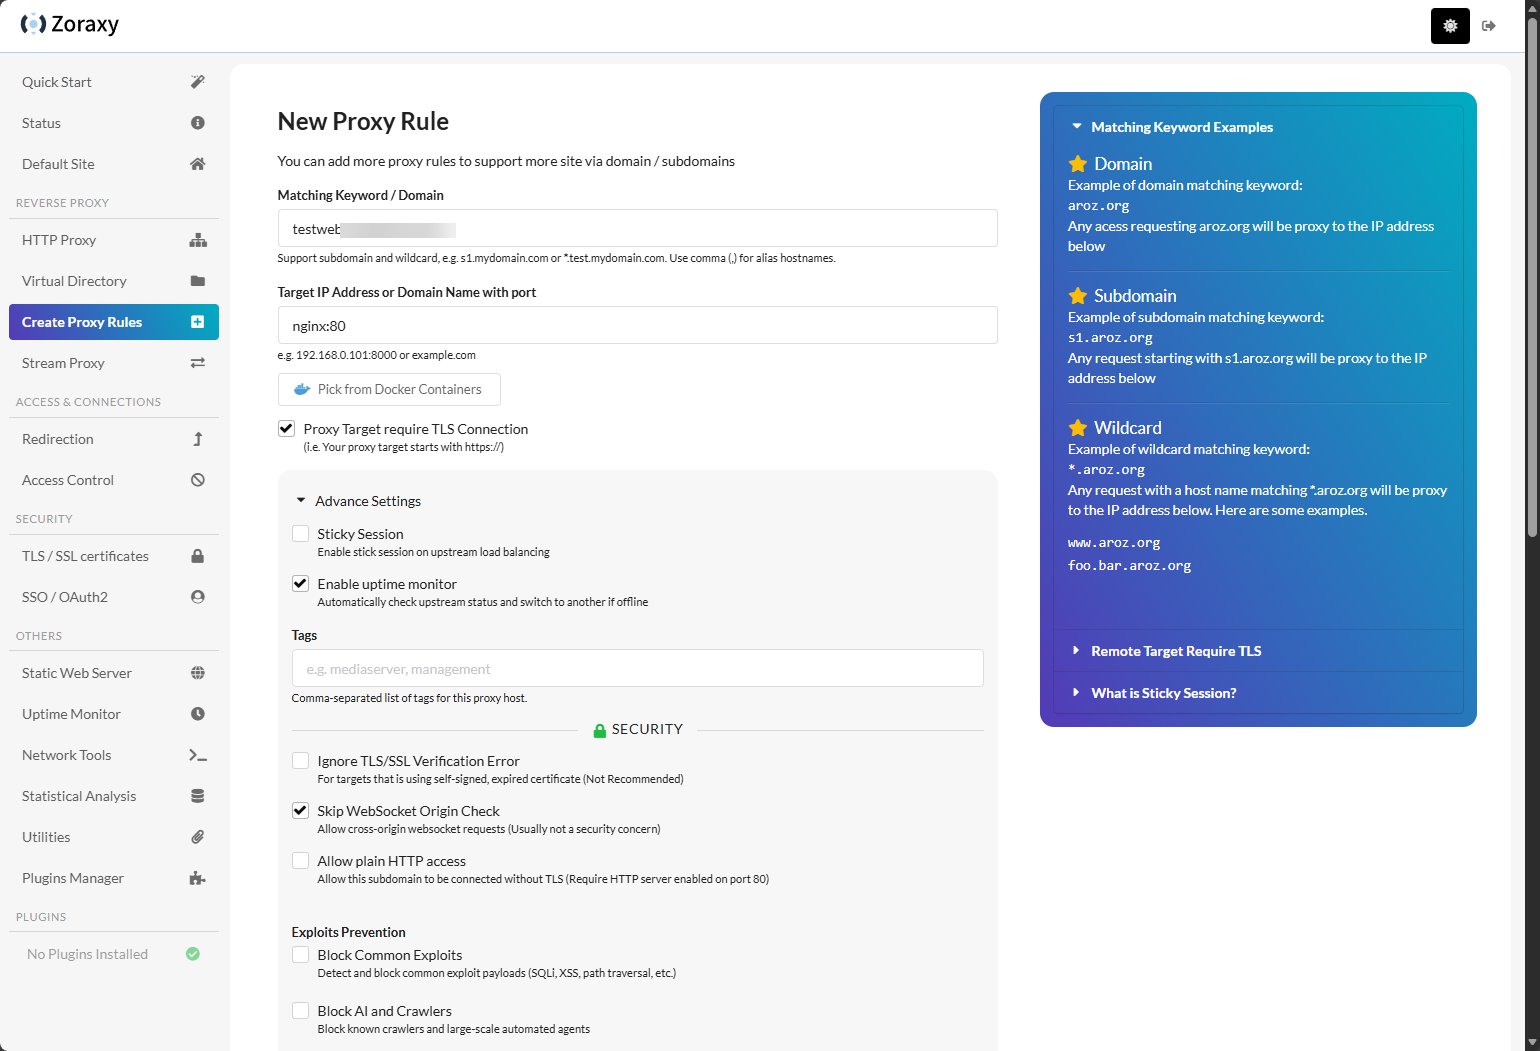
Here, I have expanded the Advanced settings so you can see some of the other settings you can set up. Note how if your container is setup on the backend to use SSL, you can set the Ignore TLS/SSL Verification Error if it is using a self-signed certificate. This is a handy setting.
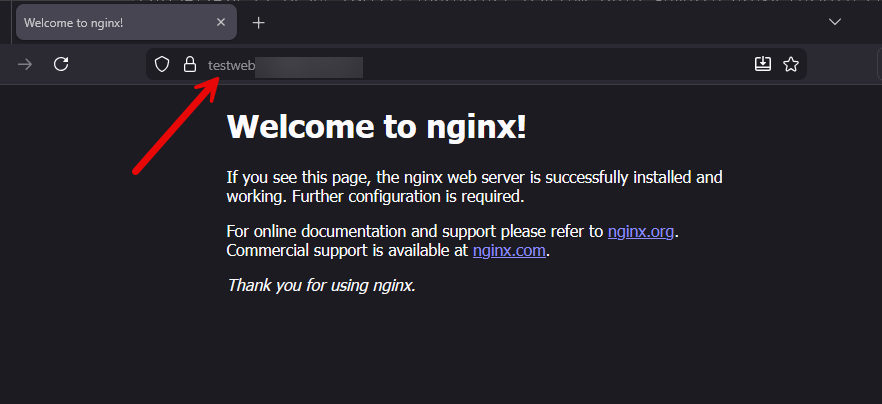
The proxy host will also automatically request a new SSL certificate for the host.
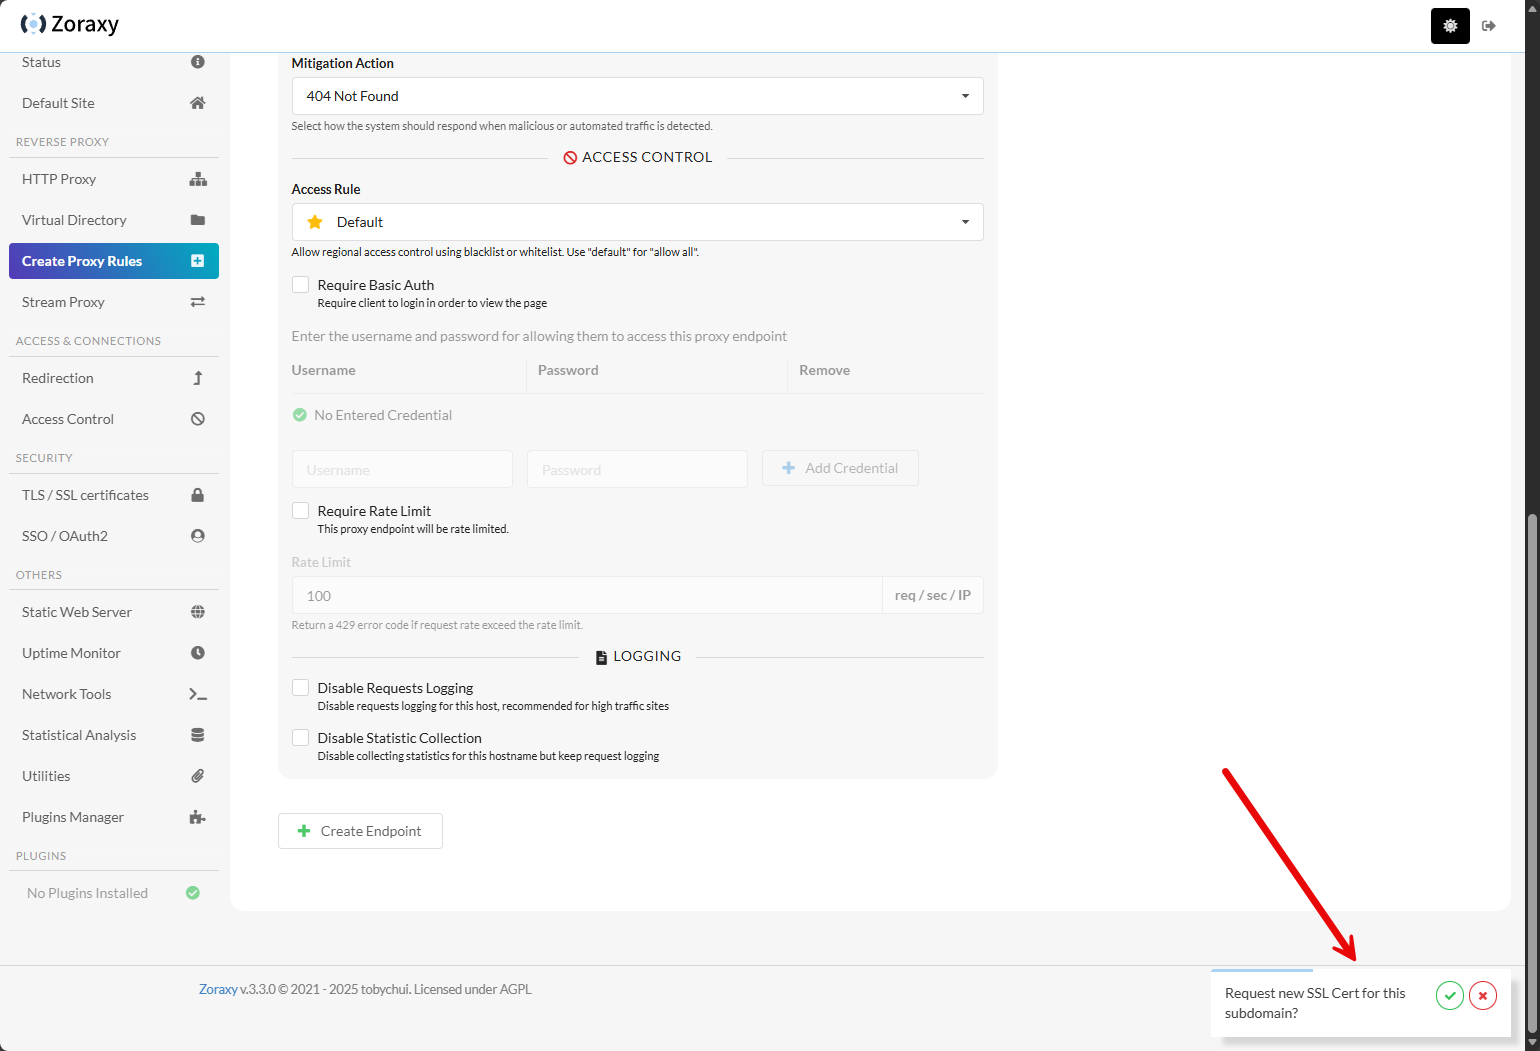
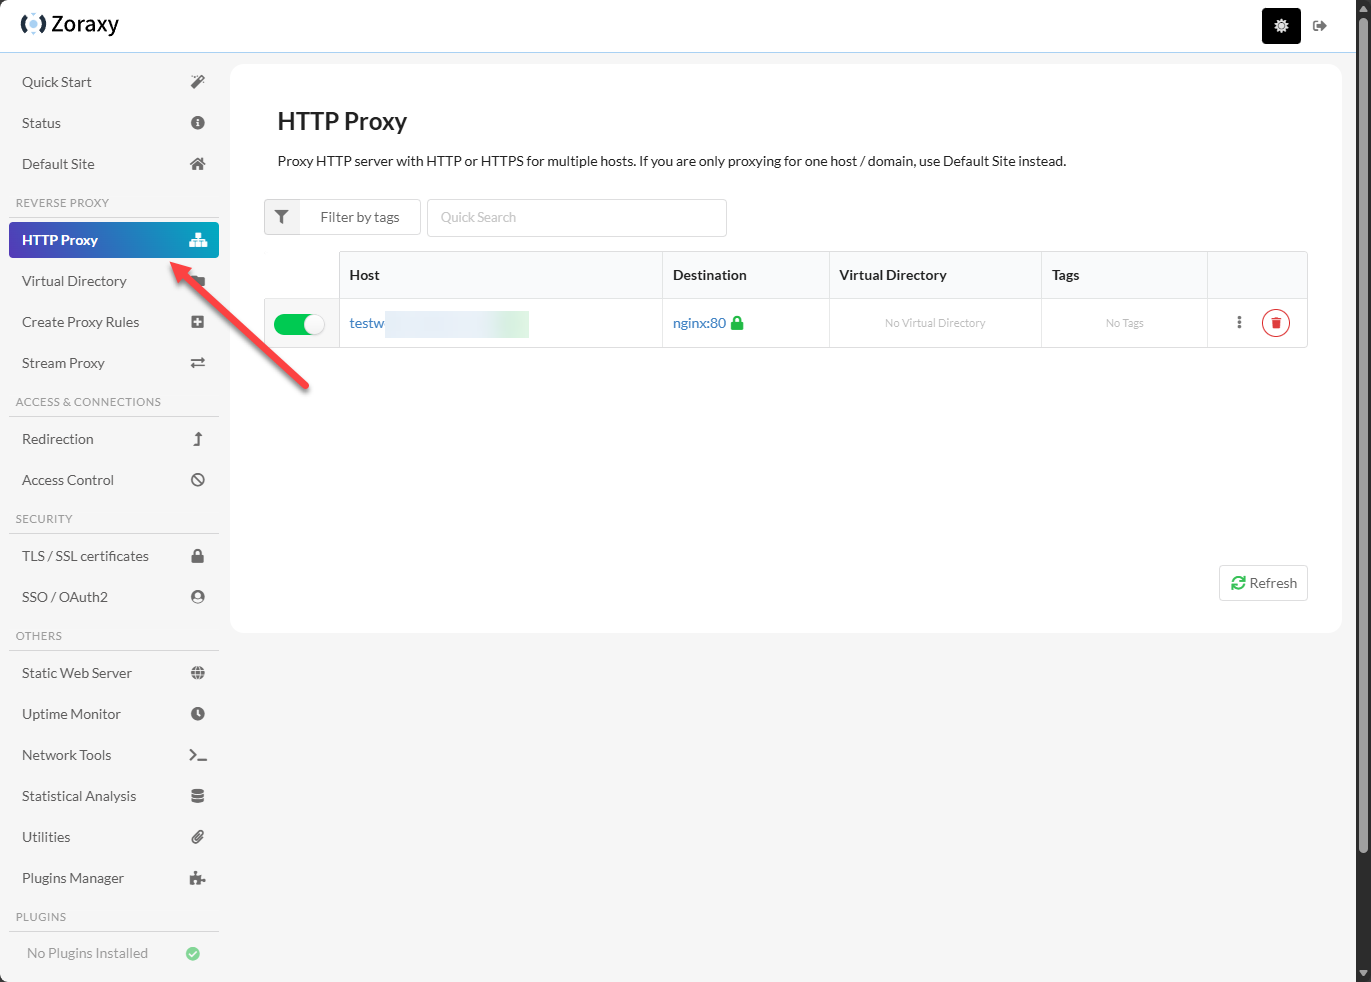
You can see below we have a proper certificate provisioned for the Nginx website.
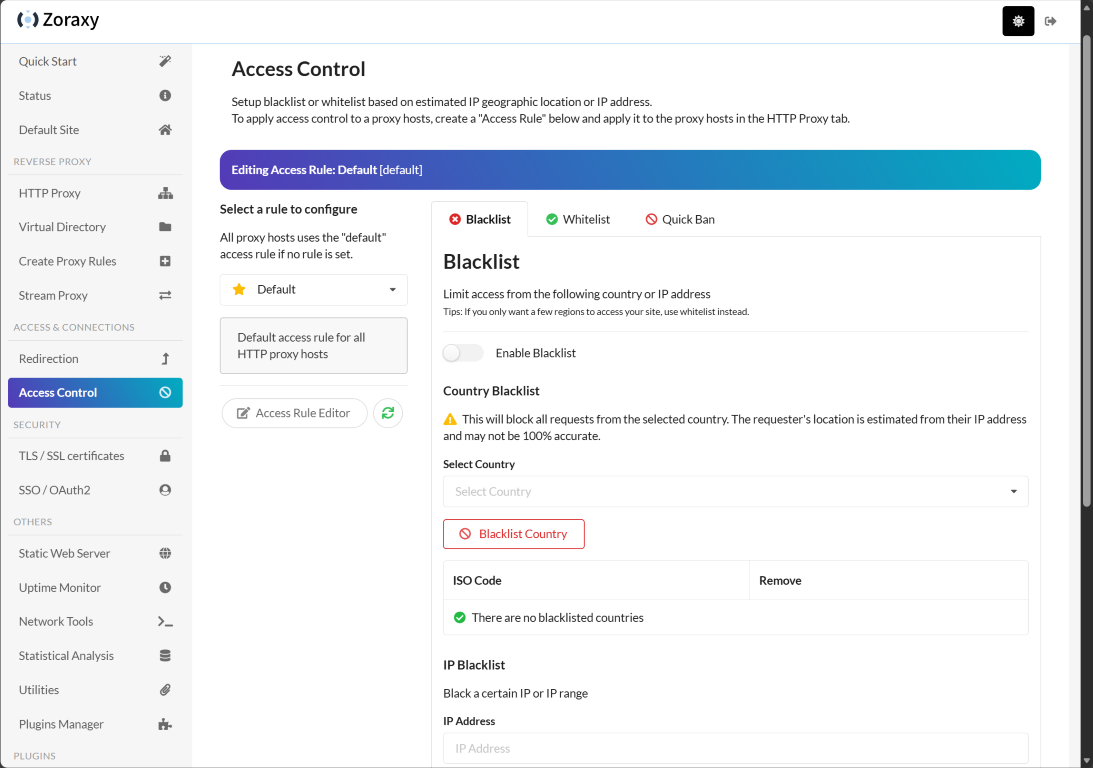
Access control
Zoraxy has a healthy configuration section for setting up access control for your hosts. You can whitelist and ban various IPs or ranges, or perform Quick bans.
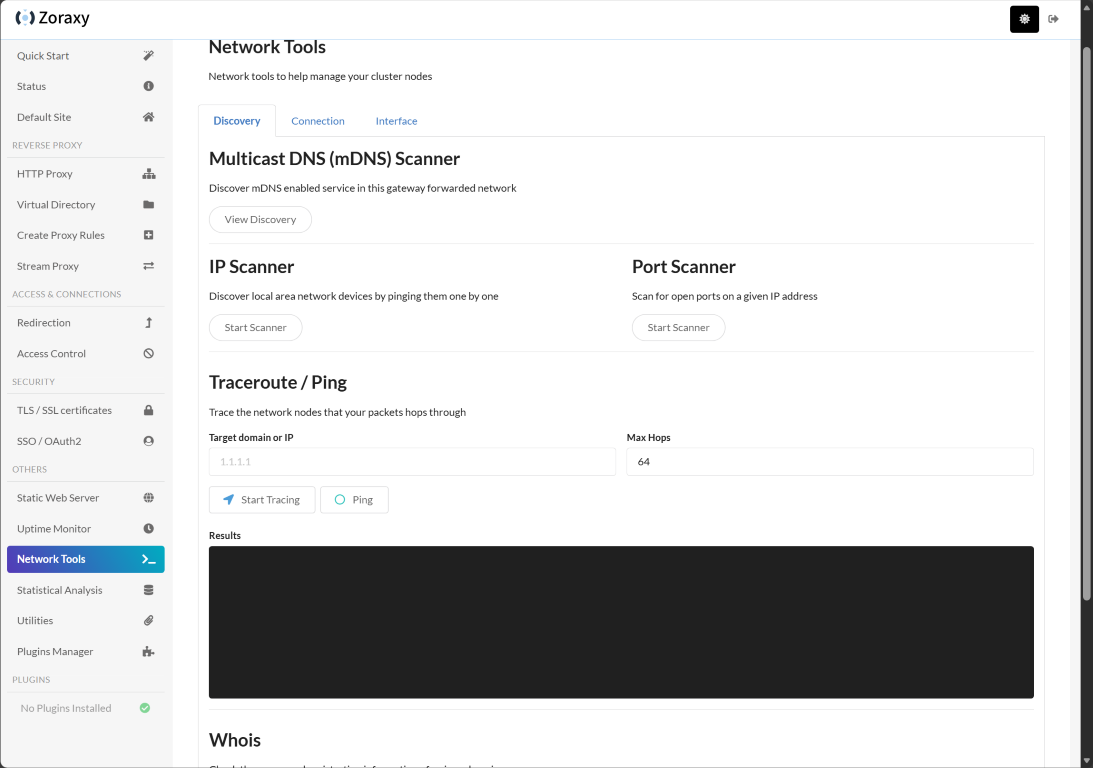
Network tools
Zoraxy has various network tools built into the interface that I think are a nice touch to have access to a few scanners at your fingertips when you are figuring out how you want to route traffic into your containers or other services. These include:
- Multicast DNS (mDNS) scanner
- IP Scanner
- Port Scanner
- Traceroute/Ping
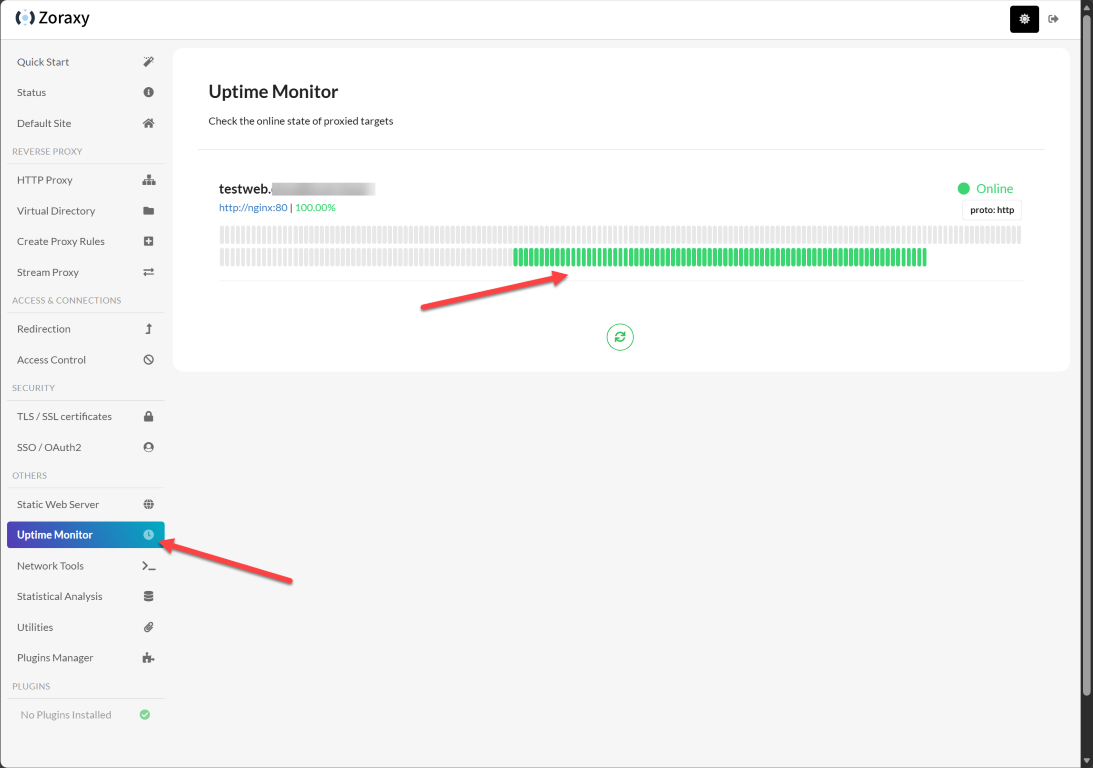
Uptime monitoring
A really cool GUI feaure that is built in is the Uptime Monitor. This almost looks like an uptime Kuma type monitor visually that allows you to not only see the current status of a proxy host, but the history of the proxy host which is nice to be able to see a history of reachability for your services.
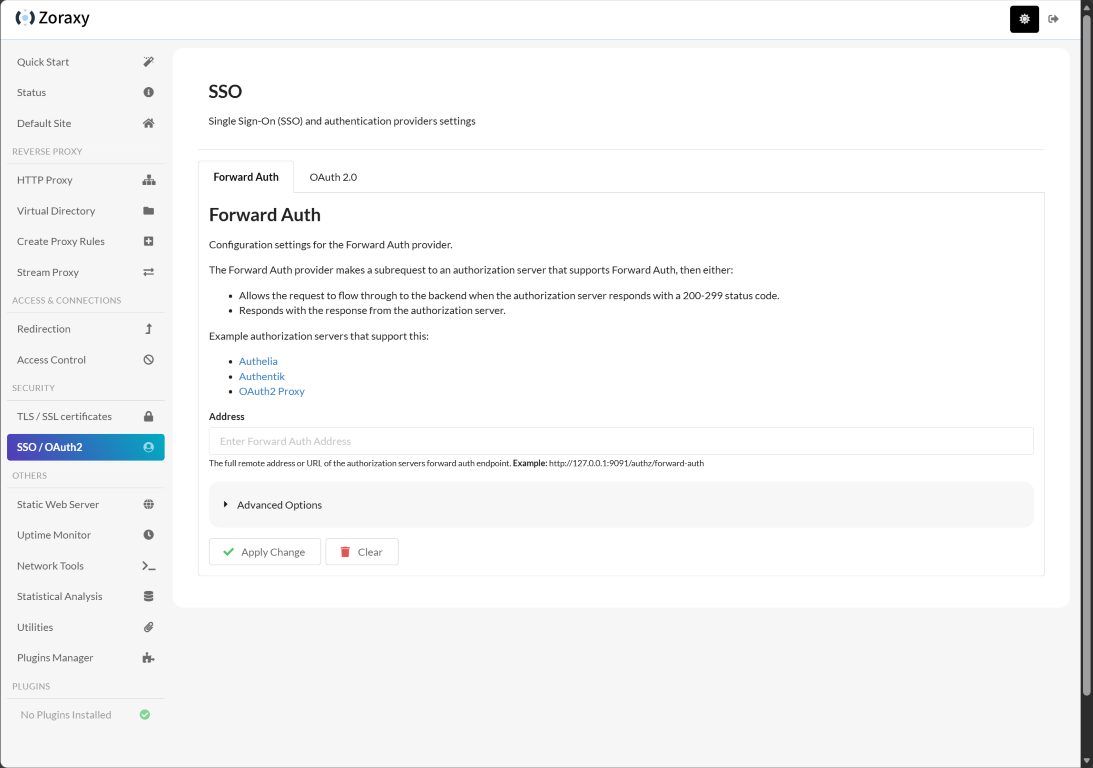
SSO and OAuth 2.0
Another nice feature that makes the login experience much better is the integration of SSO and OAuth 2.0. Especially if you are already using something like Authelia, Authentik, or OAuth2 Proxy, you can forward your authentication requests to these providers. There is also OAuth 2.0 configuration possibilities here as well.
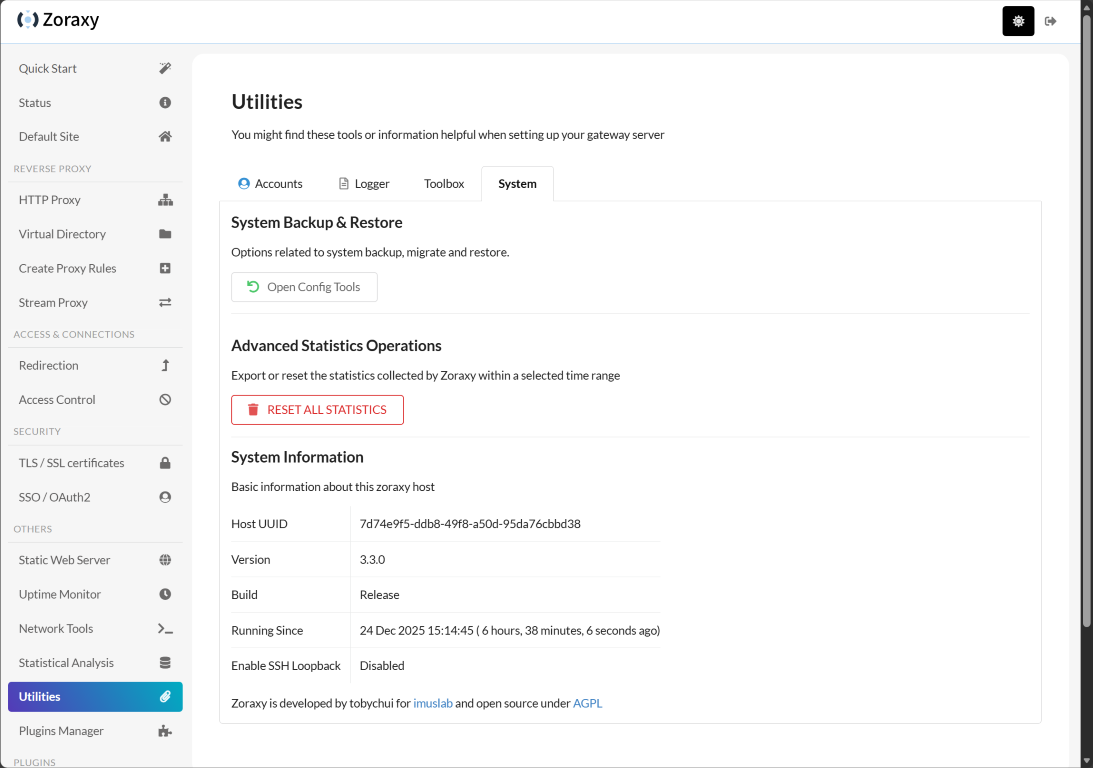
Utilities and plugins
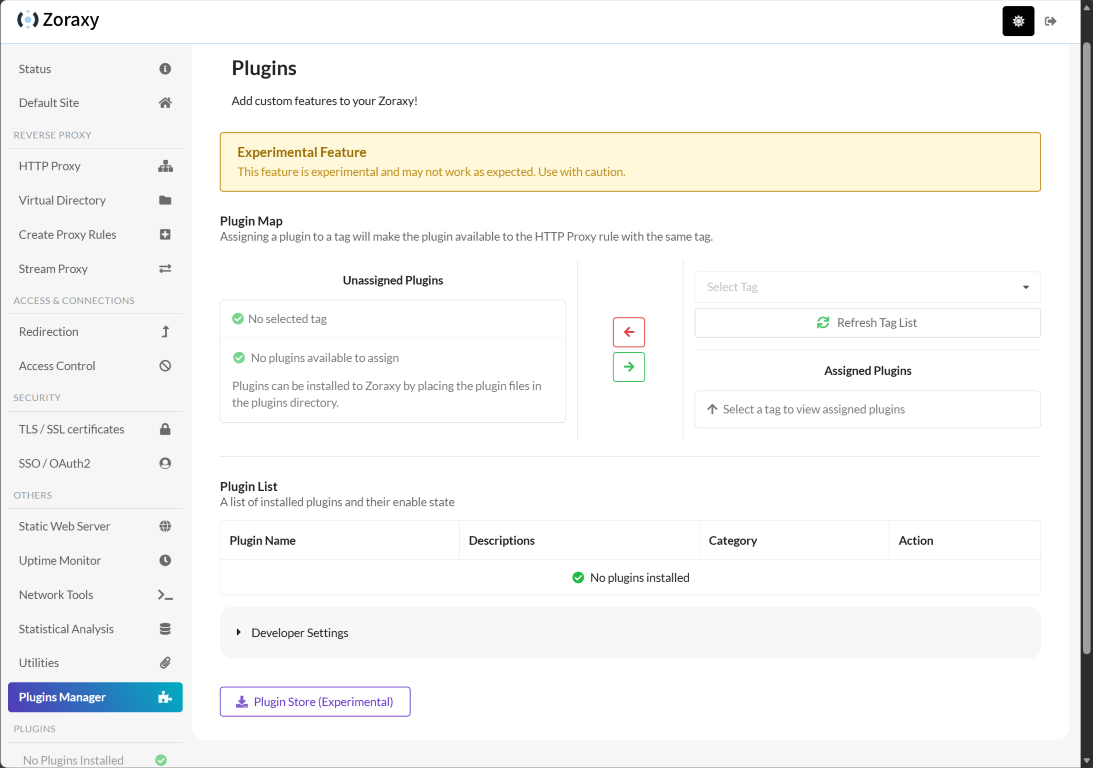
Zoraxy also has a wide range of other utilities, including system backup and restore, IP CIDR conversions, and also a plugins feature that is experimental. This will allow the solution to be extensible with plugins written for Zoraxy.
Here is a quick look at the Toolbox tab

It has a plugins feature that shows to be experimental at this point, but will be a great addition to extend the solution.
Wrapping up
I’ve only scratched the surface of all the settings and “nerd knobs” of Zoraxy. It has a crazy amount that you can do with it. But, it has quickly become my new favorite GUI-based reverse proxy. It has many advantages in terms of features and capabilities over Nginx Proxy Manager and it is super efficient and quick since it is written in Go. I still think for the absolute simplest solution for beginners, Nginx Proxy Manager still edges Zoraxy out, simply due to the fact it has less you can configure so might be slightly more beginner friendly. But, in terms of features and capabilities Zoraxy is impressive. Let me know in the comments if you are using Zoraxy. If so do you like it? If you aren’t currently using it, are you going to try it out?
Google is updating how articles are shown. Don’t miss our leading home lab and tech content, written by humans, by setting Virtualization Howto as a preferred source.
About The Author


And why not use caddy? easier then nginx
Sascha,
I think Caddy is great as well. I wrote up a blog on this one just a few weeks back. I do think Zoraxy is more user friendly than Caddy though to be honest and fits in the realm of Nginx Proxy Manager in terms of ease of use.
Brandon
Saludos, tengo una pregunta zoraxy se podra implementar en un VPS en la Nube y crear todos los demás servicios que deseo levantar.
Raul,
Thanks for the comment. I translated using Google translate so hopefully this is accurate. You can definitely install this on a VPS and then use zoraxy to route traffic to your services that you create after the fact.
Brandon
Zoraxy has always been my favorite reverse proxy ever since its first release
Check out my docker-compose.yaml and how I set it up on a VPS using Tailscale
https://github.com/hussainalhaddad/docker/tree/main/Zoraxy-With-Tailscale
Hussain,
Thanks so much for sharing your experience with the tool here. It is definitely shaping up to be my goto recommendation moving forward. So many features and capabilities. Also, thanks for sharing your tested docker compose code for setting up with a VPS and Tailscale. It seems like with the comments here, many are interested in this type of setup.
Thanks again!
Brandon
Hello!
Management of hosts is my gripe with NPM. I wish there was a spreadsheet option or something. Entering each host is laborious.
I understand people more knowledgeable than me can edit the database, but I was scared to do it.
Does it have bulk management features?
If I could dump a ton of IP’s and hostnames in, and then edit the details, that would help a ton right there.
Also, is there a fail over or cluster option for any of these things?
Cole,
I have not explored with Zoraxy enough as of yet to know if there are bulk import options. It has a wide range of features though and I wouldn’t be surprised if that were the case. It does have native clustering built into the solution on that front. Stay tuned, will explore more of this and report back here 👍
Brandon
I have been using NPM for years with over 30 proxy hosts. Is it easy to do a transition? How this can be done?
Philip,
This is something I want to explore myself as well. I will keep you posted as I do some more testing on my end.
Thanks Philip!
Brandon
It sounds interesting, but i dislike the single comparison to Nginx. Traefik and Caddy are both simpler than Nginx, and seemingly simpler than Zoraxy. Though I like the fact that it could seemingly replace at least three of my containers
Derek,
I think mainly on the comparison to NPM…as you probably know, NPM is a wrapper around Nginx that makes it much simpler. Most will find a GUI starting out with configuring a reverse proxy to be simpler than proxies that are config file driven just from the learning curve to get going. NPM is point and click and so is Zoraxy, so think they are both positioned well for really both beginners and those that are experienced as well.
Brandon
Traefik has the benefit of being completely configurable from the service end. When you create a docker service, you include the labels to create the routing. No config files in my 30 service setup! When you have to select the destinations FROM the proxy manager, you run the risk of missing things.
However, I’m still not totally happy with it 🙂 Starting a Zoraxy trial today…
Best not even close go check pangolin, that’s the best reverse proxy by a mile
Oops. Pangolin isn’t a reverse proxy. It uses Traefik for that