I get excited when I am spinning up a new Docker container host as I think about all the new, cool workloads and projects that can be ran on it. Building up your Docker container host the right way and doing the right things can make your dive into containerization a breeze and lay the right foundation for your home lab or production environment to go smoothly. Let’s take a look at the first things I do on any new Docker host. These are tips and tweaks I have learned over the years that makes running Docker easier, more stable, and secure.
Level setting
The first thing I would like to mention is that I have established a build process to provision my Docker hosts in the home lab environment. The build process starts with Packer that keeps an updated Ubuntu Server image created and ready to go so I always have a fresh template to clone from. See my post here:
Next, I use Terraform to clone the VM from the server template. Terraform allows me to use infrastructure as code to cleanly provision a new host and easily hit the ground running with a baseline configuration as I get started to implement the other tweaks.
1. Create a dedicated user and secure SSH
As I described above, this part of the process or at least the user creation process comes from my packer build and then the terraform clone of my virtual machine template. However, you can do all of these things manually and for the purposes of showing the process and steps that I go through, this is the best way to detail these out.
Running everything as root or allowing password-based SSH logins are two of the quickest ways to get hacked. My very first move is to add a non-root user and lock down SSH access. The best way to do this is to turn on key based authentication and turn off password authentication.
# Create user and add to sudo and docker groups
sudo adduser dockeradmin
sudo usermod -aG sudo,docker dockeradmin

# Copy your SSH key
sudo mkdir -p /home/dockeradmin/.ssh
sudo cp ~/.ssh/id_rsa.pub /home/dockeradmin/.ssh/authorized_keys
sudo chown -R dockeradmin:dockeradmin /home/dockeradmin/.ssh
sudo chmod 700 /home/dockeradmin/.ssh
sudo chmod 600 /home/dockeradmin/.ssh/authorized_keys

# Harden SSH: disable root login and passwords
sudo sed -i \
  -e 's/^PermitRootLogin.*/PermitRootLogin no/' \
  -e 's/^#PasswordAuthentication yes/PasswordAuthentication no/' \
  /etc/ssh/sshd_config

sudo systemctl reload sshd
You can check the users on your system, with the command:
cat /etc/passwd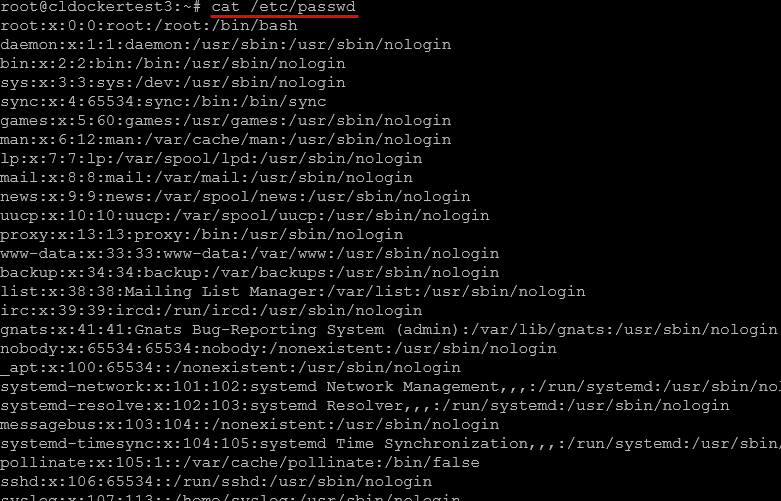
2. Update the OS and install core CLI utilities
After getting a user configured, one of the first important tasks is getting the OS updated. This is just a “must do” step that you want to accomplish and we will see also how we can set this up for automatic unattended updates. Right out of the gate, be sure to run all the available updates on your Linux host.
Then, there are a handful of tools that I like to install also. Take a look at the following tool installs in addition to performing updates:
#Run updates on your Linux host
sudo apt update && sudo apt upgrade -y

# Install additional utilities
sudo apt install -y \
  git \
  curl \
  wget \
  jq \
  yq \
  htop \
  btop \
  chrony \
  fail2ban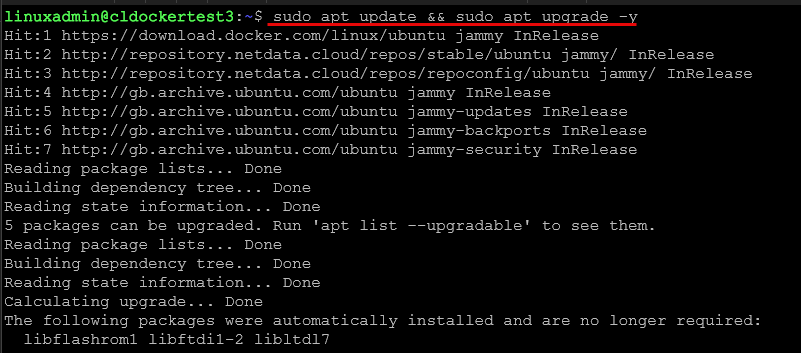
Note the brief explanation of what these extra tools and utilities do:
- git, curl, wget: grabbing repos and downloads
- jq, yq: parsing JSON/YAML in scripts
- htop, btop: interactive resource monitoring
- chrony: reliable NTP client
- fail2ban: SSH brute-force protection
Keep in mind your commands may be different on different Linux distros. On RHEL/CentOS you can use dnf install -y instead.
3. Configure timezone and location
Accurate timestamps are vital for log correlation, certificate expiry checks, and metrics. Point your host at a reliable NTP pool and set the correct timezone.
# Enable and start chrony
sudo systemctl enable --now chrony

# Check your NTP sync status
chronyc tracking

# Set timezone
sudo timedatectl set-timezone America/Chicago

# Confirm
timedatectl status
4. Make yourself a docker “projects” directory
A single location for all your Docker Compose or Terraform code brings order to your workspace. I usually create:
mkdir -p ~/docker-projects
chmod 755 ~/docker-projects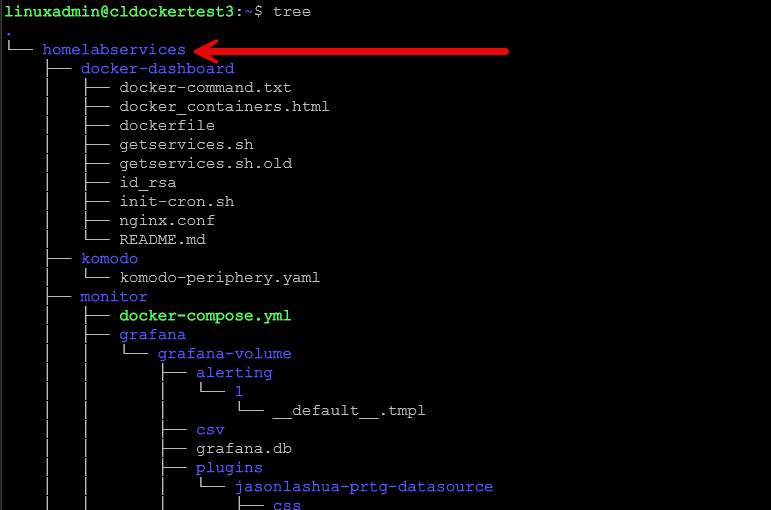
Later, you’ll clone each app repo under ~/docker-projects/app-name and run docker compose from there.
5. Harden your host with the ufw firewall and fail2ban
No matter what edge firewall you are running, an extra layer on the OS itself can’t hurt. An easy win is simply installing ufw in Ubuntu Server.
# Using UFW on Ubuntu
sudo apt install -y ufw
sudo ufw default deny incoming
sudo ufw default allow outgoing
sudo ufw allow ssh
sudo ufw allow 2376/tcp    # Docker daemon TLS (if used)
sudo ufw allow 7946/tcp    # Swarm node communication (if used)
sudo ufw allow 4789/udp    # Swarm overlay networking (if used)
sudo ufw enable
We saw earlier how to install Fail2Ban. Now, let’s see how to start and enable it:
sudo systemctl enable --now fail2ban6. Configure the Docker daemon
You can customize your Docker daemon to enforce log-rotation. This allows you to set your preferred storage driver, and, when needed, point at registry mirrors.
Create or edit /etc/docker/daemon.json:
{
  "log-driver": "json-file",
  "log-opts": {
    "max-size": "10m",
    "max-file": "3"
  },
  "storage-driver": "overlay2",
  "registry-mirrors": [],
  "insecure-registries": []
}
After saving, restart Docker:
sudo systemctl restart docker7. Enable automatic security updates
On Debian-based systems you can setup automatic security updates with the following commands:
sudo apt install -y unattended-upgrades
sudo dpkg-reconfigure --priority=low unattended-upgrades
Then confirm /etc/apt/apt.conf.d/50unattended-upgrades has security updates enabled. This helps keep both your OS and Docker packages patched between maintenance windows that you may have and helps to make sure new security vulnerabilities are patched as soon as possible.
8. Set up Netdata or other monitoring tools
I have detailed this before, but I like to run Netdata for monitoring. Netdata provides a home lab license and is a great tool for monitoring Docker containers especially.
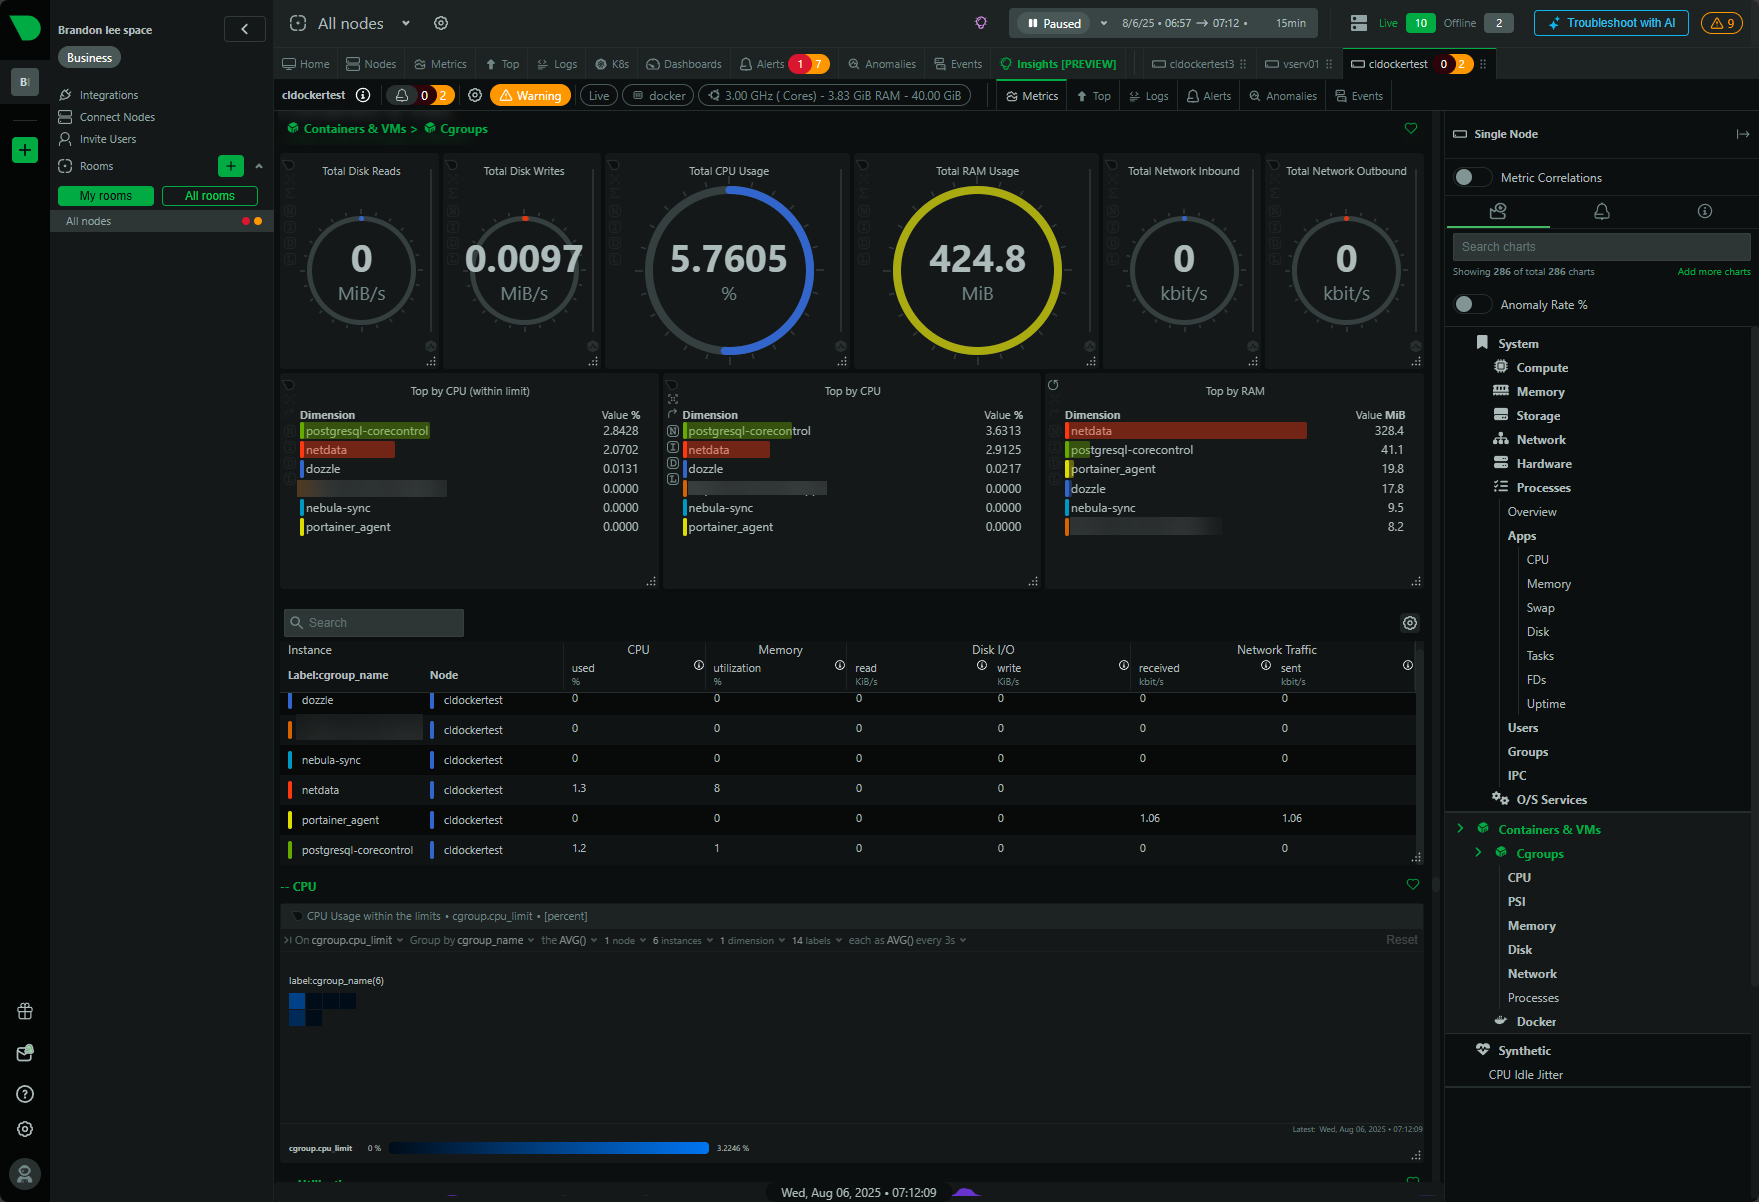
You might think about using the following to monitor your docker host and containers in general:
- Node Exporter for Prometheus
- cAdvisor for container-level metrics
- Netdata for real-time dashboards
Here is an example Docker Compose snippet for cAdvisor and Node Exporter:
version: "3.8"
services:
  cadvisor:
    image: gcr.io/google-containers/cadvisor:latest
    volumes:
      - /:/rootfs:ro
      - /var/run:/var/run:ro
      - /sys:/sys:ro
      - /var/lib/docker/:/var/lib/docker:ro
    ports:
      - "8080:8080"
    restart: unless-stopped

  node-exporter:
    image: prom/node-exporter:latest
    pid: "host"
    volumes:
      - /proc:/host/proc:ro
      - /sys:/host/sys:ro
      - /:/rootfs:ro
    command:
      - '--path.procfs=/host/proc'
      - '--path.sysfs=/host/sys'
      - '--collector.filesystem.ignored-mount-points=^/(sys|proc|dev|host|etc)($|/)'
    ports:
      - "9100:9100"
    restart: unless-stopped
You can bring up the stack with:
docker compose up -d9. Implement docker cleanup schedules
Even with Docker’s built-in rotation, unused images and volumes will accumulate over time. I schedule a weekly cron job to clean them up:
sudo crontab -l | { cat; echo "0 3 * * SUN /usr/bin/docker system prune --all --volumes --force"; } | sudo crontab -
This runs every Sunday at 3:00 AM and prunes stopped containers, unused networks, dangling images, and unused volumes.
10. Optional: tune kernel parameters
Docker networking and filesystem performance can benefit from a few sysctl tweaks. Create /etc/sysctl.d/99-docker.conf:
net.bridge.bridge-nf-call-iptables  = 1
net.ipv4.ip_forward                 = 1
fs.file-max                         = 524288
vm.max_map_count                    = 262144
Apply them immediately:
sudo sysctl --system- bridge-nf-call-iptables: ensures iptables sees bridged traffic
- ip_forward: necessary if you use custom routing
- file-max, max_map_count: support high-file workloads
11. Test your setup with a simple container
Before you declare your host ready, verify that Docker is properly configured:
docker run --rm hello-world
docker run --rm -p 8080:80 nginx:alpine
curl http://localhost:8080
If both commands succeed, your network, storage driver, and group permissions are all functioning as expected.
12. Create yourself a bootstrap script to make things reproduceable
Once you’ve got your checklist nailed down, turn it into an executable shell script (or an Ansible playbook) so you can reprovision hosts in an automated, error-free way. Use AI tools to do this for you like ChatGPT, Gemini, Claude, and other AI-enhanced IDE terminals like Windsurf, Kilo Code, or the new Amazon Kiro.
Wrapping it up
With the tweaks and tips mentioned, you can have an extremely well-configured Docker container host that is secure and runs workloads consistently for production or home lab. With this set of steps, it will help you to save time on troubleshooting and make your host more secure and manageable. These are not the only things you can do but definitely steps that you will see real benefits from implementing. What do you do on your docker container hosts?
Google is updating how articles are shown. Don’t miss our leading home lab and tech content, written by humans, by setting Virtualization Howto as a preferred source.
About The Author


This was a great read. A lot of my home lab journey was just getting things to work. Now I’m in the process of hardening. I’ve bookmarked this and will definitely be using it. Thanks
Never run SSH on default port. Change it to something high like 60077. This greatly reduces brute force attempts or eliminate it completely.
I’d also make a separate filesystem for Docker data
Abdelhak,
Interesting thought there. Are you referring to provisioning separate storage for bind mounts?
Brandon