There are two things that I highly recommend for modern home lab environments, Docker and low-power mini PCs. Docker provides a much more efficient way to run apps compared to running full virtual machines. Also, low-power mini PCs are getting more popular and powerful. However, there are still things you can and should think about to increase Docker performance on your low-power hardware. Let’s take a look at those tweaks you should consider and how they are implemented.
Why low-power hardware needs tweaks
When you purchase low-power hardware that includes fewer cores, slower clock speeds, and limited memory it is, well, slower. Also, this class of mini server may have slower, low-end storage. Even though Docker is lightweight by design, it still consumes resources for each container, container orchestration activities, image management, overlay networking, logging, and other things.

When you multiply that across several containers even more powerful mini PCs or servers can feel the strain. Docker’s default settings are tuned for general-purpose servers and may not necessarily be for tiny home servers or edge devices. So tuning your environment can make a noticeable difference in many cases.
In case you are looking for a really good little low power server, check out my review of the GMKtec Nucbox G3 Plus:
Use Alpine and distroless base images for your containers
When building Docker images, the base image you choose makes a big difference in speed and resource consumption. One tip is use Alpine Linux for your base image. Alpine images are around 5MB compared to 100MB+ for typical Ubuntu or Debian images. They boot faster, consume less disk space, and reduce container startup time.

FROM alpine:latest
RUN apk add --no-cache curl
Also, Google’s distroless images don’t include a package manager or shell. They only contain your app and its runtime. They’re extremely lightweight and secure. After all, the more packages you eliminate from any system, the attack surface shrinks.
Build multi-stage dockerfiles
Use something called a multi-stage build if you are building your own images. Multi-stage builds let you compile and package large applications in one stage. Then it copies only the necessary binaries into the final image. When you do it this way, it shrinks image sizes, speeds up builds, and reduces the container runtime overhead.

Here’s a simple example for a Go app:
# Stage 1: Build
FROM golang:1.21 AS builder
WORKDIR /app
COPY . .
RUN go build -o myapp

# Stage 2: Run
FROM alpine:latest
COPY --from=builder /app/myapp /usr/local/bin/myapp
ENTRYPOINT ["myapp"]
This cuts out all the Go build dependencies from the final image and only packages the app itself into the image, not the dependencies.
Use bind mounts instead of volumes (when practical)
Docker volumes use an abstraction layer for persistent storage with your containers. Docker volumes have many good features, but they come with a small performance cost. This is especially true if you are using low-end drives.
Below is an example screenshot of one of my compose files for Gitlab. You can see the example of persistent volume configuration below using bind mounts.

Containers that need fast file access, such as databases or NGINX with static web files benefit from using bind mounts to directly access files from the host filesystem.
docker run -v /host/data:/container/dataThis avoids the abstraction layer of Docker volumes and can help with faster I/O. This can help fairly dramatically especially on spinning disks or low-end SSDs.
Reduce logging overhead
By default, Docker logs everything your containers output. On systems with limited disk I/O performance, this can severely degrade performance over time. This is true especially if the running containers are “noisy” and produce a lot of logs.
You can limit or disable logging where it’s not needed.
docker run --log-driver=noneOr if you want logging but with control:
docker run --log-driver=json-file --log-opt max-size=10m --log-opt max-file=3This rotates logs and prevents disk space from being eaten up.
Trim unused docker images and containers
This is something I have written about previously. Pruning old container images and dangling containers can see huge benefits in terms of disk space. Unused images, dangling storage layers, and stopped containers can add up to huge amounts of space on disk. It can also slow down operations like docker ps, docker images, and other things like starting new containers.
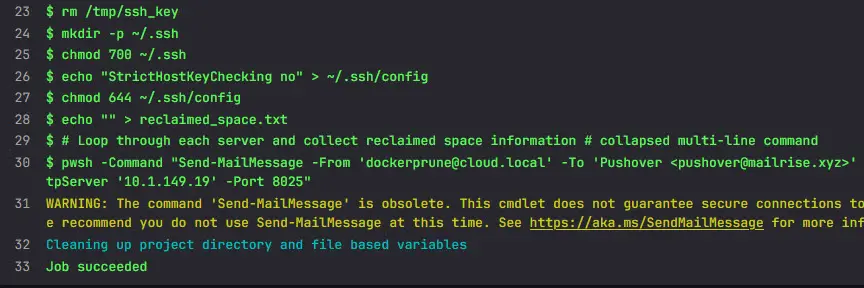
You can run periodic pruning with the following command. This prunes everything that it thinks isn’t used anymore. You need to be careful with this command as it can potentially get rid of things you don’t want to get rid of, but normally is safe to run. Just be sure to test it.
docker system prune -a -fFor a safer approach, you can use:
docker image prune
docker container prune
docker volume prune
You can also automate this cleanup using a scheduled cron job or a GitLab/Drone pipeline.
Switch to OverlayFS or ZFS (and Know When Not To)
Docker uses a storage driver to manage image layers. On Linux, the default is usually overlay2. But depending on your hardware and workload, changing this may help with Docker performance:
overlay2: Fast, stable, and ideal for most use cases.zfs: Best if you’re already using ZFS and want features like deduplication or snapshots.btrfs: Offers subvolume and snapshot support but is heavier.
To check your current storage driver:
docker info | grep Storage
Switching storage drivers requires recreating Docker’s data directory, so make sure to back up first.
Offload workloads to a remote build host or CI/CD
Building Docker images is CPU and disk-intensive. On low-power systems, image builds can take ages. Instead, offload builds to a more powerful system using:
- GitHub Actions / GitLab CI
- Docker Buildx with remote builders
For example, to use a remote builder with Buildx:
docker buildx create --use --name remote-builder --driver ssh --platform linux/amd64Push your image to a private registry or locally pull it when ready.
Use lightweight orchestration (or none if not needed)
Kubernetes can be overkill for a Raspberry Pi. Even Docker Swarm or k3s can feel heavy depending on your device. If you’re just running a few services, stick with Docker Compose. It’s simple, effective, and faster to start containers.
But if you need orchestration, k3s (a lightweight Kubernetes distro) is the better option over full Kubernetes. And for Swarm users, avoid over-provisioning services and use placement constraints to keep services where they matter.
Limit CPU and memory usage per container
Without limits, a single container can hog everything. On constrained systems, that can bring the host to a crawl and affect Docker performance in general.
Set explicit limits:
docker run --memory=512m --cpus=1For Docker Compose:
services:
  app:
    image: myimage
    deploy:
      resources:
        limits:
          cpus: '0.50'
          memory: 256M
This ensures fair sharing between containers and prevents crashes due to memory starvation.
Disable swappiness and tune the host OS
On Linux, vm.swappiness determines how aggressively the OS swaps memory to disk. On SSDs or slower storage, high swappiness can lead to sluggish performance. You can tune your swappiness values though.
To set it to a lower value, you can do something like the following. As a note, the default swappiness value is usually 60 for most Linux systems.
sudo sysctl vm.swappiness=10Also disable unused services and desktop environments if you’re running Docker on a full Linux distro. Every bit of freed RAM can help.
Use Docker slim or image minifiers
DockerSlim is a tool that analyzes and strips out unnecessary parts of your images to make them smaller and faster to run.
Install it and slim your image:
docker-slim build myimageYou’ll end up with dramatically smaller images, which means faster pulls and startups.
Use Netdata, cAdvisor, or Prometheus to identify bottlenecks
To narrow in on performance issues, you need to know where your bottlenecks in performance are. This can be difficult by just manually looking at things on your Docker host. Having a tool that gives you insights on performance and hot spots is a great way to pinpoint issues.
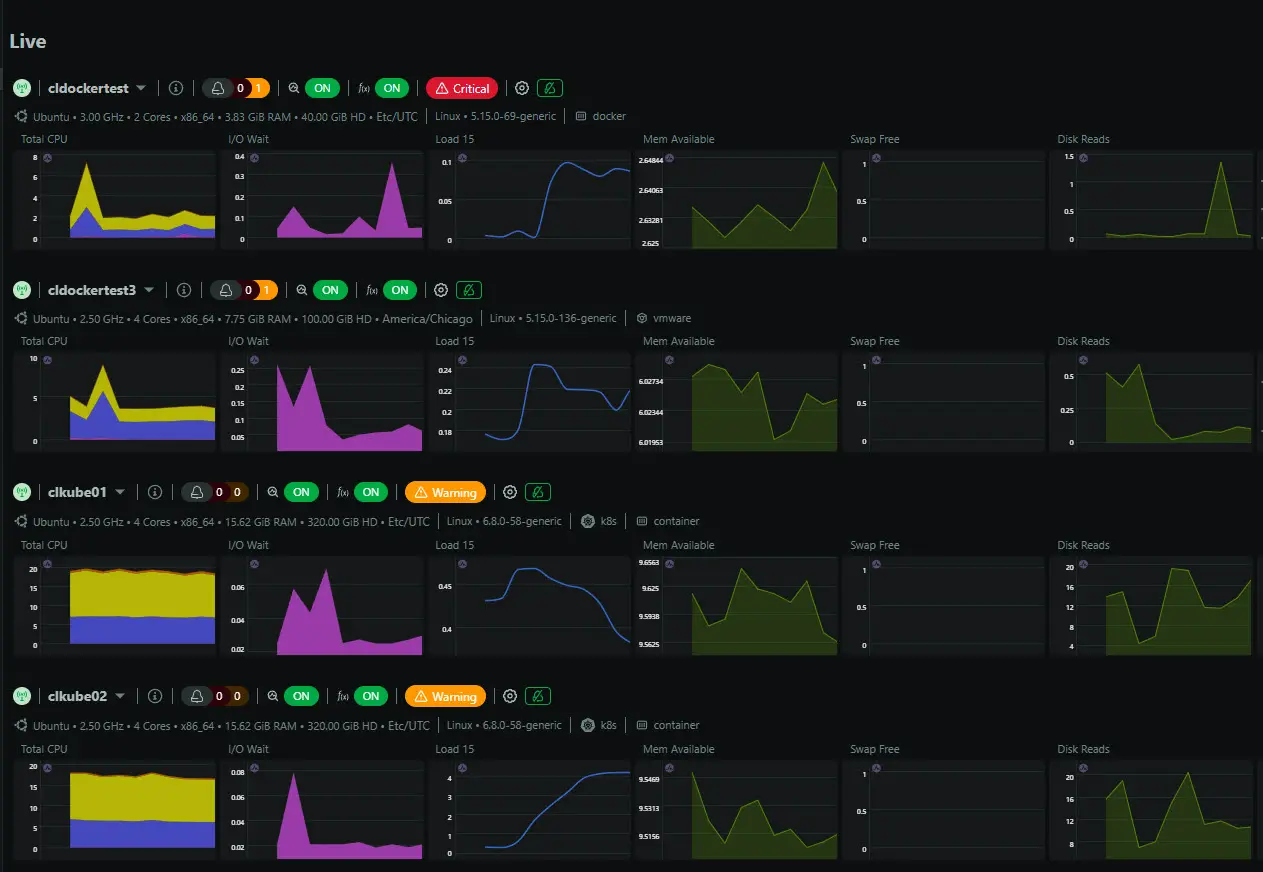
Tools like Netdata and cAdvisor provide real-time stats for CPU, memory, I/O, and network usage per container. One awesome thing about Netdata is that they have a home lab license that is very economical at $90 a year without limitations. Do check that out if you are interested.
When using tools like Netdata, you might find that a single noisy container is slowing down the entire host. Or you may discover your disk I/O is maxed out due to logging or database writes.
Wrapping up
Running Docker on low-power hardware doesn’t have to feel slow. There are a few really helpful tweaks that can increase Docker performance and help it to run much better on low-powered hardware.
These tips are generally useful for:
- Home labs built with mini PCs that have low-power CPUs like Intel N100, N200, or ARM SBCs
- Low-power servers running 24/7
- Edge devices and other low-power deployments at the edge, running Docker
Keep in mind, these are not the only tweaks that are possible with Docker. However, these represent some low hanging fruit when it comes to making Docker run faster, especially when you are using relatively low-powered mini PCs. Let me know in the comments what you all are doing for tweaks to your Docker environments.
Google is updating how articles are shown. Don’t miss our leading home lab and tech content, written by humans, by setting Virtualization Howto as a preferred source.
About The Author