One of the tradeoffs of running a dense mini rack full of compact systems is heat. When you stack multiple high performance mini PCs into a small enclosed rack, even efficient hardware can start to have heat built up around the unit and when stacked on top of each other like in a mini rack, this compounds the heat buildup. With my Minisforum MS-01s I noticed warm air pockets that developed inside the enclosure. In Pulse I would have a random temperature warning on one of the NVMe drives in one of the cluster hosts. I wanted to share a simple cooling mod I made for my mini rack and how it has improved heat buildup.
My case and mini PCs
My case is the 10 inch TecMojo 12U rack. I really like this little rack and have enjoyed it since going through the build out of my minicluster. Also, I am running five Minisforum MS-01 systems. These are fantastic little machines and they perform incredibly well for Proxmox clustering, Ceph storage, and 10 gig networking. But one thing the rack itself does not provide is active airflow. But, I believe this is a characteristic of most mini racks.
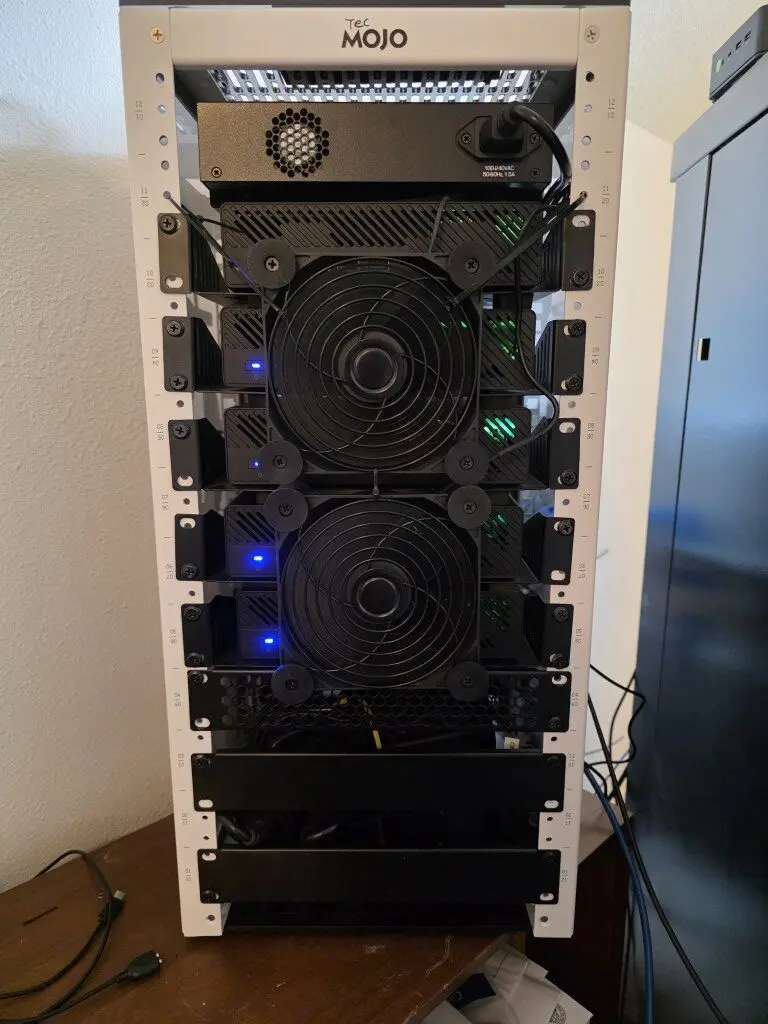
Below is a pic of my mini rack I took just a few days back (no modded cooling solution).
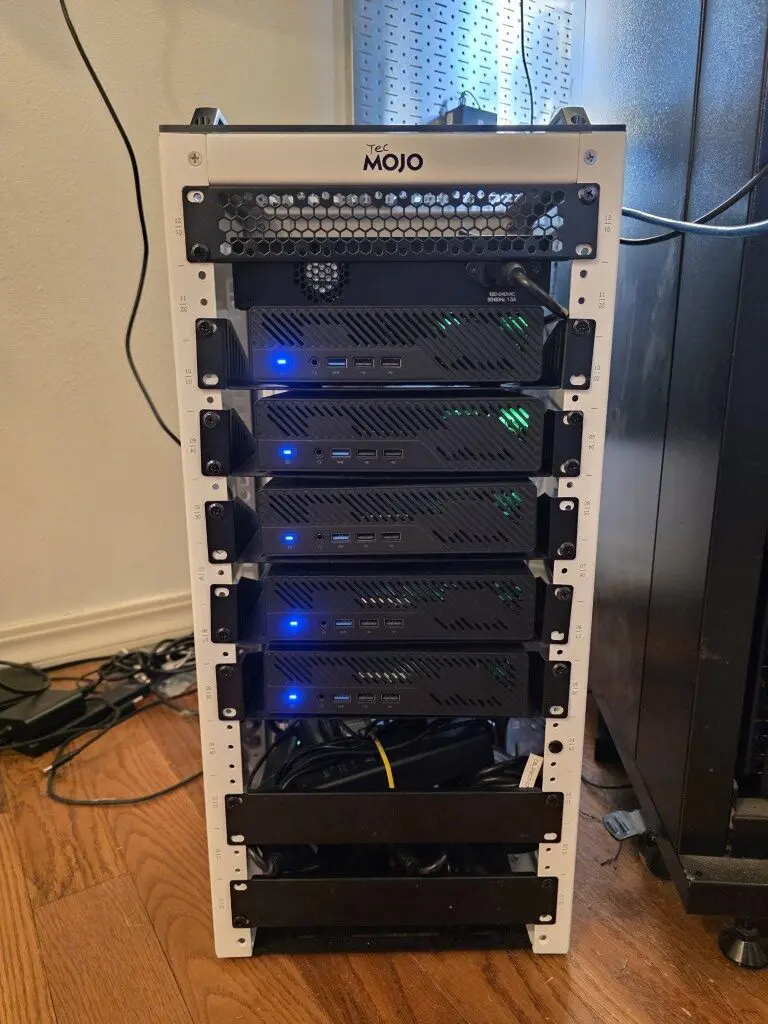
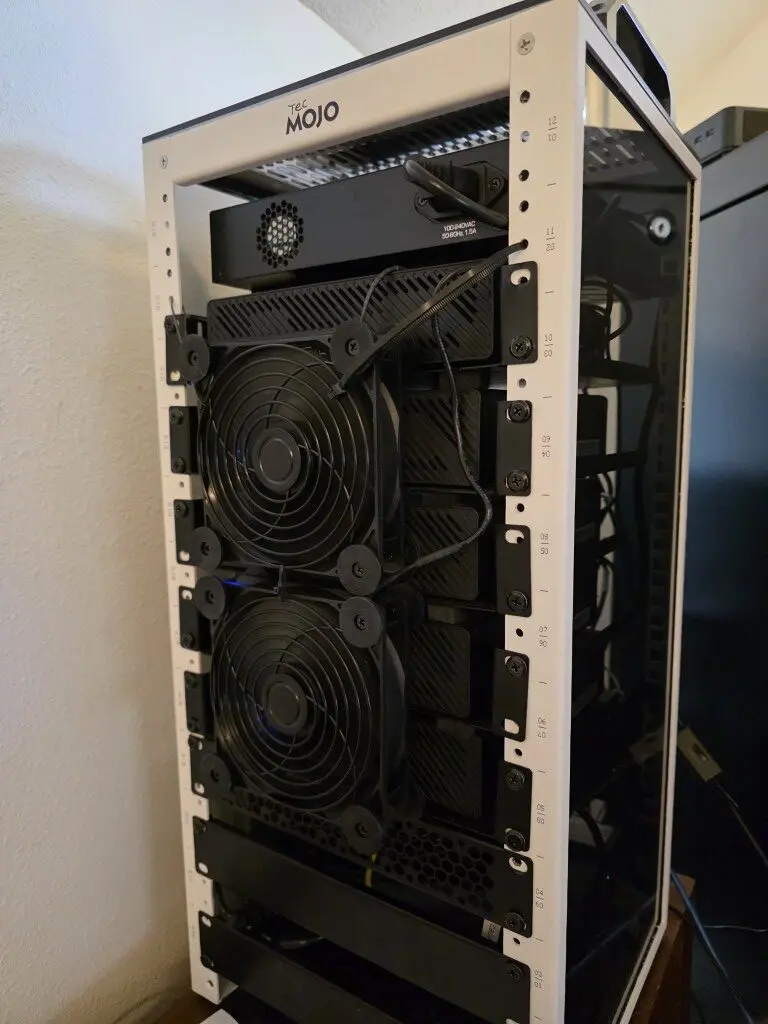
The TecMojo mini rack has solid sides with no vents, but then has vents on the bottom panel and the top panel. So heat does have a way to escape from the top. But, if you think about it, most are going to have solid gear in between the middle and top of the rack any way, so there is quite an obstruction to getting heat up through the case.
After noticing higher ambient temps inside the rack, I decided to implement a simple cooling mod. It cost very little, required no permanent modifications, and made a measurable difference.
The heat problem in compact mini racks
Unlike a full 19 inch rack that often have vented doors and designed airflow patterns, many 10 inch racks are mainly passive enclosures. Without forced airflow, vent holes alone do not solve the problem. Warm air tends to accumulate, especially toward the top of the rack. Also, when the mini rack is stacked with equipment from bottom to top, this impedes heat from rising as efficiently as it would otherwise so it will accumulate around your gear instead.
When you stack five MS-01 units vertically:
- Each system pulls in air and exhausts it internally
- Warm air rises and gets trapped inside the rack which is a small space
- There is no forced intake or exhaust path
- Heat begins to hover around the upper units
My five nodes in the Tecmojo mini rack are also running some pretty serious enterprise workloads. These include the following:
- Proxmox workloads
- Ceph OSD activity
- VM migrations
- Kubernetes test clusters
So, as you can imagine, there is consistent heat generated. So, my goal with this project was to see what inexpensive hack I could do to remove the heat pockets from the mini rack. The best solution would be to have active airflow through the mini rack.
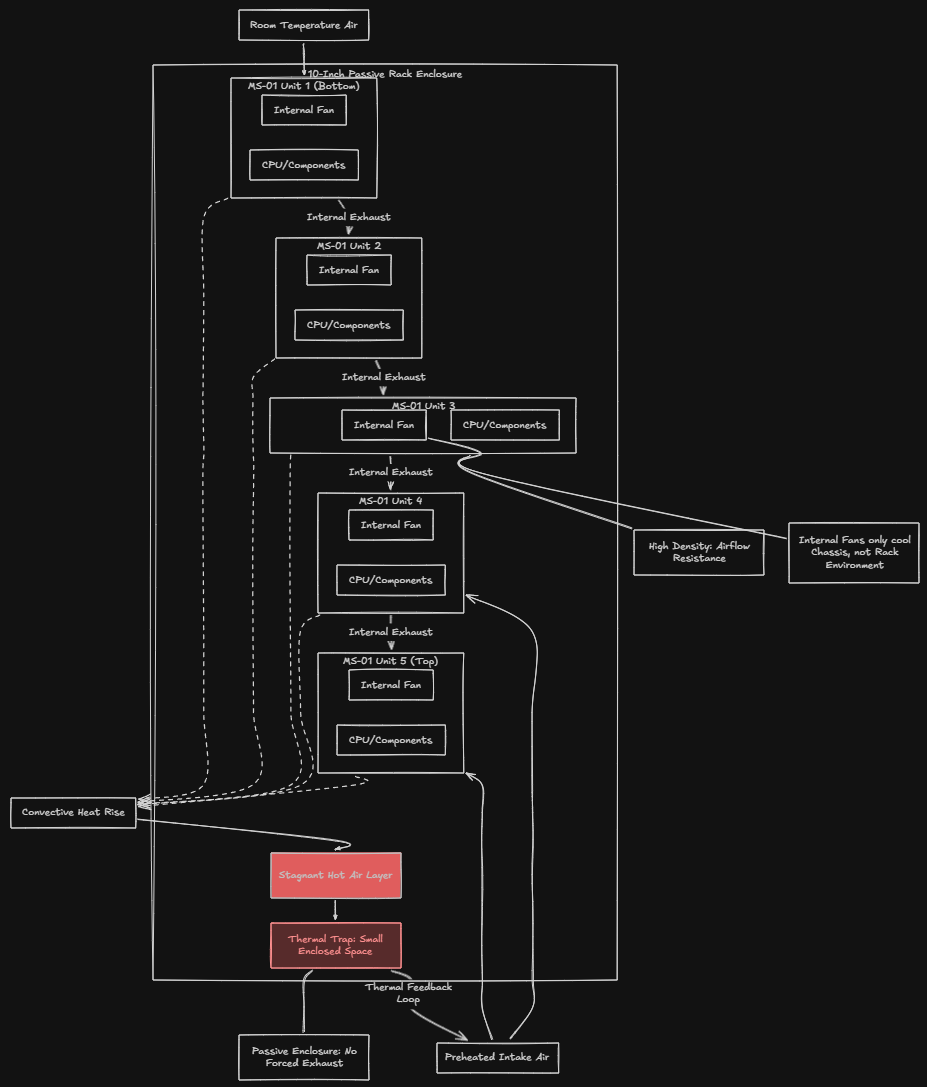
The MS-01 systems have their own internal cooling fans, but they are cooling themselves, not the shared air environment inside the rack. And, they are super dense so air can’t really “move” a hot, outside of just getting exhausted out of the chassis. Over time, the air inside the rack becomes warmer than room temperature, much warmer. And every system is now pulling in preheated air as the heated air is going to leak around the outside of the rack enclosure and underneath the mini PC above it. That reduces cooling efficiency and increases fan speeds across all nodes.
The cooling mod was adding a dual USB fan setup
Thinking along these lines led me to a very simple solution for my mini rack setup. What I wanted:
- Pull cool air into the rack
- Create a consistent airflow path
- Reduce heat pockets
- Not require modifying the rack permanently
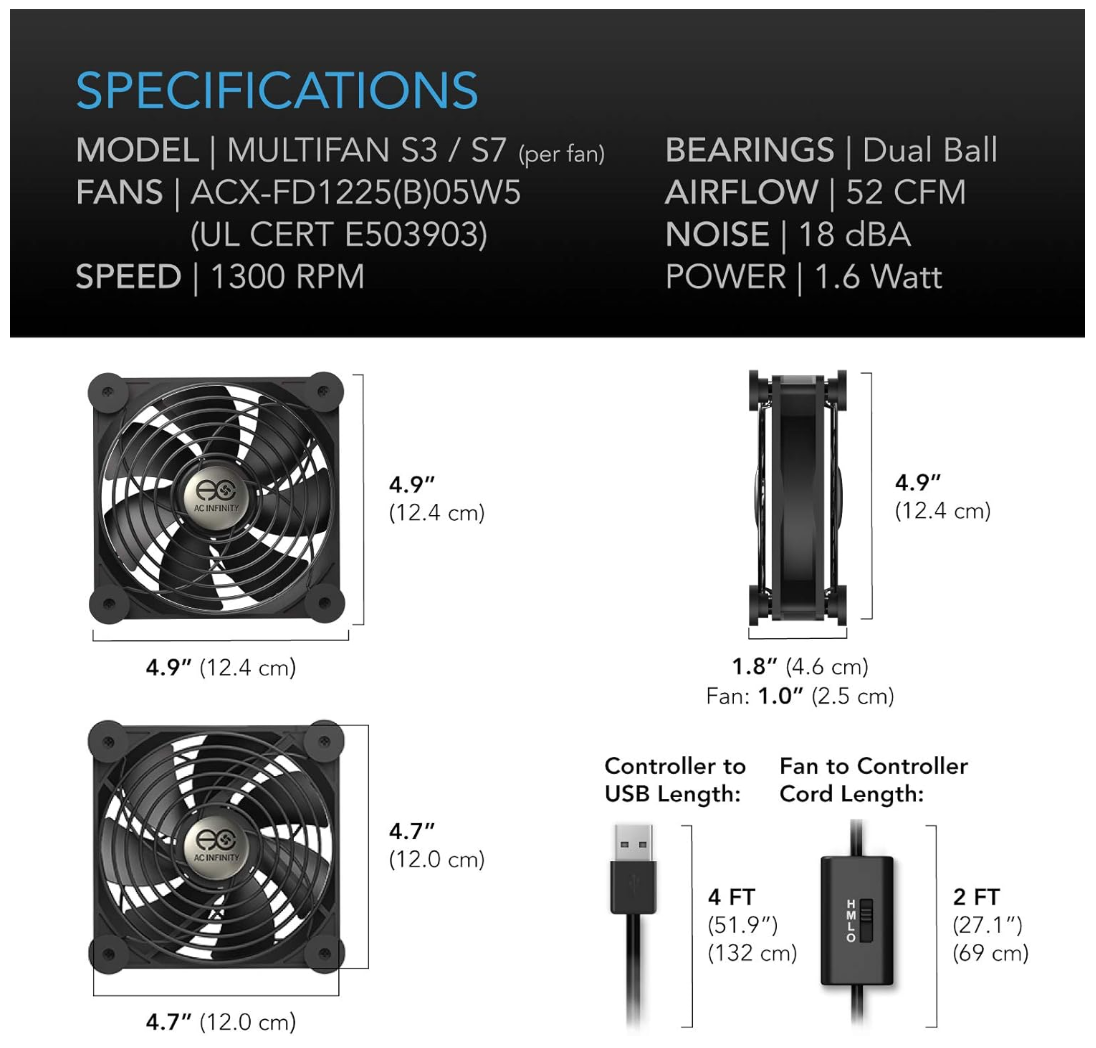
Instead of doing something drastic like cutting into the rack or installing AC powered rack fans, I purchased a dual USB powered fan unit on Amazon that had good reviews, AC Infinity USB powered dual fans.
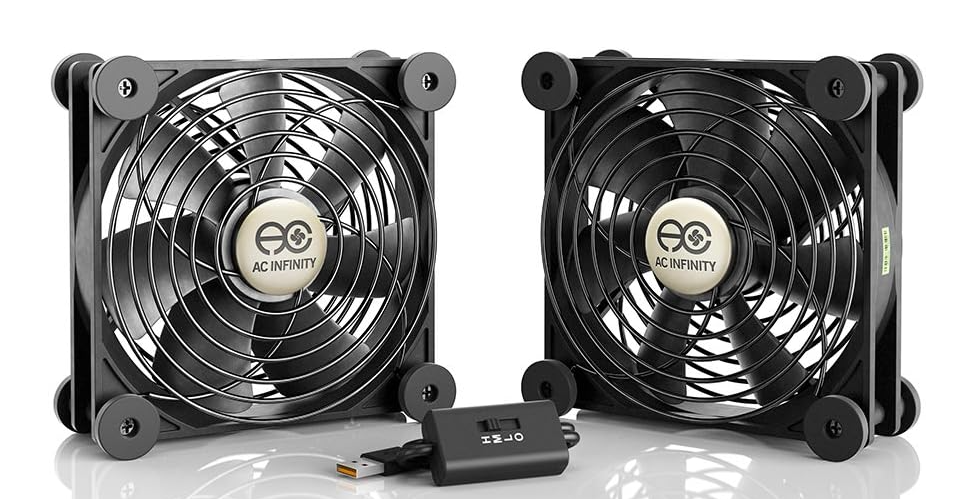
It is a simple two fan setup designed for cabinet cooling and general purpose airflow. It mounts to the front of the rack and runs off USB power. In my case, I power it directly from one of the MS-01 units. There is a version of this kit that is also AC powered and has some extra power and speed with the AC version. However, I was running low on my small PDUs that I have for my mini rack, so I decided to go with USB and honestly this has worked perfected for me so far. They pull enough air and are super quiet, and get their power from one of the USB ports on one MS-01.
Using these fans I zip-tied them together using black ties where you can’t even see it. Then also zip tied them to the rack, again hard to see. Then, they simply “drape” down over the front of the MS-01s at the front of the rack.
This:
- Pulls cooler room air into the front of the rack
- Pushes that air through the stack of MS-01 systems
- Forces warm air out the rear vents
Looking at the rack from the front, the fans are mounted to actively draw air inward. This creates positive airflow pressure through the entire enclosure. Again, no drilling, no cutting, and it is simple. Just plug them into USB and turn them on.
Why Intake Instead of Exhaust?
This is important.
You could mount fans to exhaust air out of the rack. But I specifically chose intake for a few reasons:
- First, positive pressure helps reduce dust buildup. When you create positive airflow, air exits through cracks and vents rather than pulling dust inward through random gaps.
- Second, pulling cooler room air directly across the face of the MS-01 units ensures they are drawing in cooler intake air immediately.
- Third, in a small enclosure like a 10 inch rack, forcing air in creates a clear front to back airflow path.
With intake at the front and natural venting at the rear, you create directional airflow instead of random convection.
Installation actually pretty easy but a little janky
Mounting the dual fan unit was simple but a little “hodge podge”. However, all in all, I think the results are still pleasing and not overly complicated. I am sure someone could print up something that would be great with a 3d printer. This is a hobby I have intentionally not delved off into as I don’t have any time as it is!
I attached it to the front rail area of the rack using zip ties. I just created a loop through both sides of the top fan and then attached these to both sides of the rack. And, as I mentioned earlier, this lets it drape down the front of the mini rack and honestly looks great to me and it serves its purpose. Also, removal won’t be difficult at all either.
Power was even easier. USB cable straight into one of the mini PCs. Because these USB fans draw very little power, there is no strain on the host system. Total install time was probably under 20 minutes.
The results are lower ambient rack temps
The results have been very impressive. Before you could just stick your hand in the rear of the mini rack and feel the huge pocket of hot air at the back of all the units and inside the rack. Now, the air almost feels room temperature. So, it has definitely done the job of taking care of the stagnant air that was accumulating around each of the mini PCs.
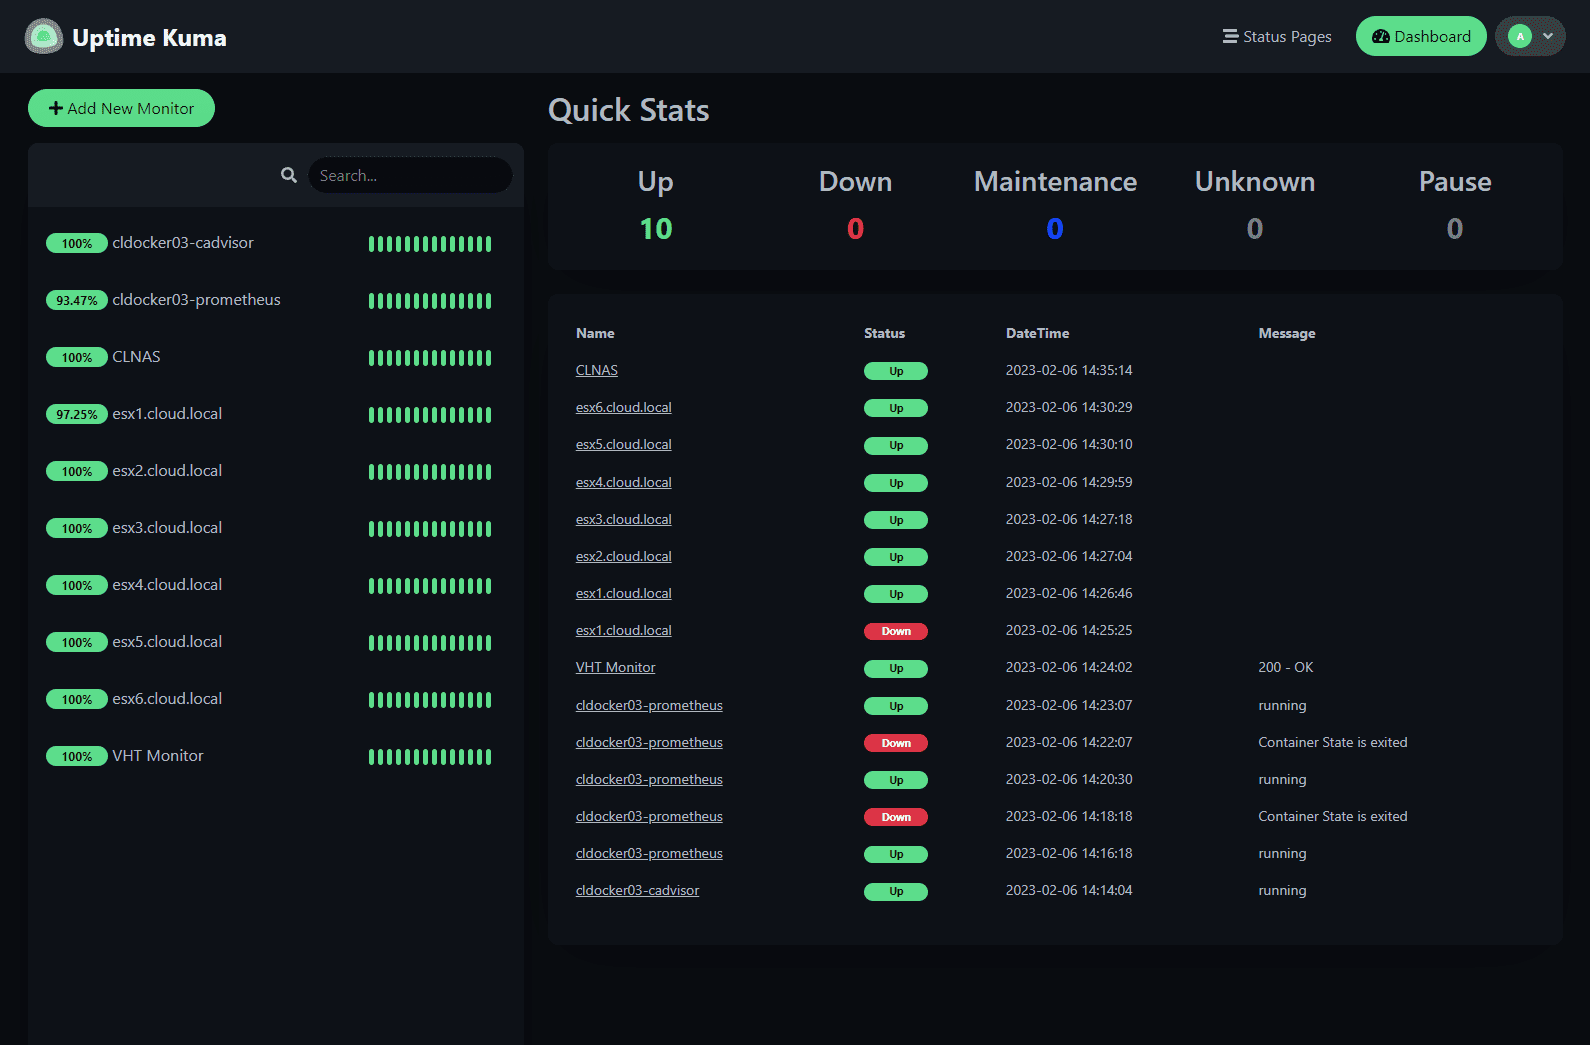
Below are temps after installing the fans taken in ProxMenux monitor. As you can see everything is healthy. This particular node is in the middle of the cluster so it is probably worst case scenario. Before, these numbers were in the low 50’s.

What about noise?
One concern with adding fans is noise. But, these USB dual fan units I chose run at an extremely low noise level. It adds only a low background air noise that is super quiet. I don’t even hear it to be honest since I have other louder gear like a NAS and switches, etc.
In fact, because the MS-01 internal fans do not ramp up as aggressively anymore, overall perceived noise during load is actually less. Instead of sudden fan bursts from individual nodes, airflow is steady. Also, these fans have 3 speeds (L M H) that you can run. So far, I have kept things on medium speed and it is very quiet.
These also have rubber feet on the bases on both sides so that it is super quiet and no rattling against things, although they seem to be extremely well balanced any way.
Wrapping up
I am loving my mini rack build this year with the new Proxmox and Ceph cluster and the full move to Proxmox for the home lab. However, one lesson I have learned with the mini rack so far is that density changes the game. Once you install multiple mini PCs in the rack, heat can definitely build up and you need something that creates positive air flow through the rack. My little solution of hanging 2 fans on the front of the rack has made a pretty drastic difference in the large pocket of heated air lingering in the mini rack case. What about you? Have you run into similar challenges with your mini rack? Any similar solutions that you are using to cool your rack or something completely different?
Google is updating how articles are shown. Don’t miss our leading home lab and tech content, written by humans, by setting Virtualization Howto as a preferred source.
About The Author