With all the gloom and doom on pricing of hardware and components at the beginning of 2026, upgrading can be painful and expensive. However, there are a few “low hanging fruit” items that don’t necessarily have to cost a lot of money, depending on how crazy you go, but a few of these are architectural things that you can do as well. The good thing is, you don’t have to rebuild your lab or chase the latest and greatest hardware to make meaningful improvements. These upgrades can improve responsiveness, reduce latency, and just make everything feel “boringly” smooth. Let’s look at the easiest home lab performance upgrades you can make in 2026.
Move from spinning disks to solid state storage
This first one is oh so valuable in terms of performance. Spinning “rust” disks are great for capacity, but not that great for performance. Especially if you are running part of your virtual machine or container workloads on spinning disks, you are leaving a massive amount of performance on the table. The difference between running VMs and containers on SSDs or NVMe compared to spindles is exponential. It affects everything from boot times, application startup, database performance, snapshot operations, backups, restores, and responsiveness of your applications.
Even thought hard disks have gone up in price and NVMe drives have certainly taken a jump, you can still find SATA SSDs for relatively cheap and even some NVMe drives that won’t break the bank. Even if you don’t move everything to SSD or NVMe storage, you can think about moving your most active workloads to SSDs. This can result in a dramatic increase in useability in your home lab.
Buy a cheap one on Amazon here: https://geni.us/Hr2j8h

So, the great thing is that it isn’t an all or nothing type approach. You can also create and use a “tiered model” where you have SSDs that handle “hot” data that is very active, and then you have HDDs remain for very infrequently accessed data or cold storage for your backups or archive data. This single change can remove a HUGE bottleneck in your entire environment.
Upgrade from 2.5 GbE to 10 GbE where it actually matters
This is another big one that you can see a world of difference in doing and that is upgrading from 2.5 GbE up to 10 GbE. For many years, 1 GbE was the standard. Then, it took three forevers, but it seems like now the multi-gig 2.5 GbE interface has become the comfortable upgrade path for home labs. In 2026. 2.5 GbE is pretty standard with most mini PCs that you purchase.
But, the downside is, it still may not be enough, especially if you are running shared storage, or software-defined storage like Ceph. So, upgrading from 2.5 GbE up to 10 GbE is a smart move if you want to experiment with shared storage, like Ceph.
Below is a switch that I have used as a 10 gig top of rack switch for my mini rack 10 gig network retrofit:
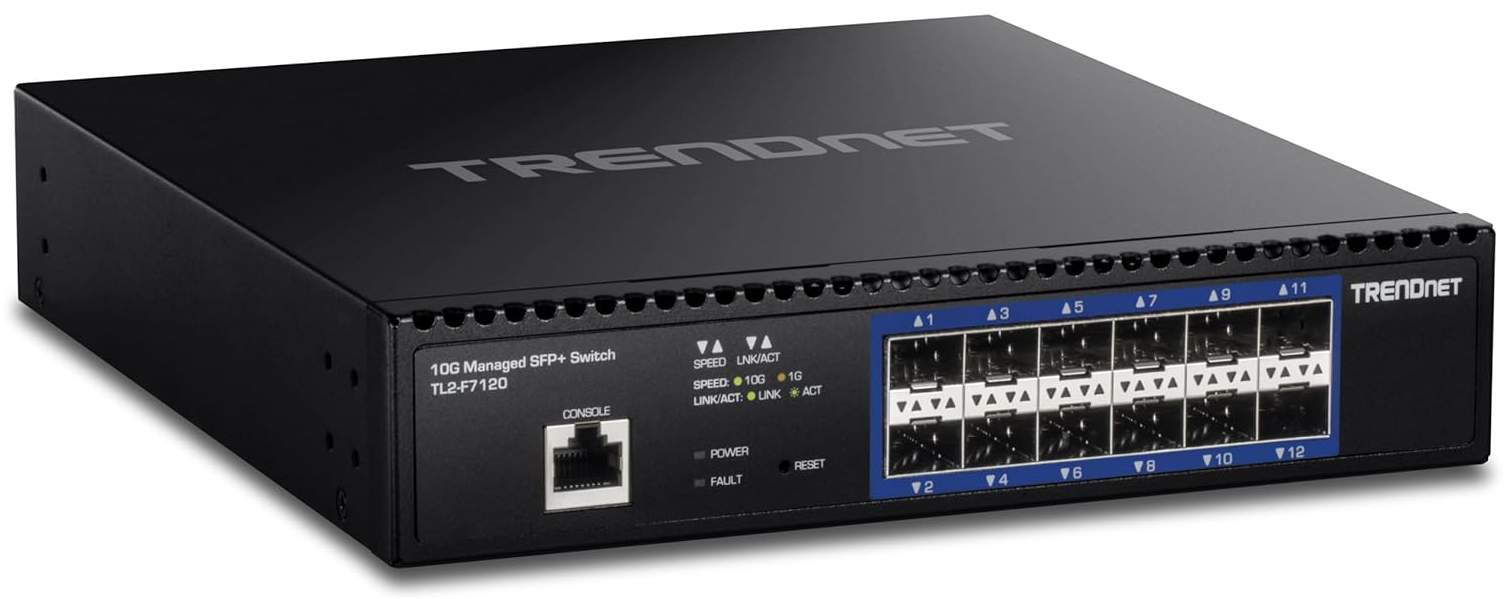
Also, like the SSD improvement mentioned above, this doesn’t have to be an all or nothing approach. In fact, 10 GbE is usually reserved for uplinks that matter to run at 10 GbE. So, you can gain the benefits of 10 GbE with relatively inexpensive 10 GbE switches with only a few ports. This way you can uplink your Proxmox hosts to the 10 gig ports and then have all your other client traffic still on your 1 or 2.5 GbE uplinks.
Also, just a word of wisdom here as I have run both for years. I would definitely lean toward SFP’s instead of Base-T (looks like RJ-45 connections) for 10 gig. The Base-T connections run very hot, especially if you have to use a Base-T SFP to plug into an SFP-only switch. This will use more power in the process as well.
Separate storage traffic onto its own network
Another “upgrade” that you can make is one that potentially can be made without purchasing any new hardware if you have free ports available and the capability to do VLANs on your network switch. Separating storage traffic from other traffic types and putting it on its own network can be one fo the most overlooked performance improvements you can make in the home lab.
When storage traffic shares the same network as your virtual machines, containers, and management traffic, everything is competing for bandwidth and latency. This impact is definitely noticeable during high traffic events like backups, rebalancing, or just large file transfers. Even when your network is technically fast enough, contention can push things just enough over the edge where you definitely feel it in your applications.
This looks a lot like the following:

Separating your storage traffic onto its own dedicated network helps to bring this back under control. Storage operations are more consistent. Latency will stabilize and your management interfaces truck right along even when very network heavy operations are underway.
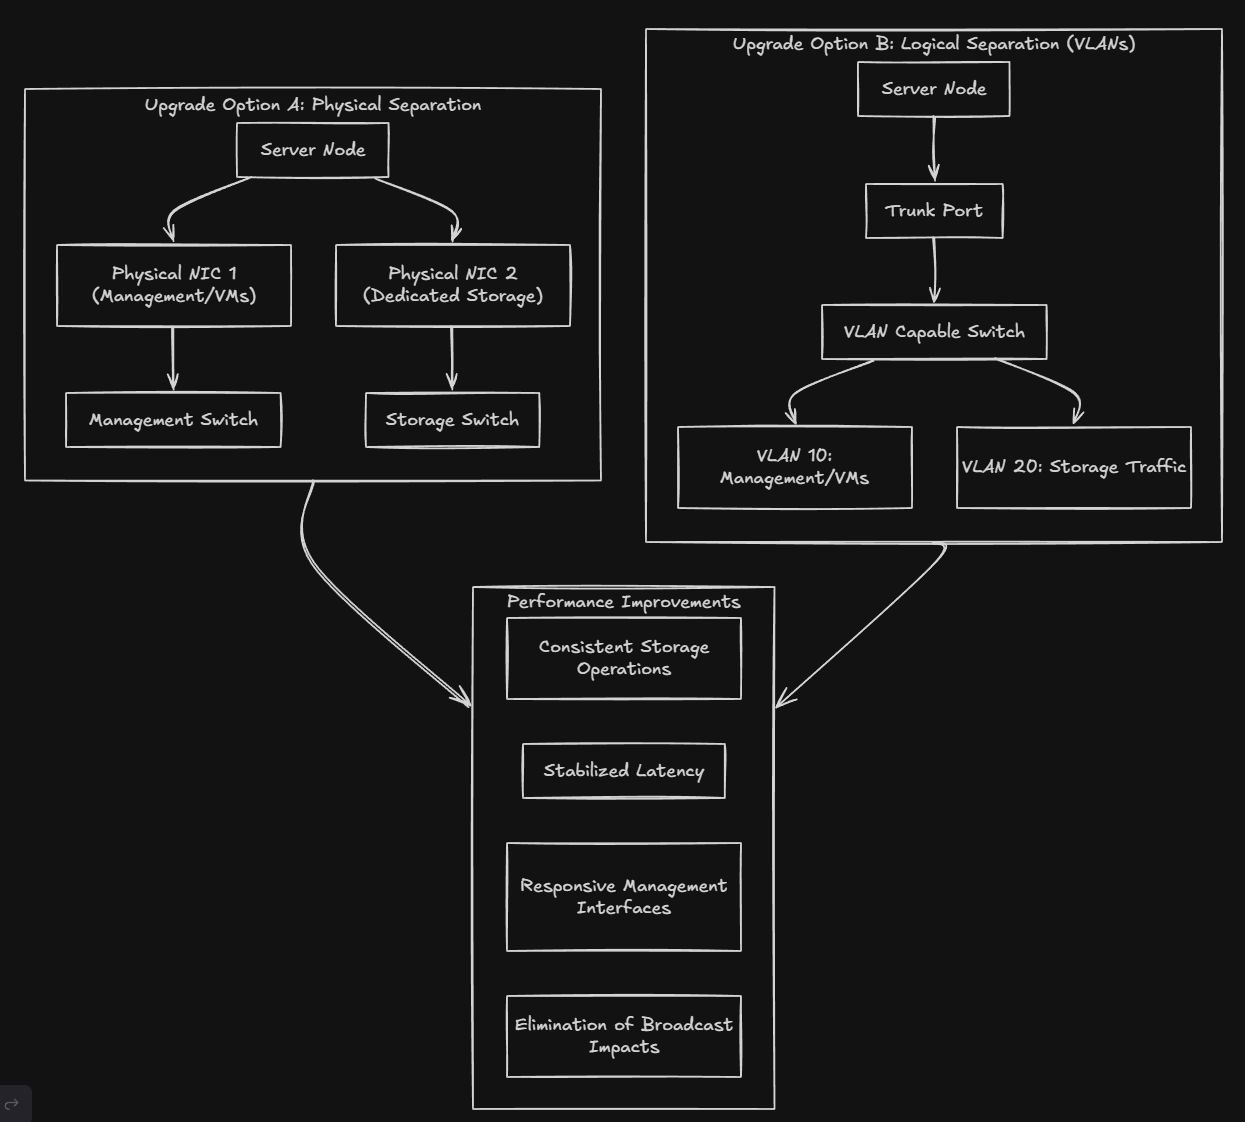
Most of the time this can be done using existing NICs and VLANs. If your nodes have multiple network interfaces, dedicating a separate physical interface to your storage traffic is one of the cleanest performance boosts that you can get. If you don’t have a separate physical adapter, then you can introduce VLAN separation between networks and gives you more control over your traffic and helps eliminate broadcast impacts between traffic types.
Move boot and system disks off USB and low end media
This is an upgrade that can have surprising benefits, even if it may not seem like it would. Many home labs still boot hypervisors from USB drives or other low-end SATA devices. I know for years, I ran my VMware ESXi hosts on USB keys inserted into the back of the hosts. In production in the vSphere 6.x days these commonly ran from SD-Cards.
However, while this works, it introduces quality of life issues that can result in slow updates, sluggish reboots, and occasional instability. These things had notorious longevity issues, especially when you had lots of logs being continuously written to these types of devices that were not really meant for high endurance operations.
As hypervisors have morphed and changed over the past few years, these types of devices are no longer recommended or encouraged. Just buying a very cheap SSD drive to boot your hypervisor from can be a major boost in enjoyment of your home lab. It is so nice not to come into a hypervisor host every day or weekly that has one of these low-endurance boot drives that has bitten the dust.
Make sure you are using full speed slots for your NVMe drives
One of the things that you need to be sure about when loading up a mini-PC that has multiple M.2 slots with NVMe is to make sure the M.2 slots speeds you are using for your virtual machine or other quick storage, are your fast slots.
Depending on the architecture your mini PC comes with, not all of them have slower speed slots, but it is definitely something to note. Note all M.2 slots are created equal. For instance the Minisforum MS-01 has 3 NVMe slots. But, only one of the slots the closest to the U.2 connection is the PCIe 4.0 x4. The middle slot is a PCI 3.0 x4 and then the furthest to the right is a PCI 3.0 x2 slot.
With this configuration, you have to be mindful of where you plugin that beautiful PCIe 4.0 NVMe capable drive or you won’t see the full speed from your storage.
How to check NVMe slot speeds on Linux or Proxmox
On a Proxmox or Linux host, the first step is identifying your NVMe devices.
lsblk -d -o NAME,MODEL,SIZEOnce you know which NVMe device you want to inspect, you can query its PCIe link information.
First, identify the PCI address of the NVMe device:
ls -l /sys/class/nvme/nvme0/deviceYou will see a PCI address similar to this:
0000:01:00.0Now query that PCI device directly:
lspci -s 01:00.0 -vvIn the output, look for the LnkCap and LnkSta fields. These tell you both the maximum supported speed and what the device is currently running at.
For example:
LnkCap: Port #0, Speed 16GT/s, Width x4
LnkSta: Speed 8GT/s, Width x2
Enable jumbo frames where it makes sense
Jumbo frames is a setting that you see tons and tons of blog posts on, videos on the topic, and many other resources and references about. As simple as the concept is, it is often misunderstood or applied in the wrong places. When it is used correctly though and implemented correctly, they can reduce CPU overhead and improve throughput. This is especially true with storage traffic. If they are not used correctly, they can cause performance problems that are difficult to troubleshoot.
In a home lab environment, jumbo frames make the most sense for storage networks. Ceph traffic, NFS, iSCSI, and VM migration traffic all benefit from larger MTU sizes. This is because they move large amounts of data between the same hosts repeatedly. Reducing the number of packets that is required for those operations lowers CPU interrupt overhead. This will improve the efficiency of the hosts under load.
This is not something you need to enable everywhere. Client networks, management networks, and user facing traffic usually gain little from jumbo frames and are often better left at standard MTU sizes. The goal is turn it on where it is needed but leave it off everywhere else.
The most important rule with jumbo frames is to be consistent where you implement it. Every device on the path must support the same MTU size. What does this include? It should include network interfaces on your hosts, bridges or bonds, virtual switches, storage networks, and the physical switch ports in between. A single mismatched MTU can lead to fragmentation. That can ultimately lead to dropped packets, or intermittent performance issues.
Implementing jumbo frames in Proxmox
A common and safe MTU value for home labs is 9000. This value is widely supported by modern NICs and switches and works well for storage traffic. On a Proxmox host, enabling jumbo frames starts at the network interface and bridge level. Both need to be configured with the same MTU. For example:
auto vmbr1
iface vmbr1 inet static
        address 10.10.10.11/24
        bridge-ports enp4s0
        bridge-stp off
        bridge-fd 0
        mtu 9000
The physical NIC, the bridge, and any bonded interfaces should all have the same MTU size. Once the host is configured, the switch ports for the host must also be set to support jumbo frames.
After configuration, it is extremely important to validate that jumbo frames are actually working. The easiest way to test is with a ping that uses a large packet size and disables fragmentation:
ping -M do -s 8972 10.10.10.12If the ping succeeds, jumbo frames are working end to end. If it fails, something along the path does not support the configured MTU.
Wrapping up
These are some of the easiest home lab performance upgrades that you can make without breaking the bank so to speak. Some of these as we have shown don’t require any investment in new hardware, but rather just taking a look at how things are configured and making changes where these are needed can make a huge difference. Also, looking at the design of your network, especially when it comes to your storage network if you are using shared storage or software-defined storage. How about you? What performance tips have you implemented lately that have helped in your home lab?
Google is updating how articles are shown. Don’t miss our leading home lab and tech content, written by humans, by setting Virtualization Howto as a preferred source.
About The Author