Proxmox has definitely become one of the most popular platforms for home labs, arguably THE most popular. That momentum doesn’t look to be slowing down in 2026. In fact, I would say that it is speeding up. Proxmox has some really great ways you can automate it. And all of the infrastructure as code platforms like Terraform, Ansible, and others work really well with Proxmox. This post walks through the best automation projects you can build for Proxmox in a home lab in 2026. These are not just exercises to work through as a learning exercise. These are Proxmox automation projects that bring you real benefits and make your lab feel intentional. You do not need to build all of them at once. But if you just do one a week or even one a month you will be surprised at how much progress you will make in learning.
Why automation matters more in Proxmox labs now
Home labs are looking different and morphing compared to what they looked like a few years back. Many home labbers were running VMware vSphere back in the day and using native tooling there to automate environments. VMware has a lot of great automation with it as well.
However, I think Proxmox just works so well with the community of great open-source solutions out there for automation. Now, I would say most home labbers are already running Proxmox or looking to make the move this year and are looking to fully adopt the platform. Running Docker containers, Swarm clusters, or Kubernetes are also top of mind for many and learning DevOps mindsets.
These types of technologies (Docker, Swarm, Kubernetes, Linux in general) just lend themselves to automation since most are configured with YAML and other infrastructure as code. Automation has many great benefits that it brings including making things repeatable. Instead of nursing along a server and treating it as a “pet”. We can now automate and rebuild systems instead, “cattle”. Also, this helps to reduce manual steps. It makes the workload feel much lighter once you get everything automated.
It all starts with projects in the home lab to get things going when learning any discipline. The projects below are ones that will bring real value to your lab environment and take you to the next level.
Automating VM template builds with Packer
This is I think one of the best projects you can start with in the home lab. It is one of those projects that immediately gives you value as a return. None of us want to spend our time building and updating virtual machine templates that we need to deploy as Docker hosts, or other types of servers.
Manually installing an operating system means you have updates to apply, tweaks to make for settings that apply in your lab environment, and you have to keep repeating this process as the template grows older and gets behind on updates or other tweaks you have made.
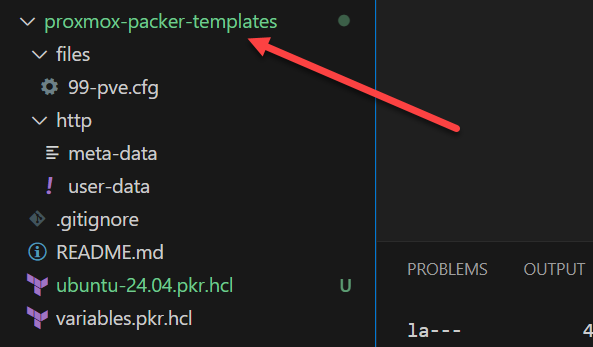
Hashicorp’s packer changes all of this. it is a tool you can use to add automation to the process of building your virtual machine templates in the home lab. It can entirely change how we view templates in fact. Instead of treating them as these artisanal creations, you view them as disposable and easily recreatable. When something needs to change, you can rebuild your template and redeploy rather than patching a dozen virtual machines.
Also, this process pairs really nicely with cloud init. Packer handles the base image. Then “per VM” customization happens when you deploy the template with something like Terraform, which we will look at below. This results in clean and predictable systems. If you have never done this before, I have you covered. Check out my blog posts on the Proxmox front here:
Provisioning Proxmox VMs and containers with Terraform or OpenTofu
Another great automation technique is provisioning Proxmox VMs and containers using something like Terraform. OpenTofu is quickly gaining traction as a popular fork of Terraform, now that Hashicorp has Terraform under a Business source license. Once you have your templates automated, the next step is automating how resources get created from those templates.
Terraform/OpenTofu is a natural fit for this as it allows you to describe your Proxmox infrastructure in a declarative way. In your Terraform code, you can define which VMs, containers should exist, what CPU config and memory they should have, networking config, tags, cloud init, and other things. Very cool!

The thing I like about all of this is that you can version control your configs in Git and then this allows you to track changes, roll back changes, compare updates made, etc. So, instead of clicking through the UI each time you need to create a VM or container from one of your templates, you can run a terraform plan and then a terraform apply.
This way, you can spin up test environments and not worry about cleanup. You can run a terraform destroy command and it will do it for you as all changes it made is stored in the state file it knows exactly what resources it created and need to be cleaned up. You can rebuild entire clusters if you want or learning labs. This helps you also think about design. When your infrastructure lives in your code, you have living documentation and a way to look at how things are provisioned and improve upon them.
Check out my blog post on this topic where I show you the steps to use with Proxmox here:
Automating Ceph operations inside Proxmox
Ceph is incredibly powerful, but once your Proxmox cluster grows beyond a couple of nodes, manual Ceph management can get to be a lot of manual steps. Repetitive tasks that you have to perform manually lead to inconsistent pool settings, and ad hoc tuning. This is exactly how our storage environments can drift and become fragile.
Automation in Ceph is not about hiding complexity. Ceph can still be complex. But, it is about codifying the things you do repeatedly so your clusters are configured the same way each time.
OSD deployment when new disk configurations
One of the first places automation pays off is OSD creation. In a growing home lab, new NVMe drives are added regularly. Manually creating OSDs means there is the risk of inconsistent settings or accidentally skipping devices.
In Proxmox, Ceph OSD creation is already scriptable. A new disk can be added using the same command every time:
pveceph osd create /dev/<nvme disk id>Because this command is idempotent and predictable, it fits perfectly into automating your Proxmox environment. A simple script can scan for unused disks and create OSDs automatically, ensuring every new drive joins the cluster using the same process every time. Again, this results in the process being consistent.
Automating pool creation
Pools are another area where consistency matters. VM disks, CephFS, and backup workloads all have different performance and other requirements. Creating pools manually over and over leads to mistakes.
Automating pool creation makes sure that every pool follows the same rules. For example, creating a replicated pool for VM disks, you can use the commands:
ceph osd pool create vm-pool 128
ceph osd pool set vm-pool size 3
ceph osd pool set vm-pool min_size 2
Or you can create an erasure-coded pool for bulk storage:
ceph osd erasure-code-profile set ec-profile k=3 m=2
ceph osd pool create ec-data 256 erasure ec-profile
See my new erasure coded mini cluster here:

Once these are defined, these commands can live in script. This makes sure your pools are created the same way every time. And it helps to avoid any kind of differences in replication, placement groups, or profiles. These can be hard to troubleshoot later.
PG autoscaling
Manually configuring and tuning placement groups is one of the easiest ways to get into trouble with Ceph. This is especially true as OSD counts change.
In a Proxmox-managed Ceph cluster, enabling PG autoscaling should be the default, not something you do after the fact:
ceph mgr module enable pg_autoscaler
ceph osd pool set vm-pool pg_autoscale_mode on
Once you have this enabled, Ceph automatically adjusts PG counts based on cluster size and pool usage. This helps to avoid a lot of work with manually tuning placement groups. Automation here is simply about turning on a built in feature that Ceph already has for each placement group.
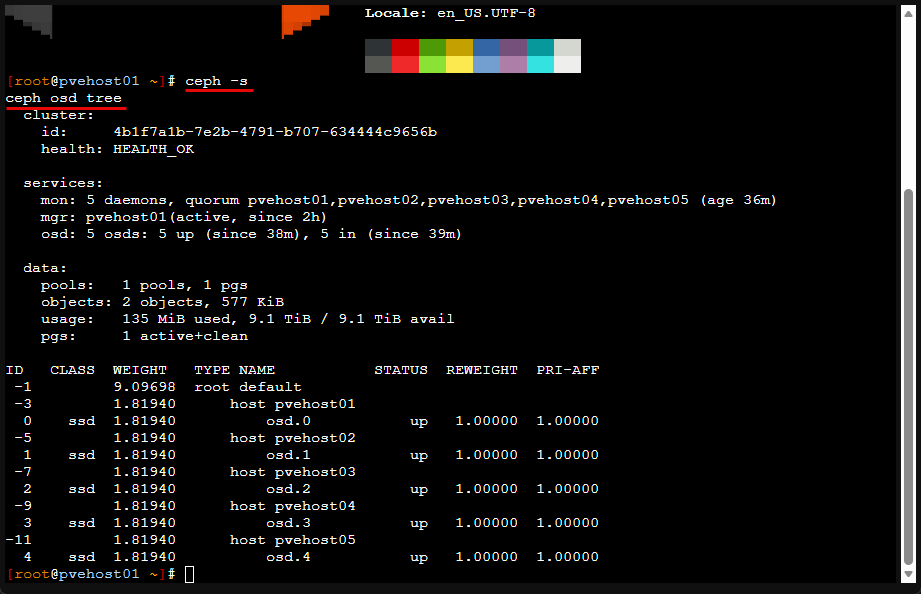
Automating health checks
Ceph already exposes everything you need to monitor cluster health if you want to do this (and you should). Automation makes sure you are actually using it.
Instead of manually checking dashboards, automated health checks run continuously or be shown with these commands, again great for scripts and other workflows.
ceph -s
ceph health detail
Managing Proxmox configuration as code
Maybe you haven’t thought of doing this already, but you can treat your Proxmox host configuration as code. Really? Yeah it is possible. You can commit network settings, storage definitions, and cluster level changes so that these are documented, versioned, and reviewed. You know what changes were made, and you can see how to get back to a previous good state if something is now broken.
This does not require a massive amount of effort. Really just a script to copy important files into a local git repo you have initialized. Here are some of the important cluster-level files to care about:
- Storage config – /etc/pve/storage.cfg
- Datacenter defaults – /etc/pve/datacenter.cfg
- Firewall rules (if you use Proxmox firewall) – /etc/pve/firewall/cluster.fw
/etc/pve/nodes/<node>/host.fw - HA config (if you use HA) – /etc/pve/ha/
- VM and LXC definitions (configs only, not disk data) – /etc/pve/qemu-server/*.conf, /etc/pve/lxc/*.conf
These are host level configs to care about below:
- Networking – /etc/network/interfaces
- Host tuning you repeat everywhere – /etc/sysctl.d/*.conf
/etc/modules-load.d/*.conf - APT repos and update policy – /etc/apt/sources.list, /etc/apt/sources.list.d/*.list, and /etc/apt/apt.conf.d/*
How I keep Proxmox config automatically synced to Git
Look for a post on this one soon. But, instead of trying to run Git directly inside /etc/pve, I keep a small local repository on one Proxmox node and copy only the safe, high-value configuration files into it. A scheduled job handles syncing, committing, and pushing changes automatically.
The repo lives somewhere normal on disk, for example:
mkdir -p /opt/pve-config-git
cd /opt/pve-config-git
git init
A simple sync script copies selected files out of /etc/pve and a few per-node paths, explicitly avoiding anything under /etc/pve/priv or other secret material:
rsync -a /etc/pve/storage.cfg /opt/pve-config-git/storage.cfg
rsync -a /etc/pve/datacenter.cfg /opt/pve-config-git/datacenter.cfg
rsync -a /etc/pve/qemu-server/ /opt/pve-config-git/qemu-server/
rsync -a /etc/network/interfaces /opt/pve-config-git/interfaces
That script can run on a timer. If anything changed, Git commits and pushes the update automatically. The result is a clean history of meaningful Proxmox changes without touching the clustered filesystem directly or leaking secrets into source control.
CI pipelines that are valuable with Proxmox
Integrating Proxmox into CI is one of the fastest ways to make your home lab feel like a real platform that is automated. The trick is keeping the pipeline actions simple and repeatable, then letting Proxmox do what it is good at. Cloning templates quickly, booting VMs, and destroying them cleanly.
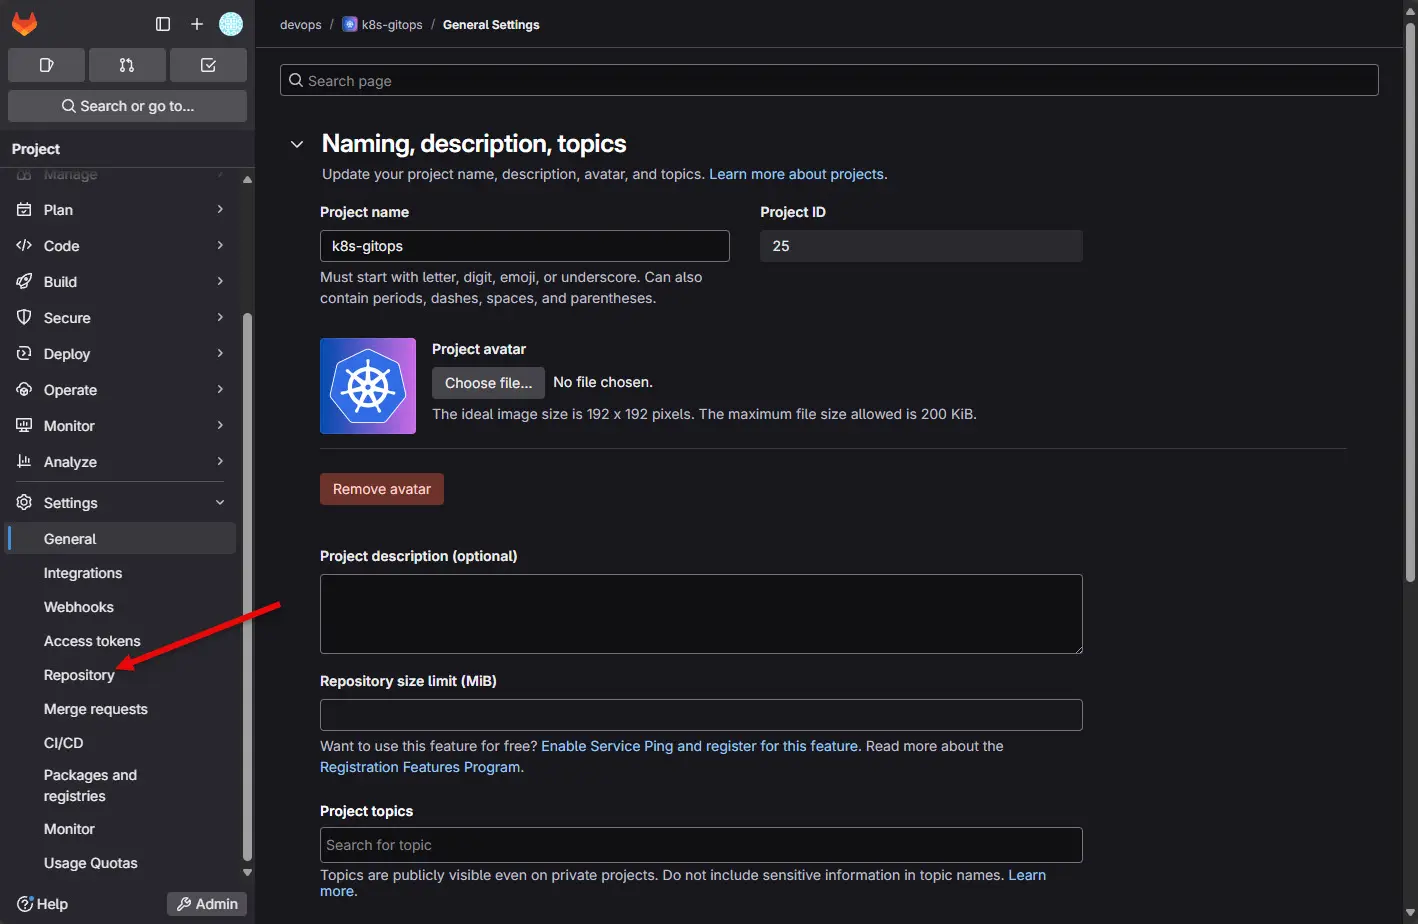
If you haven’t got a git server stood up as of yet, see my posts below:
- Gitea Install with Drone CI CD Server Self-Hosted Git
- Installing GitLab, Runner, and Container Registry on Your Home Server
There are three practical patterns that work extremely well in a home lab.
Idea 1 – Build and publish a golden template (Packer + Proxmox)
This pipeline rebuilds your Ubuntu or Windows templates on a schedule or on demand. It is a clean alternative to manually patching templates and hoping nothing breaks. This actually uses the code that you spin up in the first automation project we mentioned in this blog post (using Packer).
A pipeline job does the following:
- Runs Packer to build a Proxmox VM template
- Checks the build succeeded and the template exists in Proxmox
- Optionally tags the template as the new “current” version
The core action is simply running Packer with a Proxmox builder:
packer init .
packer build -var "proxmox_node=pvehost01" -var "template_name=ubuntu-24-04-golden" .
The key practice here is that the template is not a one-time artifact. It is rebuilt regularly, every time the pipeline runs. That keeps the whole lab consistent and reduces patch drift across VMs.
Idea 2 – Spin up a quick test VM for various purposes
This is the pattern that makes your cluster feel on demand.
Instead of testing changes on long-lived VMs, run a pipeline that creates a short-lived VM from a template, boots it, runs checks, and deletes it. The job is successful only if the VM comes up healthy and passes validation. This makes use of the 2nd project we mentioned in the post, using Terraform.
Proxmox makes this easy because cloning templates is fast. A pipeline can do something like:
- Clone template to a new VMID
- Apply cloud-init settings
- Start the VM
- Run a quick validation step
- Destroy the VM
Here is the core Proxmox CLI flow, using native Proxmox commands instead of Terraform:
qm clone 9000 120 --name ci-test-ubuntu --full 1
qm set 120 --cipassword 'TempPass!' --sshkeys /opt/ci/id_rsa.pub --ipconfig0 ip=dhcp
qm start 120
Then the pipeline waits for the VM to respond and runs the check. This can be as simple as a ping and SSH command, or running a test script inside the VM. When complete, the pipeline removes the VM:
qm stop 120 --skiplock 1 || true
qm destroy 120 --purge 1
That destroy step is important. It prevents the lab from slowly filling with forgotten test VMs and keeps the workflow truly repeatable.
Automating monitoring and alerting deployment in Proxmox
In my Proxmox lab, monitoring is automated by treating it like infrastructure. This makes sure it is not a one-off setup task. Instead of installing exporters and creating dashboards manually on each node, I have learned to standardize how monitoring is deployed. You can do this with automation.
At the node level, every Proxmox host exposes metrics the same way. Proxmox already provides a built-in metrics endpoint. You can combine this with a lightweight exporter that is installed automatically when a node is provisioned or added to the cluster. This is done with a simple script or configuration management step, not manual installs.
For example, a node setup step makes sure the exporter is present and running:
apt install -y prometheus-node-exporter
systemctl enable --now prometheus-node-exporter
At this point, the node is exporting metrics on:
http://<node-ip>:9100/metricsNothing is configured on the node beyond that. No Prometheus address, no credentials, no agent configuration.
Prometheus file-based service discovery
Instead of hardcoding node IPs inside prometheus.yml, Prometheus reads a targets file that is generated automatically.
For example:
# /etc/prometheus/targets/proxmox-nodes.yml
- targets:
  - pvehost01:9100
  - pvehost02:9100
  - pvehost03:9100
Prometheus is configured once to load anything in that directory:
scrape_configs:
  - job_name: proxmox-nodes
    file_sd_configs:
      - files:
          - /etc/prometheus/targets/*.yml
Prometheus reloads this dynamically. No restart required.
Node join updates the targets automatically
When a new Proxmox node is built and added to the cluster, the same automation that handles cluster membership also updates the Prometheus targets file.
That can be as simple as:
- A script that regenerates the file from
/etc/pve/nodes - An Ansible inventory update
- A CI pipeline that rewrites and commits the targets file
Example using Proxmox’s own cluster data:
ls /etc/pve/nodes | awk '{print " - " $1 ":9100"}'That output becomes the Prometheus target list. As soon as the file is updated, Prometheus starts scraping the new node. From this point you can create dashboards to visualize your data, etc.
Wrapping up
These Proxmox automation projects and ideas are just the tip of the iceberg when it comes to automation with Proxmox. There are so many great ideas you can take advantage of when running Proxmox in the home lab or a production environment. Since Proxmox runs on top of Linux, it is able to take advantage of all the really great automation tools and workflows that are already used with Linux in general. It is really built for automation we could say. How about you? Are you using some of these same types of ideas in your home lab? What other Proxmox automation projects do you have in your lab?
Google is updating how articles are shown. Don’t miss our leading home lab and tech content, written by humans, by setting Virtualization Howto as a preferred source.
About The Author