There are a lot of great ways to run Kubernetes in your home lab. I have covered many of these from running k3s to running a Minikube cluster on Ubuntu Server. However, as of recently, I have revisited running Talos Kubernetes since standing up Omni in my environment and it has totally changed running K8s in my home lab. Let me walk you through using Omni to create a Kubernetes home lab in 2025 on your hypervisor of choice and the benefits of using it for Talos Linux management. It makes the rather involved setup when you manually provision Talos into a more “point and click” approach that is much easier.
What is Omni?
In case you missed my blog post on Omni, please check that out here: How to Install Talos Omni On-Prem for Effortless Kubernetes Management. In the blog, I walk through how to setup Omni in a self-hosted environment and get things working where you can manage and access Talos Omni for Kubernetes management.
Omni is a GUI management platform for managing Talos Linux Kubernetes nodes. It makes visualizing and managing one or more clusters much easier than having to do everything from the command line. Omni is totally free for the home lab for those that want to self-host it there.
What is Talos Linux Kubernetes?
Talos is a very unique Kubernetes distribution and provides one of the most secure ways to run Kubernetes in your home lab or production environments. With Talos Linux Kubernetes, you don’t spin up a Kubernetes host on Ubuntu, Alpine, CentOS, etc. Instead you provision a Talos Linux node which is a self-contained minimal installation. The Talos Linux node is extremely secure. The only way you have to interact with it is via the API is exposes. You can’t SSH to it, etc.
You use a tool called talosctl to interact with your Talos Linux Kubernetes nodes. Then also, you can use the traditional kubectl tool to work with Kubernetes directly. Talosctl manages the cluster, nodes, and other configuration, while kubectl interacts with your Kubernetes applications, deployments, daemonsets, etc as you would normally do.
Talos is extremely small when you deploy it and the small footprint and way it is accessed is making it gain rapid visibility among home labs and production environments interested in running Kubernetes in the most secure way possible.
Viewing the resources in Omni to get started
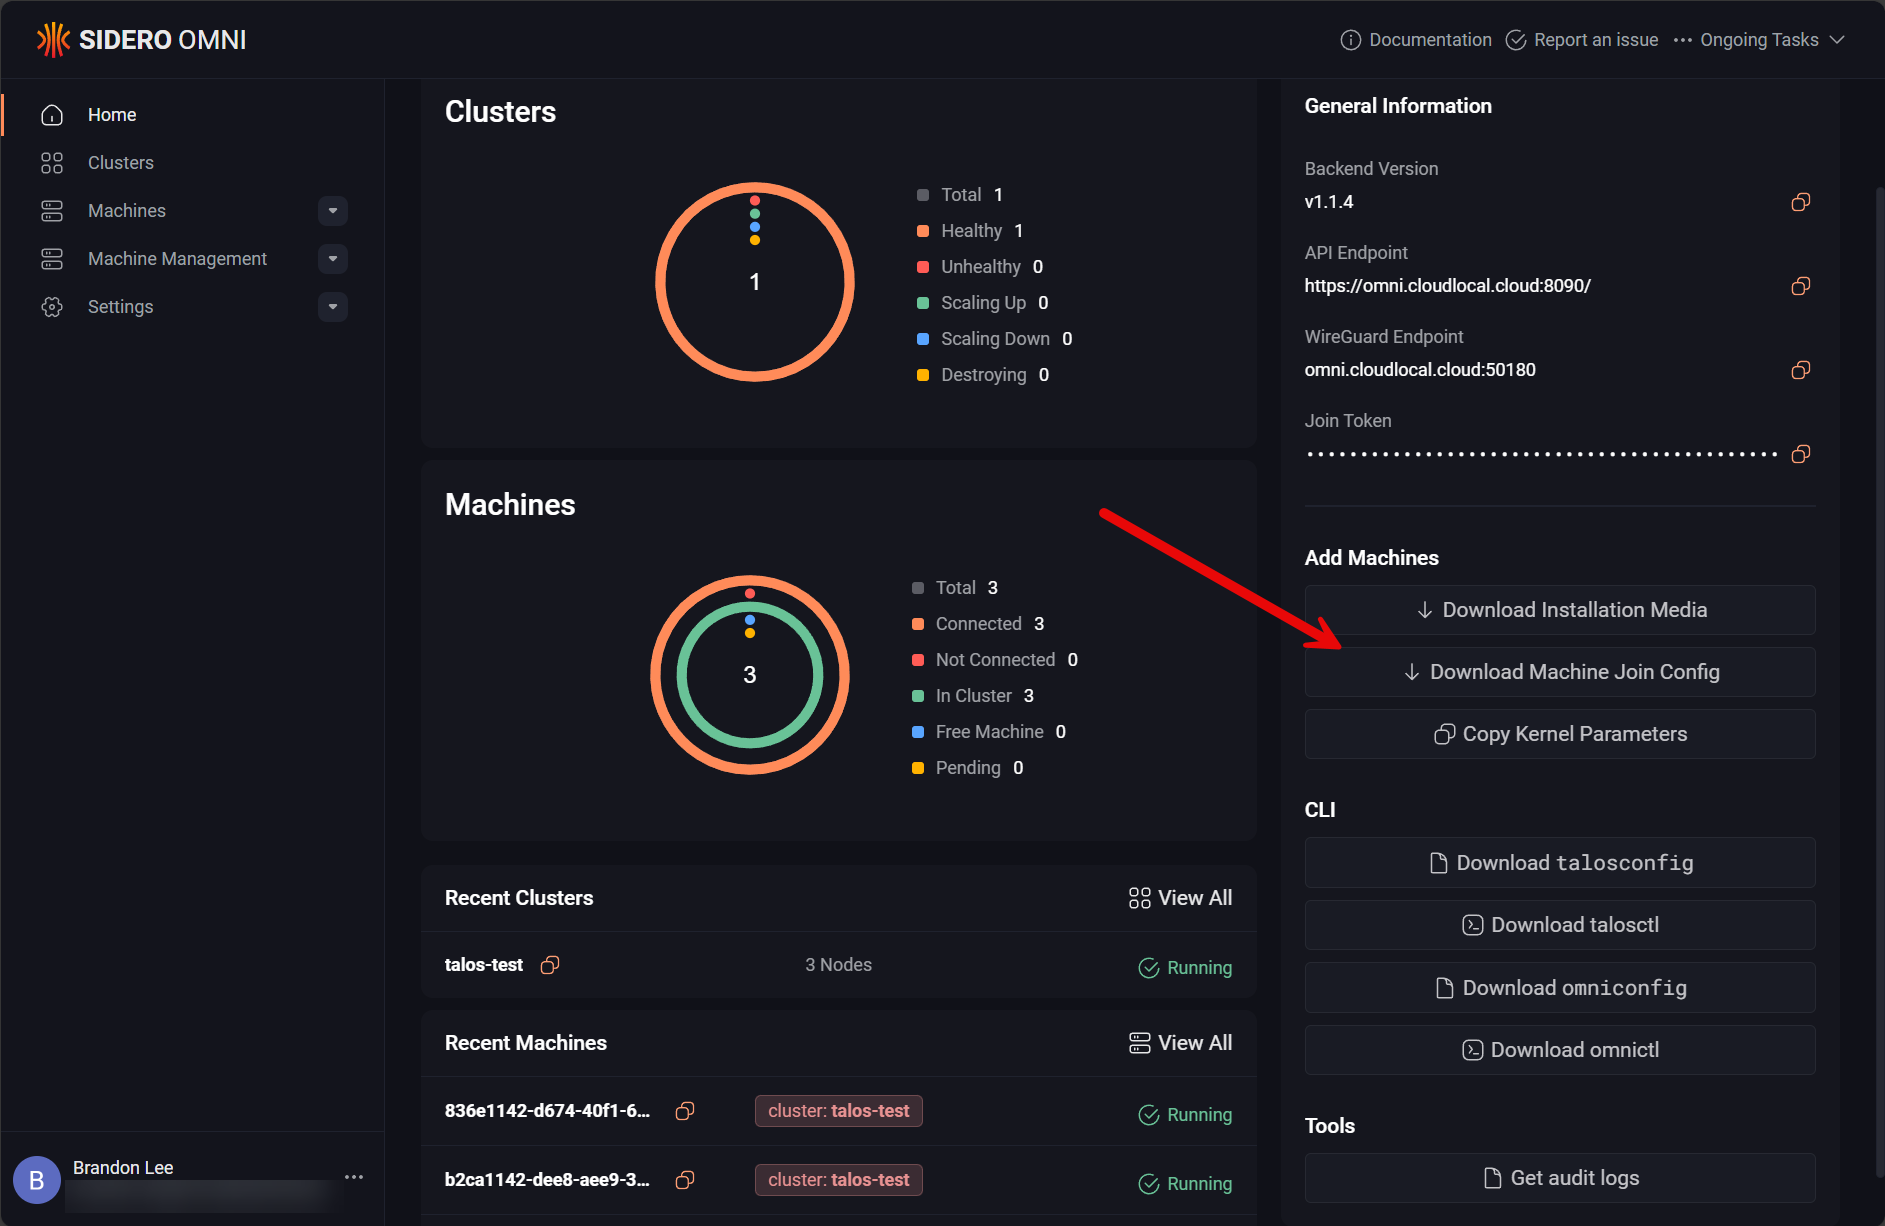
Once you have used my earlier blog post linked above to get up and running with Omni, you can login to Omni and view the resources presented there. Here you can download:
- Installation media
- Machine Join Config
- Copy kernel parameters
- Download talosconfig
- Download talosctl
- Download omniconfig
- Download omnictl
- Get audit logs
Download installation media
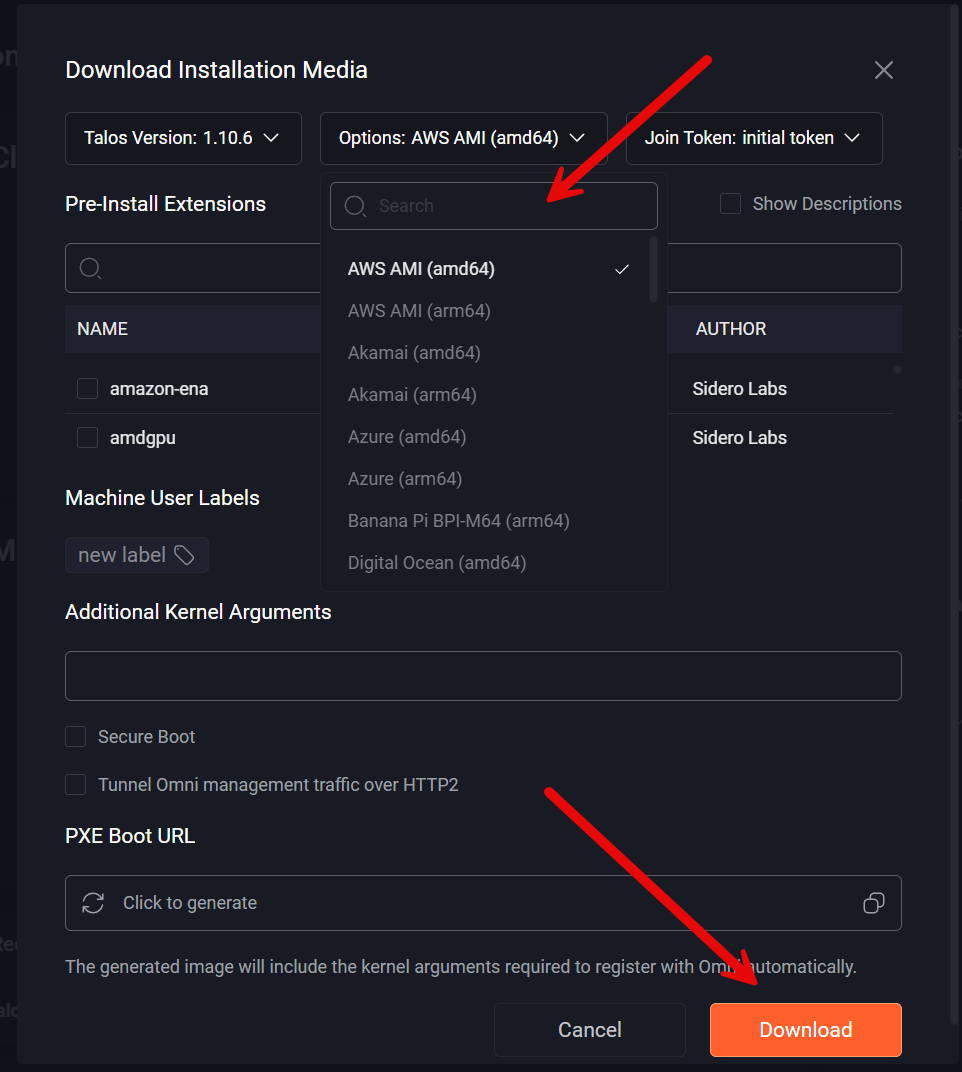
The first thing you will want to do creating your Talos Omni Kubernetes home lab is download the installation media. I really like how this makes getting your hands on the install media for Talos VERY easy, and you can download install media for all kinds of environments, including AWS, VMware, and generic ISOs. The nice thing is it gives you OVA downloads for VMware and other environments so it takes the heavy lifting out.
Below I have clicked the Download Installation Media link from the dashboard. You will be able to choose the Talos version, and which environment you are installing on, along with add many extensions that are in the catalog from Talos to use with the installation. This slipstreams plugins and other extensions that you might find useful if you choose to include them in the installation media.
Provisioning your nodes
Once you download the installation media you can provision your nodes. This is the part that Omni does not do for you. Instead you bring up your 3 or 5 nodes (these are good starting points for small labs) and then your nodes will automatically register themselves with Omni.
Below is a screenshot of Omni after installing 3 nodes with Talos Linux downloaded from Omni. So just to clarify, I didn’t have to do anything special for the machines to show up in Omni. This is tied into the download media that you install Talos Linux with.

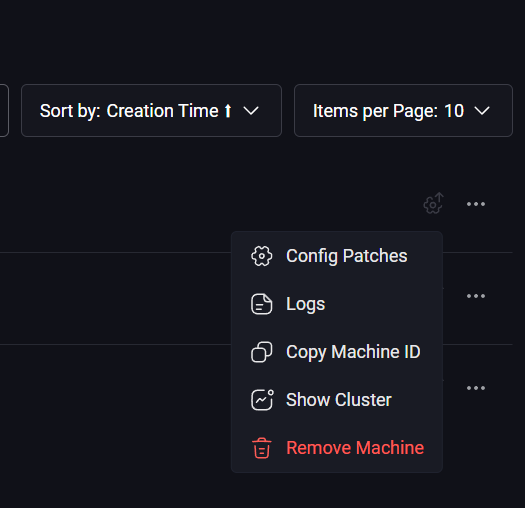
With the ellipse at the right of the node tags, what actions are possible? Well here when you click this, you have the following:
- Config patches
- Logs
- Copy machine ID
- Show Cluster
- Remove Machine
Creating a Talos Kubernetes cluster
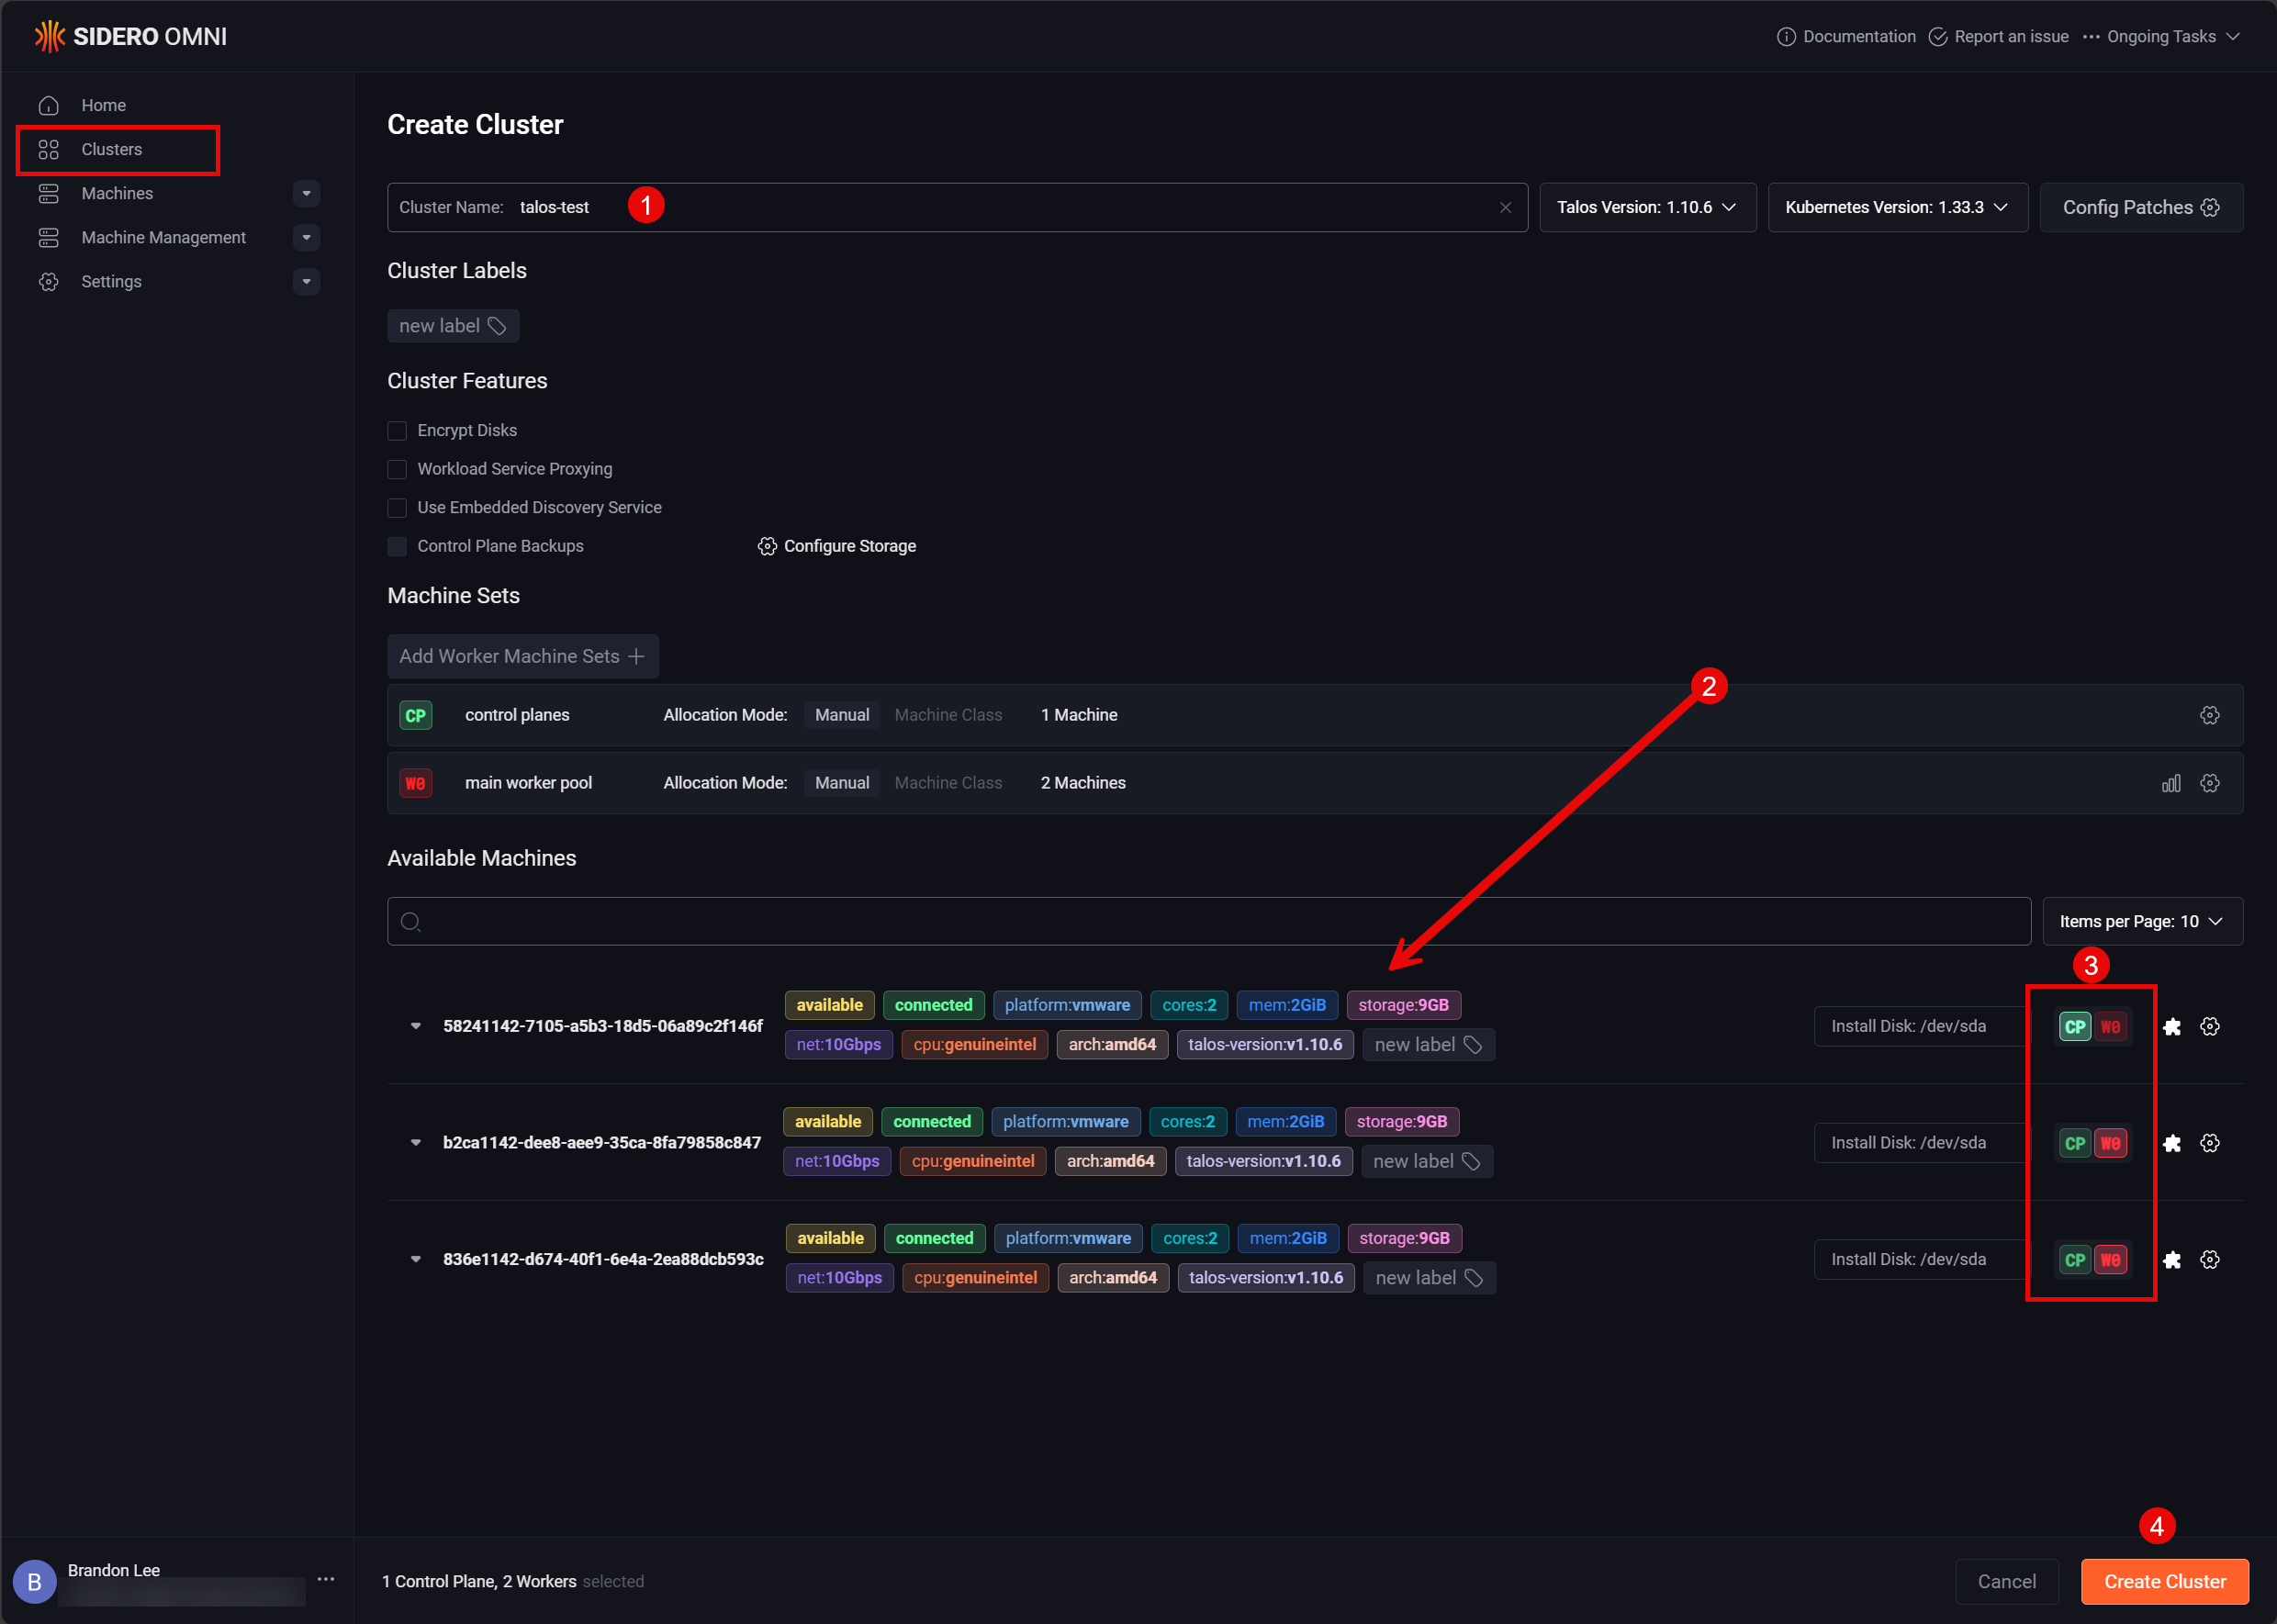
Once you have your machines connected to Omni, now comes the fun part, actually creating a Talos Kubernetes cluster. Click the Clusters menu over on the left.
Then click the Create Cluster button. This will take you to the Create Cluster page. First, you need to name your cluster. Then locate the machines it has listed, which in my case are the same machines that are showing as free in the machines menu. Next, to each machine you will see a green box with CP in it, for control plane. Also, you will see a red W0 in the box next to CP. This designates the node as a worker node. So, you select the box next to each node that you want to designate for one role or the other.
After you are finished doing that, you will click the Create Cluster button.
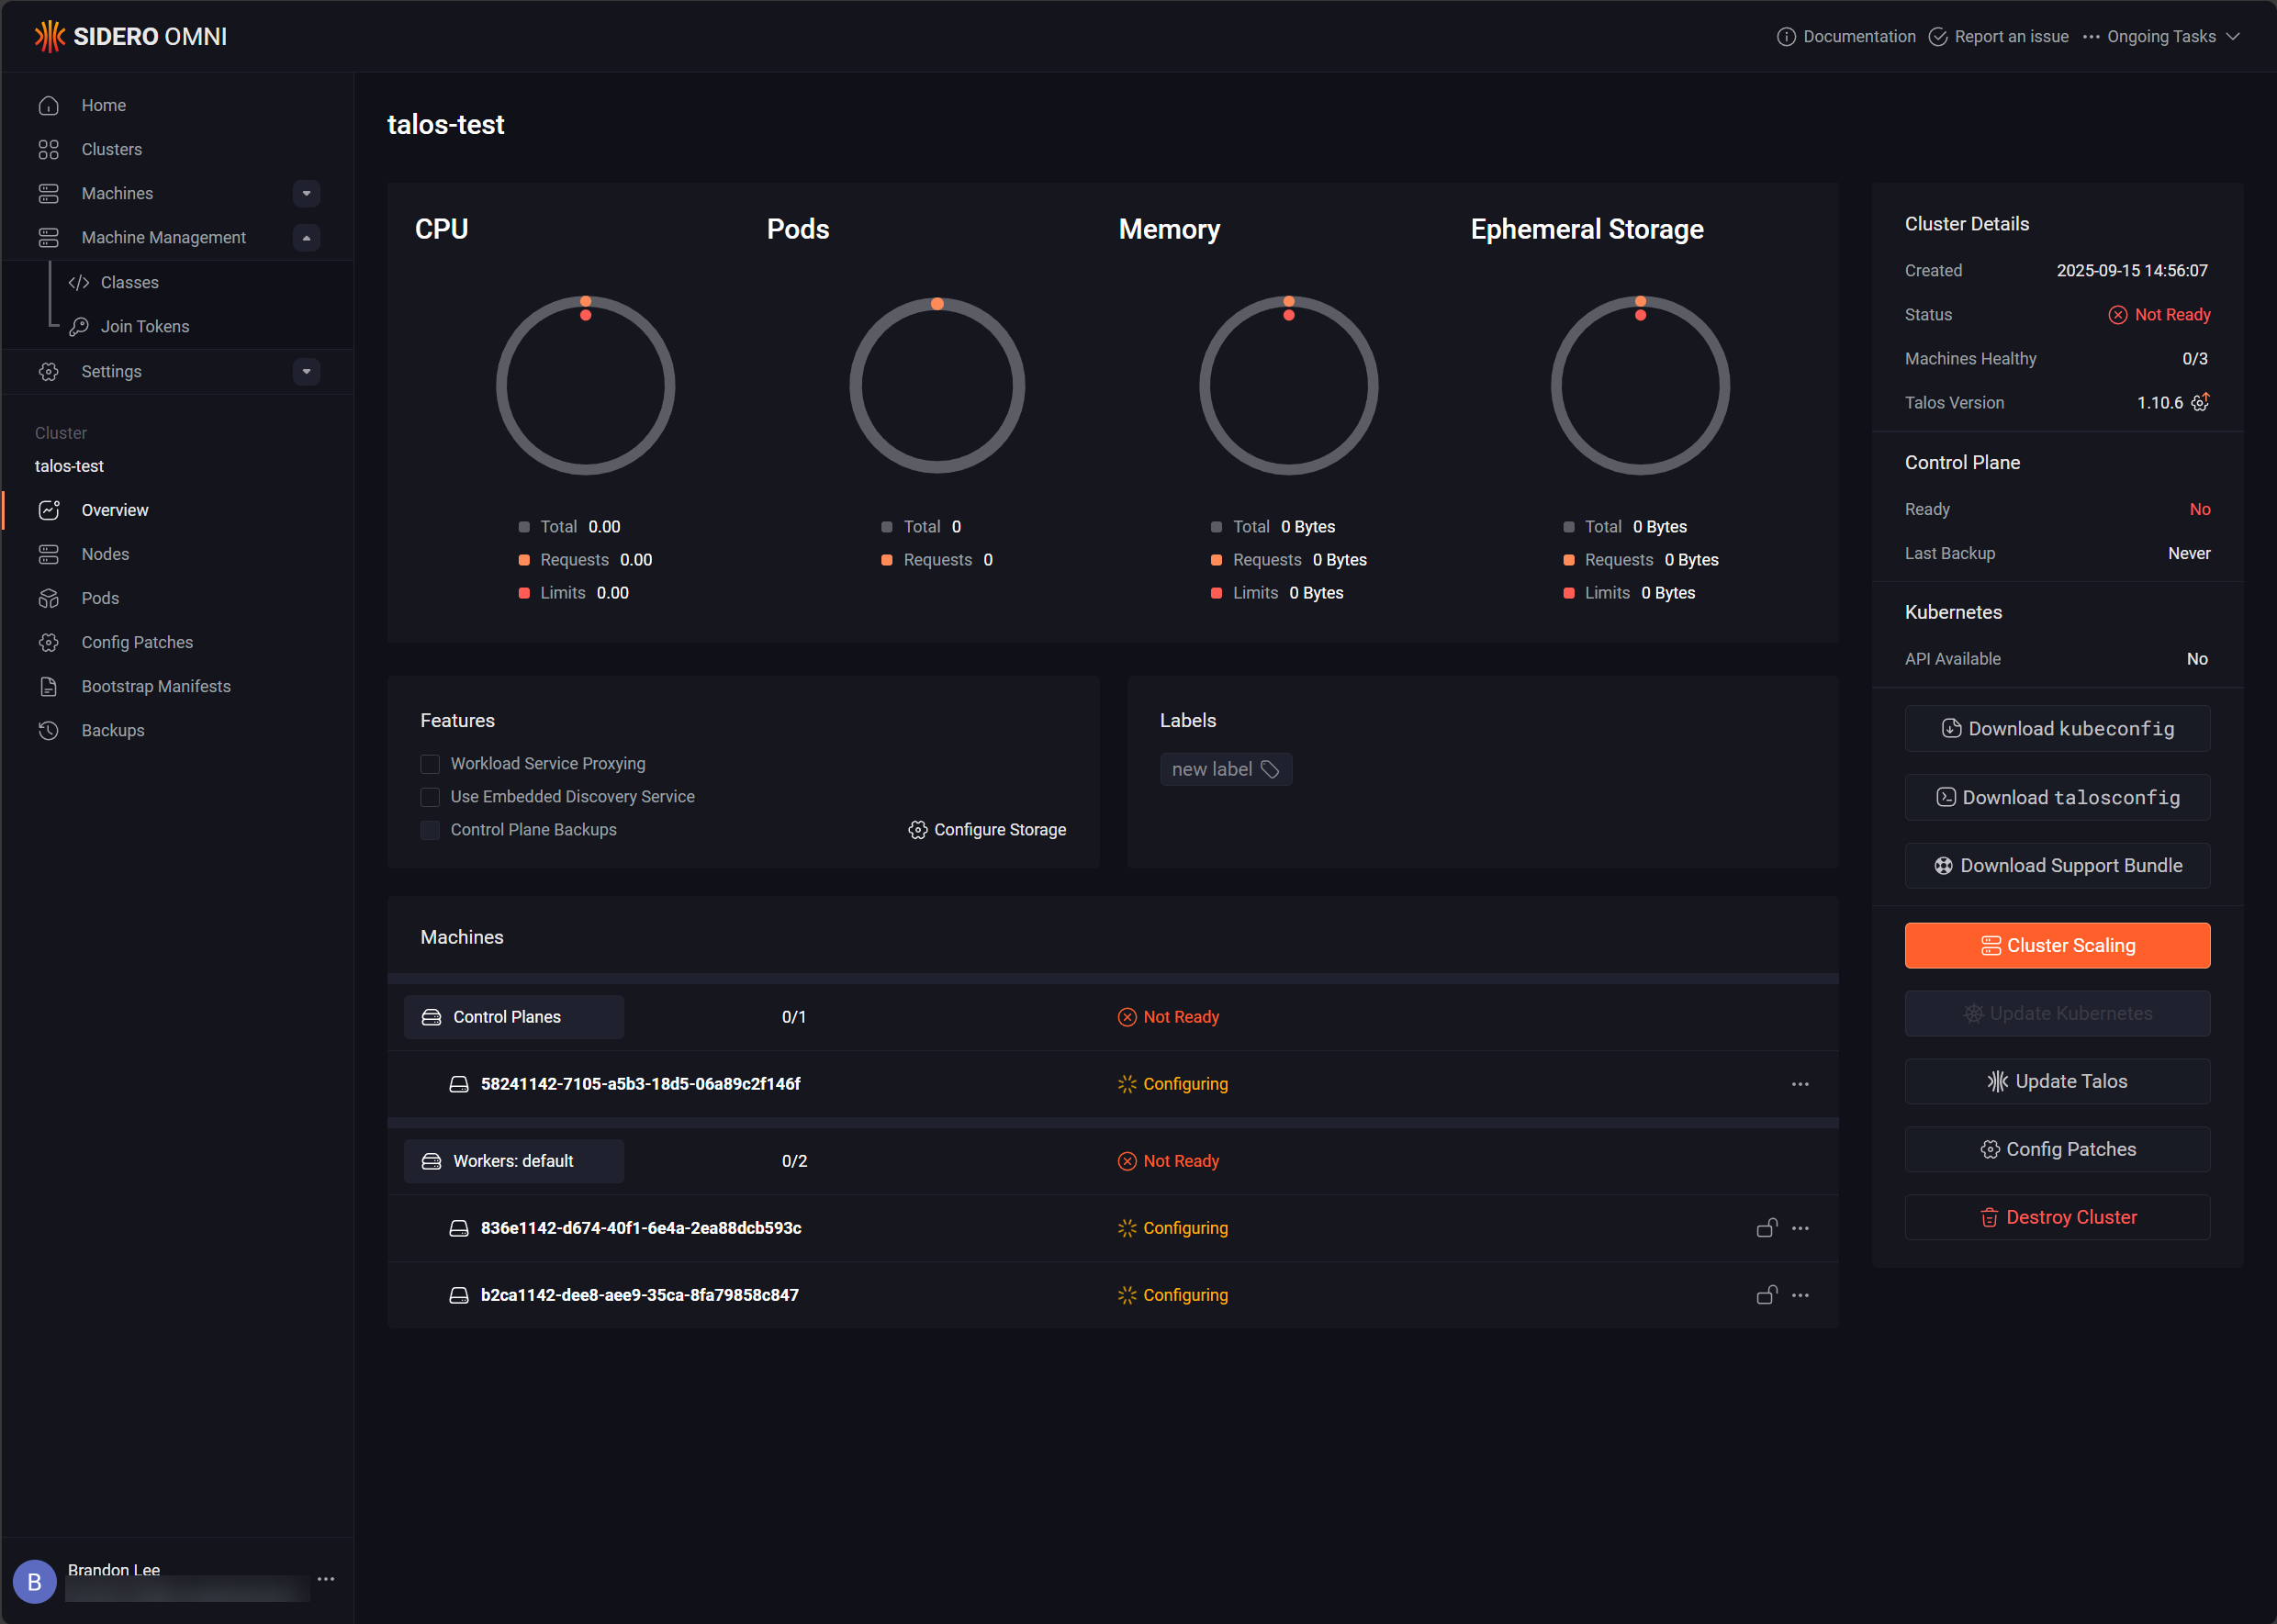
Once you click the create cluster button, you will see the cluster begin creating.
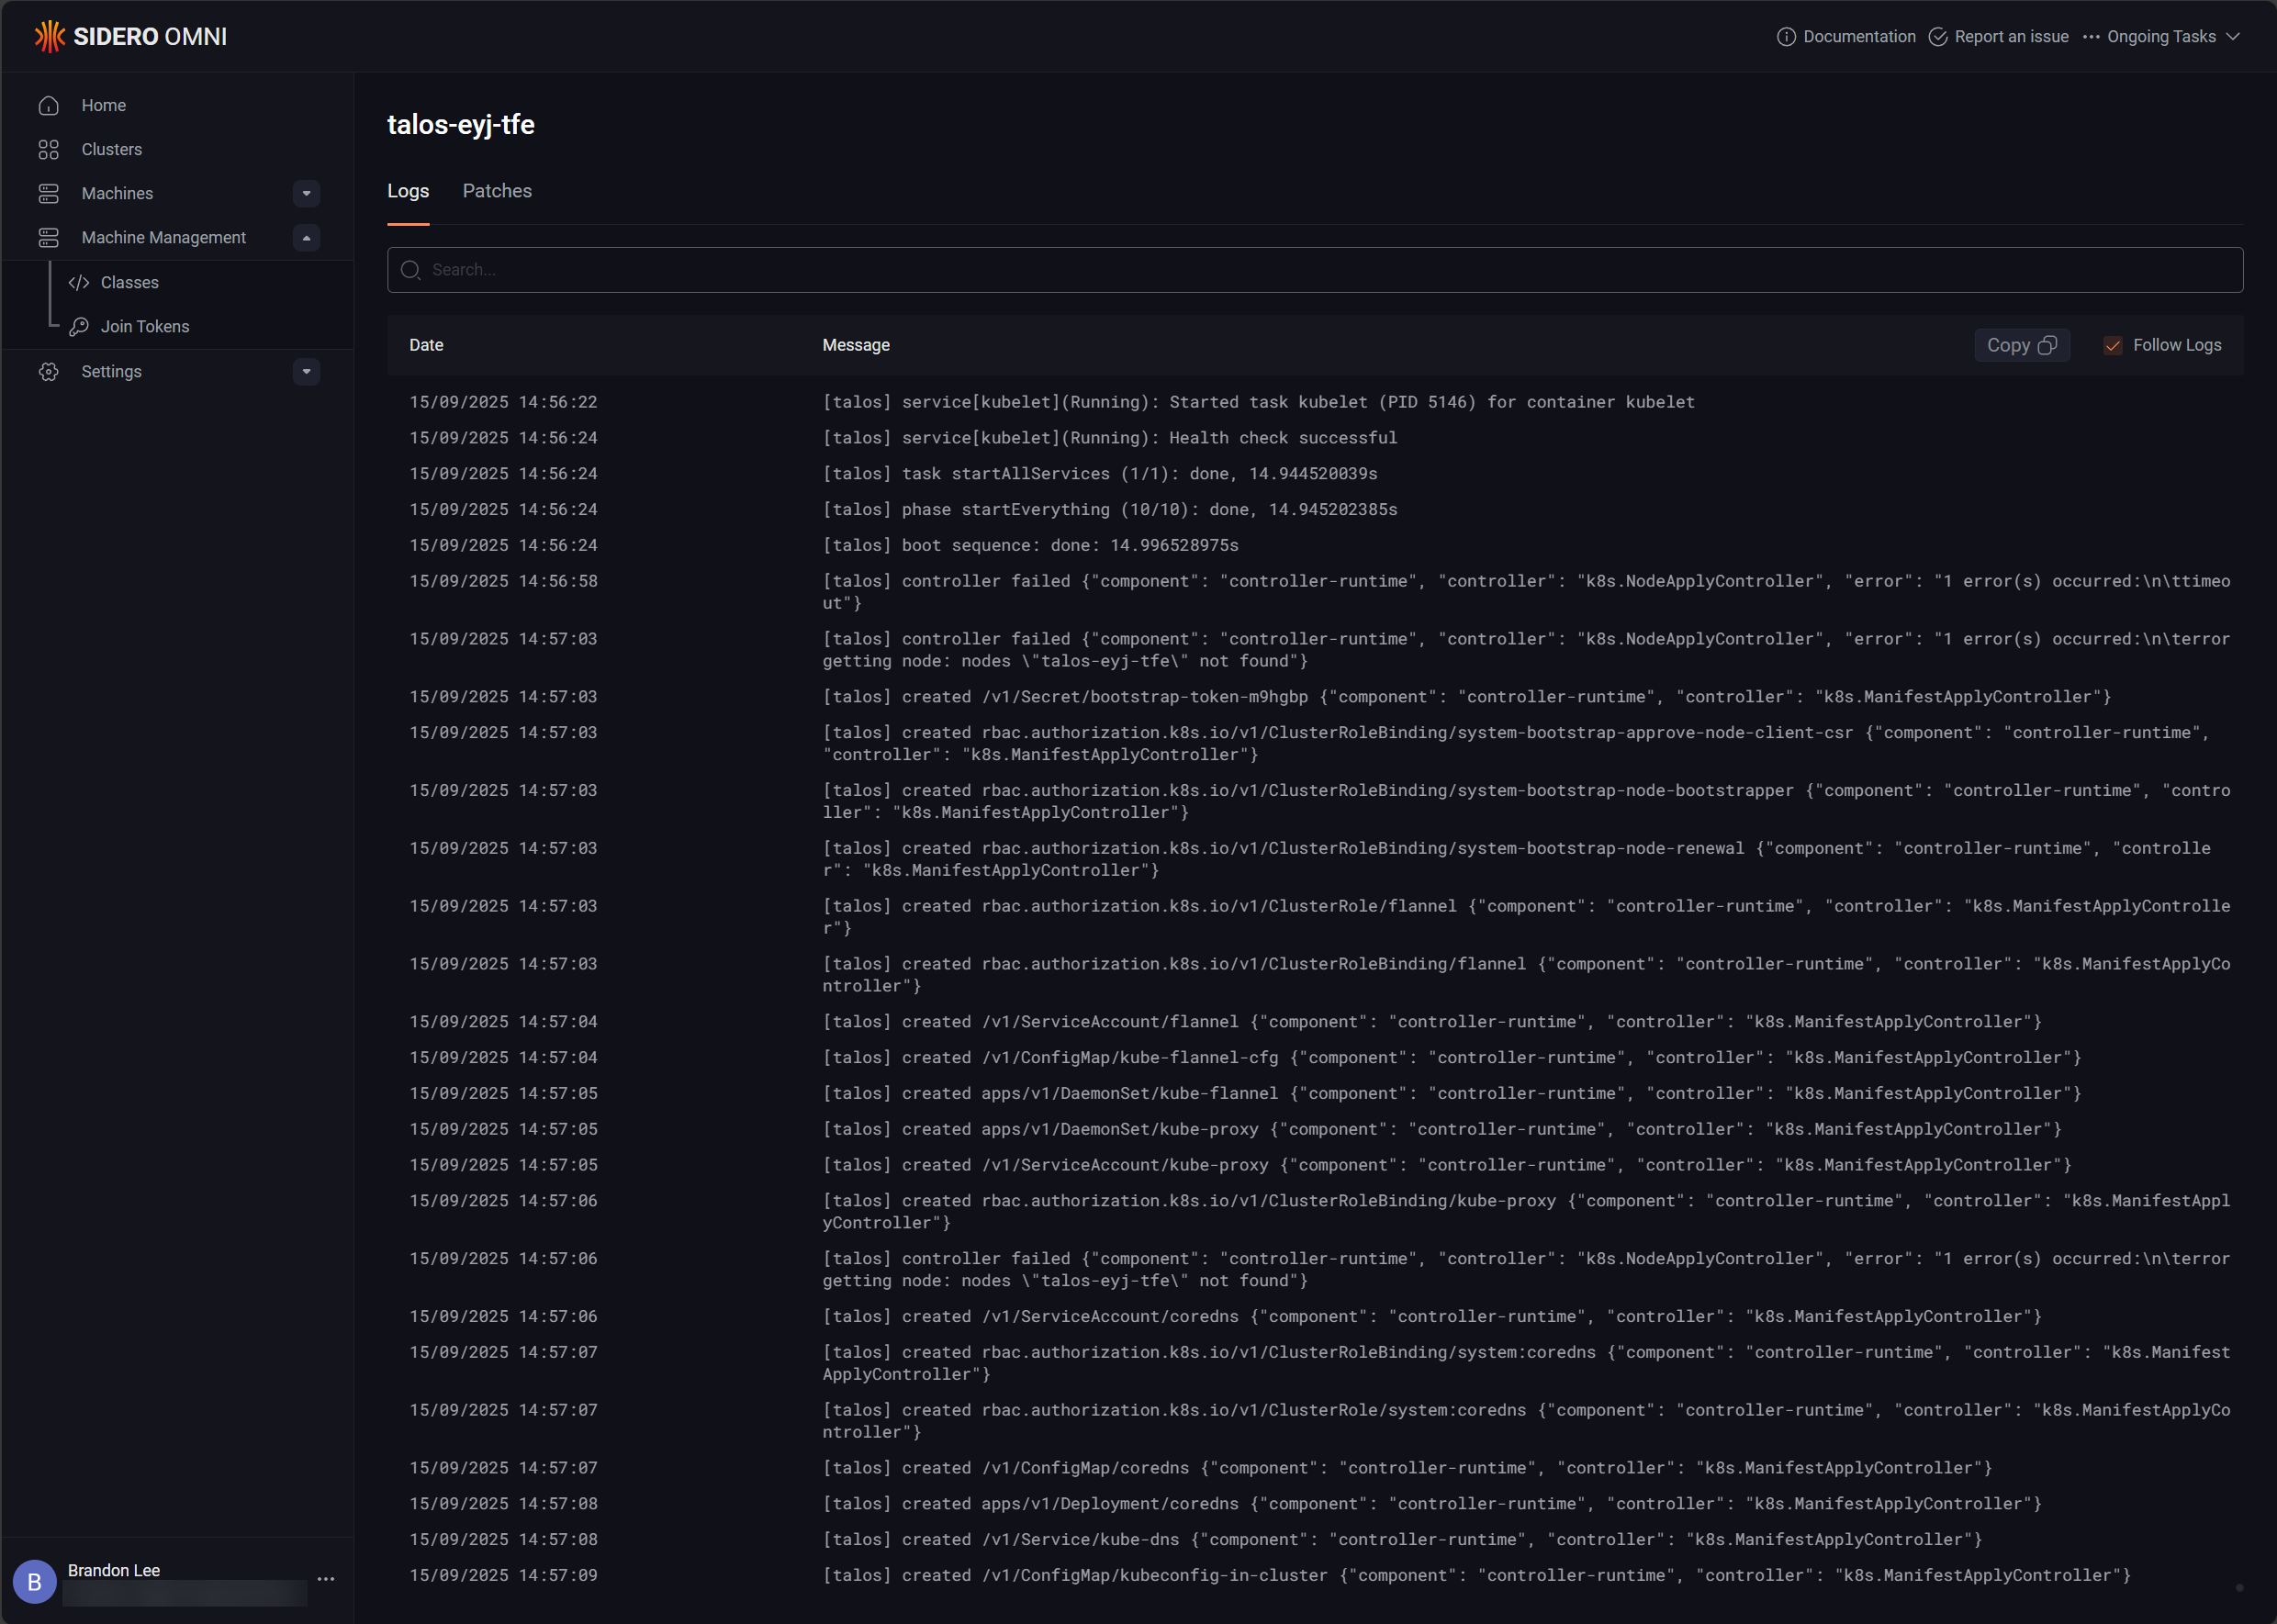
Also, what is nice is that you can click the ellipse next to the nodes at this point and view the logs.
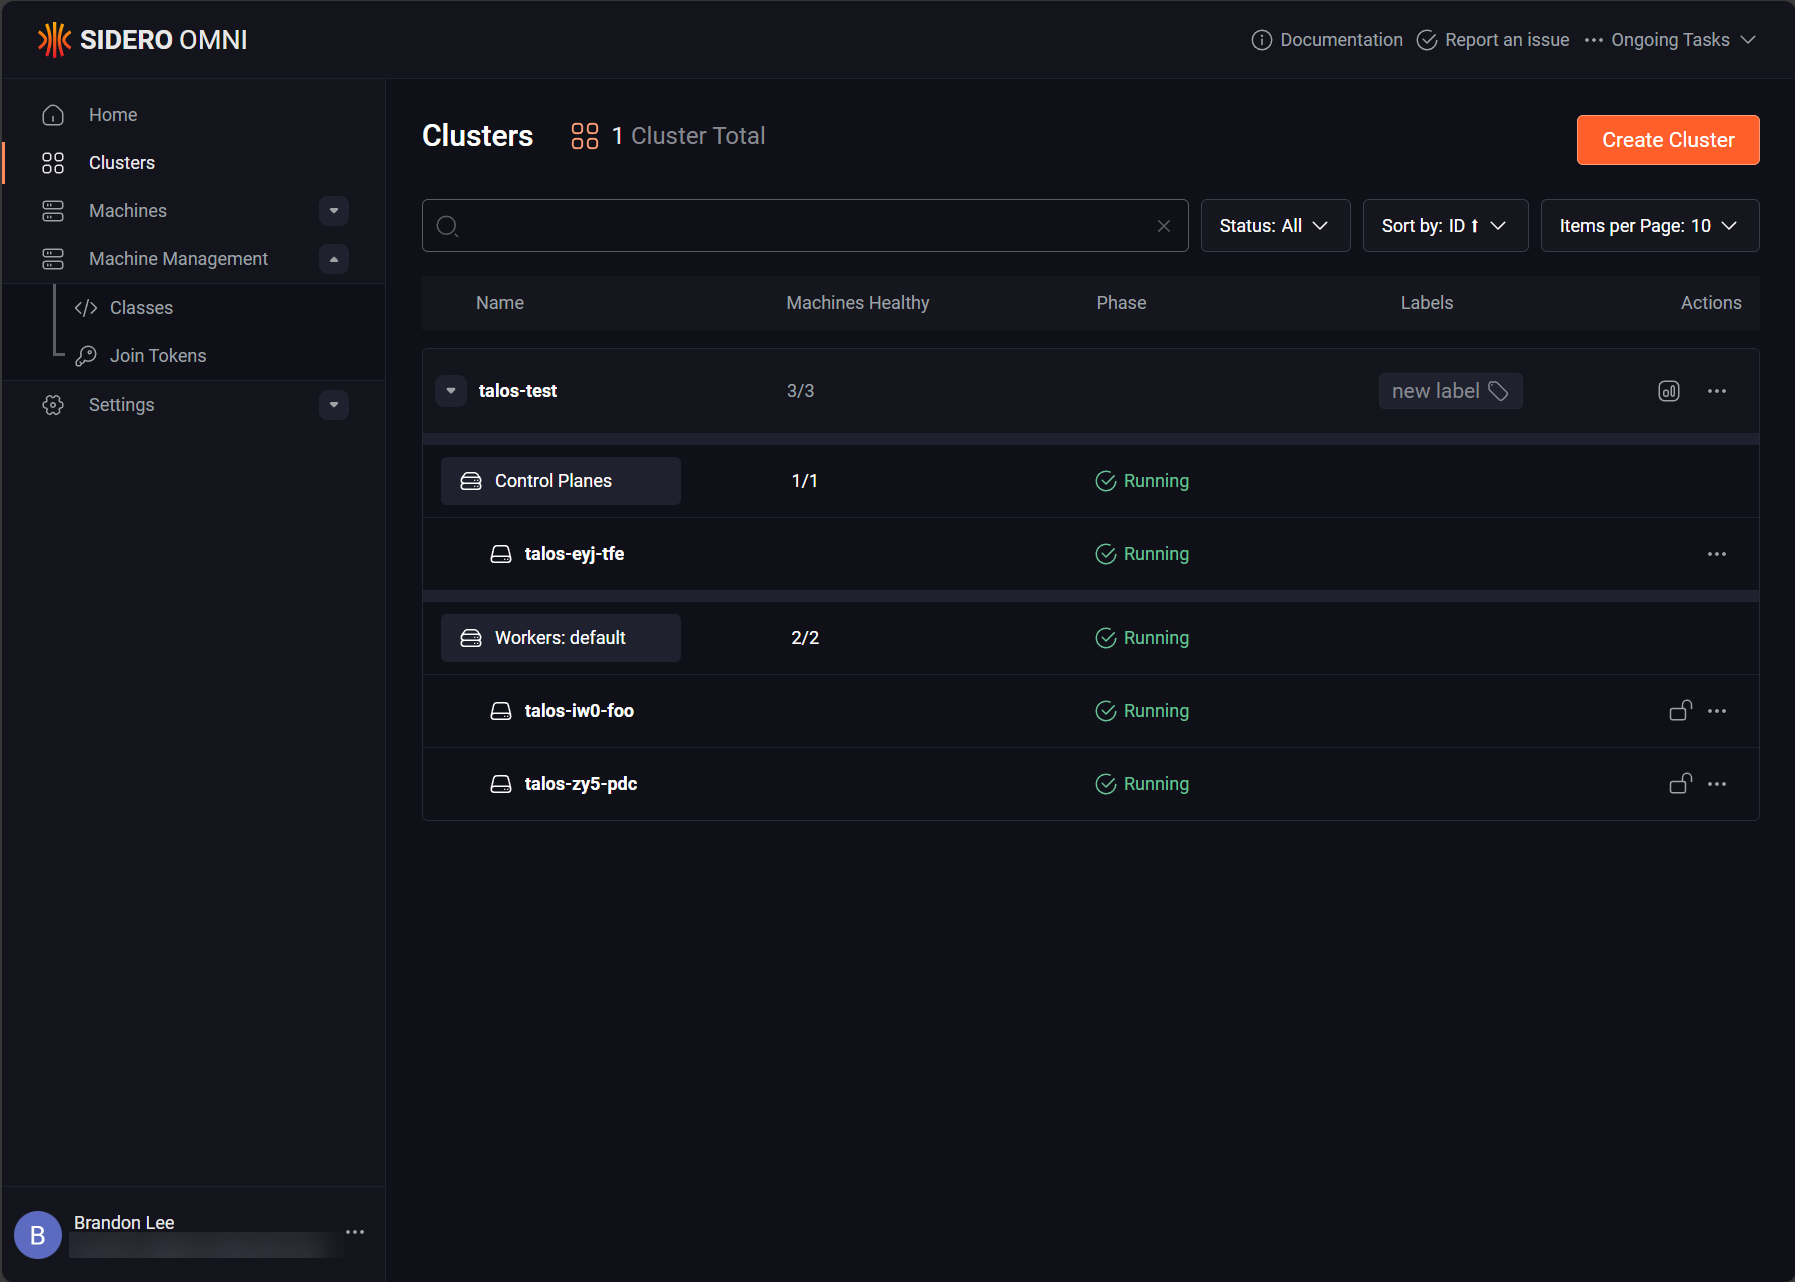
After just a couple of minutes, the cluster should be created successfully for your Kubernetes home lab. Below, you can see both the control plane node and worker nodes are all showing as “Running”.
Installing Talosctl and Kubectl to interact with Talos Omni Kubernetes
There are a couple of tools you will need to interact with Talos Kubernetes, talosctl and kubectl. Both of these tools allow you to fully control your cluster from the command line.
To install talosctl, use the following command:
curl -sL https://talos.dev/install | sh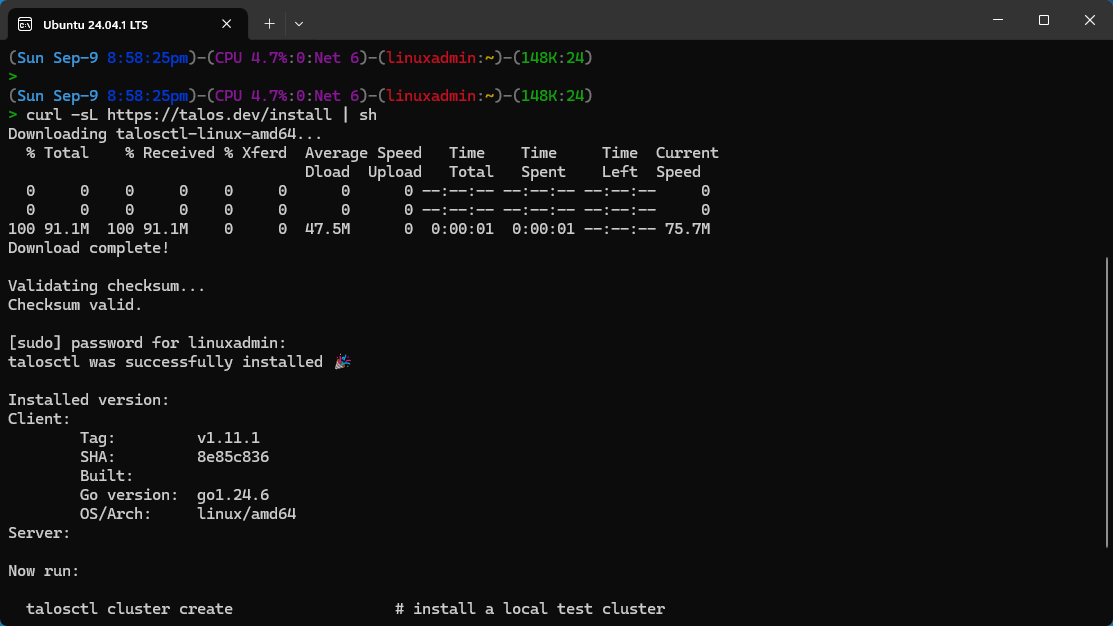
Then, to install kubectl in Ubuntu, you can use this set of commands:
# 1. Update packages and install prereqs
sudo apt-get update
sudo apt-get install -y apt-transport-https ca-certificates curl

# 2. Add the Kubernetes apt repo key
sudo curl -fsSLo /etc/apt/keyrings/kubernetes-archive-keyring.gpg https://pkgs.k8s.io/core:/stable:/v1.33/deb/Release.key

# 3. Add the Kubernetes apt repo
echo "deb [signed-by=/etc/apt/keyrings/kubernetes-archive-keyring.gpg] https://pkgs.k8s.io/core:/stable:/v1.33/deb/ /" | \
  sudo tee /etc/apt/sources.list.d/kubernetes.list

# 4. Install kubectl
sudo apt-get update
sudo apt-get install -y kubectl

# 5. Verify
kubectl version --client
Downloading Kubectl OIDC plugin
There is another plugin that we need to download to authenticate with kubectl. Since Talos Omni uses Auth0 OIDC to interact with the cluster, we need to add this plugin for kubectl. Here are the commands:
# AMD64 architecture
curl -Lo kubelogin_linux_amd64.zip https://github.com/int128/kubelogin/releases/latest/download/kubelogin_linux_amd64.zip
unzip kubelogin_linux_amd64.zip
sudo mv kubelogin /usr/local/bin/kubectl-oidc_login
chmod +x /usr/local/bin/kubectl-oidc_login

# ARM64 architecture
curl -Lo kubelogin_arm64.zip https://github.com/int128/kubelogin/releases/latest/download/kubelogin_linux_arm64.zip
unzip kubelogin_arm64.zip
sudo mv kubelogin /usr/local/bin/kubectl-oidc_login
sudo chmod +x /usr/local/bin/kubectl-oidc_login
Download the kubeconfig and talosconfig files
Now that we have the tools installed, we can download the config files we need to make the connection to our cluster. Click the Clusters menu. Then click the ellipse next to the cluster name under Actions. Here we can click:
- Download kubeconfig
- Download talosconfig

Once you have your kubeconfig downloaded, we need to make a directory and copy it to our normal kubeconfig location:
# Create the .kube directory if it doesn't exist
mkdir -p ~/.kube

# Copy your kubeconfig to the default location
cp talos-test-kubeconfig.yaml ~/.kube/config

# Set proper permissions (important for security)
chmod 600 ~/.kube/config
You can also call the config file directly using the parameter as shown below:
kubectl --kubeconfig ./talos-test-kubeconfig.yaml get nodesRun a kubectl command and authenticate
Now we can run a simple kubectl command and should be prompted to authenticate:
kubectl --kubeconfig ./talos-test-kubeconfig.yaml get nodesYou should see something about “permission denied” and then you will see the message:
Please visit the following URL in your browser manually: http://localhost:8000/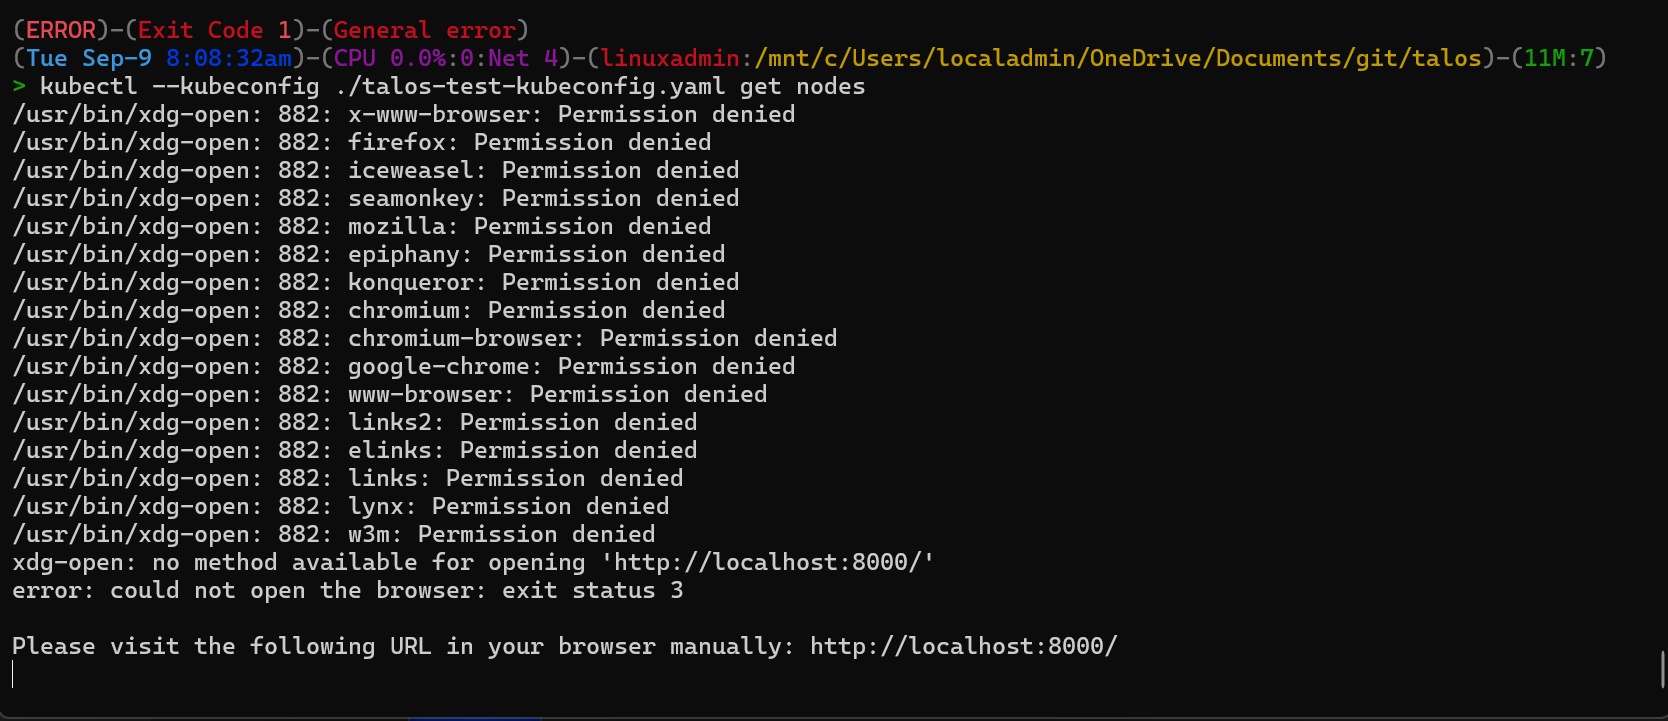
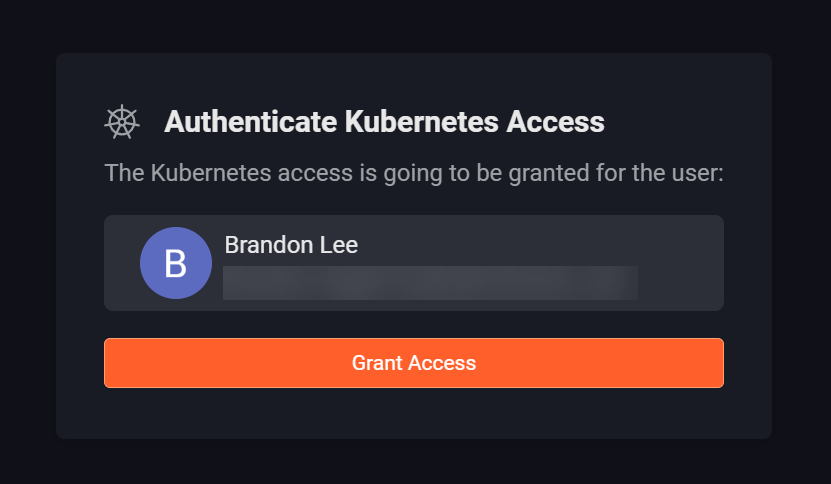
On the page displayed on http://localhost:8000 you will see the below. It will be an OIDC prompt for your provider asking you to grant access. Click Grant Access.
You should then see the following “authenticated” message.
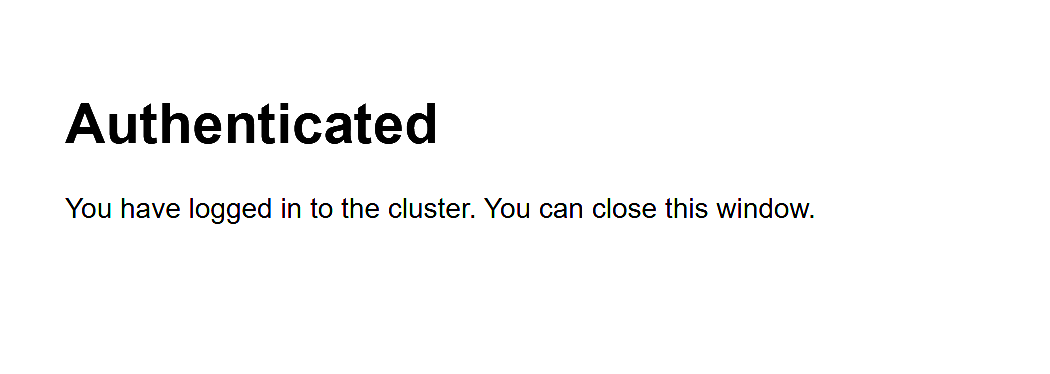
Then, your kubectl command will return results after the authentication is successful.

Wrapping up
Hopefully, this walkthrough of how I am using Talos Omni Kubernetes to spin up self-hosted clusters in the home lab. I have always been a fan of Talos Linux, but this to me makes it more practical to install and manage than the artisanal way that you had to spin up clusters and manage them from the command line without Omni. Now, you can still do that and that is a great way to learn the architecture. But if you want to get started quickly, stand up an instance of Omni and use it to provision your Talos Kubernetes cluster.
Google is updating how articles are shown. Don’t miss our leading home lab and tech content, written by humans, by setting Virtualization Howto as a preferred source.
About The Author


Can Talos Omni connect and manage my existing selfhosted Talos Cluster now? It couldn’t before.