As you all know if you have been keeping up with my home lab adventures as of late, I have been heavily diving into Proxmox VE Server and Ceph software-defined storage. I am a huge fan of software-defined storage, and ran a VMware vSAN cluster for a number of years in the home lab, until Broadcom killed vSAN in my opinion with licensing changes. Ceph is a very similar technology that is free and open source. However, one thing about Ceph, like vSAN and other software-defined storage, it heavily utilizes the network. I thought I could get away with 2.5 GbE connections from my mini PCs, but after implementing a 5 node erasure coded NVMe Ceph cluster, it just wasn’t cutting it and had the feel of being anemic. This post documents why I moved back to 10 GbE and also how I architected the 10 gig switch for Proxmox Ceph cluster in my mini rack. Hopefully you will enjoy this read!
My cluster details before and what drove the change
Definitely check out the details of the cluster as I had initial built it in my post here: I Built a Ceph Erasure-Coded NVMe Cluster in My Home Lab. Here’s What Actually Happened. As I detailed in that post, note the following:
- This Proxmox cluster consists of five nodes
- Each is running NVMe storage and participating in a Ceph erasure coded pool
- The cluster is designed for density and efficiency rather than raw node count
- As I initially built the cluster, each node had (1) OSD per mini PC
- It has a mix of mini PC models and hardware
The Ceph configuration is erasure coded, not replicated. That choice trades some write complexity and network overhead for a lot better usable capacity. For me, I hadn’t ran an erasure-coded cluster, but it is the right tradeoff for NVMe dense mini clusters in my opinion for a good mix of protecting your data with distributing chunks and parity information across multiple nodes. With erasure coding, as mentioned, you get much better use of your capacity. With pure replicated Ceph, you might loose as much as 70% of your capacity! So it is brutal hit on your storage utilization but you get great performance. Erasure coding gets this back, but you have a lot more dependency on the network.

Every write is a distributed operation. Data is split into chunks, parity is calculated, and fragments are written across multiple nodes. Reads also pull data from multiple locations. The network and its performance is a major player for every storage operation.
Initially, this cluster ran on 2.5 gig networking with converged traffic. That meant Ceph replication, recovery, scrubbing, VM traffic, migrations, backups, and Proxmox cluster communication all shared the same paths. I thought it actually worked incredibly well, but, especially during backups and other intense operations, I noticed a few “slow MDS” and other messages in my monitoring and it just had the feel of being taxed.
Being a performance enthusiast, I wanted to change this!
Constrained network, what are the symptoms?
I have already mentioned a little bit about this, but there are subtle signs that even when the network is for the most part working. For the most part Ceph was healthy on the 2.5 GbE network and I never saw an issue with my OSDs or Pool being degraded. However, what I did see was “1 MDSs report slow requests” detected and a few other things like this.
Also, I noticed a couple of Swarm failovers when backups were running across the environment. Services would get spun up on a different host. I didn’t see this with my environment running on static shared storage.
This is what makes network saturation so difficult sometimes to diagnose or pinpoint. Things rarely “just break” where you know something is down. Problems are usually transient in nature and don’t always present the same way. This makes it hard to build trends that are cut and dry. Also, they don’t always clearly in dashboards but where you “feel” them is in the experience.
Why dual 10 gig links per node change everything
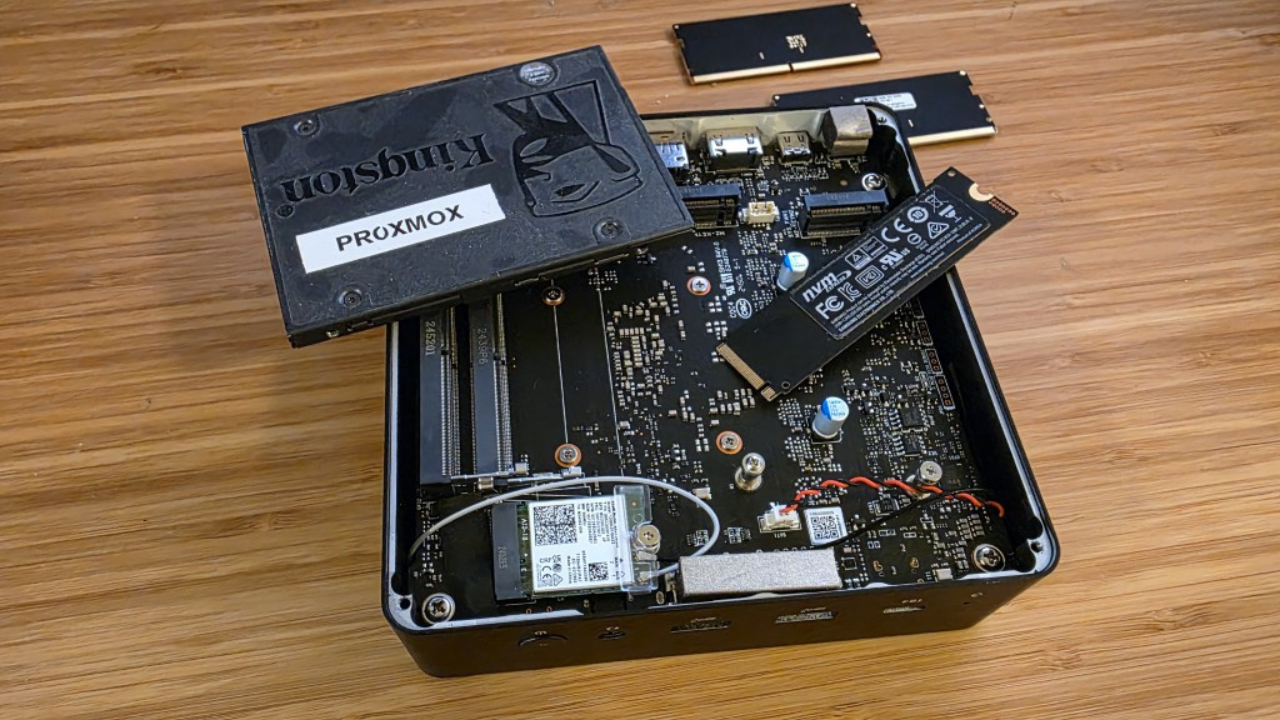
In addition to changing out the 2.5 GbE switch, I am standardizing on (5) minisforum MS-01 mini PCs. These little boxes are great. I have had much success running them in the home lab environment over the past 2-3 years I believe it has been now. I already had (2) in the current cluster, but was using other mini PCs. The problem with the others is they didn’t have 10 GbE.
Each Minisforum MS-01 has two 10 gig SFP+ ports built in. Once Ceph entered the picture, those ports stopped being a nice to have feature and became the obvious solution. So I pulled the trigger on 3 more of these little units. In case you are wondering, I already have the RAM I am going to use so didn’t have to sell a kidney for that this go around. I just bought (3) more barebones units for this project.
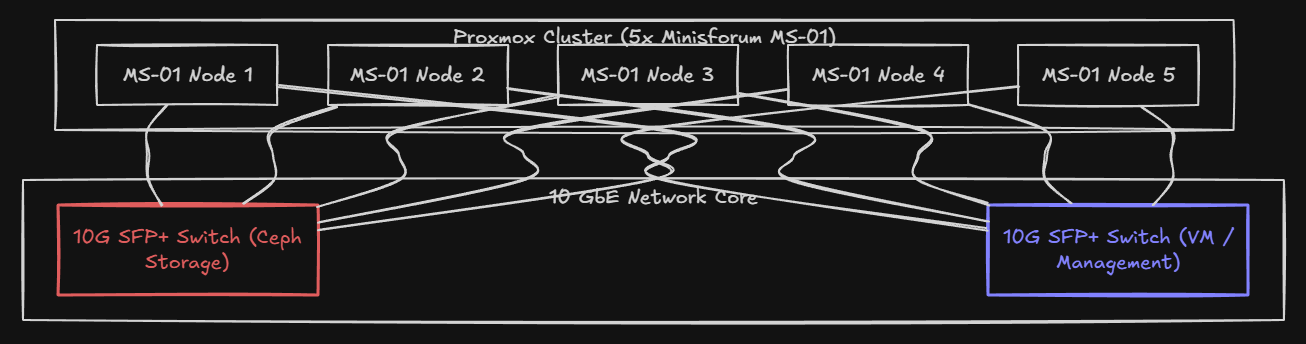
Since the MS-01 has a wealth of network connectivity with (2) 10 gig SFPs, my plan became not only to step up to 10 gig, but to also separate out the traffic for Ceph to its own 10 gig link and then have 10 gig for all other traffic types. So:
- One 10 gig link per node dedicated entirely to Ceph traffic
- One 10 gig link per node for VM traffic, Proxmox cluster communication, and management, and any other VLANs that need to be carried
So, keeping things simple, no bonding, or any aggregation this go around, just slinging packets with (2) 10 gig connections
Choosing the right switch for a mini rack Ceph fabric
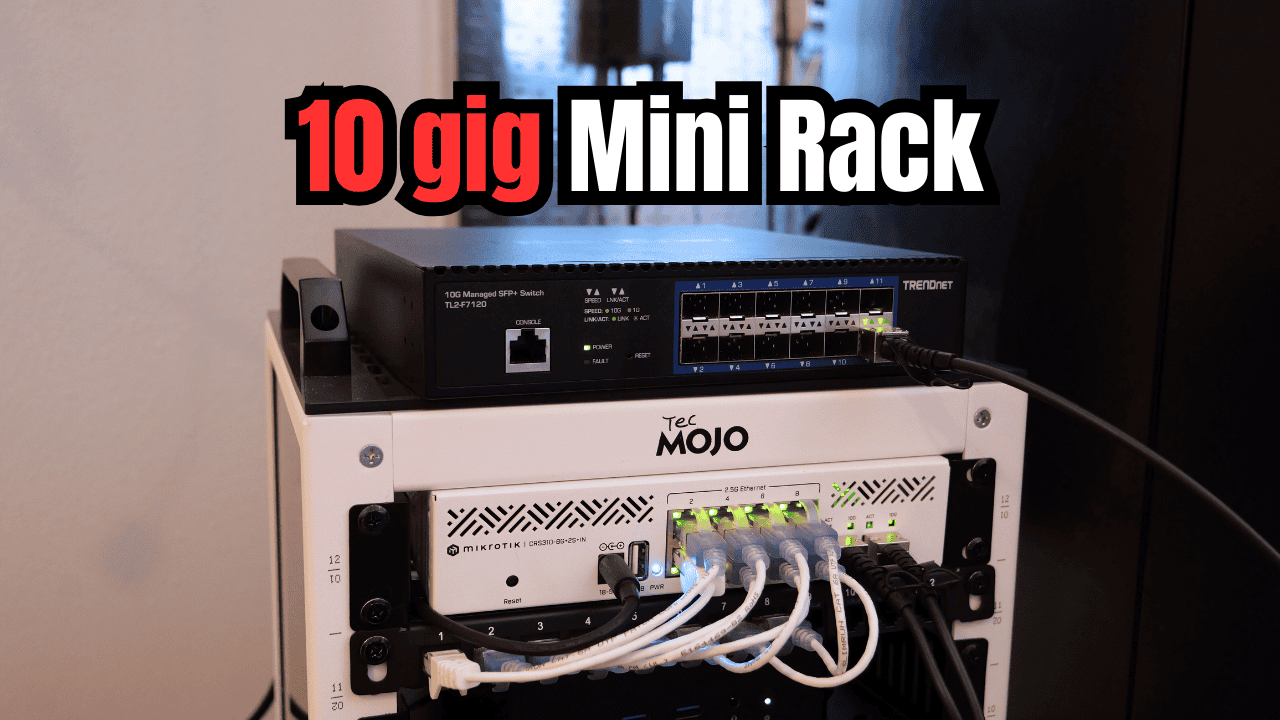
So I needed a 10 gig top of rack switch for this purpose that was also small in footprint that would fit in my 10 inch rack. I found that with the Trendnet TL2-F7120 switch. This little switch packed a lot of SFP ports in a small package which is what I needed. I didn’t want Base-T connections as this wasn’t what I had with the MS-01’s and these also create a lot of heat and additional power draw.
- https://geni.us/LbZhpWj (my affiliate link)
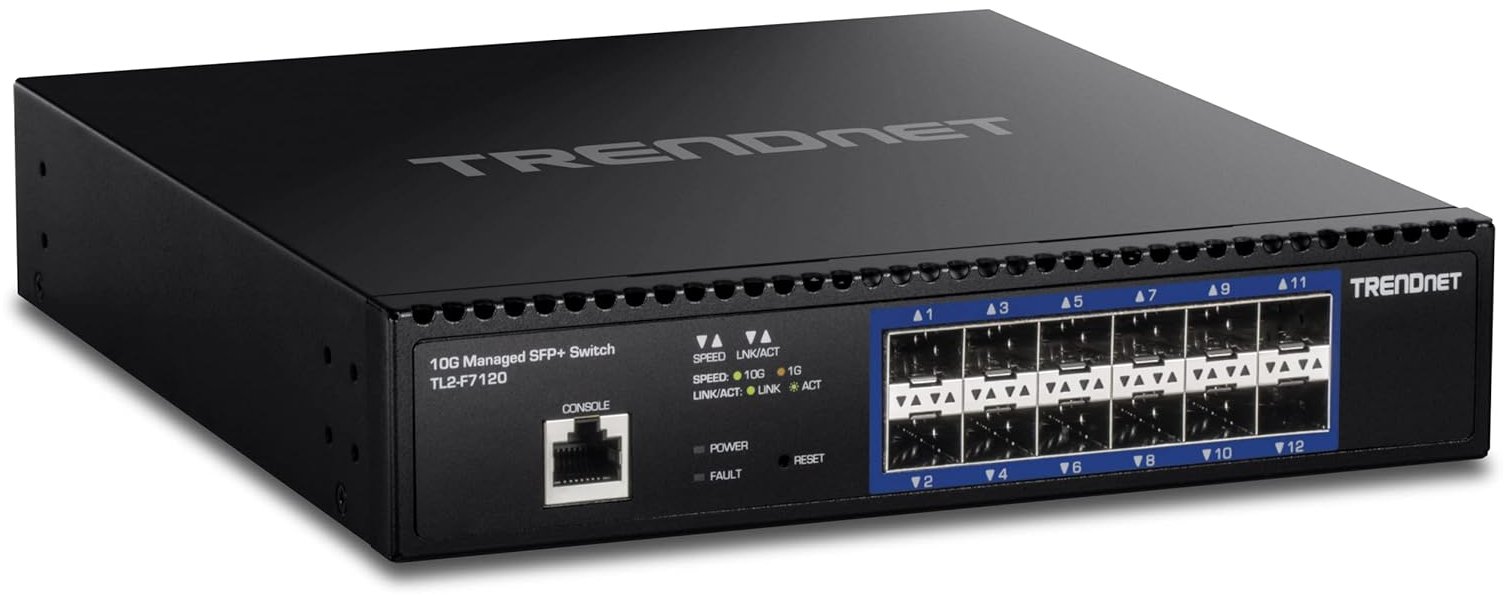
The 12 ports it included was enough 10 gig ports to support dual uplinks for five nodes and give me a couple of uplinks to use for a bonded connection back to my main home lab top of rack. This little switch has a switching capacity of 240 Gbps, which is beyond what this cluster can saturate. Even during aggressive Ceph recovery operations, the switch fabric itself is not a limiting factor.
Power draw tops out around 20 watts, and the fan isn’t loud at all. That matters in a mini rack that lives outside of a datacenter. This switch does not dominate the noise profile of the lab.
Cabling choices and settling on DAC
So thankfully, the MS-01 has SFP+ cages instead of Base-T connections. these are WAY better in terms of heat and power consumption compared to Base-T. But I could still use Fiber or DAC/Twinax cables. What did I go with? I personally like DAC cables that are premade as they are very rigid and you don’t have to worry nearly as much about kinking them like you do fiber AND you the SFPs are built into the cable itself. So, you don’t have to buy SFPs for your Fiber connections.
Every MS-01 is connected to the switch using two SFP+ DAC cables. One cable feeds the VM and cluster network. The distances are short. I just ordered a set of 1 meter DAC cables since my mini rack is compact.
- https://geni.us/M8b6DJV (my affiliate link)
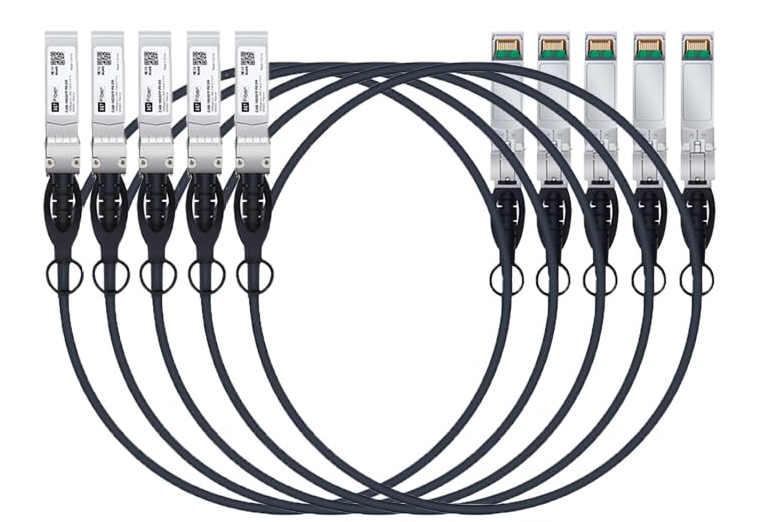
Also, DAC cables are relatively inexpensive and for the most part, most if not all the DAC cables I have purchased on Amazon as of recently have been compatible and worked with all of my switches at home.
The changes that were noticed after the upgrade to 10 GbE
While 2.5 GbE wasn’t terribly slow, again, there was a certain amount of noise that came with it. Just faint things here and there that would happen, especially when storage intensive tasks were happening, such as backups, VM migrations, or other things in the environment itself.
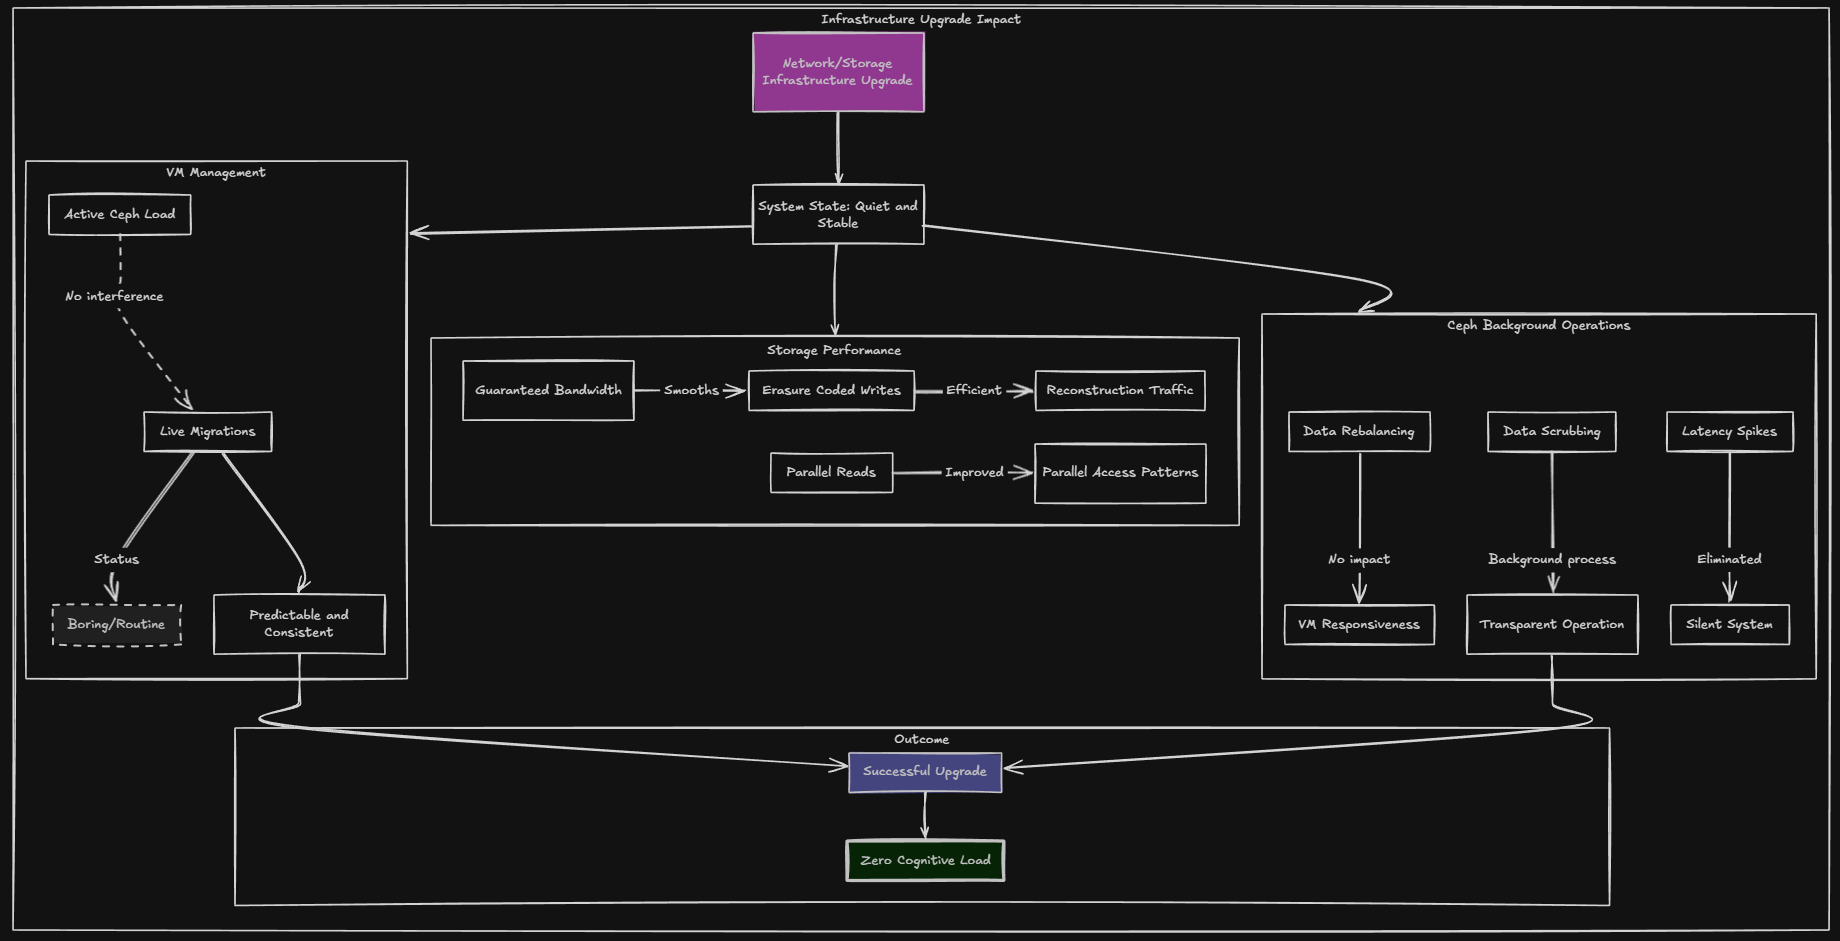
After implementing 10 GbE and effectively going from 2.5 of bandwidth (5 gig with my LACP bond but only parallel operations not single threads) up to 20 gigs of bandwidth (saying this since I am using BOTH of the 10 gig SFP+ ports and giving Ceph a totally dedicated network, things were boringly quiet.
Ceph activity stopped impacting anything or causing latency spikes. Rebalances run with absolutely zero impact on VM responsiveness. Scrubs happen in the background and are something that I no longer “feel” or notice in other ways.
Live migrations returned to being boring as well. Honestly, don’t get me wrong I was actually really pleased with how well 2.5 GbE performed for an erasure coded Ceph environment. But again, it felt like coming home after a while of being away when implementing 10 GbE.
Configuring the 10 gig top of rack switch for the mini rack
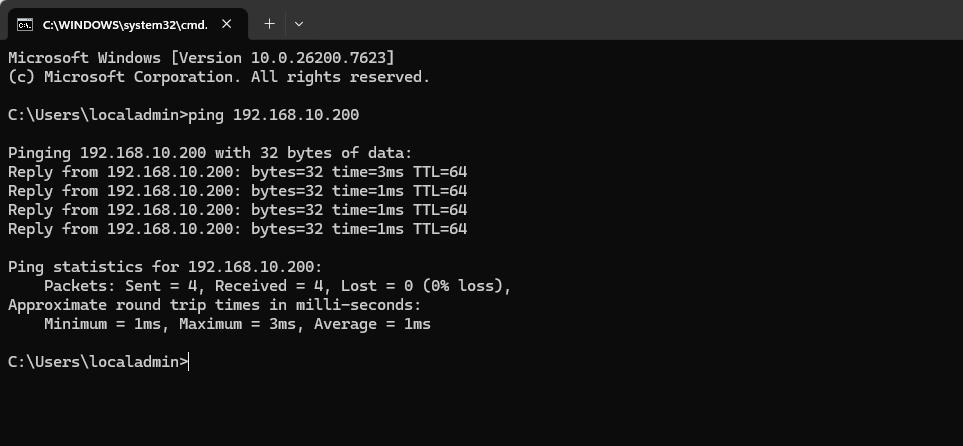
Let me show you a few things about the Trendnet 10 gig switch during the configuration. It has a few quirks but nothing that couldn’t be figured out with a bit of trial and error. When you get the switch, it is defaulted to the IP address, 192.168.10.200. So, just throw it on a VLAN of your choice and IP a laptop or another device to this subnet and you should be able to ping the switch.
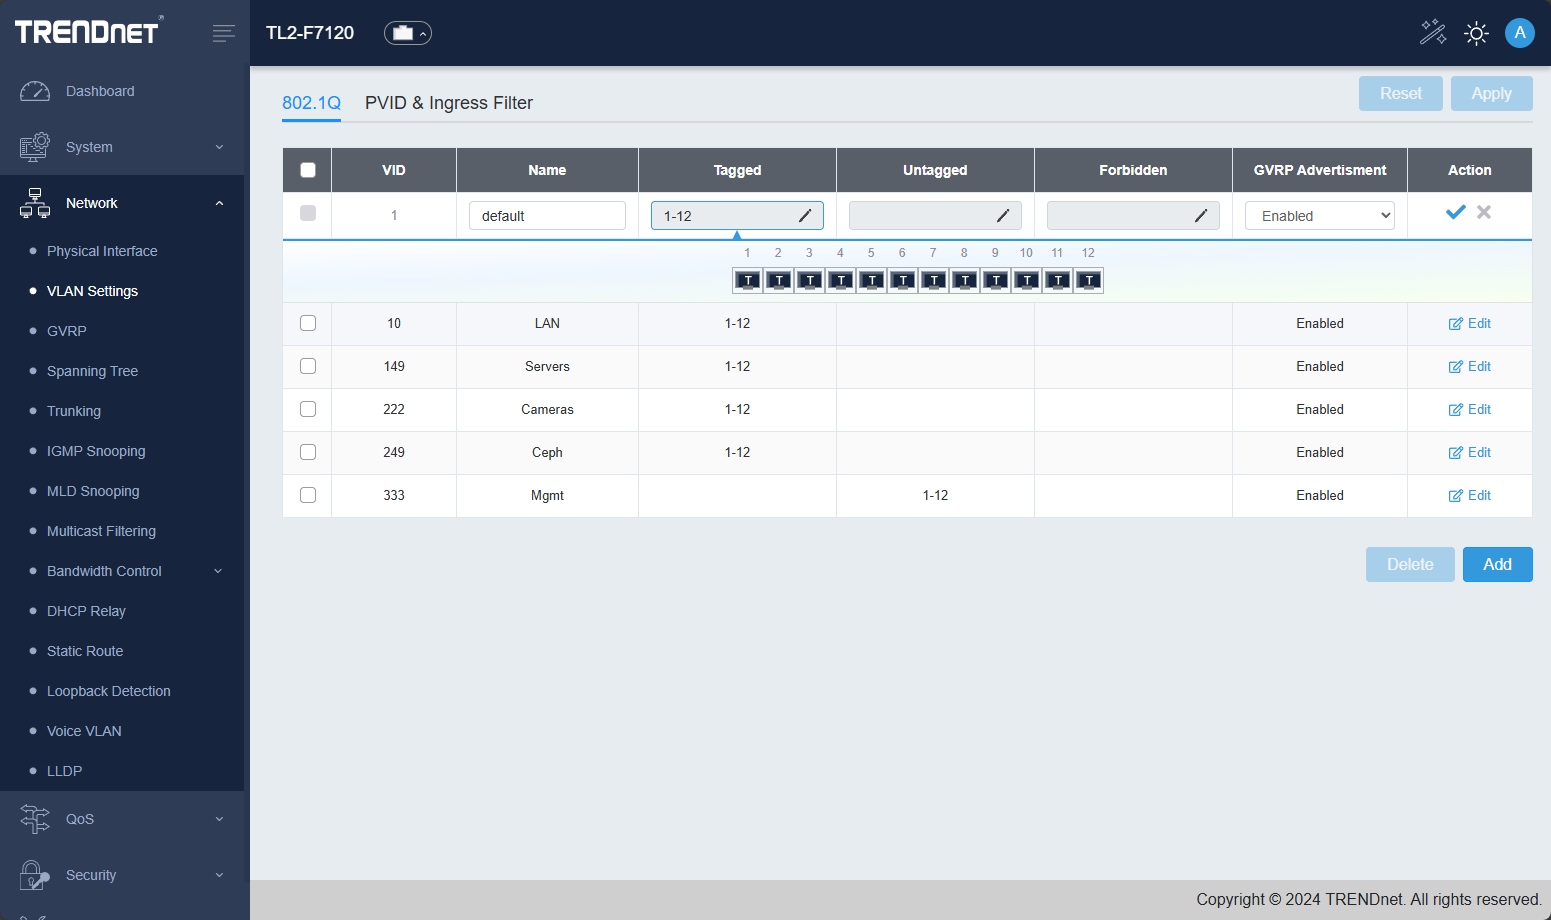
VLANs
This switch has a healthy array of VLAN options and covers all the bases that you would want to cover for the most part for a TOR switch. Here you can see VLANs I have created. The interface is a little quirky here, but you just edit the VLAN, and there is a little graphical UI that pops down where you can click the ports and tag or untag the port based on how you want the traffic to flow. As a note, I had to “click” into the “Tagged” or “Untagged” box and then start clicking the ports.
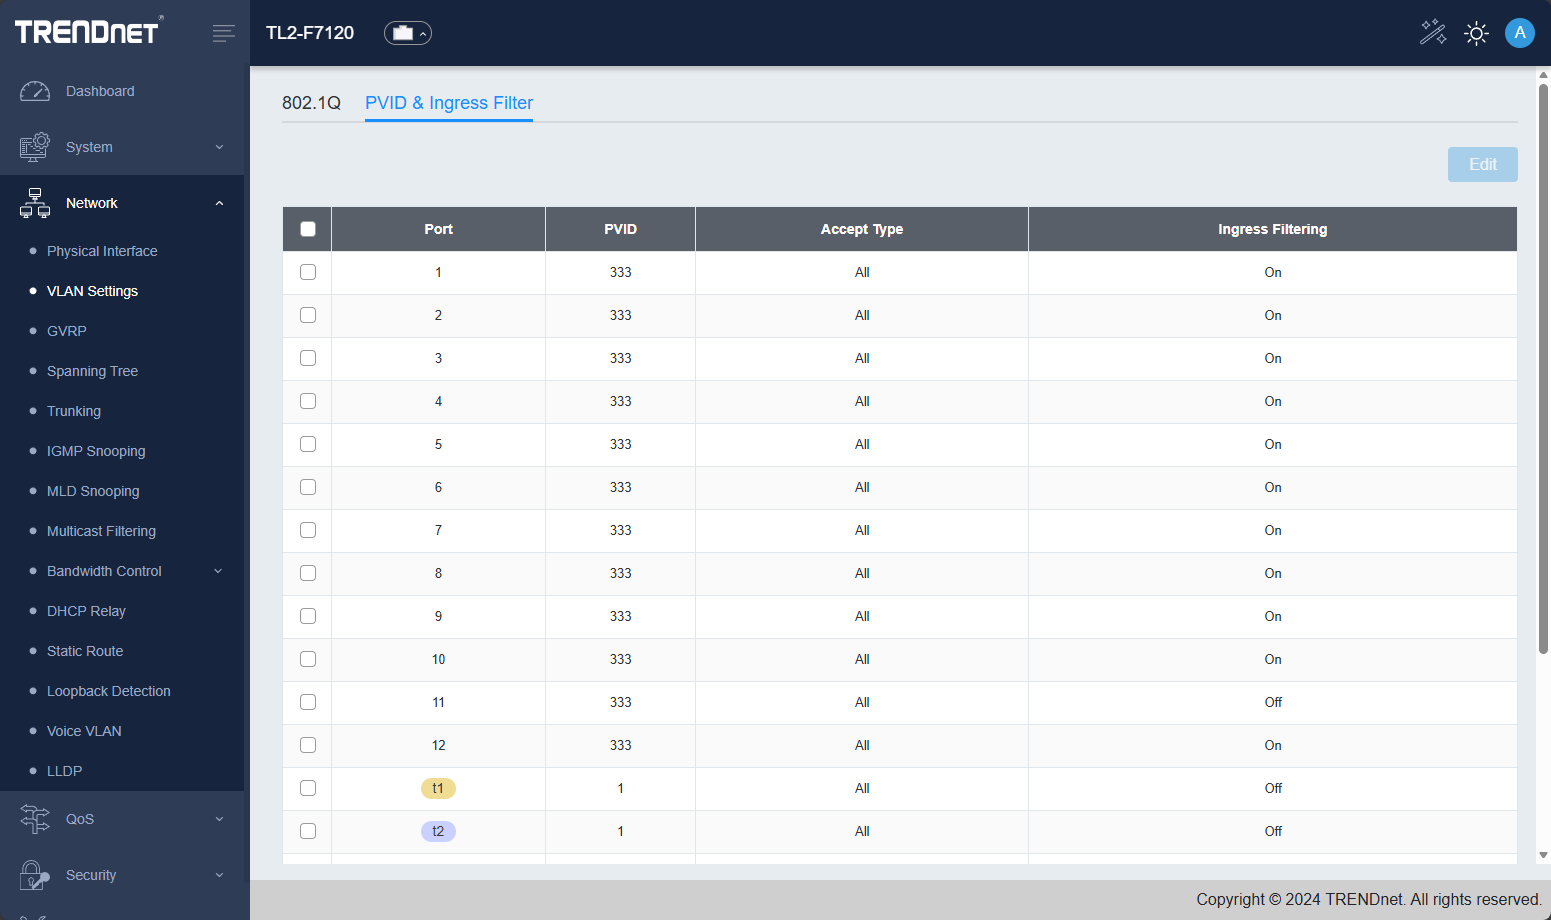
Below you can see the PVID and Ingress Filter screen.
Jumbo frames
When you are talking about software-defined storage or virtualization storage technologies, they definitely love Jumbo frames. Jumbo frames help to make network communication with large traffic flows much more efficient. It can also lower CPU use. The trendnet switch supports jumbo frames up to 10 KB.
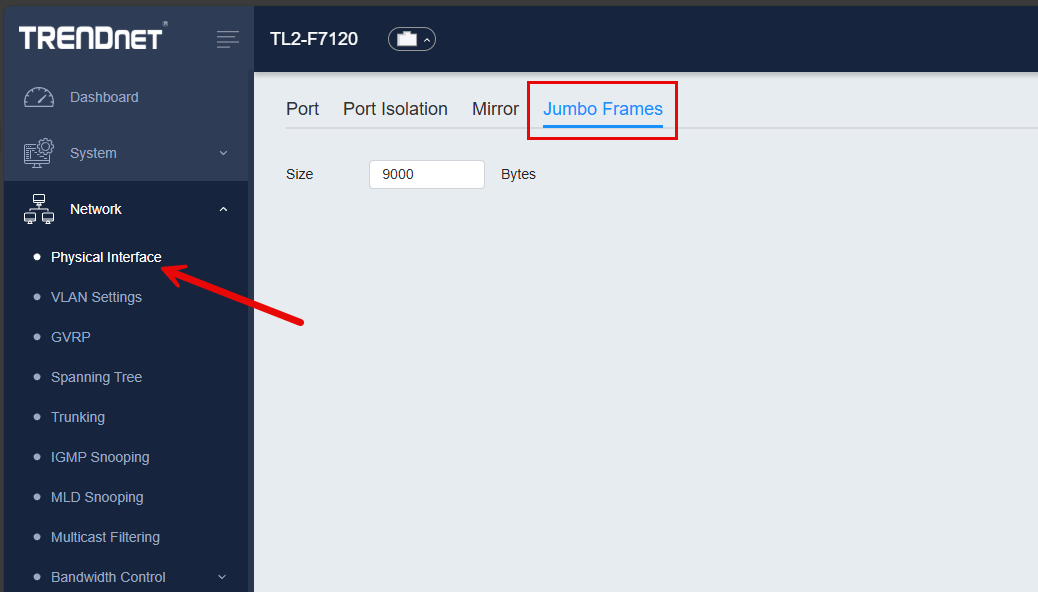
Ceph benefits from jumbo frames end to end between your hosts

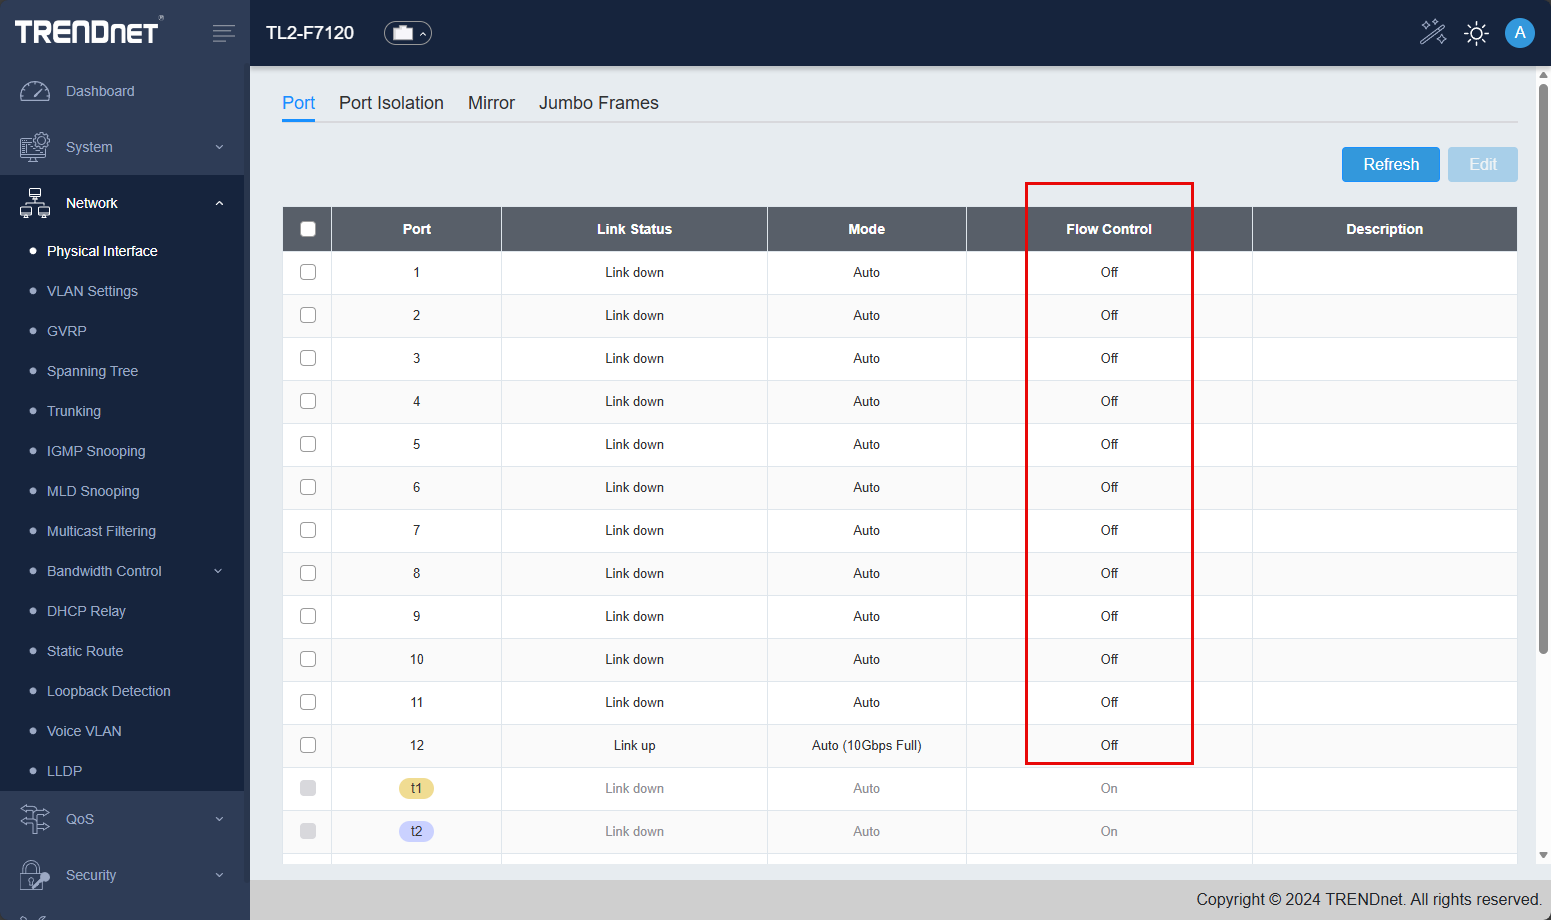
Flow control
Another setting that you will likely want to tweak and implement a change is flow control. Most best practice guidance will have you turn off flow control when it comes to network switches that back storage solutions for server clusters, virtualization cluster, software defined storage, etc.
Flow control can introduce pause pits that can cause storage errors, latency, etc. So you will want to turn this off if you are using it for a use case like I am with the Ceph cluster. This is a shot of the switch interface before I had the hosts uplinked:
Why this upgrade is great for the mini rack
It just goes to show that a 10 inch mini rack doesn’t have to feel anemic. It doesn’t mean they have to be underpowered or that your options mean you are stuck at 1 gig or 2.5 GbE. I have mentioned this in previous blog posts recently, but I think the mini rack build has as a goal, intentional design. Smaller hardware doesn’t have to mean compromising your architecture.
Especially when running something like Ceph, 10 GbE is the way to go and removes many of the performance issues that you will run into, especially if running erasure coding configurations. Plus, with the port density of the Trendnet switch I have enough ports for all 5 nodes uplinked with (2) 10 gig connections and the ability to dedicate one entirely to Ceph.
Wrapping up
If you are looking for a great little mini rack 10 gig switch for Proxmox Ceph cluster, the Trendnet switch is one that I can recommend so far in my home lab. It has the features I was looking for, the size, the power consumption profile, the quietness, and the port count. It fits perfectly in a mini rack and gives me enough uplinks for uplinking (5) Minisforum MS-01 mini PCs for a combined total of 20 gigs of bandwidth per mini PC, which is great. How about you? Is anyone running 10 gig uplinks in their mini rack builds? Anyone running Ceph erasure coding? Or am I the only one crazy enough to do this? Definitely let me know I am in good company!
Google is updating how articles are shown. Don’t miss our leading home lab and tech content, written by humans, by setting Virtualization Howto as a preferred source.
About The Author

this is awesome…making me want to introduce Ceph and 10 gig in the minirack….have just not done it before now since I wasn’t sure if I would see much difference.
Doesn’t the ms01 offer 40gbit networking over thunderbolt with a bit of effort? Would that be worth investigating as a private network for your nephew storage?
Darn ac. Ceph storage obviously.
😂😂😂
Steve,
Yes great point it actually does support 40 GbE with Thunderbold. But I haven’t looked into this as it will require external hardware I believe such as a Thuderbolt to PCIe expansion chassis. I am not sure about direct connecting nodes, but I think in practical terms may be hard to get this to work correctly. Definitely will have a look though. I think Jim’s Garage did some thunderbolt network testing with the MS-01’s.
Brandon