
Network latency can absolutely kill your performance. If you have noticed y our virtual machines lagging, or your Docker containers struggling to pull images down. Or, if you have felt your remote services feeling, well, sluggish, then latency might be to blame. It is one of the hardest issues to visualize, but there is a tool that can definitely help with this: Smokeping. Smokeping makes it easy to visualize latency, jitter, and packet loss, and see all of this over time. With the graphs it produces, it makes it easy to understand what is going on behind the scenes.
What is Smokeping?
If you haven’t heard about Smokeping before, you are not alone, many haven’t. It is an open-source and totally free network latency visualizer that is created by the developer Tobias Oetiker. In case you are wondering, this is the same developer behind the MRTG tool (Multi Router Traffic Grapher). Smokeping continuously pings defined hosts or services and it plots the results in a graph format. It gives us humans what we find easy to read with graphs that represent the metrics over time.
Smokeping sends out ICMP echo requests, “pings”, to your defined targets and measures the response times and consistency of the responses. So, you don’t just see if the host is reachable, you see how stable or consistent the connection is. This is really helpful when it comes down to diagnosing intermittent problems on the network or performance problems in general.
Why I think Smokeping is a great fit for every lab
In the home lab network, most of us aren’t running enterprise network switches across the board and we don’t have business class fiber servicing our labs. Even when you do, things can go south with an ISP. But, when you are running more commodity gear and Internet connections, I think it is even more important to keep an eye on your network.
Latency and packet loss can creep in and ISPs aren’t very willing to help most consumer-grade customers troubleshoot what is going on. What’s more, without the raw data to prove it, most ISPs will never admit there is a problem on their end. Trust me, I have been around and around with several of them.
This is where something like Smokeping shines. It gives you a live AND historical view of your network latency and the ebbs and flows of your network. This helps you to spot issues like:
- Packet loss on a flaky cable or switch port
- Latency spikes when backups or VM migrations run
- Poor Wi-Fi performance between access points
- ISP problems where your circuit is impaired and the ISP says there is no issue
The great thing is that Smokeping is lightweight and open-source. You can run it easily on a very small and lightweight Linux VM or inside a Docker container, which is how I am running it. It’s perfect for having visibility to your latency and packet loss.
How does Smokeping work?
Smokeping uses the concept of probles to send packets to the targets you define. The most common probe is just a standalone probe that does what you would think. It sends out pings to various endpoints. It then tracks the minimum, maximum, and median round-trip times in your environment to various endpoints.
Here is an overview of how it operates. Note the following:
- It sends several ICMP pings to each target at a defined interval (for example, every 60 seconds)
- It records the latency results for each ping
- It uses RRDTool (Round Robin Database) to store the data
- It generates visual graphs that you can view in your web interface showing latency, jitter, and loss and the trends for each of these
Using Master and Slave Configuration in Smokeping
One of Smokeping’s really great features is that it allows you to configure a master and slave configuration. This setup means that you can configure monitoring across multiple nodes in different locations. But even at that, you keep all the graphs and data in a central location, on the master node. I think this is perfect for home labbers who have several remote nodes, multiple VLANs, or other servers maybe in a remote office, or another location (friends house, etc).
The master Smokeping server coordinates everything. It has the configuration files, manages the probes, and collects results from one or more slave instances. Each slave runs Smokeping in a lightweight mode. The slave/probe performs the actual latency tests from its local network perspective.
Example config of this
On the master, edit /etc/smokeping/config.d/General and enable the master role:
*** General ***
owner    = Brandon
contact  = [email protected]
mailhost = localhost
cgiurl   = http://your-server/smokeping.cgi
slaves   = pi01 pi02
sharedsecret = /etc/smokeping/secret.txt
Then define your slave nodes in /etc/smokeping/config.d/Slaves:
+pi01
displayname = Pi-WiFi
location = Living Room
color = blue

+pi02
displayname = Pi-Wired
location = Server Rack
color = red
On each slave, install Smokeping and point it to the master:
*** Slave ***
secrets=/etc/smokeping/secret.txt
master_url = http://master-ip/smokeping/smokeping.cgi
The secret.txt file must contain the same key on both the master and the slave for authentication. You can generate a key with:
openssl rand -base64 32 > /etc/smokeping/secret.txtAfter you have the configuration on the master/slave set, just restart Smokeping on each to initialize the configuration.
Installing Smokeping on Linux
A super straightforward way to run Smokeping is running it on Linux machine, either a VM or bare metal. It can also run on just about any Linux distro. On Ubuntu or Debian-based systems, installation is easy. You can install it using the following
sudo apt update
sudo apt install smokeping apache2 -y
This installs Smokeping and Apache. There is one more step we need to do. We need to expose the Smokeping files to Apache. We can do that with the following commands:
sudo a2enconf smokeping
sudo systemctl reload apache2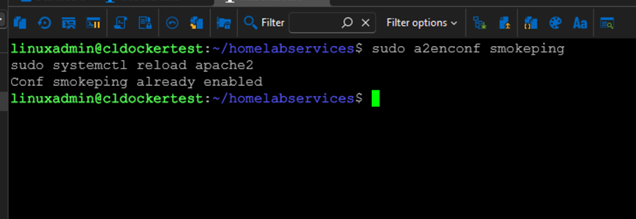
Once installed, you can access it by navigating to:
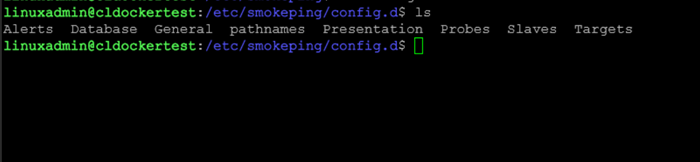
http://<your-server-ip>/smokeping/smokeping.cgiThe default configuration files are located under /etc/smokeping/config.d/, which contain sections for general settings, probes, targets, and alerts.
Running Smokeping in Docker
If you are like me, I prefer running everything that I possibly can inside of docker containers for the ease of being able to spin things up quickly and keep things updated properly. You can use a readily available Docker container image like linuxserver/smokeping from the Docker Hub, which is the one I am currently using.
Below is my exact Docker Compose code for you to use and take a look at. Just change out the bind mount path with the path you want to use for your container.
services:
  smokeping:
    image: lscr.io/linuxserver/smokeping:latest
    container_name: smokeping
    hostname: smokeping #optional
    environment:
      - PUID=1000
      - PGID=1000
      - TZ=America/Chicago
      #- MASTER_URL=http://<master-host-ip>:80/smokeping/ #optional
      #- SHARED_SECRET=password #optional
      #- CACHE_DIR=/tmp #optional
    volumes:
      - /home/linuxadmin/homelabservices/smokeping/config:/config
      - /home/linuxadmin/homelabservices/smokeping/data:/data
    ports:
      - 80:80
    restart: unless-stopped
Save this file as docker-compose.yml and run:
docker compose up -dAfter deployment, open your browser to http://<your-server-ip>:8080 and you’ll see the Smokeping interface.
Configuring your Smokeping targets
It comes preconfigured with several built-in targets like Internet sites (YouTube, Facebook, etc). However, you can configure your own targets with Smokeping. Think about adding your own internal devices like switch management IPs, VLAN gateways, Proxmox Servers, etc.
The target configuration is found at (/etc/smokeping/config.d/Targets or /config/Targets in Docker):
+ Local
menu = Local Network
title = Local Network Latency

++ Router
menu = Router
title = Home Router
host = 192.168.1.1

++ Proxmox
menu = Proxmox Node
title = Proxmox Node
host = 10.1.149.10

+ External
menu = Internet
title = External Latency

++ Google
menu = Google DNS
title = Google DNS
host = 8.8.8.8

++ Cloudflare
menu = Cloudflare DNS
title = Cloudflare DNS
host = 1.1.1.1
After saving changes, you will need to restart Smokeping:
sudo systemctl restart smokeping

##docker
docker restart smokeping
Within a few minutes, you’ll start to see your addresses start populating for your monitored endpoints.
Smoke ping graphs
So what do the graphs look like that Smokeping produces? Take a look at the screenshots below. These are just the default graphs and destinations that Smokeping comes configured with out of the box. You get visibility on Internet sites like:
- YouTube
- JupiterBroadcasting
- google.com
- ipv6.google.com
- linuxserver.io
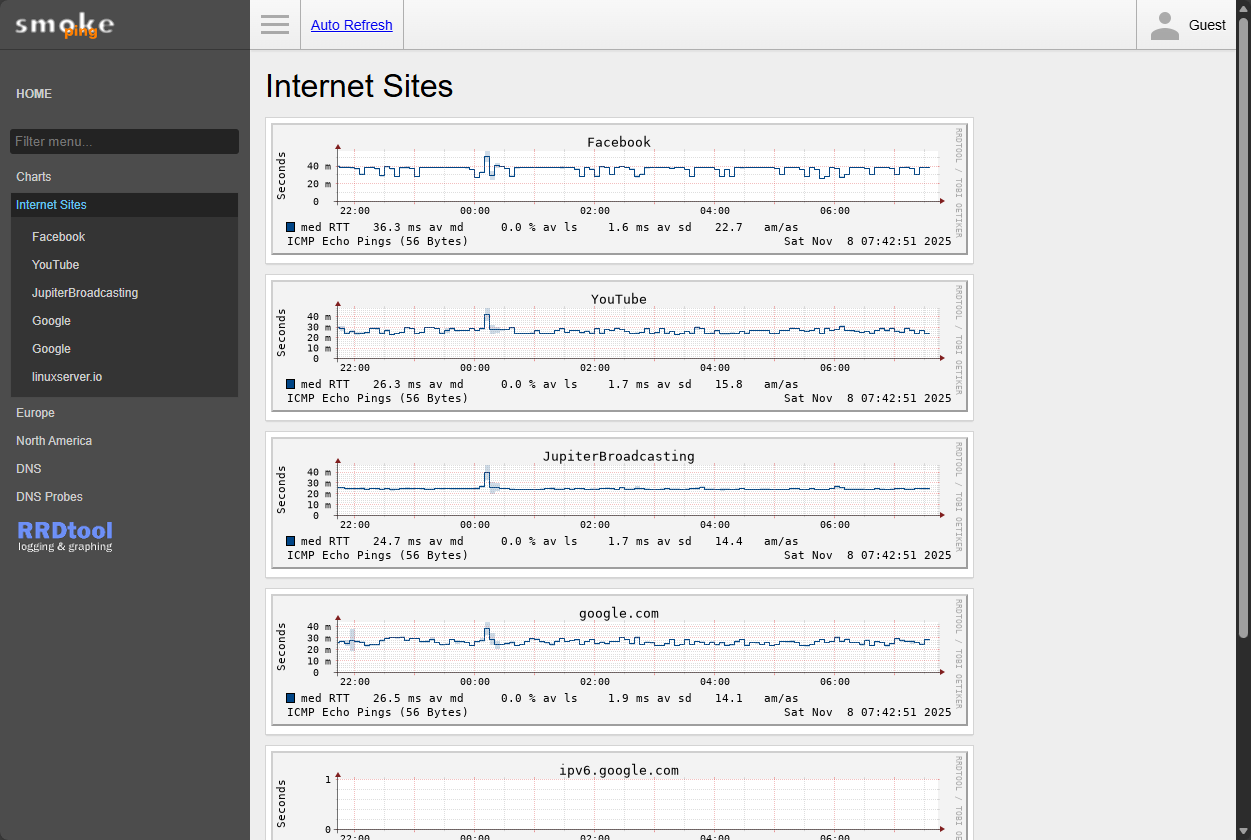
Below, I have clicked on the Facebook graph to drill in on more information. You can see the historical information on Facebook pings which is great. Notice the spikes, ebbs and flows, that you can see in the graph, very cool.

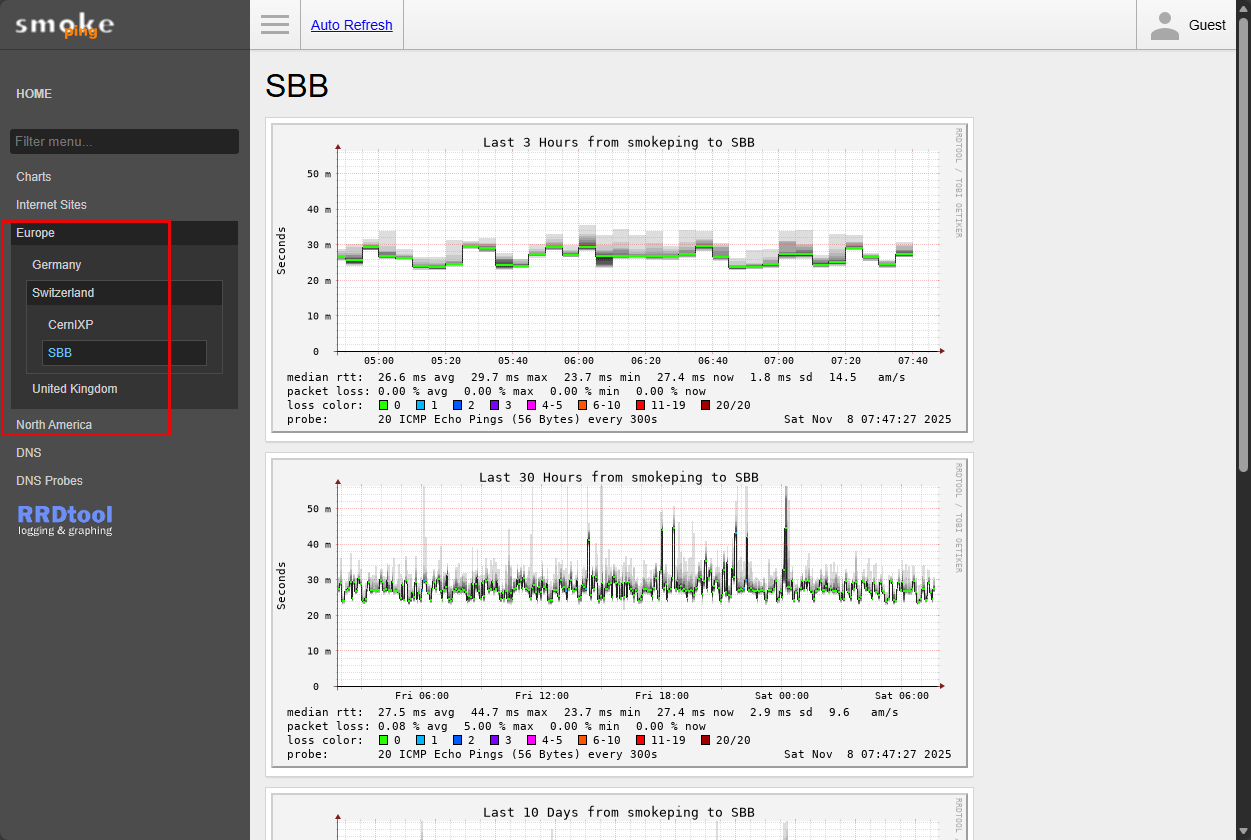
I like too how it comes with Europe and America configurations that have the sites allocated to each so you can see your respective ping times, latency, loss, to different regions.
Alerting
Also, Smokeping includes alerting built-in using ssmtp. You can configure the ssmtp.conf file to point to your SMTP server that you are using. Below are the contents of the default configuration file you will find in your config directory.
#
# Config file for sSMTP sendmail
#
# The person who gets all mail for userids < 1000
# Make this empty to disable rewriting.

root=

# The place where the mail goes. The actual machine name is required no
# MX records are consulted. Commonly mailhosts are named mail.domain.com

mailhub=smtp.gmail.com:587
AuthUser=
AuthPass=
UseSTARTTLS=yes

# Where will the mail seem to come from?
#rewriteDomain=

# The full hostname
#hostname=

# Are users allowed to set their own From: address?
# YES - Allow the user to specify their own From: address
# NO - Use the system generated From: address
#FromLineOverride=YES
Real use cases in the home lab
Take a look at the following things that I can think of you can benefit from with Smokeping running in your home lab:
- Testing VLAN performance – You can compare latency between management, storage, and VM networks
- ISP reliability – This is a big one. You can track external sites like Google and Cloudflare to see when your connection drops or pings begin to spike
- Troubleshooting Wi-Fi mesh systems – You can monitor latency between access points or wireless bridges
- Virtual machine latency testing – You can track pings and ping times between Proxmox or ESXi hosts and VMs
- Home automation stability – You can monitor smart devices or IoT hubs that tend to lose connection
Wrapping up
Ping times, latency, and packet loss are absolute killers of performance and most don’t have any visibility on this aspect of their home lab. Smokeping is a great self-hosted tool that allows you to monitor and keep a history of your pings and latency to see trends that you wouldn’t have been able to spot unless you had a tool like this. Smokeping is easy to configure and setup and it has various modes you can configure as well as alerting to get notified when things are down or you have lots of packet loss. How about you? Are you using Smokeping or another tool? Let me know in the comments.
Google is updating how articles are shown. Don’t miss our leading home lab and tech content, written by humans, by setting Virtualization Howto as a preferred source.
About The Author

Thanks Brandon for this piece of information and advice !
In addition, would you be able to recommend a simple tool for knowing exactly which IP addresses within a Home Lab network have already been assigned, and are active..?
Chris,
No problem at all! Yes absolutely. I use phpIPAM. It has a scan function that you can configure to keep a check on the subnets you add. It keeps up with hosts that are live and those that have once been assigned but are currently down. This is really helpful as things are often in flux in the lab, I can see what I have assigned to a resource before so I can use that same IP address information if I want. All in all it is a great tool. Hopefully this helps!
Brandon