I have to say that I am a sucker for tools and utilities, especially when these are good and add value to a platform. Not long ago, I did a review on ProxmenuX, a killer toolkit for Proxmox. Well, it has been reborn in an even better tool that has even more powerful Proxmox tools under its belt, especially related to GPU passthrough. The new version of the tool is called the Proxmox Enhanced Configuration Utility (PECU). It is an open source project that is quickly becoming my favorite tool across the board for Proxmox management. Let’s dive into this tool and see what it is all about.
What is PECU?
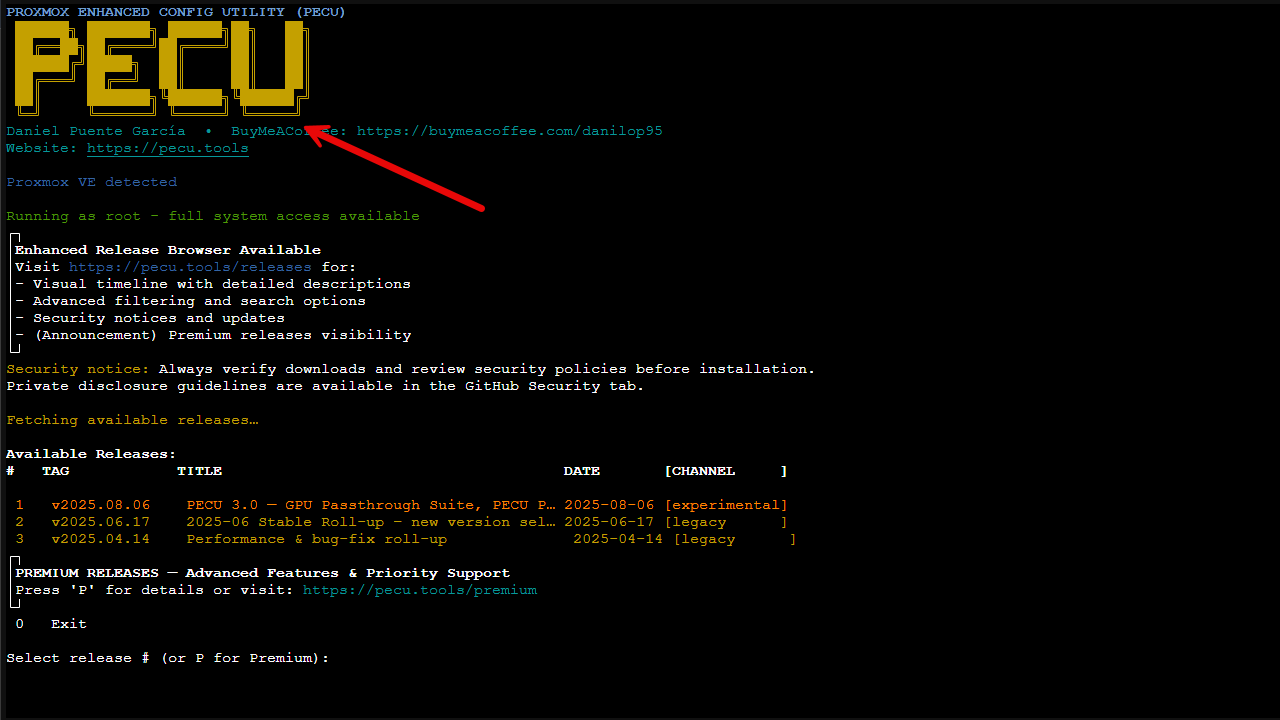
The Proxmox Enhanced Configuration Utility (PECU) is a bash script toolkit that is designed to simplify Proxmox configuration and management. It was built by developer Danilop95 (DVNILXP). The script has both beginners and advanced users in mind. And this shows as it offers menu-driven functionality that saves time and helps to reduce the chance you will make a mistake with your Proxmox configuration. Instead of you having to manually edit configuration files or run multiple commands, PECU lets you make many of these advanced configuration changes interactively and in a guided way.
The project is actively maintained on GitHub and is skyrocketing in popularity due to widespread recognition in the Proxmox community. It helps to fill in the gaps that Proxmox VE Server leaves to manual configuration. Just as an example, GPU passthrough normally requires editing system files and ensuring kernel modules are set correctly. PECU makes this much simpler as it brings it into a guided process that can be followed by any skill level.
This is perfect for new Proxmox users who want to experiment and who don’t have time to read through pages of documentation. It also saves time for experienced administrators spinning up new nodes in a cluster. Quickly bootstrapping your environment with PECU provides a lot of automation so that you spend less time on repetitive setup.
Closely related to ProxmenuX
You may remember a tool that I have written about not long ago and also a video I did on the topic of ProxmenuX. PECU is very similar to ProxmenuX.
Read my blog on ProxMenux here: ProxMenux Might Be the Best Proxmox Management Tool You’re Not Using.
Easy install and setup
One of the reasons Proxmox is popular overall is that it is easy to install and setup compared to other hypervisors. Even absolute beginners can quickly get a feel for the hypervisor and start using it effectively. PECU keeps with this as it offers a one-line install for the tool. It pulls down the latest version
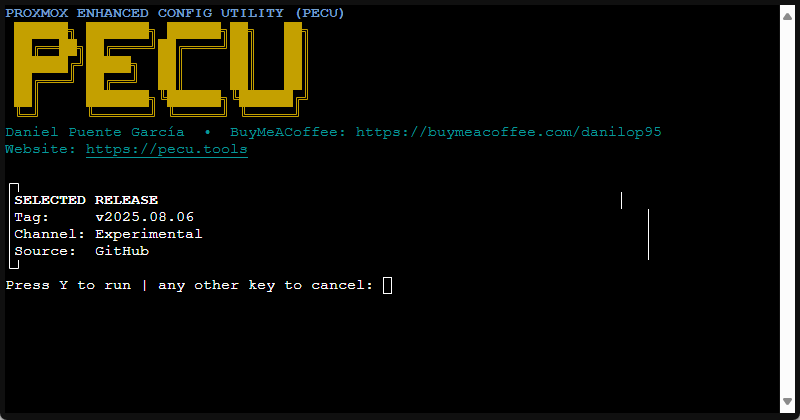
One of the reasons Proxmox has become so popular in the home lab and enterprise space is its ease of installation compared to more complex hypervisors. PECU extends this philosophy by offering a one-line install command that allows you to choose which version of the script you want to run. The bash script fetches all tagged releases and lets you launch whichever version (Stable, Beta, Experimental) you want to try.
With just this one command you can have it up and running in just a few seconds:
bash <(curl -sL \https://raw.githubusercontent.com/Danilop95/Proxmox-Enhanced-Configuration-Utility/refs/heads/main/scripts/pecu_release_selector.sh)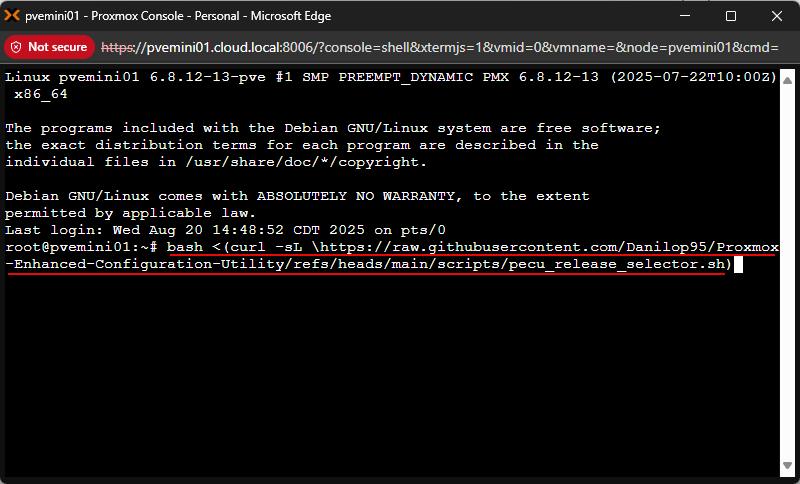
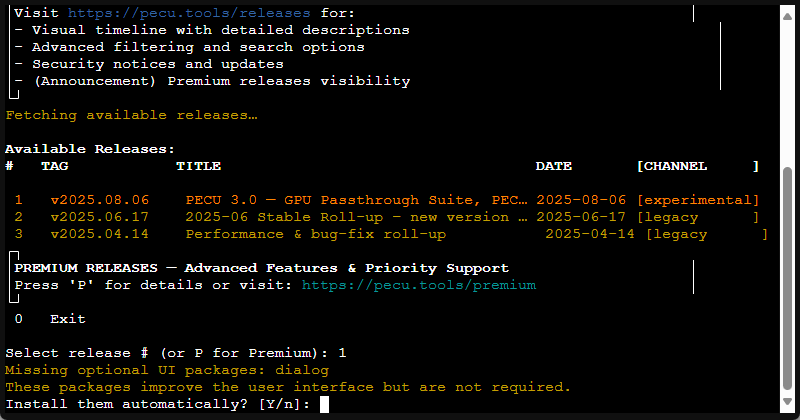
After running the script, you will see the below menu about installing any missing prerequisites.
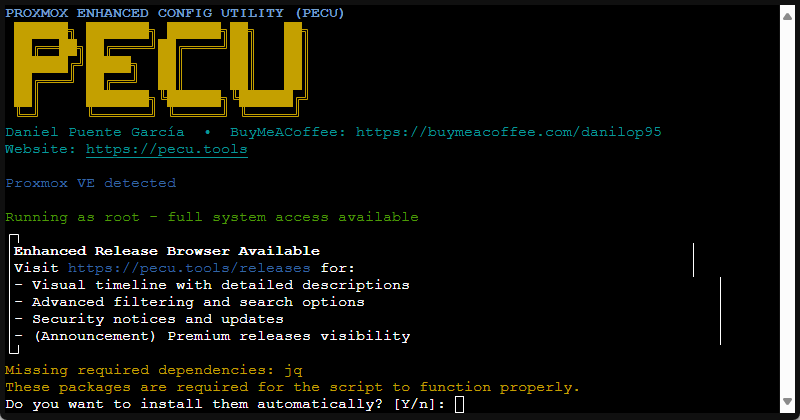
Below, you see what we mentioned earlier about asking which tagged version to run. Here I have chosent he experimental tag. We are prompted to install a missing UI package.
The interface and configuration modules you have available
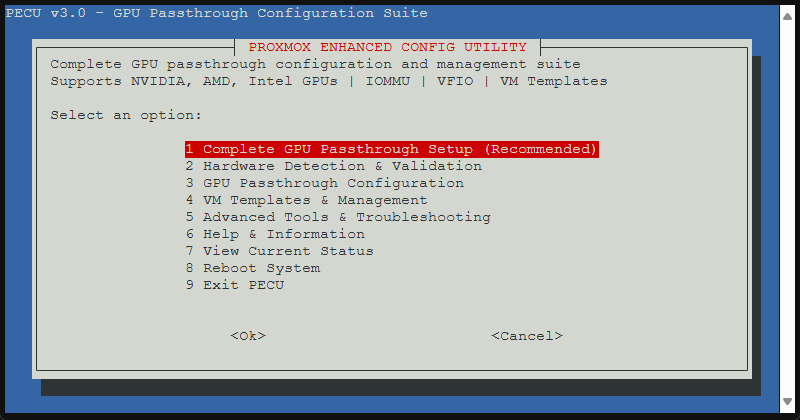
Below is a view of the parent-level menu and the configuration items you have control over. Here you can see the following:
- Complete GPU passthrough setup (recommended)
- Hardware detection & validation
- GPU passthrough configuration
- VM templates and management
- Advanced tools & troubleshooting
- Help & information
- View current status
- Reboot system
- Exit PECU
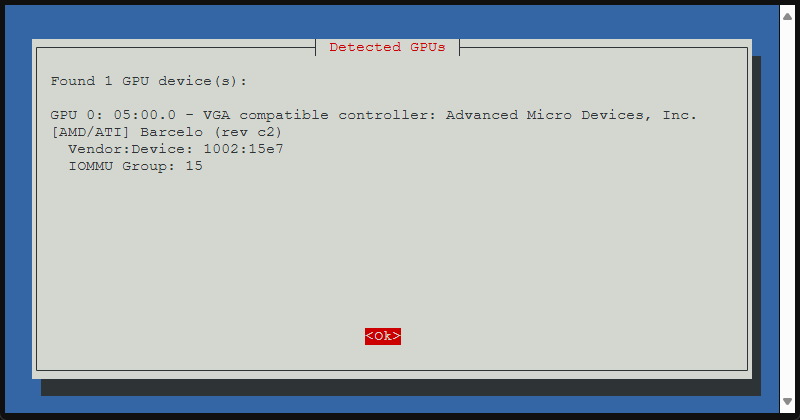
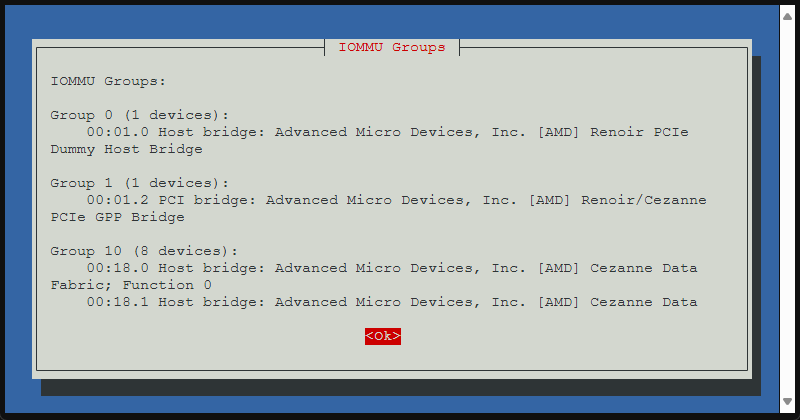
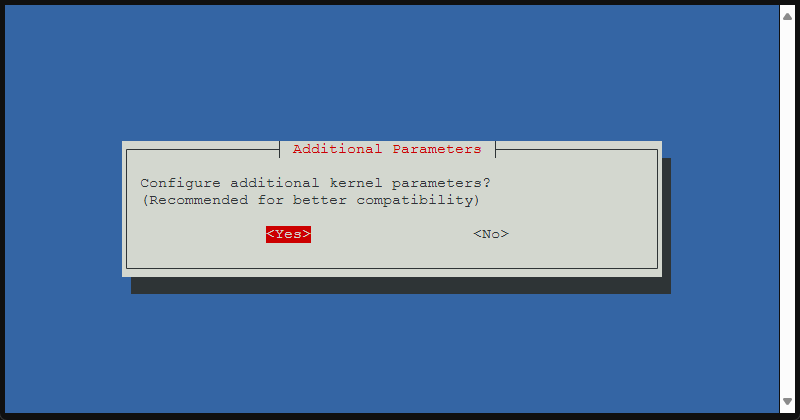
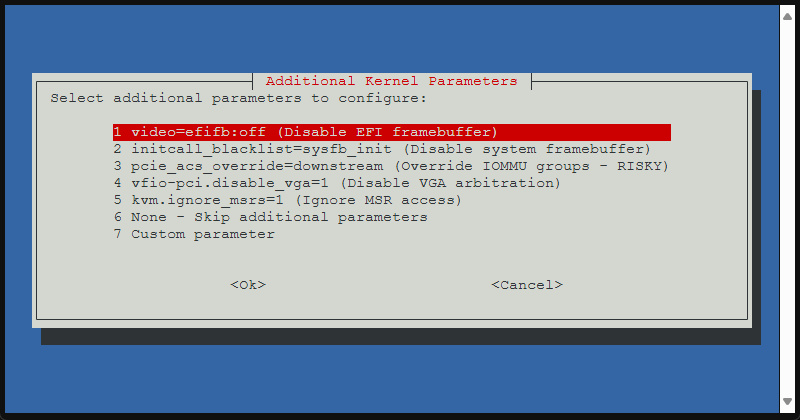
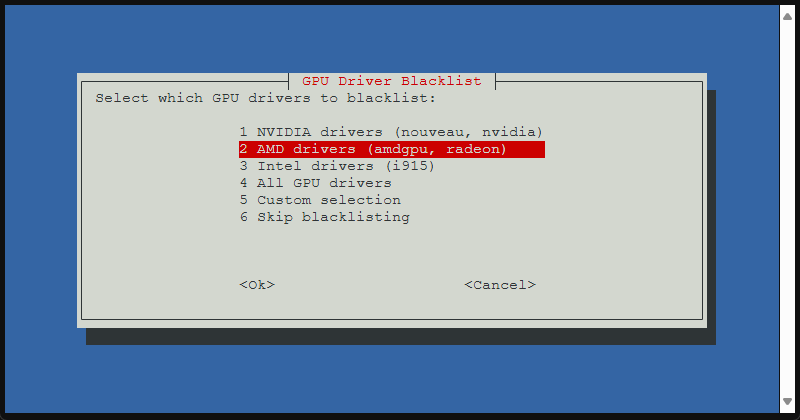
GPU passthrough made easy
By far, one of the trickiest and most problematic configurations that most Proxmox users have is configuring GPU passthrough. GPU passthrough is typically a VERY manual process with lots of command line commands and the possibility to get things wrong very easily. However, this is where PECU really shines and really what the primary focus of the tool seems to be.
It takes the manual and command line driven process for GPU passthrough and brings this into a menu-driven system that very much wizardizes the process to get GPU passthrough configured. And, let me tell you this is a amazing!
Below are a few screenshots of the GPU passthrough configuration after I selected this first item in the parent menu for fully automated configuration (experimental).
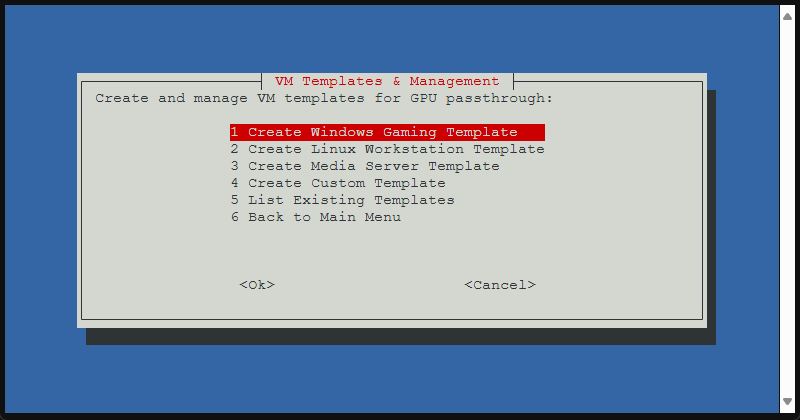
VM template and cloning system
Related to GPU passthrough. After you have the GPU passed through, you likely want to use this inside a virtual machine for GPU compute for your workloads. The VM Templates & Management menu allows you to create and manage VM templates for GPU passthrough.
Advanced tools and troubleshooting
PECU also includes a menu for Advanced configuration and troubleshooting. These tools include the following:
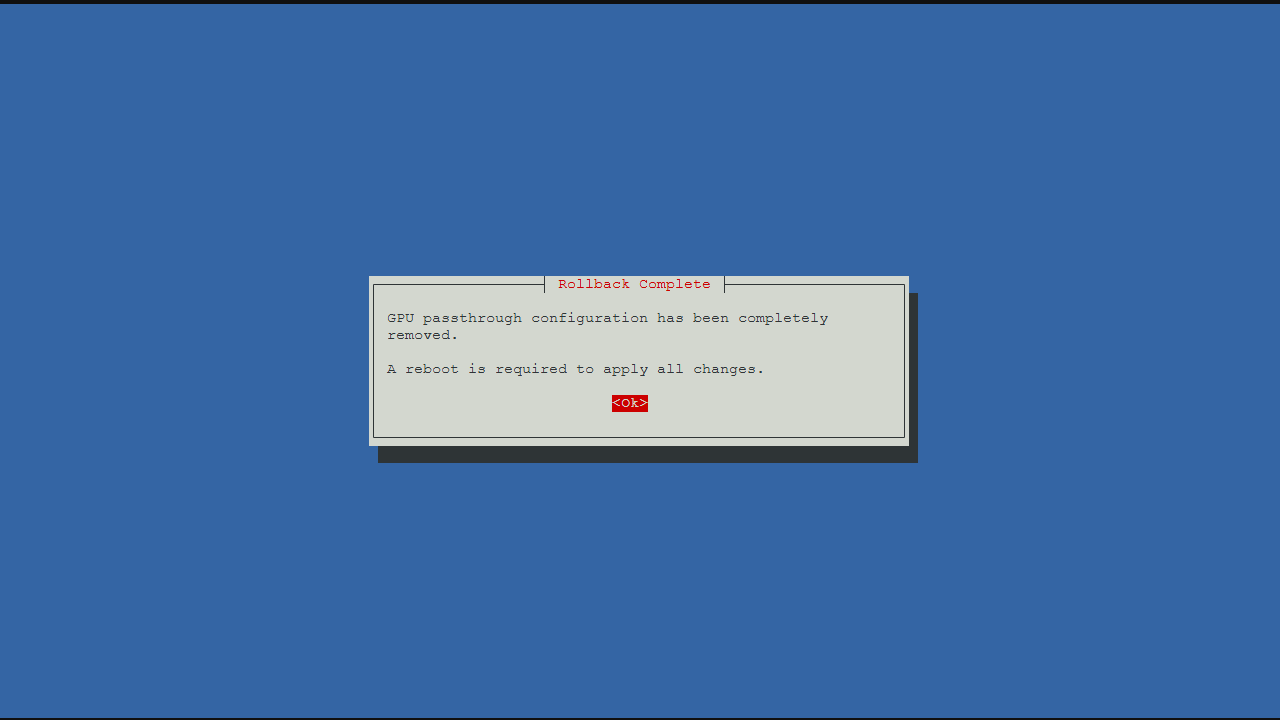
- Complete rollback (remove all configuration)
- View configuration files
- Manual kernel parameter editor
- VFIO device unbind/rebind
- Systgem backup & restore
- View detailed logs
If you have already went through the GPU passthrough configuration, the complete rollback allows you to remove all the changes made to the system if you want to start back at the beginning before you introduced GPU passthrough. This is great to know that you have a way to undo changes if you need to do that.
PECU and ProxMenux are great tools for those migrating to Proxmox
Let’s face it, most are trying to get off VMware as fast as possible. Proxmox has emerged as a very capable and viable alternative to VMware and other mainstream hypervisors for running VMs, Docker containers, and Kubernetes clusters. Tools like PECU and ProxMenuX allow admins to quickly get up to speed with their Proxmox environments even if they don’t as of yet have much experience with the platform.
For home labs the Proxmox Enhanced Configuration Utility allows home labbers to get more done in less time. Especially with GPU passthrough it takes the normal pitfalls out of the process of configuring GPU passthrough.
Wrapping up
The Proxmox Enhanced Configuration Utility (PECU) is a great tool to be able to take your Proxmox installation to the next level, either in the home lab or in production environments. PECU is very much focused on GPU passthrough configurations and has wizardized menus that allow you to create GPU passthrough configuration in your Proxmox system very easily. It also allows you to create VMs that are purpose-built to take advantage of the GPU passthrough configuration.
For home labbers who are looking for an easy way to get GPU passthrough up and running to production admins that are looking for a streamlined way to configure advanced configurations in a uniform and streamlined way, Proxmox Enhanced Configuration Utility is another great tool to add to your environment. Let me know in the comments. Are you already using ProxMenux? What about Proxmox Enhanced Configuration Utililty? Is this something you are going to try out for GPU passthrough configuration?
Google is updating how articles are shown. Don’t miss our leading home lab and tech content, written by humans, by setting Virtualization Howto as a preferred source.
About The Author