I get it. Man things are expensive these days. At least currently, the days of simple “and cheap” upgrades like adding RAM or upgrading a hard drive are over for the short term at least. However, over time, I have found that some of the best “upgrades” that provide the biggest improvements in things like usability, reliability, and overall experience are actually inexpensive upgrades I have made. I really think these are the kinds of upgrades that do not get talked about enough. They are not flashy. They do not show up in benchmark charts. But they absolutely change how your lab feels day to day and how things run. Let’s look at 7 upgrades that cost less than $100 each that made a huge difference in my home lab.
1. Better airflow and cooling in the mini rack
This is one of the most underrated upgrades you can make and it is simple and inexpensive. If, like me, you are running a very dense 10 inch mini rack that is packed with 5 or more mini PCs, temperatures can definitely go up in that small space. Then you get what is called heat leeching or heat soaking where the devices temperatures go up due to soaking up the heat put off from the other devices.
In my little mini rack setup, I added a simple set of USB powered fans that I have “draped” over the front of the mini rack to pull in cool air and push hot air out the back. This was not anything fancy, but just a couple of quiet fans and a clean mount setup (just a couple of black zip ties that fit into my color scheme so you can’t even see them.
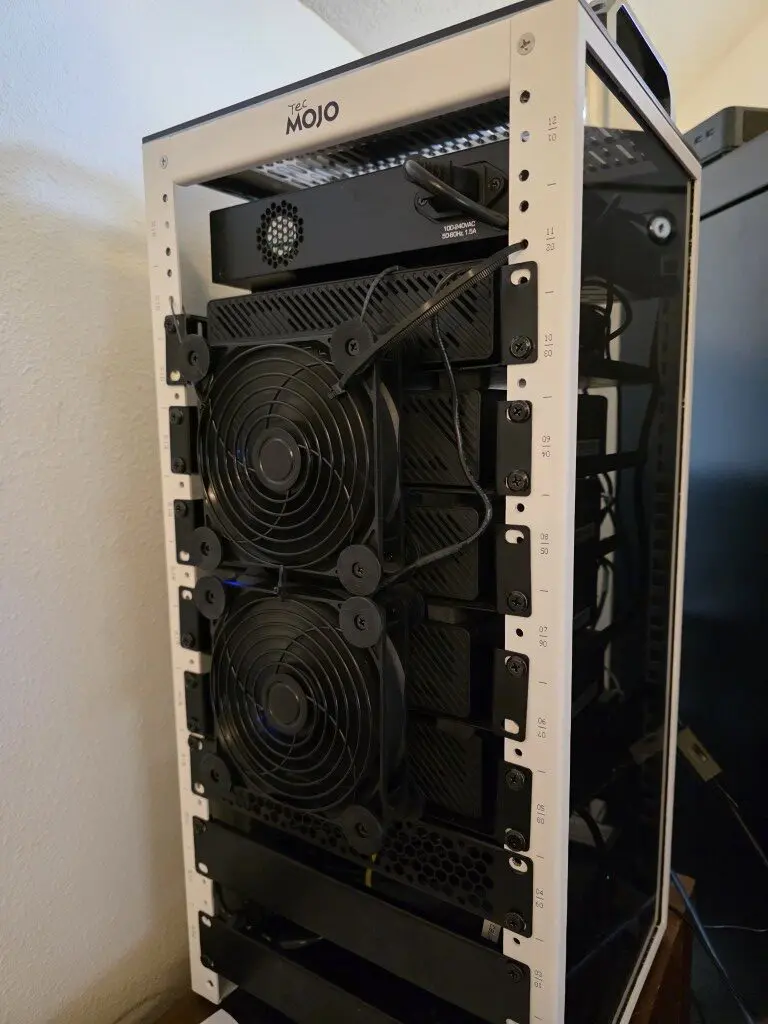
The difference these two fans made was immediate. The internal temperatures dropped across all of my nodes. Now I can hold my hand inside the rack and it basically feels cool and room temperature air instead of feeling that mass of hot air build up like it was before.
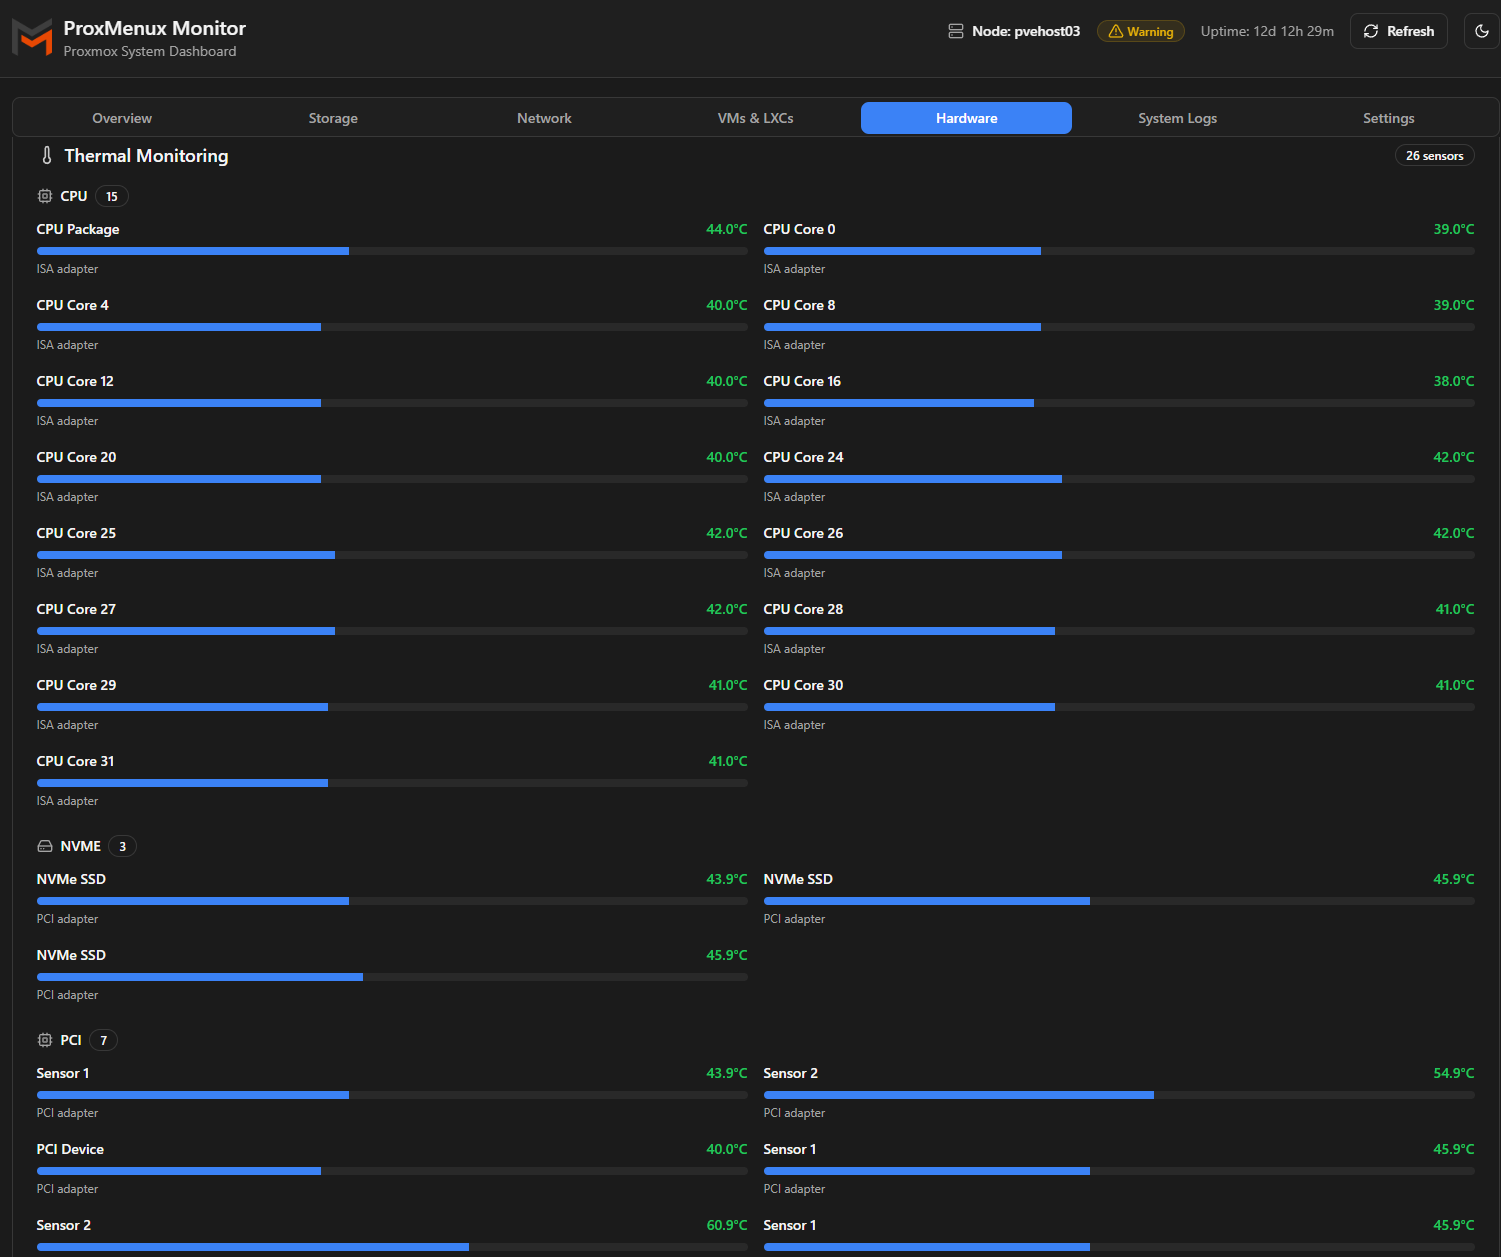
Check out my full post covering this project here: How I Fixed Heat Buildup in My 10-Inch Mini Rack with a Simple Cooling Mod. I saw much better temps across the hardware in each of my mini pcs after doing this. Below is a look at my temps on one of the mini PCs using ProxMenux:
So, if you have your mini rack sitting on a desk or under a desk or even in an area that doesn’t have a lot of heat build up naturally, do yourself and your rack a favor and get you a couple of the USB fans and do a similar setup where you have active cooling for your mini PCs.
2. 10Gb DAC cables instead of messy transceivers
This is another low cost upgrade if you are running 10 GbE networking with SFP+ ports. You can switch over to DAC cables. This is a pretty good quality of life improvement that you can make to keep from having to deal with tranceivers. Also, if you are running Base-T connections, these get super hot and draw a LOT of power. Before using DAC cables, I had a mix of SFP+ modules and fiber cables and some Base-T connections.

DAC cables simplify everything. They are cheap and require no additional modules as these are built into the cable itself. They are perfect for short runs (up to 10 meters) so work perfectly fine inside a rack or even between devices in different racks.
After switching over 10 gig connections to all DAC cables, this cleaned up the setup and they are much more sturdy cables than fiber. You can get a lot rougher with them than worrying about kinking a fiber patch. This is one of those upgrades that feels small but improves your day to day experience and reduces heat if you are using Base-T instead of SFP+ (keep in mind you may have to use Base-T if that is the only connection you have on the device, but if you have a choice, make the swap!).
If you are running 10Gb networking with SFP+ ports, switching to DAC cables is one of the easiest quality of life upgrades you can make.
3. NVMe heatsinks for cooling and performance
NVMe drives are absolutely amazing for home lab environments as they let us run super dense virtual machines and container environments and perform like you have a huge enterprise SAN at your disposal. But there is something to consider with them.
They tend to run hot under load and especially if the load is sustained workloads. This is especially important if your drives are packed closely together in a small form factor system like a mini PC. What I have found is that without proper cooling NVMe drives will throttle on you. You might not notice it immediately but when your system gets under load, performance can drop like a rock.
What I have found out pretty early on is that you need proper cooling on NVMe drives. Due to their small size and stature, you just assume they don’t get hot at all. But this is not the case. Most that you buy do not come with a heatsink. This is a pretty easy fix that you can make with just a few bucks on Amazon.
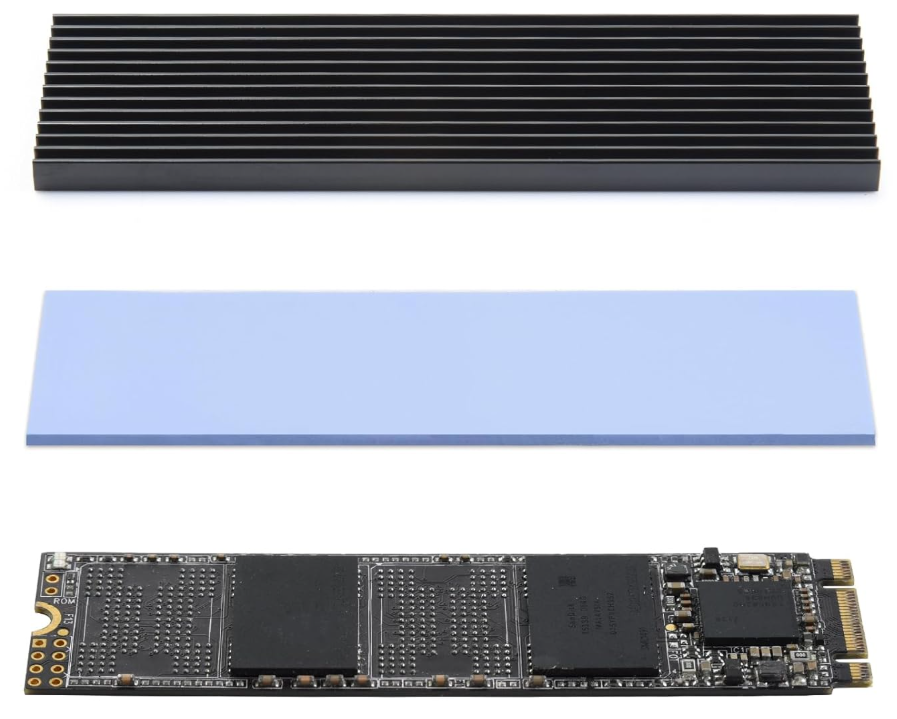
You can buy a package of several heatsinks to retrofit all of your NVMe drives if you want. These are just small aluminum or copper heatsinks that attach directly to the drive via a sticky heat transfer strip. They usually have a couple of plastic bands that you put around the drive and the heatsink to hold them in place.
Once I started adding heatsinks to my consumer NVMe drives, these saw more consistent performance during benchmarking and during high sustained workloads during backups, or other high data transfer operations.
4. Labeling cables and ports
Labeling and tidying up cables and ports may not be the most exciting upgrades you can make for your home lab, but it is one of the simplest and most important upgrades that you can do for very cheap. At some point, every home lab reaches a point where you probably no longer remember what every cable does or how things are connected. That is when troubleshooting becomes an absolute nightmare.
I started labeling everything at this point. Network cables, power cables, switch ports, patch panels. Even labeling nodes and interfaces is helpful. This does not require anything fancy. A simple label maker or even printed labels and tape can work.
I also found that on Amazon you can get these neat zip tie labels that have the label built in where you can write on the label and attach to cables, etc. You can get these from $10-20 or so.
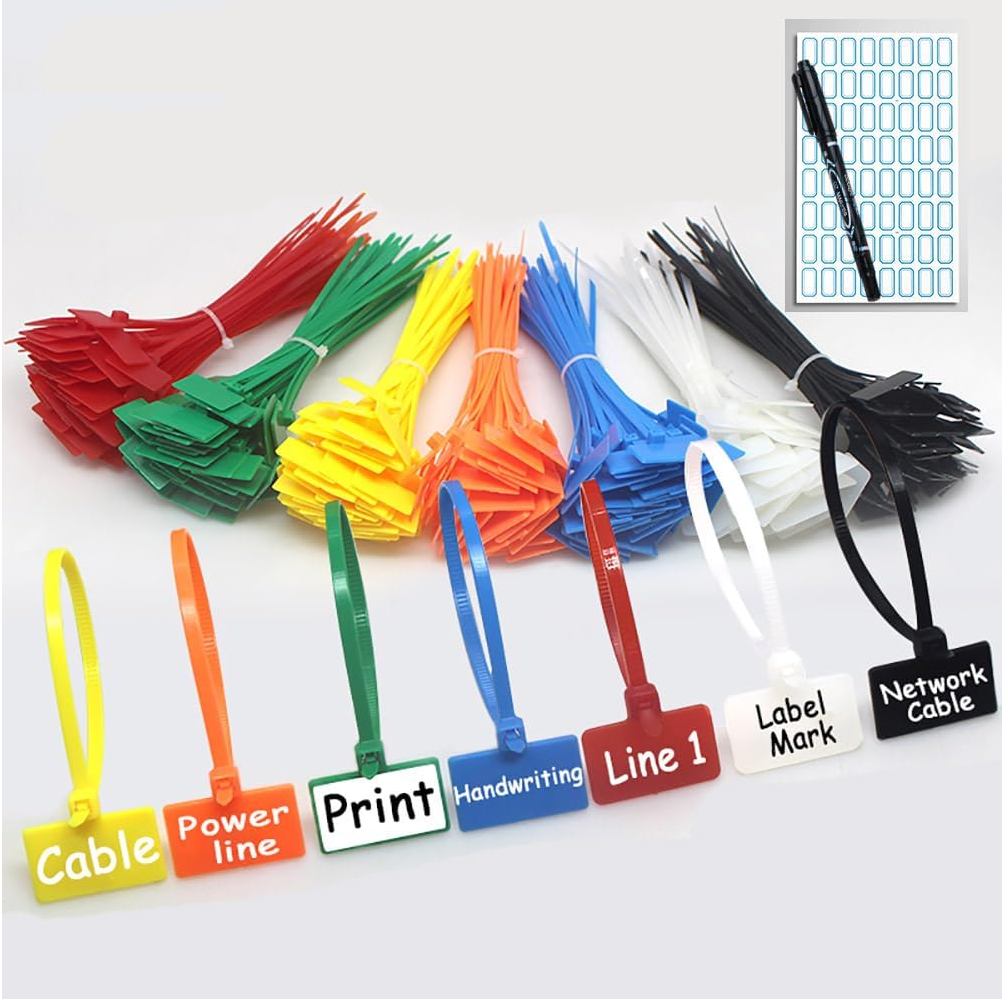
The result is clarity. When something goes wrong, you can trace it immediately. When you are making changes, you have confidence in what you are touching.
This upgrade does not improve performance, but it dramatically improves your efficiency and reduces mistakes.
5. Smart power plugs for remote control
There is no question that one of the most frustrating situations that you could be in is to be remote and have something that just needs to have a hard power reset at home and not be able to be there to do it. However, if you have a “smart plug” then you can do this remotely.
Smart plugs allow you to remotely power cycle devices whether this is a hung node, or misbehaving switch or really anything else. I use smart plugs to control individual devices or small groups of devices. It gives me a simple way to reset things without physically being there to interact with the hardware. The two below are around $15.
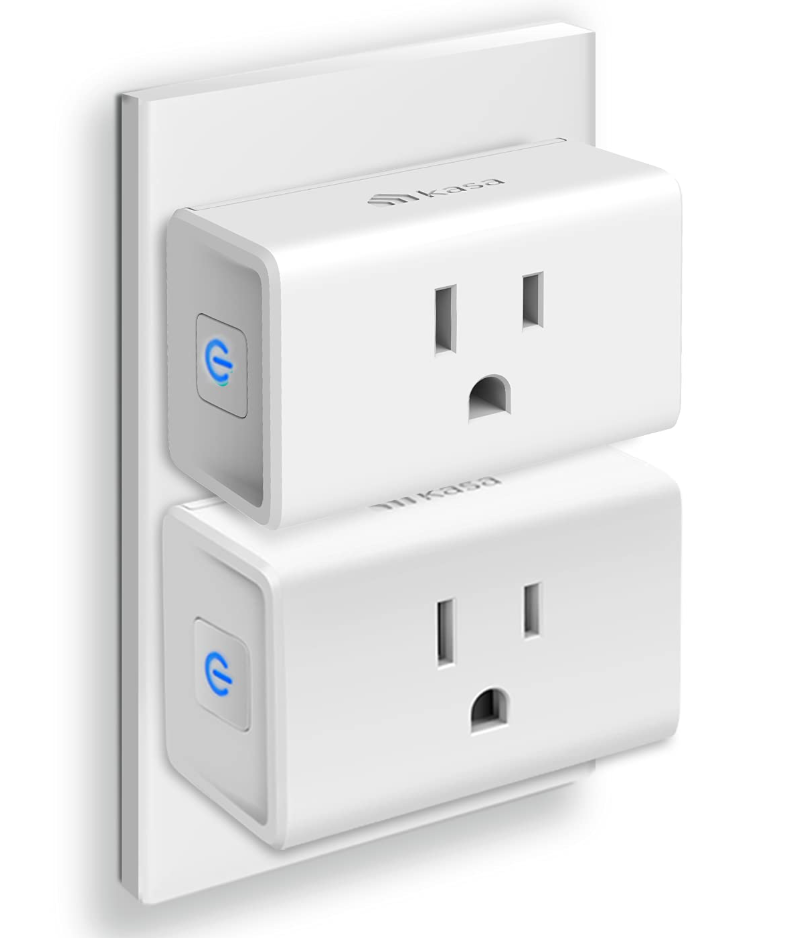
Being able to remotely power cycle a device is incredibly useful. Whether it is a hung node, a misbehaving switch, or a test environment that needs a reset, having remote power control saves time and frustration.
Another side benefit is that these provide you with power usage metrics which can be helpful if you are trying to keep a check on energy consumption in your home lab.
6. A proper cable management kit (velcro, clips, and organizers)
This is one of those quality of life upgrades that helps to keep everything organized from a physical cabling perspective. When you combine this with the labels mentioned in the #4 upgrade, you will be surprised at just how much this will improve the look and organization of your home lab.
Amazon sells really cheap “cable management” kits that have an assortment of different ties and holders for various cables and how you want to “tie” them up or hold them. Here is just one example of one of the kits they have for sale for $10-$20 ish.
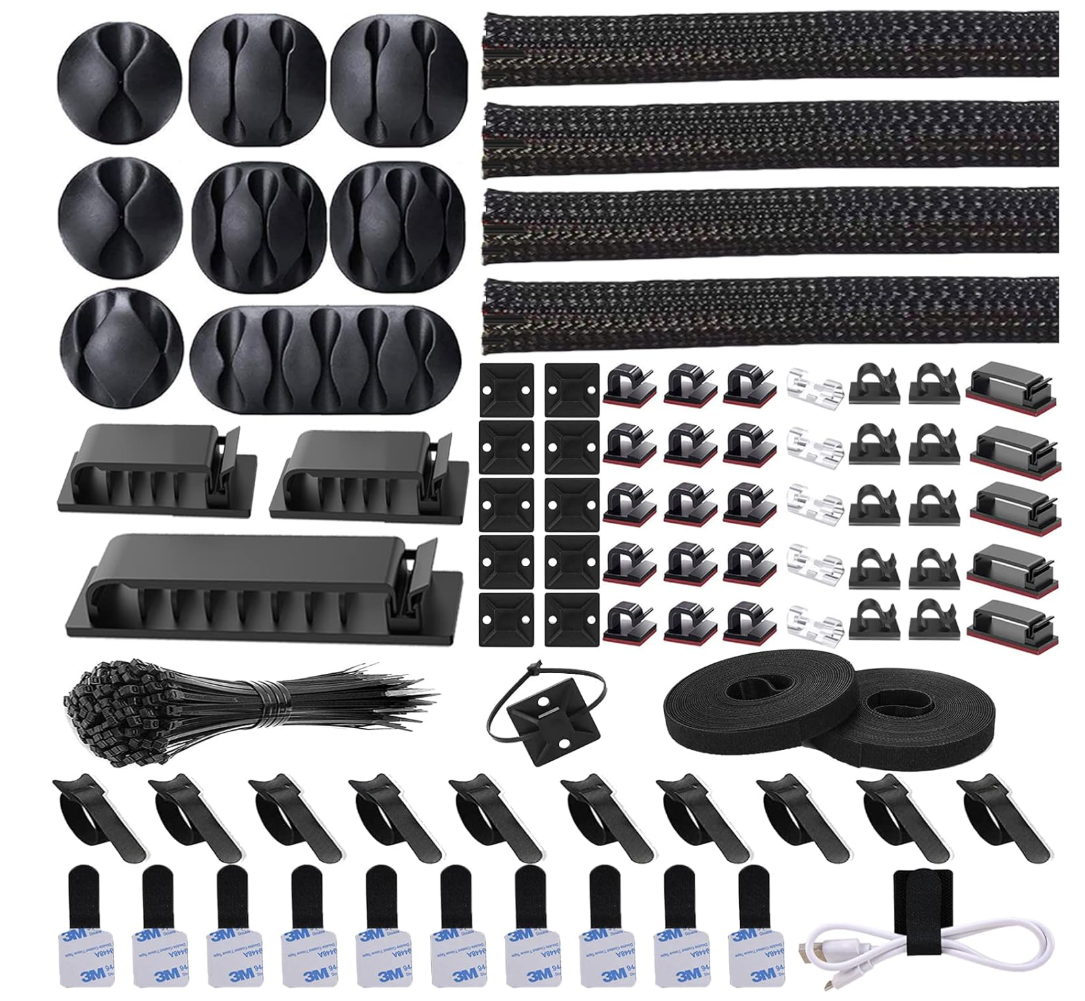
Not only does keeping your cables organized improve organization, it also helps to improve airflow in your rack or mini rack. It makes it MUCH easier to trace connections and cables, etc.
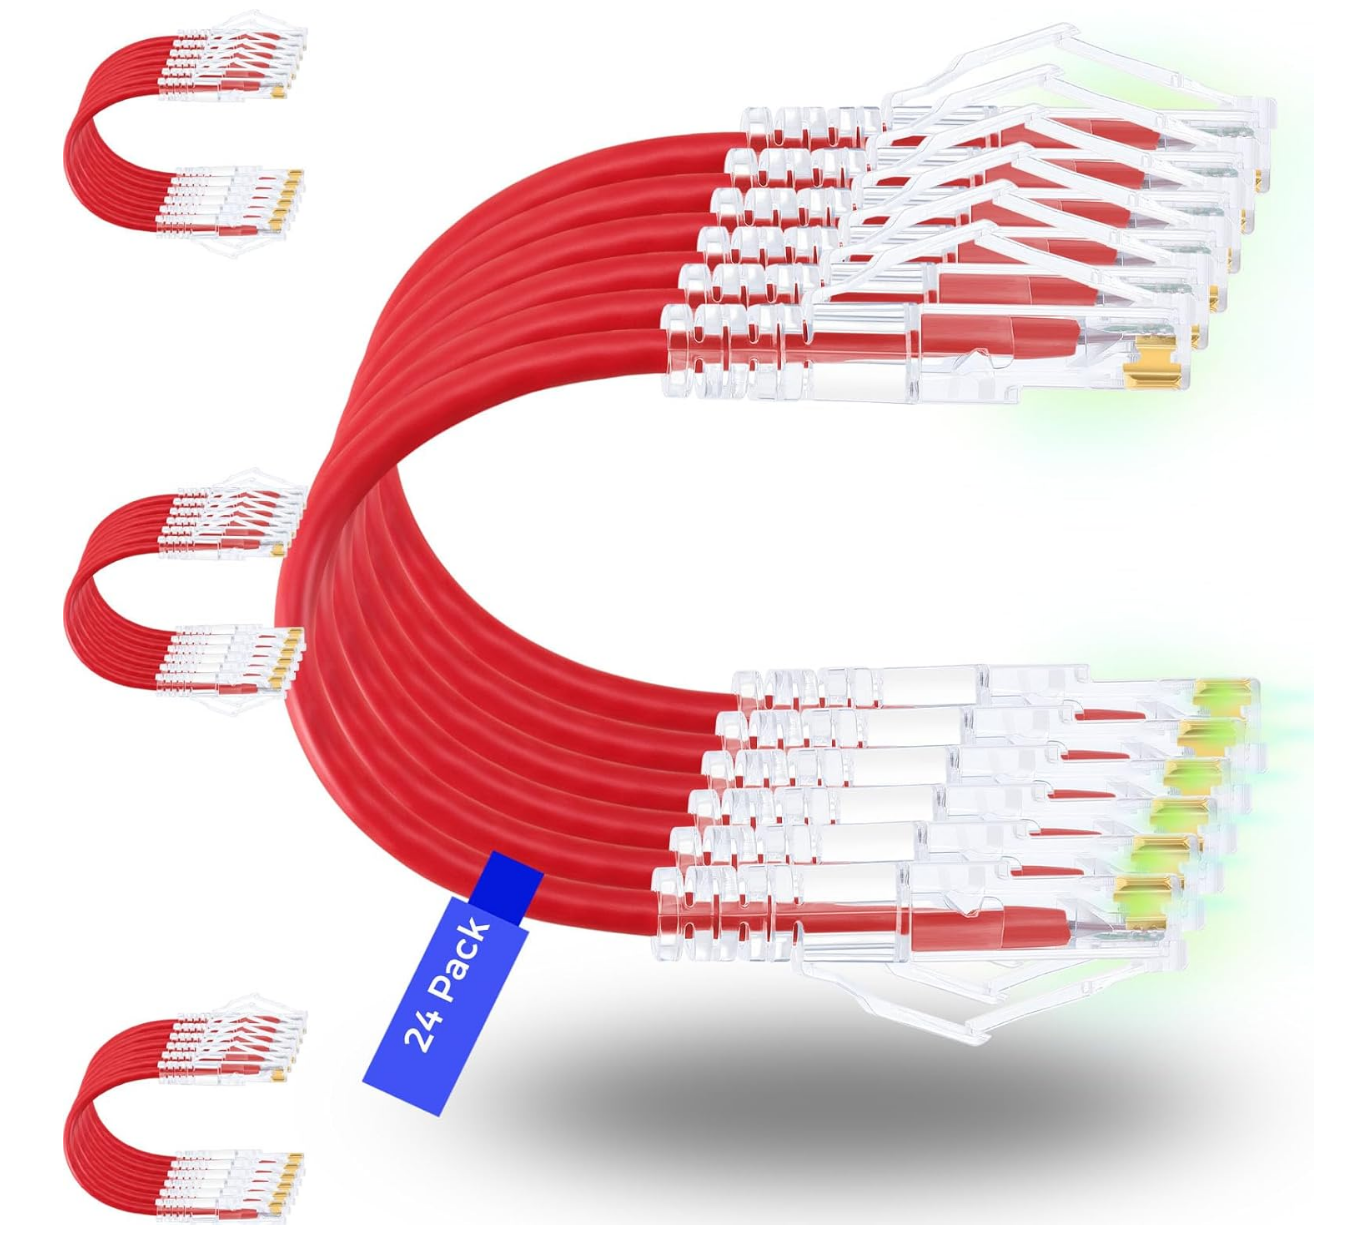
7. Slim run patch cables and a keystone patch panel
We have already talked about what an impact cables can have in the form of DAC cables for 10 GbE connections. But what about 1 and 2.5 GbE connections? One of the best upgrades you can make is moving to “slim run” cables paired with a “keystone” patch panel.
Like me, most start out running home runs from servers directly to your network switch. While this works just fine for connectivity, it leads to a mess of cables that are usually too long and various lengths connecting all of your equipment.
Instead of doing this, you can get what is called a keystone patch panel. With these patch panels, they have keystones in the back just like they do on the front side. This means that you can just literally “plug in” your CAT6 cables in the back instead of needing to punch them down with a punch down tool. These are rated very well and even 10 GbE capable. I have been running one of these in my 19 inch rack for years now and you can buy one for about $38 from Amazon.
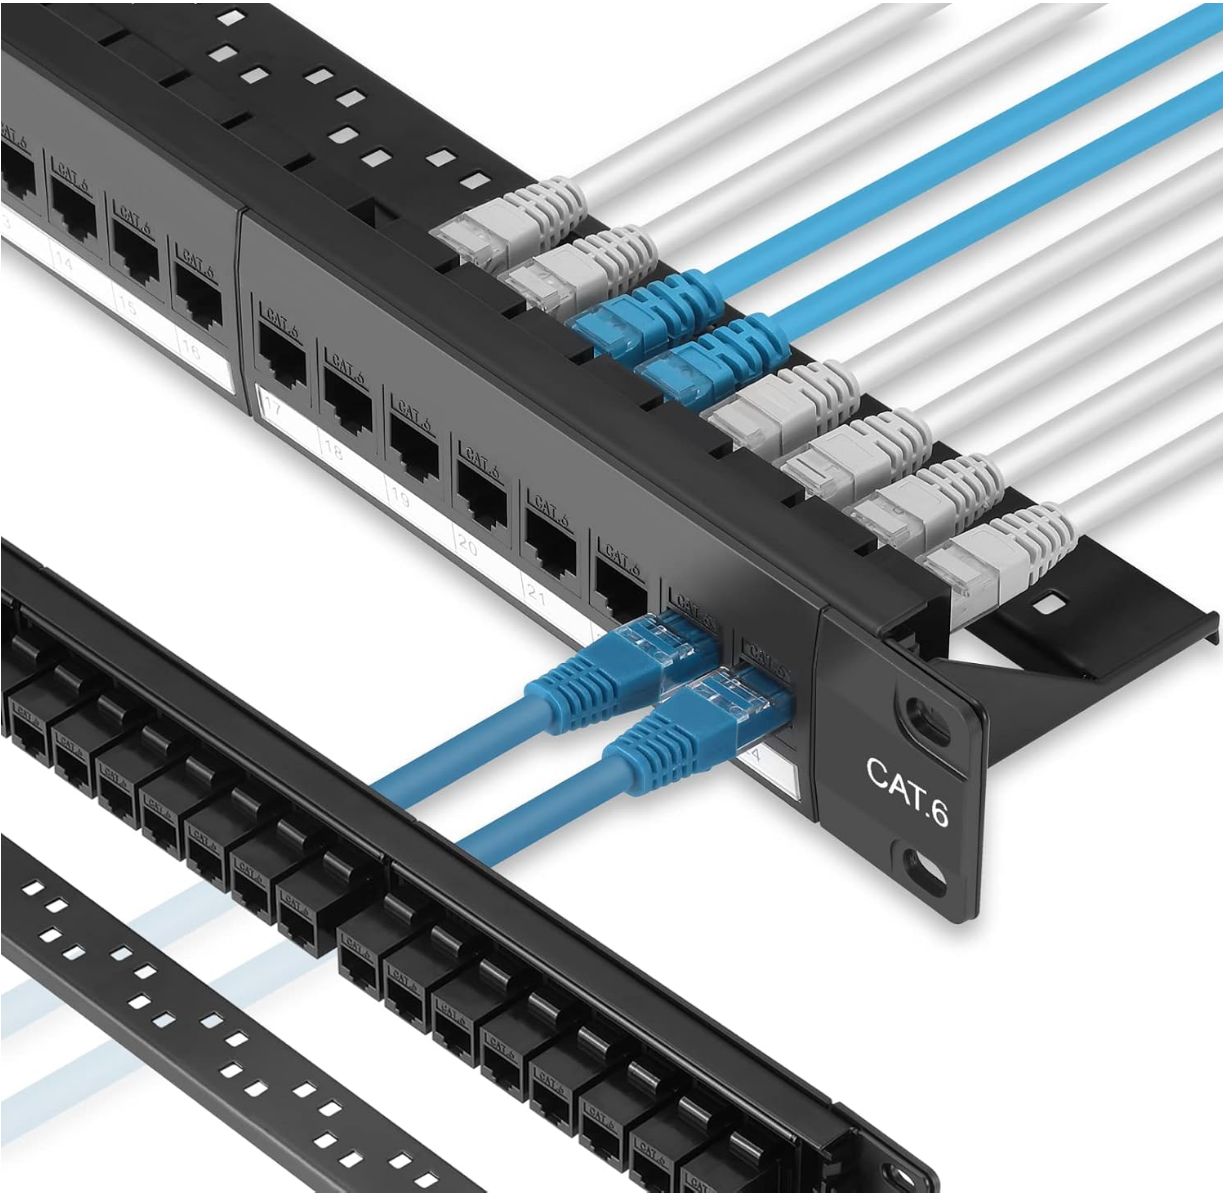
Then, the perfect pairing with this keystone type patch panel is to use “slim run” patch cables that are super stylish, slim as the name implies, and much easier to make things look good. You can get a 24-pack of these for around $20 from Amazon.
Wrapping up
Especially with the tight budgets of most of us these days and the super high costs of upgrading things like memory and storage, a major hardware upgrade may be out of range for the time being. However, out of the upgrades that I have made in my home lab, the ones that have historically made the most impact for me are those upgrades that are sub $100. Hopefully, this list of 7 upgrades you can make for your home lab for under $100 will help give you ideas of very cost-effective upgrades that definitely make a difference in efficiency, airflow, cooling, ease of troubleshooting, and convenience. What about you? What are some extremely cheap upgrades you have made that looking back have made a huge impact in your lab?
Google is updating how articles are shown. Don’t miss our leading home lab and tech content, written by humans, by setting Virtualization Howto as a preferred source.
About The Author