How To Install Pi-Hole on Hyper-V with Debian
Pi-hole is open-source software that acts as a network-wide ad blocker, protecting your privacy and speeding up your internet connection. It intercepts DNS requests and blocks ads, trackers, and malicious websites. With Pihole, you can block ads on all devices connected to your network, including computers, smartphones, and smart TVs. Hyper-V is a virtualization technology developed by Microsoft that enables you to run multiple virtual machines on a single physical host. This blog post will explore the steps to set up Pihole on Hyper-V and how to manage it for an optimal ad-blocking experience.
Pi-hole on Raspberry Pi
In addition to Pi-hole on Hyper-V, Pi-hole can also be installed on a Raspberry Pi. Raspberry Pi is a small, low-power computer that is well-suited for use as a home server. By installing Pi-hole on a Raspberry Pi, you can protect your home network from unwanted content, improve your internet experience, and customize your ad-blocking experience.
Installing Pi-hole on Raspberry pi
Installing Pi-hole on a Raspberry Pi is straightforward, and several tutorials are available that walk you through the process. The installation involves downloading the Pi-hole software, flashing it to an SD card, and configuring your Raspberry Pi. Once installed, you can manage your Pi-hole installation, update it, and customize your ad-blocking experience using the Pi-hole Admin Console.
Protecting your Home with a network-wide ad blocker
Protecting Your Home Network Installing Pi-hole on your home network is an excellent way to protect your privacy and improve your internet experience. By blocking ads and unwanted content, Pi-hole helps to reduce the risk of data breaches, protects your personal information, and improves website load times.
Additionally, by using Pi-hole, you can control what content your devices are exposed to, ensuring that your children or other family members are protected from inappropriate or harmful content.
To get the most out of Pi-hole, it’s important to configure your network settings correctly. This includes configuring your DHCP server, setting up a static IP address, and configuring your DNS servers. You should also ensure that your router is configured to use Pi-hole as your primary DNS server, so that all devices on your home network are protected.
What is Hyper-V?
Hyper-V is a virtualization technology developed by Microsoft that enables you to run multiple virtual machines on a single physical host. This allows you to run different operating systems on a single computer and to isolate applications from one another, making it an ideal solution for testing, development, and production environments.
Why choose Pihole on Hyper-V?
There are several benefits to choosing Pihole on Hyper-V as your ad-blocking solution. Firstly, Pihole is open-source software, meaning that it is free to use and has a large community of users who can provide support and troubleshooting assistance.
Network-wide ad blocking
Secondly, Pihole on Hyper-V provides a network-wide ad-blocking solution, meaning all devices connected to your network will be protected from ads and unwanted content. Finally, Hyper-V allows you to run Pi-hole in a virtual machine, ensuring that it won’t interfere with other software on your computer and enabling you to manage it easily.
Why Use Pihole on Hyper-V
There are many reasons to use Pihole on Hyper-V, but here are the most compelling:
Blocks Ads: Pihole blocks ads and unwanted content at the network level, ensuring that all devices on your network are protected from unwanted content. With Pihole on Hyper-V, you can block ads, pop-ups, banners, and trackers, improving your online experience and protecting your privacy by controlling DNS queries
Protects Privacy: Pihole protects your privacy by blocking requests to ad-serving domains and tracking websites. This helps to prevent these websites from collecting your personal data and using it for targeted advertising. By using Pihole on Hyper-V, you can improve your online privacy and reduce the risk of data breaches.
Improves Performance: Pihole speeds up your internet connection by blocking ads and unwanted content. This reduces the amount of data your devices need to download, reducing the time it takes to load websites and improving your overall internet experience.
Customizable: Pihole on Hyper-V provides a range of customization options, allowing you to tailor your ad-blocking experience to meet your needs. You can customize the blocklist, enable query logging, customize the DHCP server, set up a reverse proxy, and use Pihole with a VPN.
Easy to Use: Pihole on Hyper-V is easy to use, even for those who are not familiar with networking or command-line interfaces. With its user-friendly Admin Console, you can easily manage your Pi-hole installation, configure settings, and view logs.
Setting up Pihole on Hyper-V
To set up Pi-hole on Hyper-V, you need to follow these steps:
Prerequisites: To set up Pi-hole on Hyper-V, you need a Windows 10 or 11 Pro or Enterprise edition with Hyper-V enabled. You also need to download the Debian or Ubuntu ISO file.
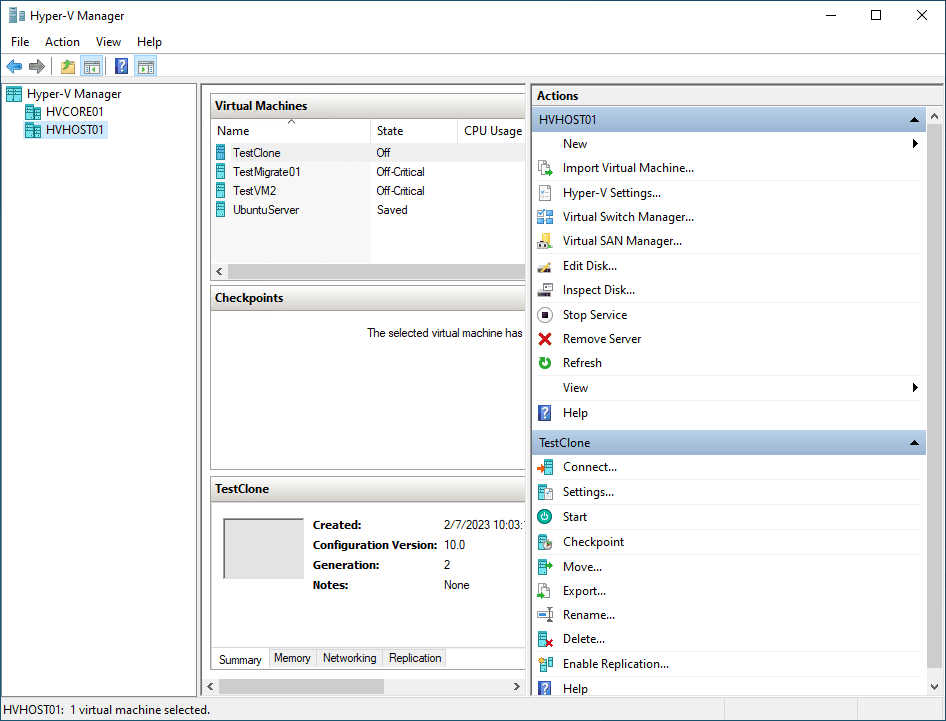
Installing Hyper-V: If Hyper-V is not already installed on your computer
Creating a virtual machine: Open the Hyper-V Manager and create a new virtual machine. Name it, specify the amount of RAM and disk space to allocate, and connect it to the Debian ISO file using a virtual DVD drive.
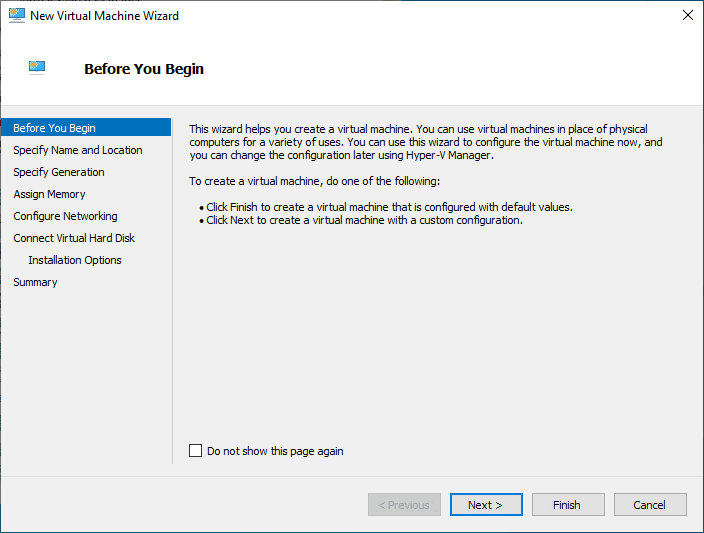
Installing Debian or Ubuntu: Start the virtual machine and follow the on-screen instructions to install Debian.
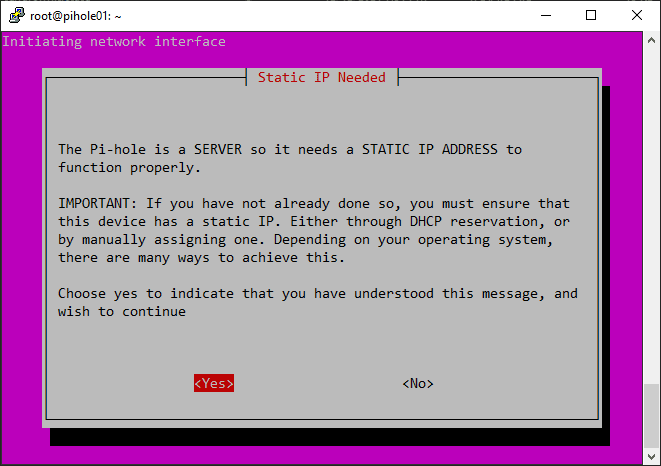
Assigning a static IP address: After the Debian install, assign a static IP address to the virtual machine to ensure its IP remains unchanged even after a reboot command. This is important for setting up Pihole, as it requires a static IP address to function correctly. To assign a static IP address, follow these steps:
Open the command line interface in Debian.
Run the following command to edit the network configuration file:
sudo nano /etc/network/interfacesIn the file, enter the following information, replacing the values with your own:
auto eth0 iface eth0 inet static address [IP address] netmask [subnet mask] gateway [gateway IP]
Save the file and exit.
Restart the network using the following command:
sudo /etc/init.d/networking restartConnecting to the virtual machine through
continue
the command line: Connect to the virtual machine using the command line interface, either through the Hyper-V Manager or a SSH client such as PuTTY.
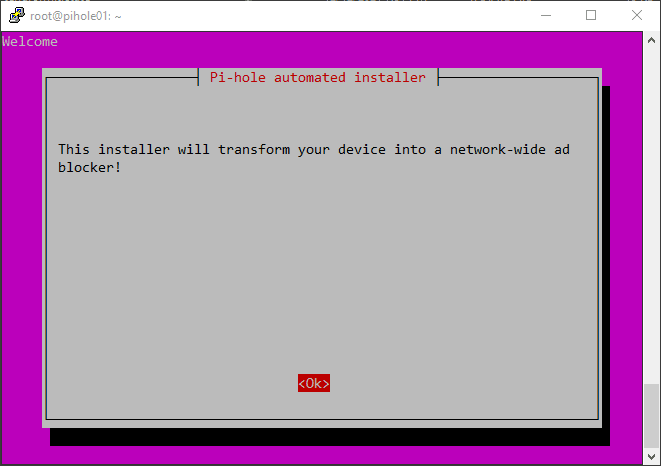
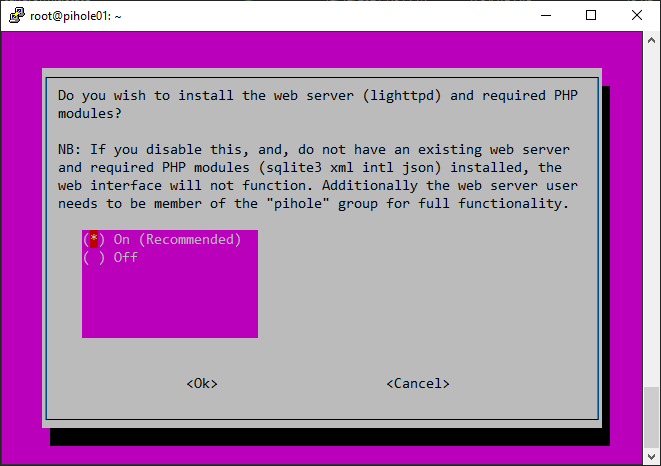
Installing Pi hole: To install Pihole, enter the following commands in the command line interface:
wget -O basic-install.sh https://install.pi-hole.net sudo bash basic-install.sh
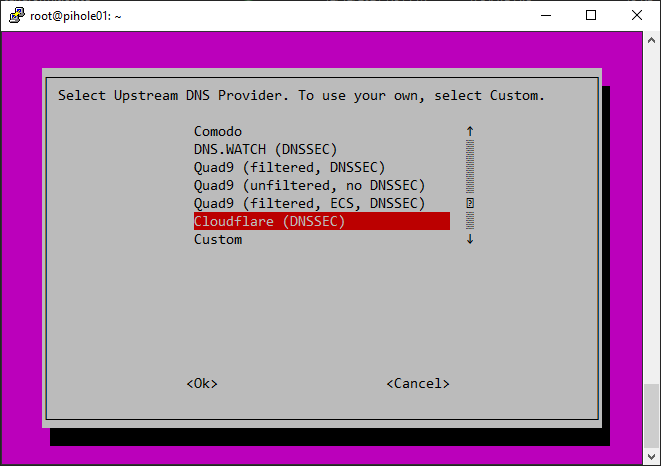
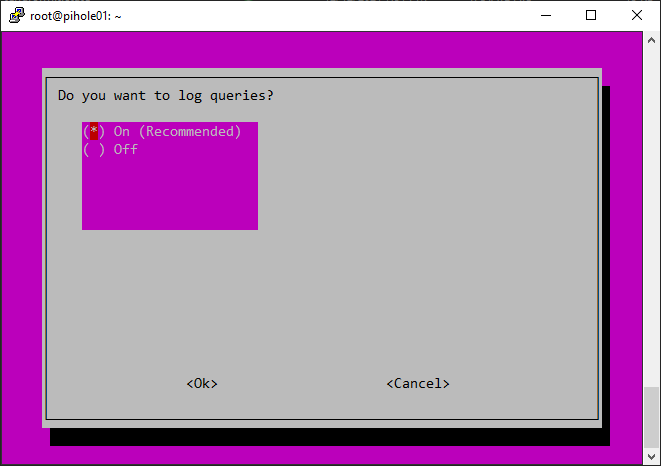
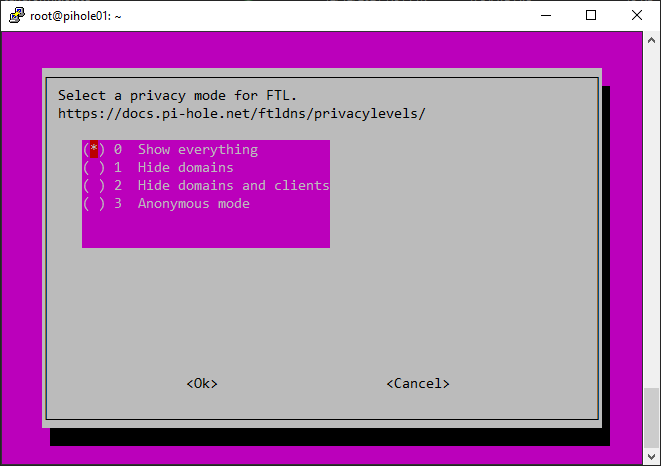
Configuring Pihole: After installing Pihole, you’ll need to configure it. You’ll be prompted to select your preferred DNS servers, set a password for the Pi-hole Admin Console, and choose whether to use the Pi-hole DHCP server. The Pihole DHCP server is an optional feature that assigns IP addresses to devices on your network, ensuring that they use Pi-hole as their DNS server.

Setting up the DHCP server: If you choose to use the Pi-hole DHCP server, set it up to ensure that all devices on your network use Pi-hole as their DNS server. This is an important step for a network-wide ad-blocking experience. To set up the DHCP server, follow these steps:


Open the Pihole Admin Console in a web browser.
Navigate to the DHCP settings page.
Select the option to use the Pihole DHCP server.
Configure the DHCP server settings to your liking.
Save the changes.
Testing the Pihole installation: Test the Pihole installation by visiting a website that displays your IP address. If Pihole is working correctly, it should show that your DNS requests are being blocked.
Managing Pihole on Hyper-V
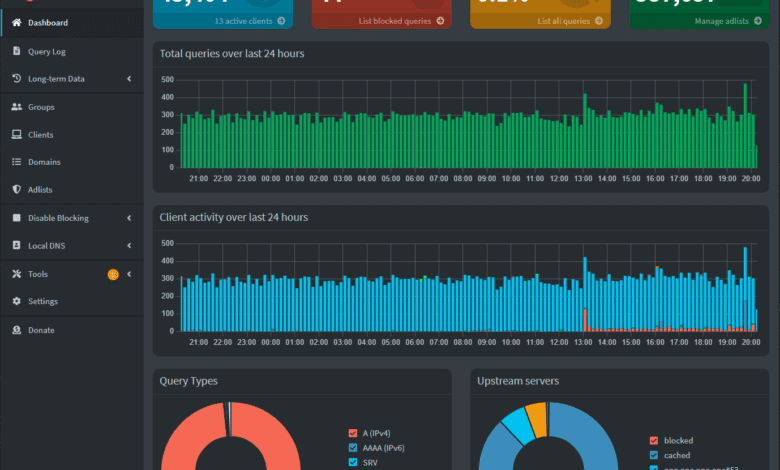
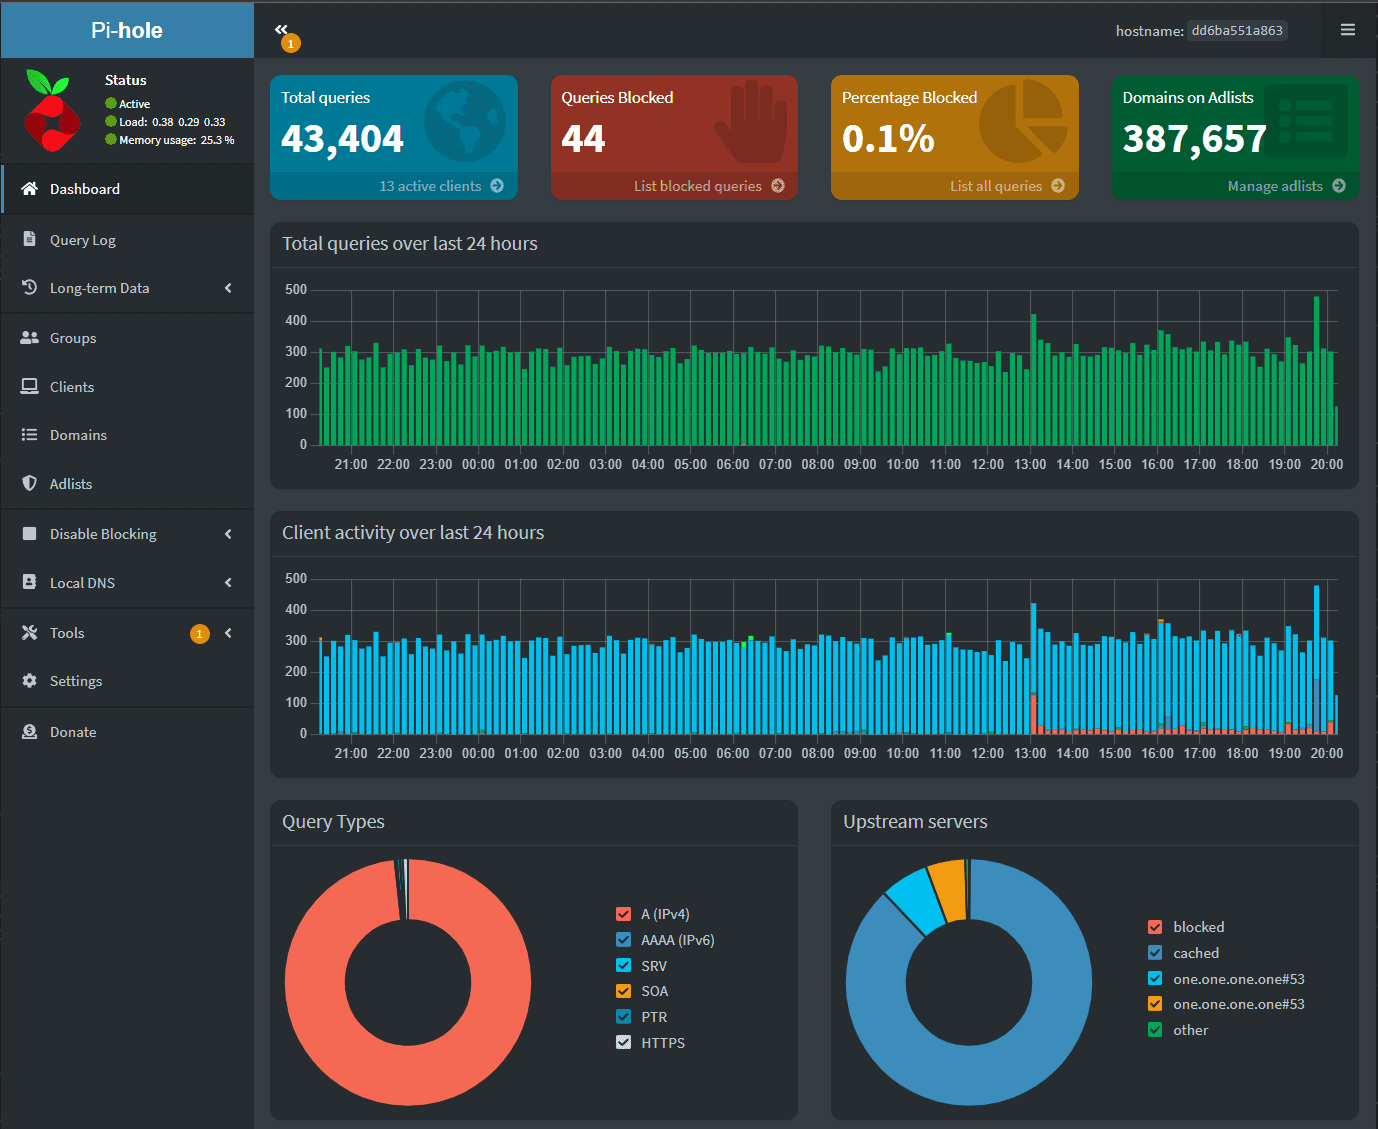
Once you have set up Pihole on Hyper-V, you can manage it using the Pihole Admin Console. The Admin Console provides you with various options for managing Pihole, including:
Update Pi hole: You can update Pihole to the latest version using the following command in the command line interface:
pihole -upConfiguring DNS settings: The Pihole Admin Console allows you to configure your DNS settings and choose custom DNS servers or use the Pi-hole DHCP server.
Blocking ads: Pihole uses a database of known ad-serving domains to block ads. You can add or remove domains from the database using the Pihole Admin Console.
Viewing logs: The Pihole Admin Console provides a log of all DNS requests made on your network, enabling you to view which domains are being blocked and troubleshoot any issues you may have with Pihole.
Managing other devices: The Pihole Admin Console provides information about all devices connected to your network, including their IP addresses, hostnames, and operating systems. You can use this information to manage and configure other devices on your network.
Managing disk space: Pihole stores its database of blocked domains on disk. You can manage the disk space used by Pihole by optimizing the database, removing old logs, or increasing the disk space allocated to the virtual machine.
Advanced Configuration
In addition to the basic configuration steps outlined above, Pihole on Hyper-V provides advanced configuration options for users who want to customize their ad-blocking experience. Here are some of the most popular advanced configuration options:
Customizing the blocklist: Pihole uses a blocklist of known ad-serving domains to block ads. The blocklist is regularly updated to ensure Pi-hole blocks the latest ads and unwanted content. You can customize the blocklist by adding or removing domains or by using a custom block list.
Enabling query logging: Pihole logs all DNS requests made on your network by default. However, you can enable query logging to capture information about the requests, including the IP address of the device making the request, the requested domain name, and the request status (blocked or allowed). Query logging is essential for troubleshooting and understanding your network’s traffic.
Customizing the DHCP server: If you choose to use the Pi-hole DHCP server, you can customize its settings to your liking. This includes setting the DHCP lease time, the range of IP addresses that the DHCP server assigns, and the DNS server that the DHCP server uses.
Setting up a reverse proxy: A reverse proxy is a server that sits between your client and Pihole, forwarding client requests to Pihole and returning the response back to the client. Setting up a reverse proxy enables you to access the Pi-hole Admin Console over the internet, secure your Pi-hole installation with SSL, and offload processing from your Pihole server.
Using Pihole with a VPN: Pihole is designed to work with a VPN to protect your privacy and security when using the internet. When using Pihole with a VPN, all your internet traffic is routed through the VPN, ensuring that your DNS requests are protected and your IP address is hidden. To use Pihole with a VPN, you need to set up the VPN on your computer or router and configure Pihole to use the VPN’s DNS servers.
Pihole vs. Other Ad-Blocking Solutions
Pihole on Hyper-V is not the only ad-blocking solution available, but it is one of the most effective and flexible solutions. Here are some of the key differences between Pihole and other ad-blocking solutions:
Network-Wide Ad-Blocking: Pi-hole blocks ads at the network level, ensuring that all devices on your network are protected from unwanted content. Other ad-blocking solutions, such as browser extensions or ad-blockers, only protect the device they are installed on.
Open-Source Software: Pihole is open-source software, meaning that it is free to use and can be modified to meet your needs. Other ad-blocking solutions, such as browser extensions or ad-blockers, are often proprietary software that may be limited in terms of customization and features.
Large Community of Users: Pihole has a large community of users who contribute to the development of the software and provide support to other users. This makes Pihole on Hyper-V a robust and reliable ad-blocking solution.
Easy to Manage: Pihole on Hyper-V provides an easy-to-use Admin Console that allows you to manage your ad-blocking solution easily. Other ad-blocking solutions, such as browser extensions or ad-blockers, may be more difficult to manage, especially for those unfamiliar with the technology.
Flexible: Pihole on Hyper-V provides a range of customization options, allowing you to tailor your ad-blocking experience to meet your needs. Other ad-blocking solutions, such as browser extensions or ad-blockers, may be limited in customization options.
Wrapping Up
Pihole on Hyper-V is an excellent ad-blocking solution for anyone looking to block ads, protect their privacy, and improve their internet experience. With its network-wide ad-blocking, open-source software, a large community of users, and an easy-to-use Admin Console, Pihole on Hyper-V stands out as one of the most effective and flexible ad-blocking solutions available. Whether you’re a beginner or an advanced user, Pihole on Hyper-V provides a range of customization options to meet your needs, ensuring you get the most out of your ad-blocking experience.
Additionally, Pihole on Hyper-V provides a range of advanced configuration options for users who want to take their ad-blocking experience to the next level. Whether you want to customize the blocklist, enable query logging, set up a reverse proxy, or use Pihole with a VPN, Pihole on Hyper-V provides the tools and options you need to achieve your goals.
So if you’re looking for a powerful and flexible ad-blocking solution that protects your privacy, improves your internet experience, and provides a range of customization options, Pihole on Hyper-V is the solution you’ve been looking for.