Palo Alto Initial Setup CLI
One of the best ways to get familiar with networking gear and other solutions is by working with them in a lab. I maintain a fairly diverse home lab with various gear, hypervisors, and other software to lab out solutions, learn new things and get familiar with various technologies. The Palo Alto Networks VM 100 lab unit is one of the solutions that I have in my home lab. If you have a Palo Alto VM series firewall or a hardware appliance, you may want to use the CLI to perform the initial setup of your Palo Alto device. Let’s take a look at Palo Alto initial setup CLI to see what steps need to be performed to get up and running.
Don’t buy off eBay or second hand
Before getting into configuring the Palo from the CLI, I wanted to impart a few things I have learned with Palo gear. Some networking gear makes sense to buy second hand. With some equipment, you can find some good deals on networking gear from eBay and other places. However, Palo Alto gear is not one of them. If you buy gear second hand, Palo has a recertification process you have to go through to get the hardware recertified to put it under support and have a subscription with it. The following information is found from the official Palo Alto page found here regarding secondary market gear:
- Upon receipt of a purchased device on the secondary market, you must place two orders through a Palo Alto Networks authorized local reseller. The first order must be for a non-refundable certification fee and the second for a one time activation fee and the purchase of a one year support subscription (you may purchase a longer support subscription if desired but the purchase it at minimum a one year subscription). The purchase of other subscriptions or services are optional.
- After the two orders have been placed, Palo Alto Networks will send instructions on the verification process that will be used to determine if the device is in good working condition. The verification process will involve verification tests to validate hardware is in good operating condition, the generation and uploading of a technical support file to our support portal, and may require an internet connection to allow a Palo Alto Networks engineer to test the device remotely.
- If the device is determined to NOT be in good working condition, the re-certification fee will not be refunded, and the second order will be cancelled.
While there is a process to buy second hand gear and get this back under support with Palo Alto, this process is cumbersome, and expensive. Any bargain you may have found will be offset by the recertification fee and getting it back under a support contract. Ok, back to the reason you are reading this blog: Palo Alto initial setup CLI. Let’s see how this is done.
Palo Alto Initial Setup CLI
For the purposes of performing the steps listed, I will be using a Palo Alto VM 100 firewall that I have in the lab environment. One of the first things you need to consider before the CLI is the actual “physical” connections you have to the rest of your network. I have the word physical in quotes as with the VM-series, network connections are accomplished by connecting your vmnics for the Palo Alto VM-series firewall to the appropriate vSwitch, connected to the correct network.
By default, the Palo Alto management interface will be attached to the first vmnic installed in the VM. Also, by default, the management interface is setup to pull an address from DHCP. While the Palo Alto initial setup CLI method most likely may include configuring an address, this is not a necessary step just to get an initial configuration set on the Palo VM series firewall.
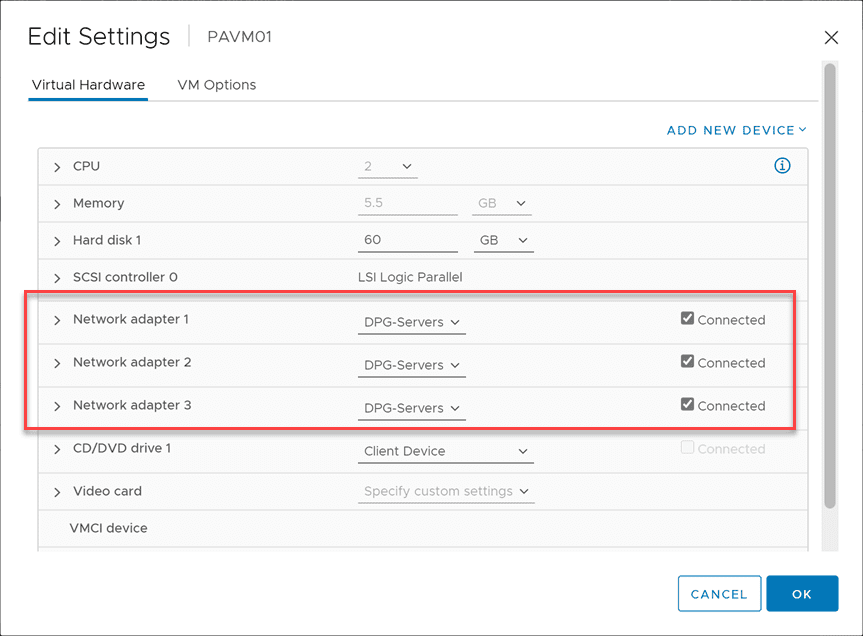
Below is a screenshot of my Palo Alto VM 100 virtual firewall after deploying to the vSphere environment. As you can see, there are three network connections by default. The first adapter will be assigned as the management adapter.
After deploying, you will want to follow the Palo Alto initial setup CLI process to get a static IP on your management interface, set up a default gateway, and DNS. In addition, you can ensure your admin password is changed to what you want before trying to login into the UI.
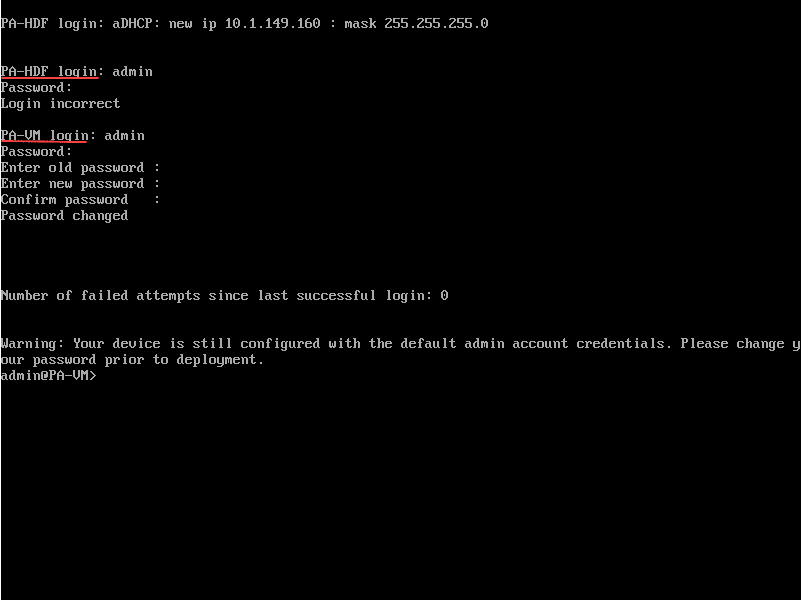
As a note, you won’t be able to change your password (entering it wrong 3 times) before the prompt changes to PA-VM login. Not the difference below.
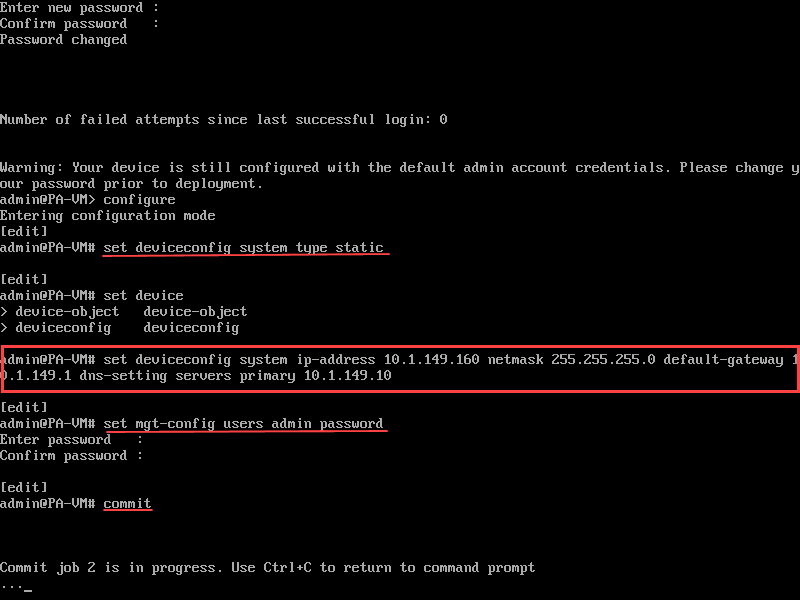
After setting the password for the command line access, now we can configure the IP address for the management interface, default gateway, DNS server, and also set the admin password for the UI, before committing changes.
configure
set deviceconfig system type static
set deviceconfig system ip-address
Example:  set deviceconfig system ip-address 10.1.149.28 netmask 255.255.255.0 default-gateway 10.1.149.1 dns-setting servers primary 10.1.149.10

Setting admin password:  set mgt-config users admin password

commit
exit
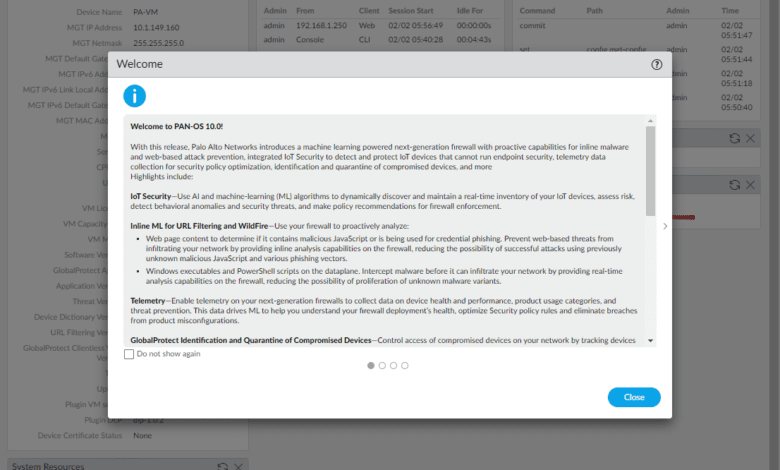
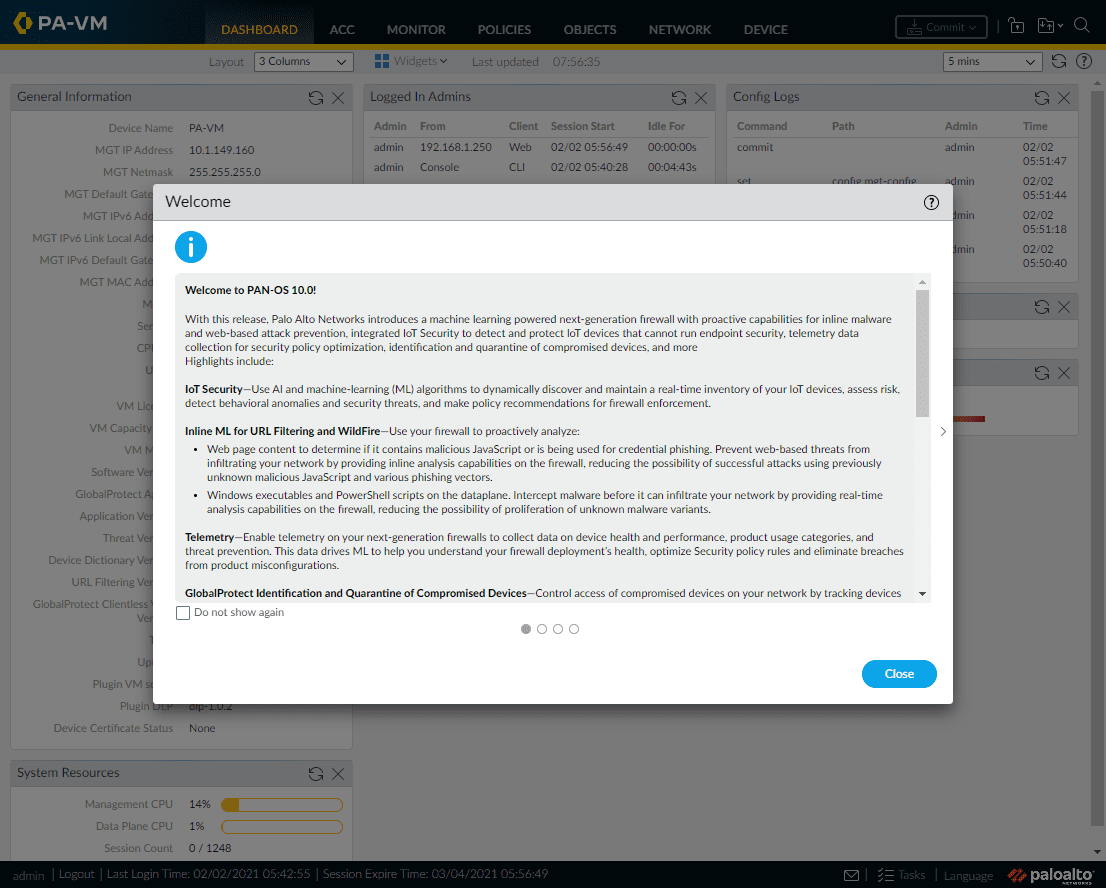
After the initial configuration at the Palo Alto CLI, you should be able to login to the Web UI and complete the more advanced configuration by way of the GUI.
Wrapping Up
The process to get a Palo Alto firewall initially configured using the CLI is straightforward with just a few commands. Hopefully this short walkthrough will help any who may be struggling to get their Palo VM-series or other firewall up and running.