Raspberry Pi Headless Wifi SSH Setup
The Raspberry Pi platform is one of the coolest platforms to work with when you need a physical headless server with a tiny footprint. There are tons of use cases, including home automation, security filtering and devices, and even ARM virtualization! The use cases are only going to grow as the platform becomes more powerful and fully-featured. Some may find it a bit daunting to learn the basics of what you need to get up and running with the Raspberry Pi headless server serving out various resources. If you are running a wireless-equipped Raspberry Pi, one of the first two things you will want to do is configure wifi and ssh. Let’s look at the Raspberry Pi headless wifi SSH setup and see the steps to do this.
Choosing the Raspberry Pi Headless Server Operating System
While the Raspberry Pi can run a desktop operating system, for a headless configuration, you want to choose a “server” operating system that is generally command line only. There are quite a few options out there for a headless Raspberry Pi installation. A couple of my favorites are:
- Raspberry Pi OS Lite
- Ubuntu 20.04 for ARM
Using either operating system for a headless Raspberry Pi configuration works great and will allow doing just about anything you want to do. A factor in choosing your headless server operating system may come down to the specific project or installation you are working with. A developer may have written an app to install and work with a specific Raspberry Pi installation. So, read the requirements and documentation for your specific application.
Installing your Raspberry Pi Headless Server Operating System
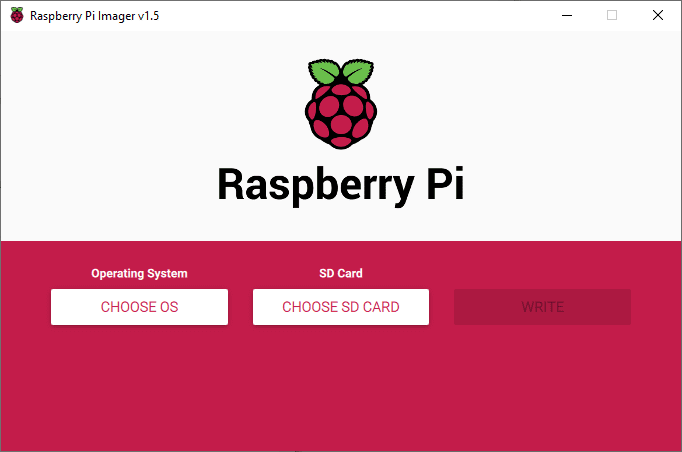
You may wonder, how do you get the headless server operating system on your Raspberry Pi? Raspberrypi.org has made this simple by providing the Raspberry Pi Imager utility. Using the Raspberry Pi Imager, you can easily install pre-provided images on your SD-CARD, or you can select a custom image on the hard drive of your Windows or Ubuntu machine. Get the Raspberry Pi Imager utility here:
The Raspberry Pi Imager utility is very straightforward and intuitive. You first choose the operating system you want to use and then select the SD Card you have mounted on your Windows or Ubuntu workstation.
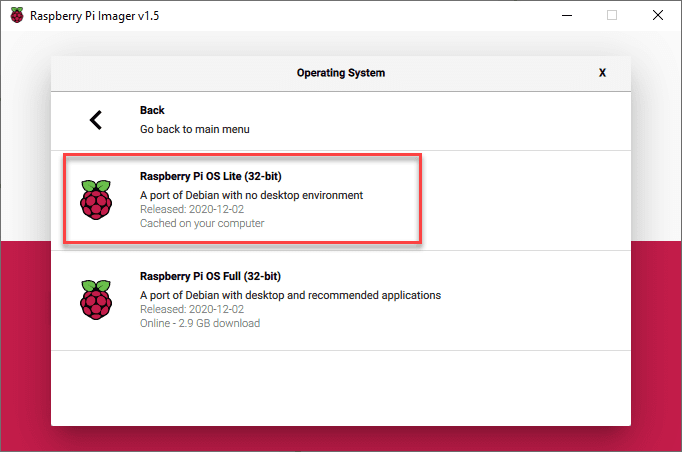
Below are a few screenshots of the Raspberry Pi Imager utility and the operating systems you can pull using the utility. As you can see here, there are many selections you can choose from that are already built into the utility. This means you don’t even have to pull the image down as the utility does that for you.
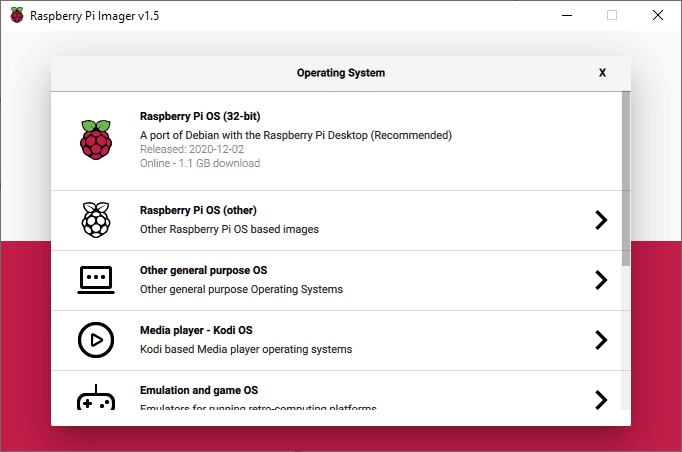
Here you see the Raspberry Pi OS Lite installation.
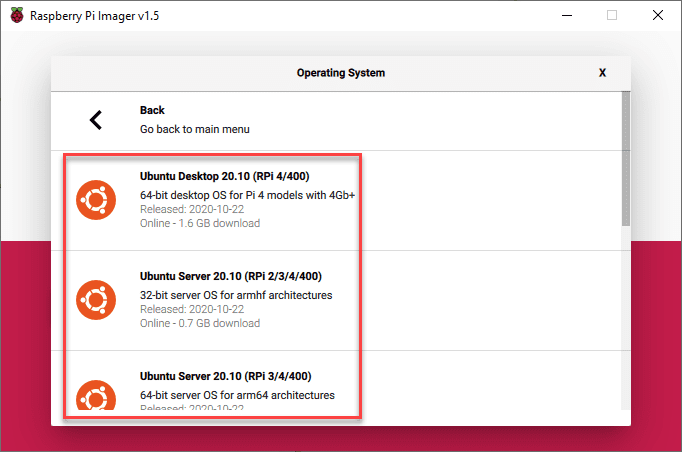
Also, you can pull the latest version of Ubuntu Server for your headless operating system.
Raspberry Pi Headless Wifi SSH Setup
Let’s now look at the Raspberry Pi Headless Wifi SSH setup and see how to configure these two critical services for use with a Raspberry Pi that may need to be placed where you have no hardwire Ethernet connection, only wireless. You will also want to have SSH access so you can administer the machine remotely over WiFi.
First, let’s take a look at the Raspberry Pi OS Lite installation to see how you can configure both of these services in the Raspian operating system.
Raspberry Pi Headless Wifi Configuration
The first thing you will need to do is, of course, get the Raspberry Pi installed, booted, and hardwired into the network so you can configure the wireless as this will not be available for obvious reasons when you first boot.
Raspberry Pi OS Lite includes a great little command environment GUI that allows you to easily perform most of the configuration settings, including wireless connectivity.
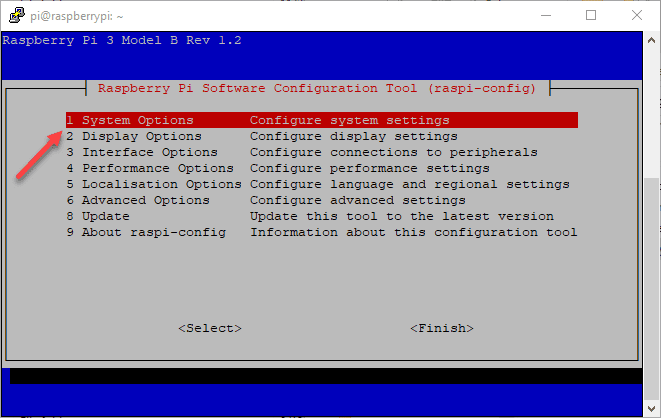
The utility is called raspi-config. Login with your default user pi and pi as the password (until you change). After you login:
sudo raspi-config
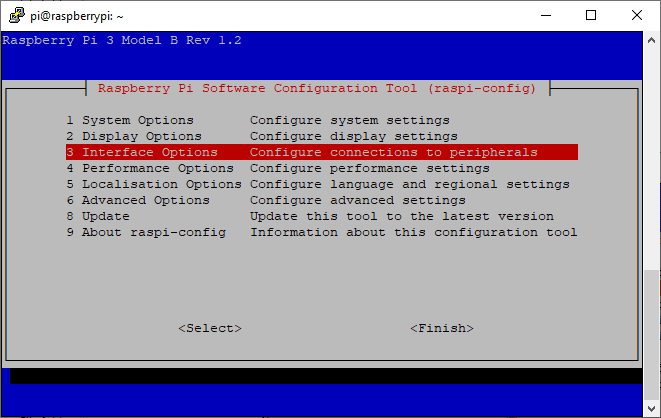
Once you launch the raspi-config utility, select the System Options.
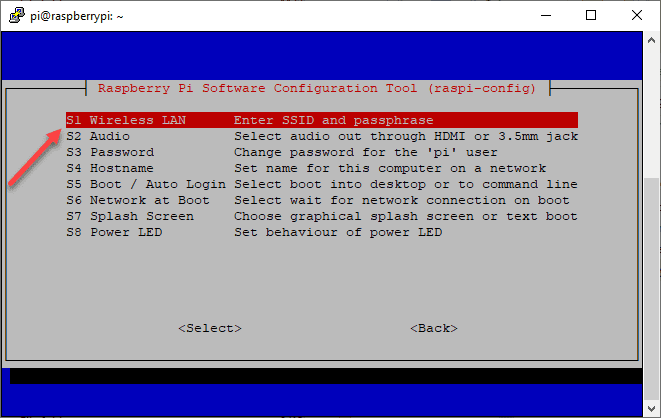
Under System Options, select the Wireless LAN menu. Under the Wireless LAN menu, you will be asked to provide the SSID and the password. After saving the options, you should be connected to your wireless LAN.
If you choose to use Ubuntu as your headless server operating system, it is slightly more involved with Ubuntu as it involves editing the Ubuntu. Ubuntu uses a YAML file to perform the network configuration by means of netplan. Use the following command to find your YAML file name to edit.
ls /etc/netplan
This will display the name of the YAML file used for netplan. In my Ubuntu Server ARM installation, the file was named 50-cloud-init.yaml. Edit the YAML file and add the following config pertaining to your Wireless LAN configuration. You can run ifconfig to get the name of the wireless adapter.
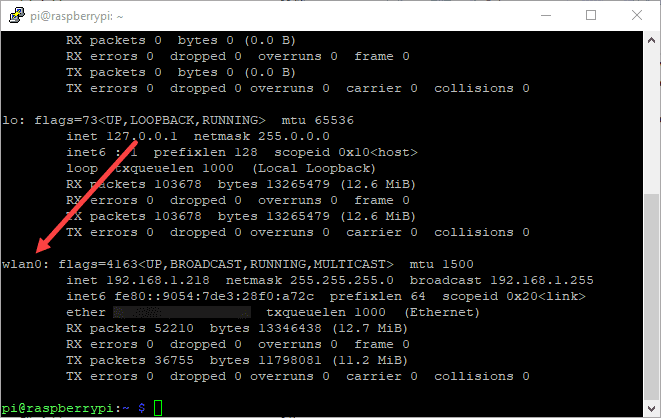
Once you know the wireless adapter name and the YAML file used for the network configuration, we can edit the YAML file and apply the wireless network connection configuration. Note below. You will see the wlan0 adapter being used that we found with the ifconfig command. Make sure your YAML code lines up as shown below.
This file is generated from information provided by the datasource.  Changes
 to it will not persist across an instance reboot.  To disable cloud-init's
 network configuration capabilities, write a file
 /etc/cloud/cloud.cfg.d/99-disable-network-config.cfg with the following:
 network: {config: disabled}
 network:
     ethernets:
         eth0:
             dhcp4: true
             optional: true
     version: 2
     wifis:
         wlan0:
             optional: true
             access-points:
                 "Your SSID":
                     password: "SSID Password"
             dhcp4: true
Raspberry Pi Headless SSH Configuration
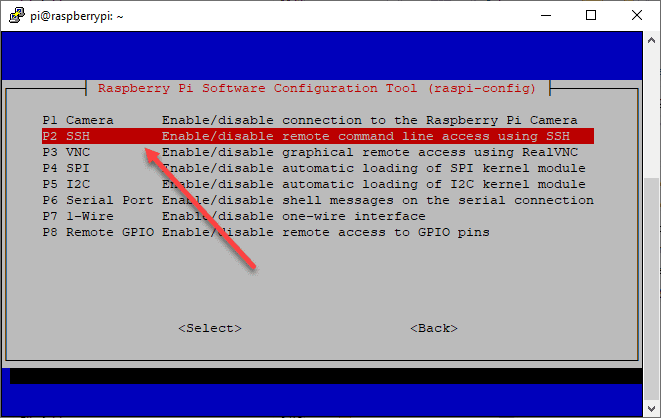
To configure the Raspberry Pi Headless SSH configuration on the Raspberry Pi OS Lite installation, we can use the same raspi-config command menu. Here, it allows starting the SSH service.
On the flip side of the coin between Ubuntu and Raspberry Pi OS Lite, Ubuntu is a bit easier since, from what I noticed with the Ubuntu ARM installation, SSH is already enabled out of the box. So thumbs up there for ease of configuration.
As with any standard Linux installation, you can choose whether or not you want to allow SSH logins with the root account by editing /etc/ssh/sshd_config. Find the line PermitRootLogin and assign the desired option.
Wrapping Up
Hopefully, this walkthrough on Raspberry Pi Headless Wifi SSH Setup will help anyone who may be struggling to get up and running with their Raspberry Pi headless server. There are many different operating system options to choose from. However, in both distros shown (Raspberry Pi OS Lite and Ubuntu), it is straightforward.