System Center Virtual Machine Manager 1801 New Features and Installation
For those not familiar with System Center Virtual Machine Manager it is part of the System Center Suite and is the tool developed by Microsoft cover management of both private clouds and public clouds in Azure. So, we can say it is multi-cloud aware. Additionally, it works with private clouds built on top of private clouds from Microsoft Hyper-V as well as VMware vSphere. These can then be integrated with Azure public cloud services as well. System Center Virtual Machine Manager 1801 touts cool new features that make it a worthy successor to SCVMM 2016. Let’s take a look at System Center Virtual Machine Manager 1801 New Features and Installation.
System Center Virtual Machine Manager 1801 New Features and Installation
System Center Virtual Machine Manager 1801 new features includes new, welcomed functionality. Making the list of items that have been included in this release:
- Nested Virtualization – Nested virtualization allows you to basically run a Hyper-V host inside a Hyper-V host
- Migration of VMware VM EFI firmware-based VM to Hyper-V VM – Currently you can only migrate BIOS-based VMs from VMware to Hyper-V
- The Host refresher has performance improvments
- Console session in VMM has been enhanced
- Storage QoS has been improved in VMM
- Guest Cluster SDN configuration through VMM
- Configuration of SLB VIPs through VMM service templates
- Configuration of encrypted VM networks
- Linux shielded VM support – supported with Hyper-V 1709
- Fallback HGS configuration support
- Azure integration includes management of ARM-based and region-specific subscriptions
Let’s take a look at the installation process of System Center Virtual Machine Manager 1801.
Installing System Center Virtual Machine Manager 1801
A few notable prerequisites to be aware of beforehand:
- Access to a SQL Server database
- Windows Server 2016 ADK
- SQL Server 2012 command line tools
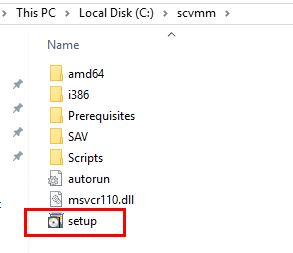
When you first download the System Center Virtual Machine Manager 1801 ISO, you will need to extract the contents of the SCVMM_1801 MSI file.

After extracting the contents of the MSI file to a directory on the server, the directory contents are as shown below.
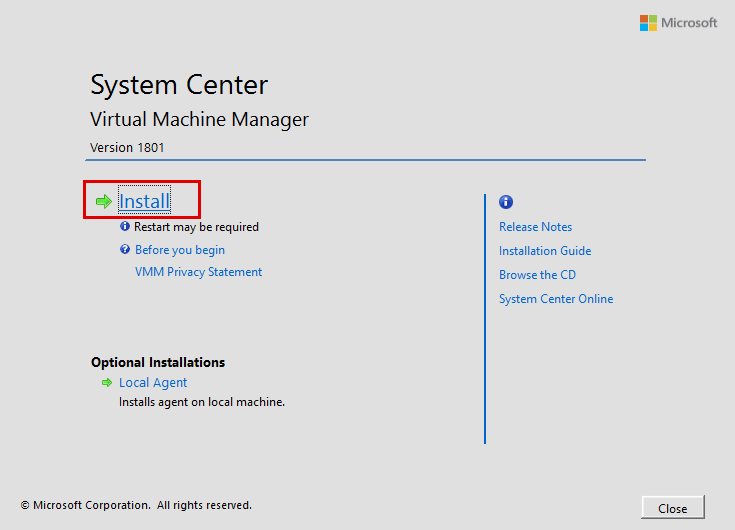
Launch the setup file. Click the Install link that is presented in the installation screen shown below.
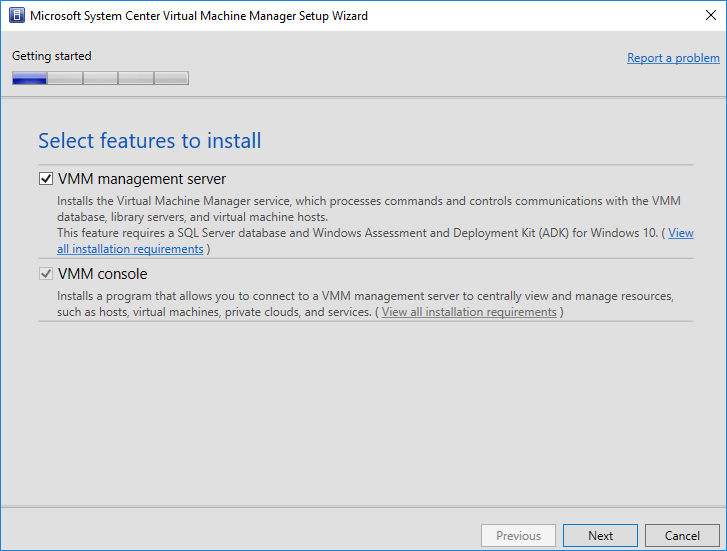
We want to install the VMM management server so select the checkbox there. This will be default also select the VMM console.
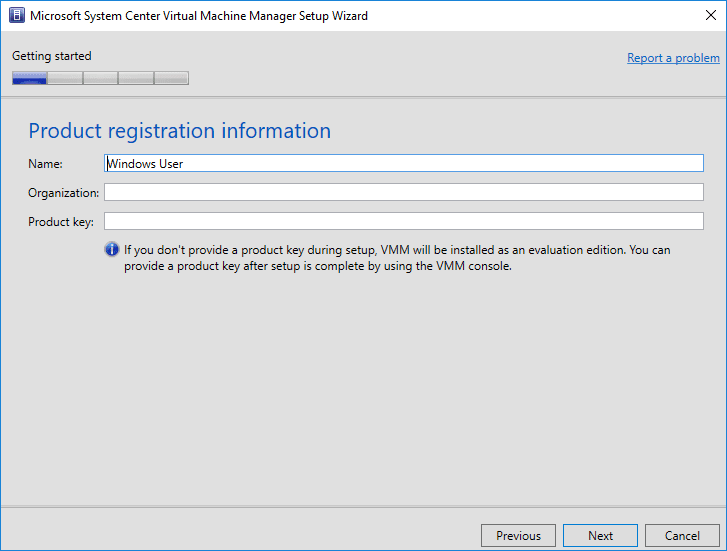
Next, take note of the product registration information.
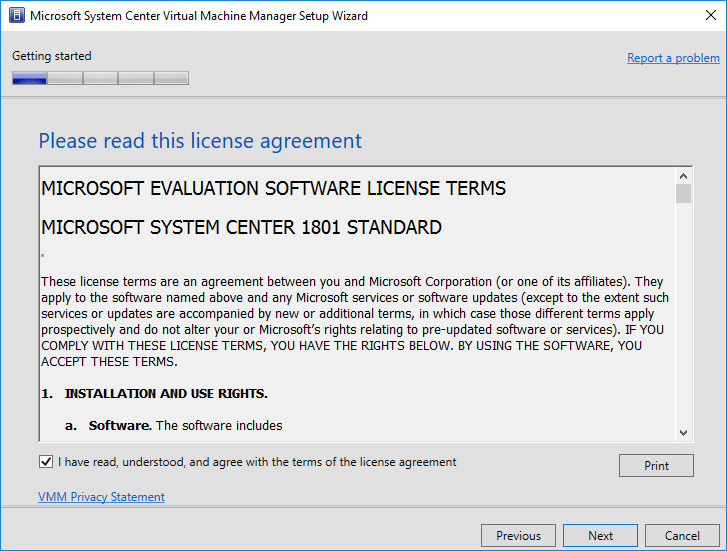
EULA acceptance.
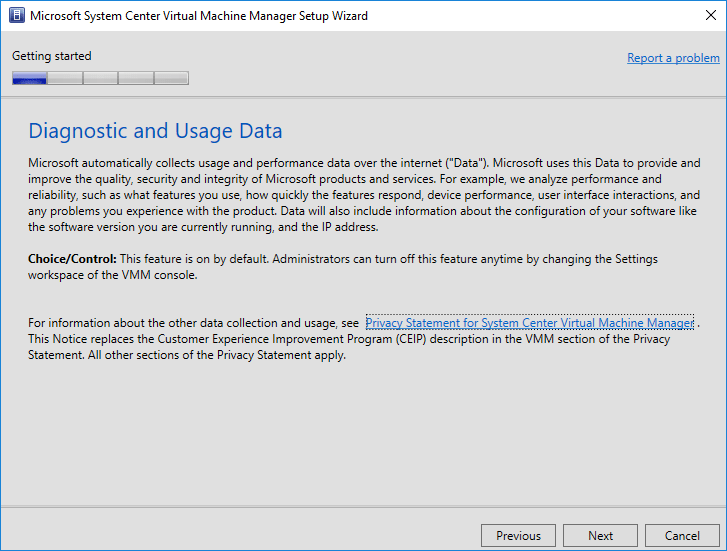
A note about the diagnostic and usage data that is turned on by default. Interestingly they don’t give you the option to opt out during install. You can turn this off after installation.
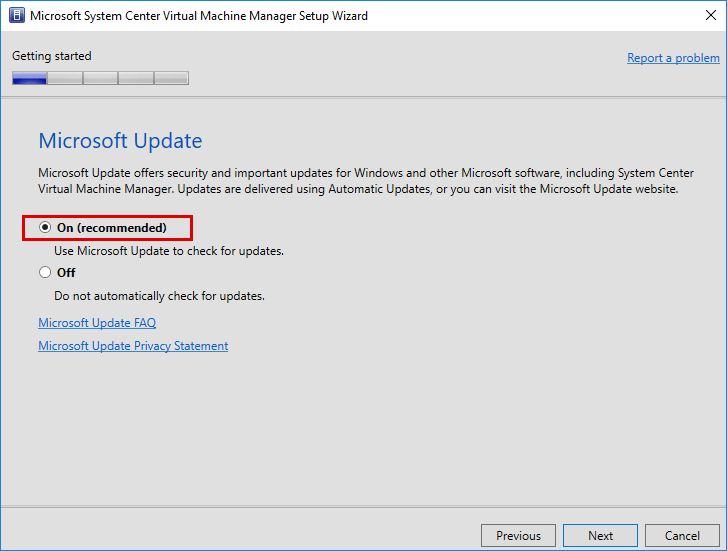
Opting into Windows Updates for SCVMM.
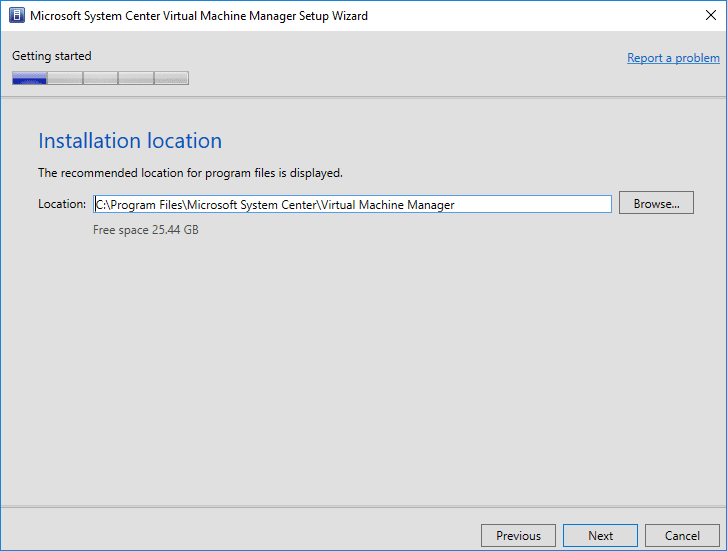
Choose the installation location for the SCVMM installation.
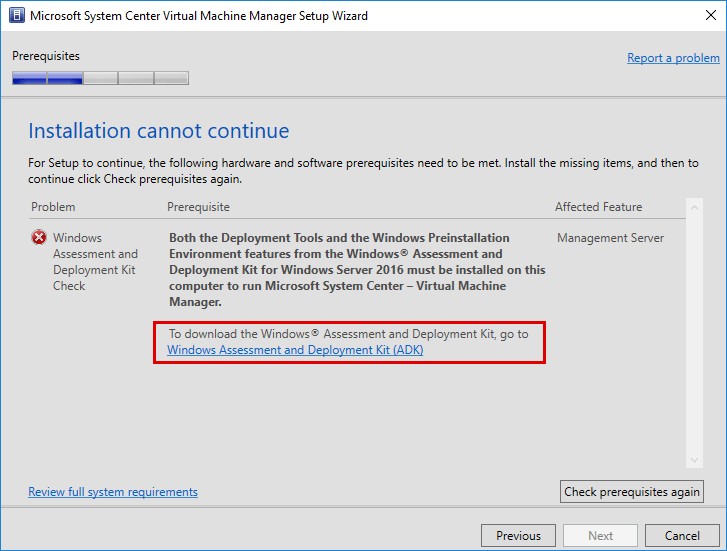
Below, I hit the first prerequisite on my Windows Server 2016 VM. I needed to install the Windows ADK for Windows Server 2016. Follow the link to download the WADK to meet the system requirements.
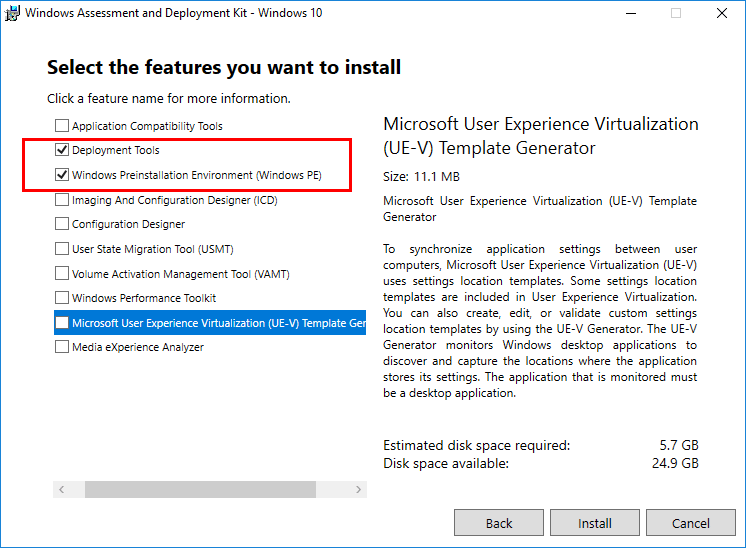
Below are the two options that are required to meet the prerequsites – Deployment Tools and Windows Preinstallation Environment (Windows PE).
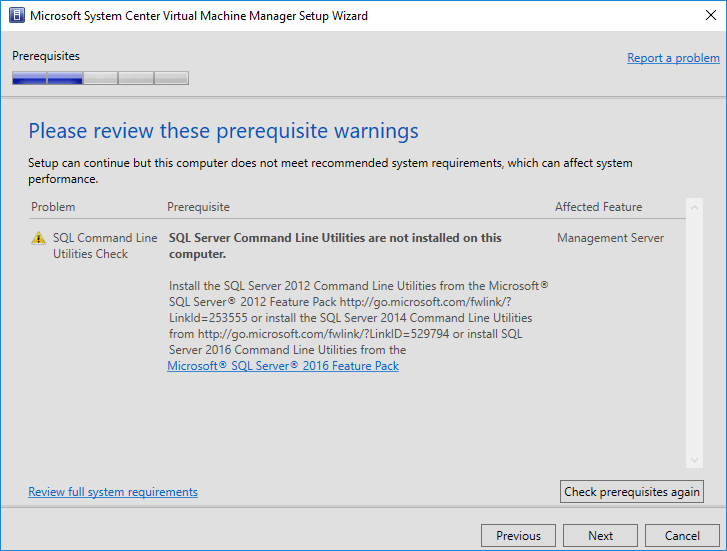
The next prerequisite is the SQL Server 2012 command line utilities. Click the link to install the appropriate packages.
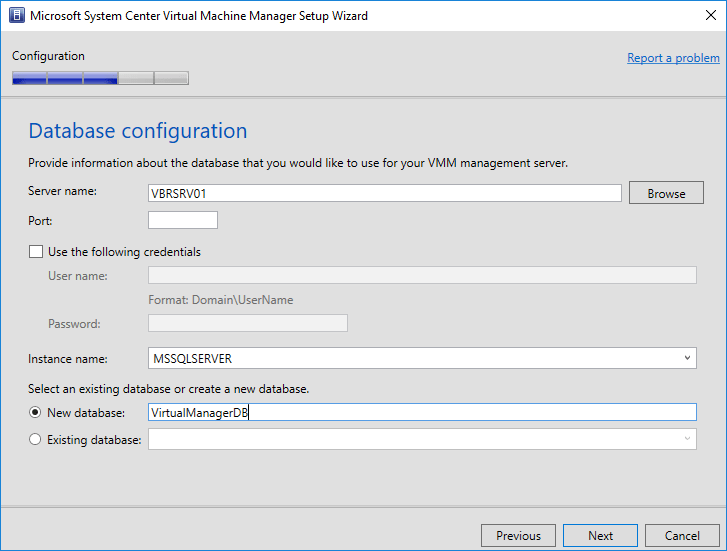
You will need a SQL Database for use with SCVMM. Below, I am pointing to an existing database server in my home lab. Choose the instance and the database name for use with SCVMM 1801.
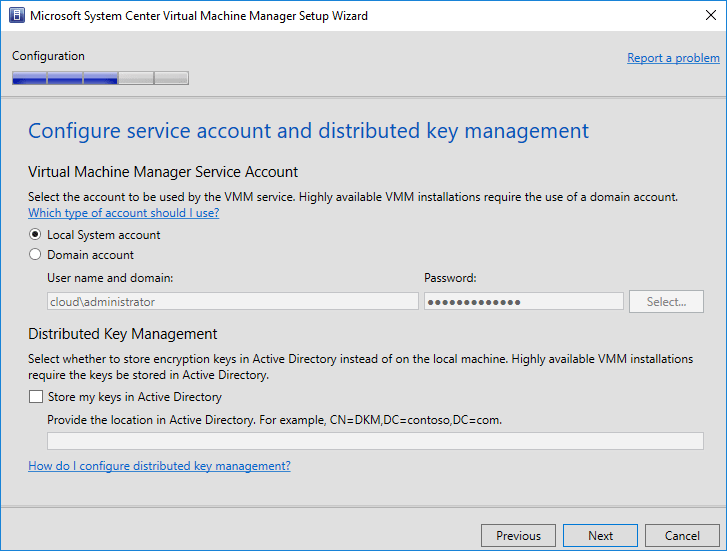
Next, you have the option to select a Virtual Machine Manager service account as well as Distributed Key Management. Since this is a lab environment, I didn’t bother with properly configuring either option, however, in production you will want to make sure to decide on the options carefully.
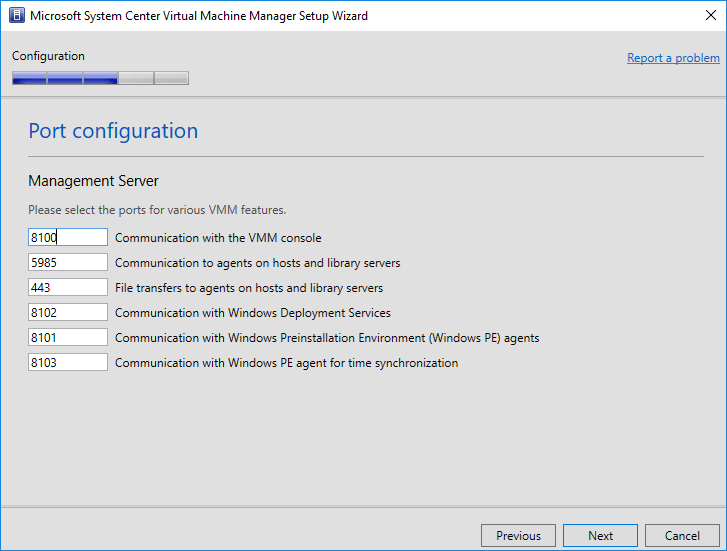
Below are the default ports that are configured for SCVMM. For most, accepting the defaults will work fine.
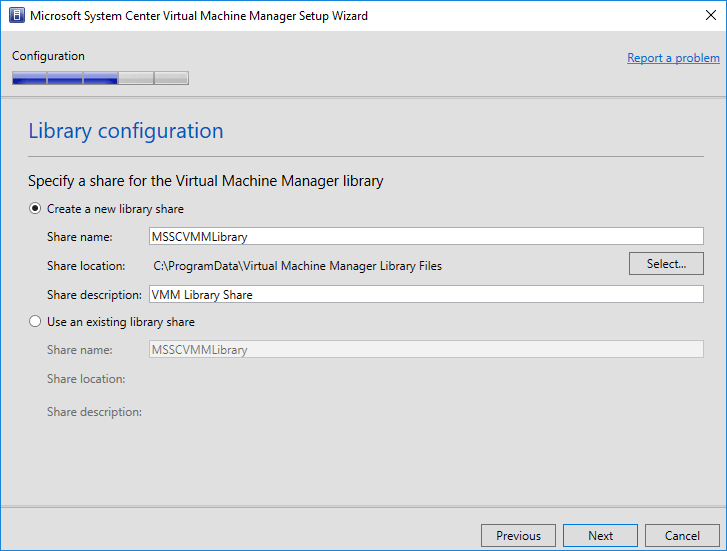
A new share name gets created on the server for library configuration. Below are the default names that were accepted.
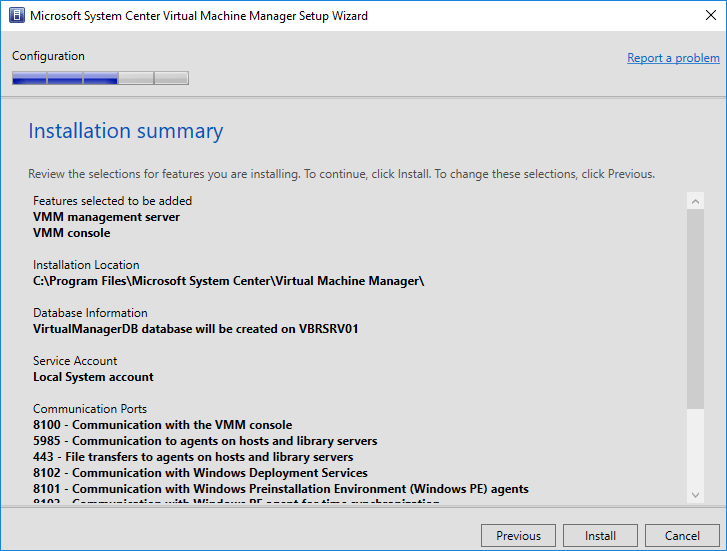
Finally, we reach our installation summary of the options chosen.
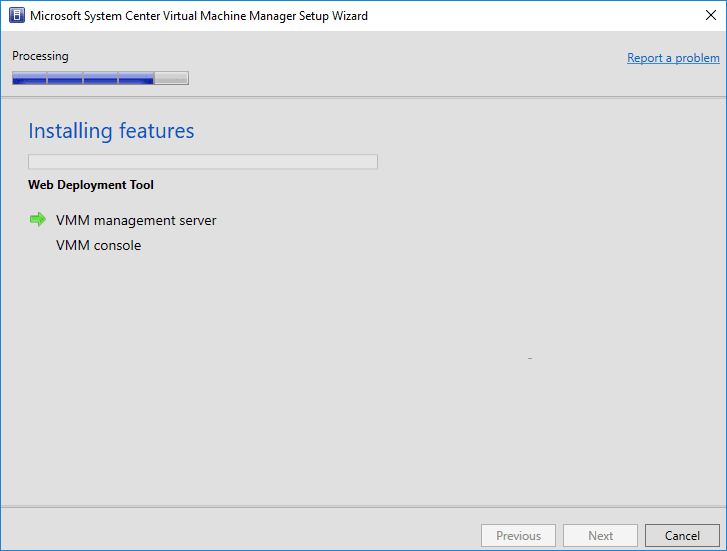
After clicking Install on the installation summary, the installation of SCVMM 1801 begins.
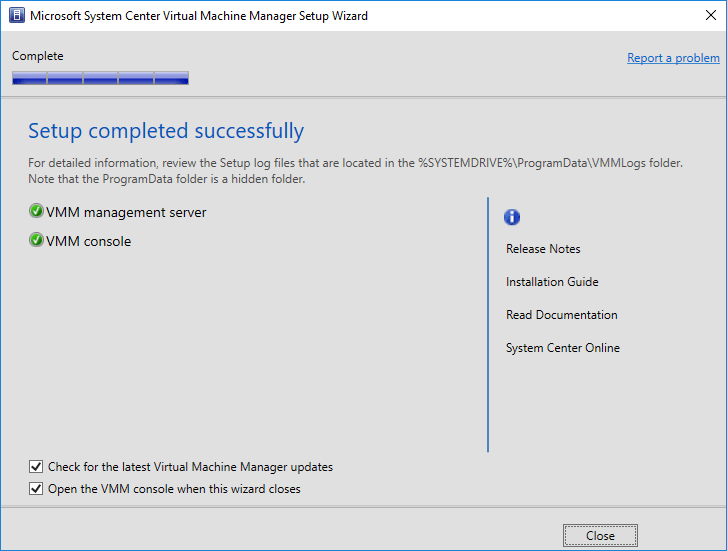
After a bit, setup should complete successfully. You can choose to check for updates and open the console when the wizard closes.
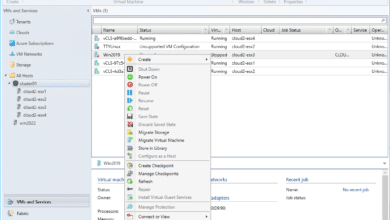
After a successful installation, we can login to the SCVMM console.

Thoughts
System Center Virtual Machine Manager has definitely come of age with support for multiple private clouds and Azure public cloud environments. The included System Center Virtual Machine Manager 1801 New Features and Installation process that is super easy makes for a smooth provisioning experience. Make sure to note the prerequisites such as WADK, SQL command line utilities, and a SQL Server to house the SCVMM DB. Stay tuned for more playing around with SCVMM 1801.