Force the primary outgoing IP address Windows Server 2012 R2
In working recently with a web server that also has a basic SMTP engine loaded as well, I ran into an issue with the mail server outbound mail queue stacking up after making a reverse DNS change with the ISP. The server which is a Windows 2012 Standard VM was not multihomed, but rather had multiple IP addresses in the same subnet assigned to the virtual adapter. In verifying everything the server was indeed setup in the SMTP server (simply the built in feature that can be installed) properties to use the correct IP address. However, it apparently was not sending using that address. Why?
It all comes down to how Windows Server versions since Windows Server 2008 and higher treat IP addresses in the same subnet when you have multiple addresses assigned. Prior to Windows 2008, Windows Server used the “weak host model” and now newer server OS’es are using the “strong host model” when picking an IP address to send from. The new server behavior more often than not picks the lowest IP address assigned in the network properties, whether this is the primary IP assigned or an additional IP assigned to the interface. Take a look at this Microsoft KB which explains the functionality of Windows Server 2008 and higher: https://support.microsoft.com/en-us/kb/969029
There are a few articles out there which explain how to use netsh to set the skipassource flag which effectively tells Windows you don’t want this interface to be used as the outgoing interface for traffic coming out of the server. However, I want to take these a bit further and describe some behavior that I saw in the environment I mentioned at the outset.
The environment
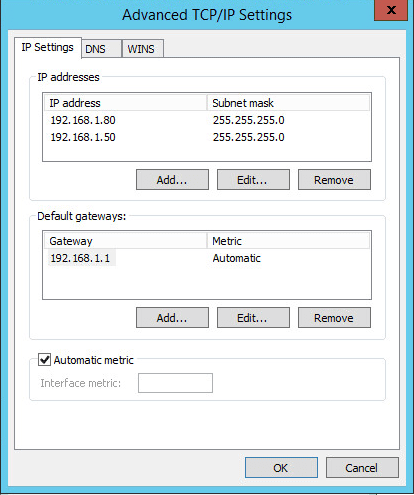
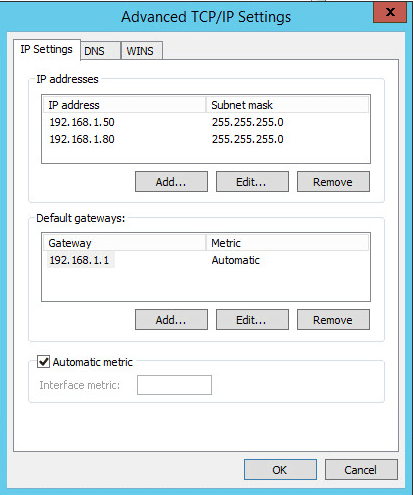
As you can see below, the primary IP address assigned in the network properties is 192.168.1.80.
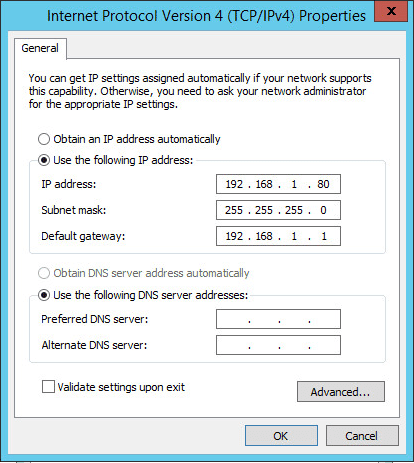
The additional IP address that has been assigned is 192.168.1.50.
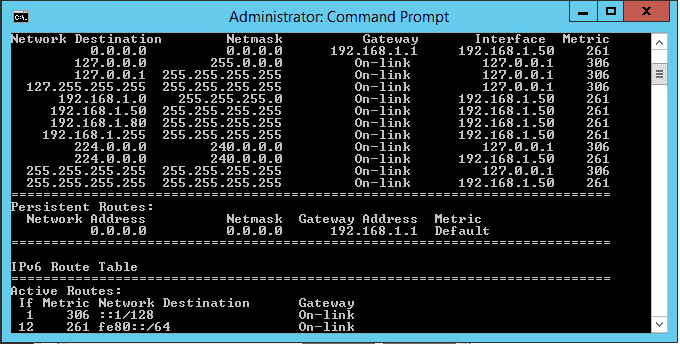
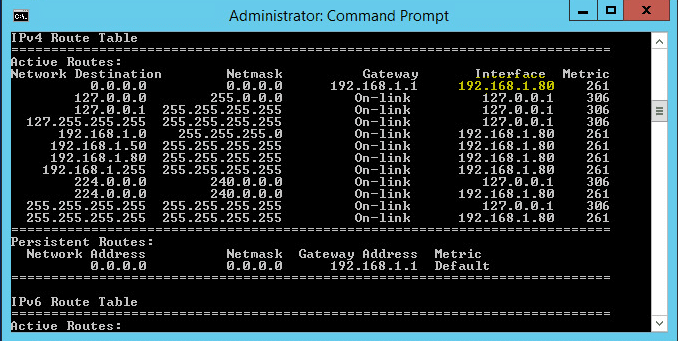
However, when quickly doing a route print on the box, it is easy to see the outgoing interface being preferred for routing traffic outbound is 192.168.1.50! So don’t assume that since you have an IP address bound to the primary TCP/IP properties slot that it will be used for the outbound interface.
In steps Powershell
There are so many awesome thing we can do with powershell that can make our lives so much better. As opposed to using netsh which requires the skipassource flag to be set when adding the IP address, the powershell commandlets will allow us to manipulate this flag as is without having to strip anything out or reconfigure IP addresses. What is the skipassource flag?
From most of the Microsoft articles I have been able to find, the skipassource flag was primarily written with the intent of DNS registration and allowing the flag to control which interface was used to register DNS records. However, this flag is much more powerful than that as we will demonstrate.
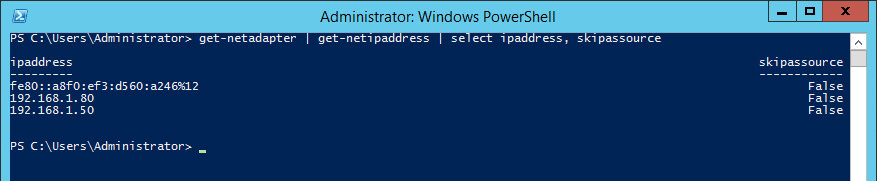
To see your IP Address and skipassource flag currently set:
get-netadapter | get-netipaddress | select ipaddress, skipassource
You will see output similar to the following:
We can effectively manipulate which address is being used to send traffic with the Set-NetIPAddress commandlet. So in the example above, I want to use 192.168.1.80 instead of 192.168.1.50 as the preferred inteface.
Set-NetIPAddress –IPAddress 192.168.1.50 –SkipAsSource $True
Notice now what our route looks like after running the command:
This is interesting how the command effectively changes your route statements. Also, a very interesting find to me was that if I set the skipassource flag for .50 back to “False” and set the .80 skipassource flag to “True”, it changes the primary address to .50! Take a look:
Ran the commandlets to set the flags accordingly:

With no GUI intervention, it has set .50 to the primary address:

Now .80 is assigned as the additional address.
Also, a really cool finding with how this works is that I ran a continuous ping on both IP addresses and the server didn’t drop a single packet with the swapping. So the additional benefit of this is that if you need to quickly swap addresses you can actually use this flag setting as a means to do that.
The skipassource flag is definitely something administrators need to keep in mind when running multiple IP addresses on a single interface or multihomed servers as well. Especially if you are running IP addresses in the same subnet range, Windows will pick the address with the lowest IP in the subnet for outgoing egress traffic if there isn’t a request coming in for a particular IP.