VMware ESXi Remote Install using SuperMicro IPMI
In working with the home lab recently, I had the need to reload one of my hosts remotely. It was great to have this functionality available via the Supermicro virtual media option using IPMI connectivity. Supermicro has really come a long way in terms of usability and features contained in the IPMI toolset. In the walk through today, I will demonstrate how you can perform a VMware ESXi remote install using Supermicro IPMI which is a great way to reload a host if you are in a pinch and need to do this remotely.
Supermicro IPMI
As most already know if you are familiar working with Supermicro servers, they have a really nice IPMI feature that allows out-of-band (OOB) management of your server.
This provides a great deal of flexibility in troubleshooting, performing maintenance, remotely viewing the console of the server, as well as installing an operating system as we will see.
You will need to have IP connectivity to your Supermicro server in terms of IPMI connectivity. Generally, from what I have seen, your Supermicro server will grab an IP for IPMI if you have one of your on-board adapters plugged into the network. It will not use add-in cards that may be installed, so keep this in mind. If you have seen otherwise, please post a comment and add your findings.
VMware ESXi Remote Install using SuperMicro IPMI
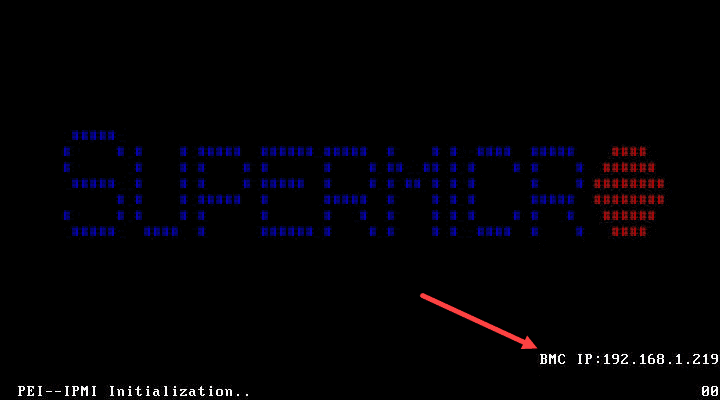
Let’s look and see how to get your media mounted and ready for performing a VMware ESXi remote install. First, you will need the IP for your Supermicro IPMI connection to your server. This is shown on the boot screen when your Supermicro server boots up and initializes the IPMI controller.
Accessing the IPMI interface is simple by using a browser to browse out to the IP address you see during POST. The default login is ADMIN/ADMIN (hopefully you have changed this from default).
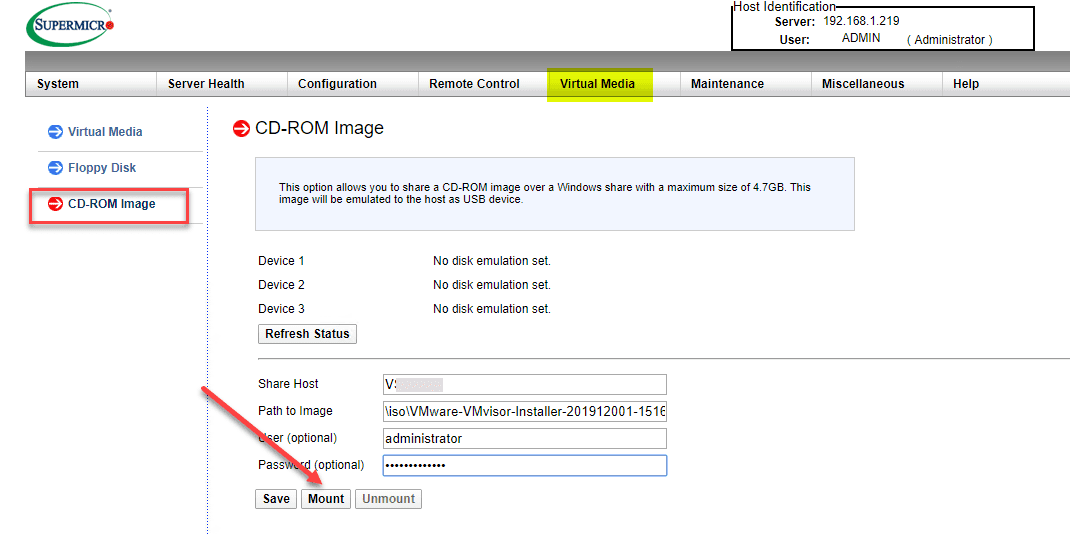
Once you have logged in, navigate to Virtual Media > CD-ROM Image. Click the Save button and then Mount. This will check the path for errors connecting and then actually mount the image file.
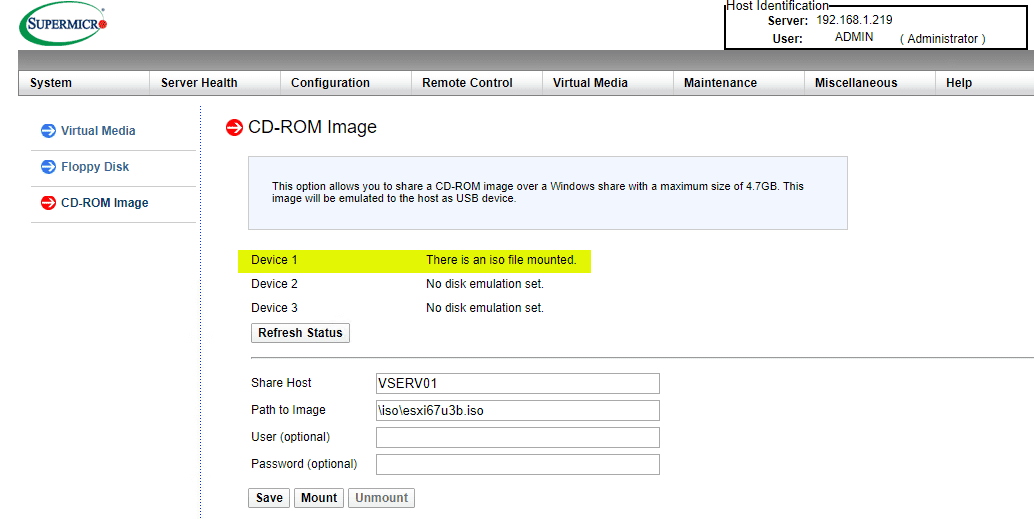
Below, you can see the CD-ROM image Device 1 is showing There is an iso file mounted.
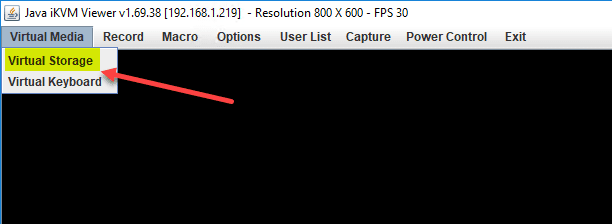
If you have any issues getting the ISO to mount, I have found the old Java client to work at times when the other configuration page doesn’t.
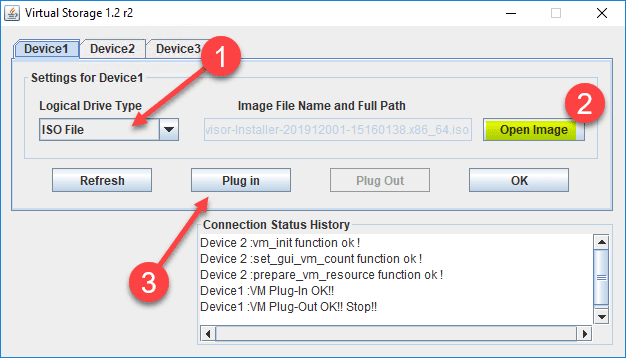
To use the Java tool to configure your virtual media, launch the Java iKVM Viewer. Choose Virtual Media > Virtual Storage.
The Virtual Storage configuration will launch. Choose Device 1 tab and then drop down the Logical Drive Type and choose ISO File. Then, select Open Image. Browse to the location on your workstation where you have the file located. Finally, choose Plug in. This actually mounts the file you choose to the server and allows it to be used.
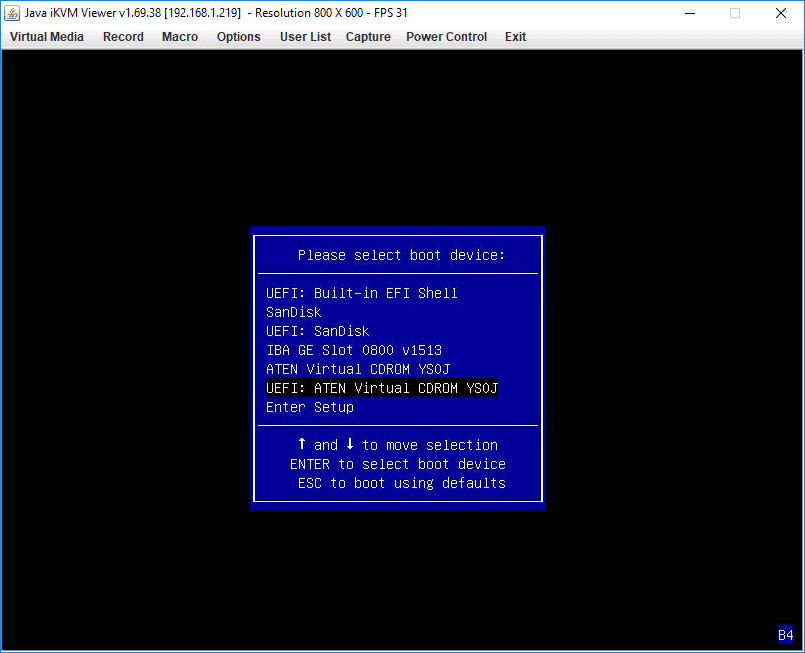
Now, when you boot the Supermicro server, you will see two new entries:
- ATEN Virtual CDROM YSOJ
- UEFI: ATEN Virtual CDROM YSOJ
Choose which option you want accordingly.
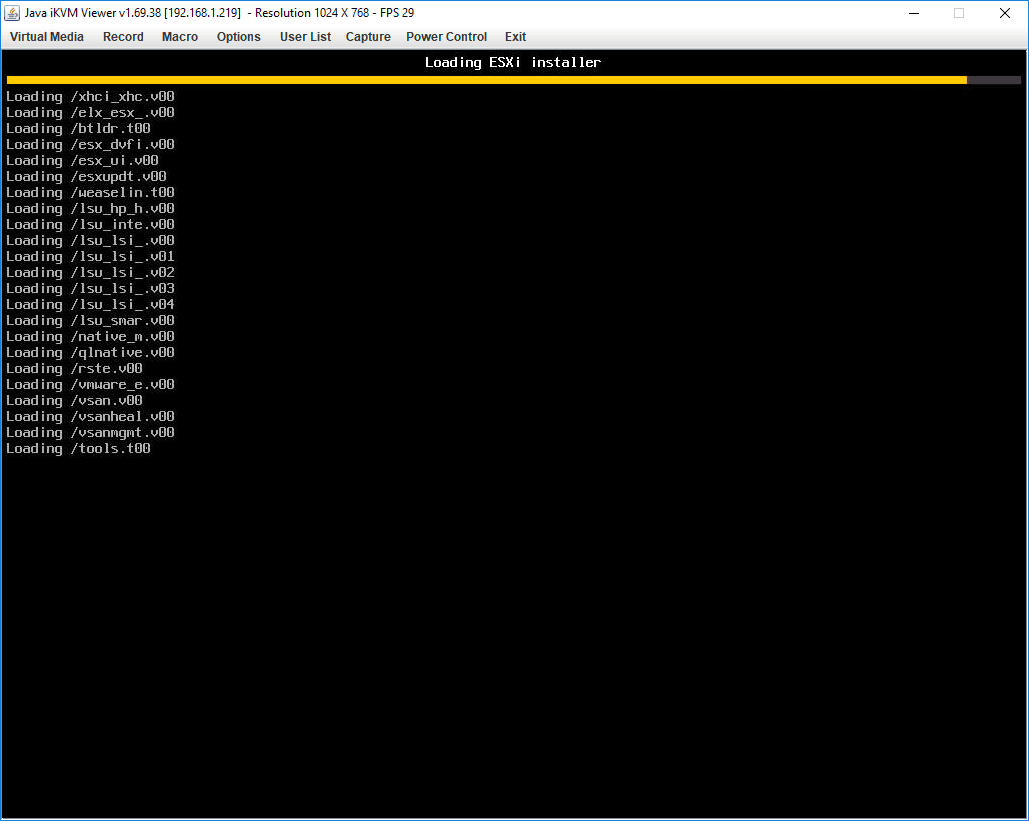
Your ESXi installation will launch and proceed along as you would expect. The one thing I want to mention is the speed of the solution. The performance of the virtual media is not great at all. In fact the page you see below took around 15 minutes to proceed to the point of getting to the first ESXi installation screen. However, if you need to do this remotely, if you are like me, you can deal with the slowness to get VMware ESXi installed without physically being there.

VMware ESXi installation at this point, once everything was loaded into memory, performed as expected.

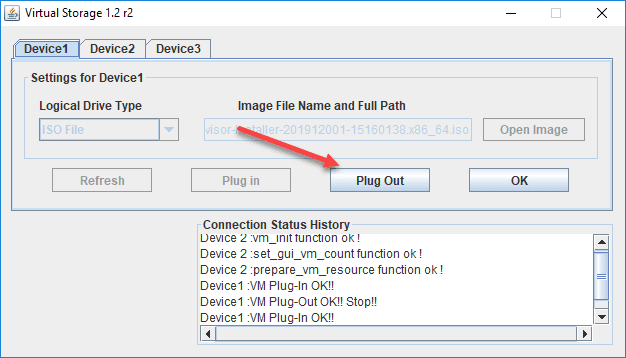
After you finish your VMware ESXi remote install, you will want to unmount the VMware ESXi ISO virtual media. To do that, you can simply click the Plug Out button.
Concluding Thoughts
It provides great flexibility to be able to perform a VMware ESXi Remote Install using SuperMicro IPMI. Especially if you are supporting a branch location, performing maintenance, or troubleshooting, having the OOB functionality provided by the Supermicro IPMI is great.
As mentioned, there is a performance penalty with the mounted virtual media from my experience, but it is well worth the ability you are afforded with the remote installation capabilities.